How to Change Longboard Bushings: Step-by-Step Guide
This post contains affiliate links. As an Amazon Associate, we earn from qualifying purchases.
To change longboard bushings, you remove the kingpin nut, take off the hanger and old bushings, and install new ones in the correct order. The exact process depends on your truck type, top-mount or drop-through, and manufacturers disagree on how tight the final nut should be.
That “how tight” clause is where most guides stop and most riders get it wrong. One manual says leave threads showing; another warns against any overtightening. The difference isn’t academic, it’s the line between a responsive board and one that feels dead or develops speed wobbles. Understanding how to change longboard bushings is the first step to dialing in this crucial setting.
What follows: the real tool list, the manufacturer-mandated order for parts, the two schools of thought on tightness, and a field repair trick that splits the difference. By the end, you’ll be able to swap bushings in ten minutes and understand why your board feels the way it does.
Key Takeaways
- You must disassemble the entire truck for drop-through mounts, the kingpin passes through the deck from the top.
- Manufacturer instructions conflict: Decathlon says tighten until 1-2 threads show; FunTomia warns to avoid overtightening to keep steering flexible.
- Manuals disagree: S+S Sportartikel GmbH (FunTomia) says the harder bushing goes on the bottom, while The Longboard Store blog advises putting the thicker bushing at the bottom.
- Never lose the pivot cup, this small nylon piece is critical for steering and is easily misplaced during disassembly.
- New bushings need a few sessions to break in and will be squeaky and stiff at first.
The Tools You Actually Need
You don’t need a workshop. A skate tool is ideal, but a 12-inch wrench or specified skate tool works for the kingpin nut. That’s it.
The T-tool is the multi-tool of skating, combining these two wrench sizes and often an Allen key for wheel nuts. If you’re serious about longboard maintenance, it’s the one investment that pays off every time you tweak your setup. I’ve seen riders try to use pliers, it rounds the nuts, scars the kingpin, and makes the next adjustment a fight.
Common mistake: Cranking the kingpin nut with the wrong size wrench. A 12-inch wrench gives you too much leverage, making it easy to overtighten before you feel the resistance. Use the shorter, purpose-built T-tool end.
Top-Mount vs. Drop-Through: Know Your Truck
Your first step is looking at your board. On a top-mount, the baseplate is screwed directly to the bottom of the deck. On a drop-through, the baseplate sits on top of the deck, and the kingpin sticks down through a hole.
This changes everything. For a top-mount, you can often just loosen the kingpin nut on the truck while it’s still attached to the board. For a drop-through, you must remove trucks completely. The Decathlon guide is explicit: “You cannot mount your trucks without disassembling them.” The kingpin has to pass through the deck hole from the top during reassembly.
If you have a drop-through, set aside five extra minutes. You’re taking the whole truck off.
The 7-Step Bump-Feed Replacement (and the One Step Nobody Skips)
Here is the universal sequence, drawn from the Decathlon and FunTomia OEM manuals. Treat this as the factory spec.
- Loosen the kingpin nut. Use your T-tool or wrench. Turn it counter-clockwise until the nut comes off.
- Remove the roadside components. Take off the washer, then the top bushing (often a cone shape).
- Lift off the hanger. This is the T-shaped piece that holds the axle and wheels. It will now be free.
- Remove the boardside components. Under the hanger are the bottom bushing (usually a barrel) and its washer.
- Mind the pivot cup. This is the critical, easy-to-lose part. The hanger’s pivot pin sits in a nylon cup pressed into the baseplate. Don’t lose it. The iFixit guide notes you can clean it with rubbing alcohol if it’s gritty.
- Install new bushings in reverse order. The order from the baseplate up is: pivot cup, boardside bushing (barrel), hanger, roadside bushing (cone), washer, kingpin nut.
- Tighten the kingpin nut. This is the step with disagreement, more on that next.
If you’re working on a drop-through board, step 6 happens before you install trucks back onto the deck. You partially reassemble the truck, then feed the kingpin through the deck hole before adding the roadside components.
How Tight Should the Kingpin Nut Be? The Manufacturer Split
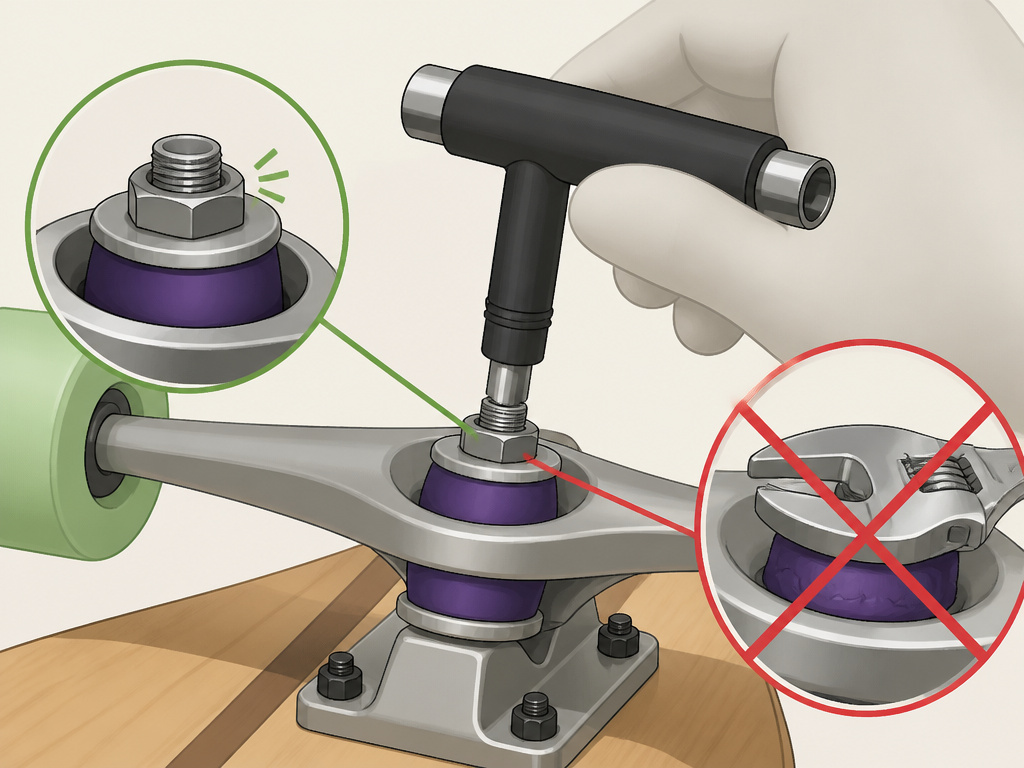
Here is where your ride feel is decided, and the manuals do not agree. You have two schools of thought.
The Decathlon/Oxelo guide gives a visual rule: “Only tighten the lower bushing nut until there is no play in the hanger. You can gauge by leaving one or two screw threads visible.” Their Polish version states to tighten with a T-tool until the nut can’t move, which aligns with the goal of eliminating play. This suggests a firm, but not crushing, tightness.
The FunTomia manual from S+S Sportartikel GmbH warns broadly: “Avoid overtightening the nut to maintain steering flexibility.” It adds, “Do not overtighten the locknut, as it may damage the threads.” No visual indicator is given, it’s a feel-based instruction.
So who’s right? Both. The Decathlon method gives a beginner a safe, repeatable target. The FunTomia warning guards against the over-enthusiastic wrench turn that deadens a bushing’s rebound. My take: start with the Decathlon method (no play, a thread or two showing), then do a parking lot test. If the turn feels sluggish, back the nut off an eighth of a turn. Your goal is to loosen trucks or tighten trucks based on performance, not just a thread count.
Where this goes sideways: Cranking the nut down until it won’t budge. This compresses the bushings into flat pucks. The truck won’t rebound properly, leading to a dead, unresponsive feel and eventually speed wobbles because the damping is gone.
Bushing Orientation: Harder on Bottom, or Not?
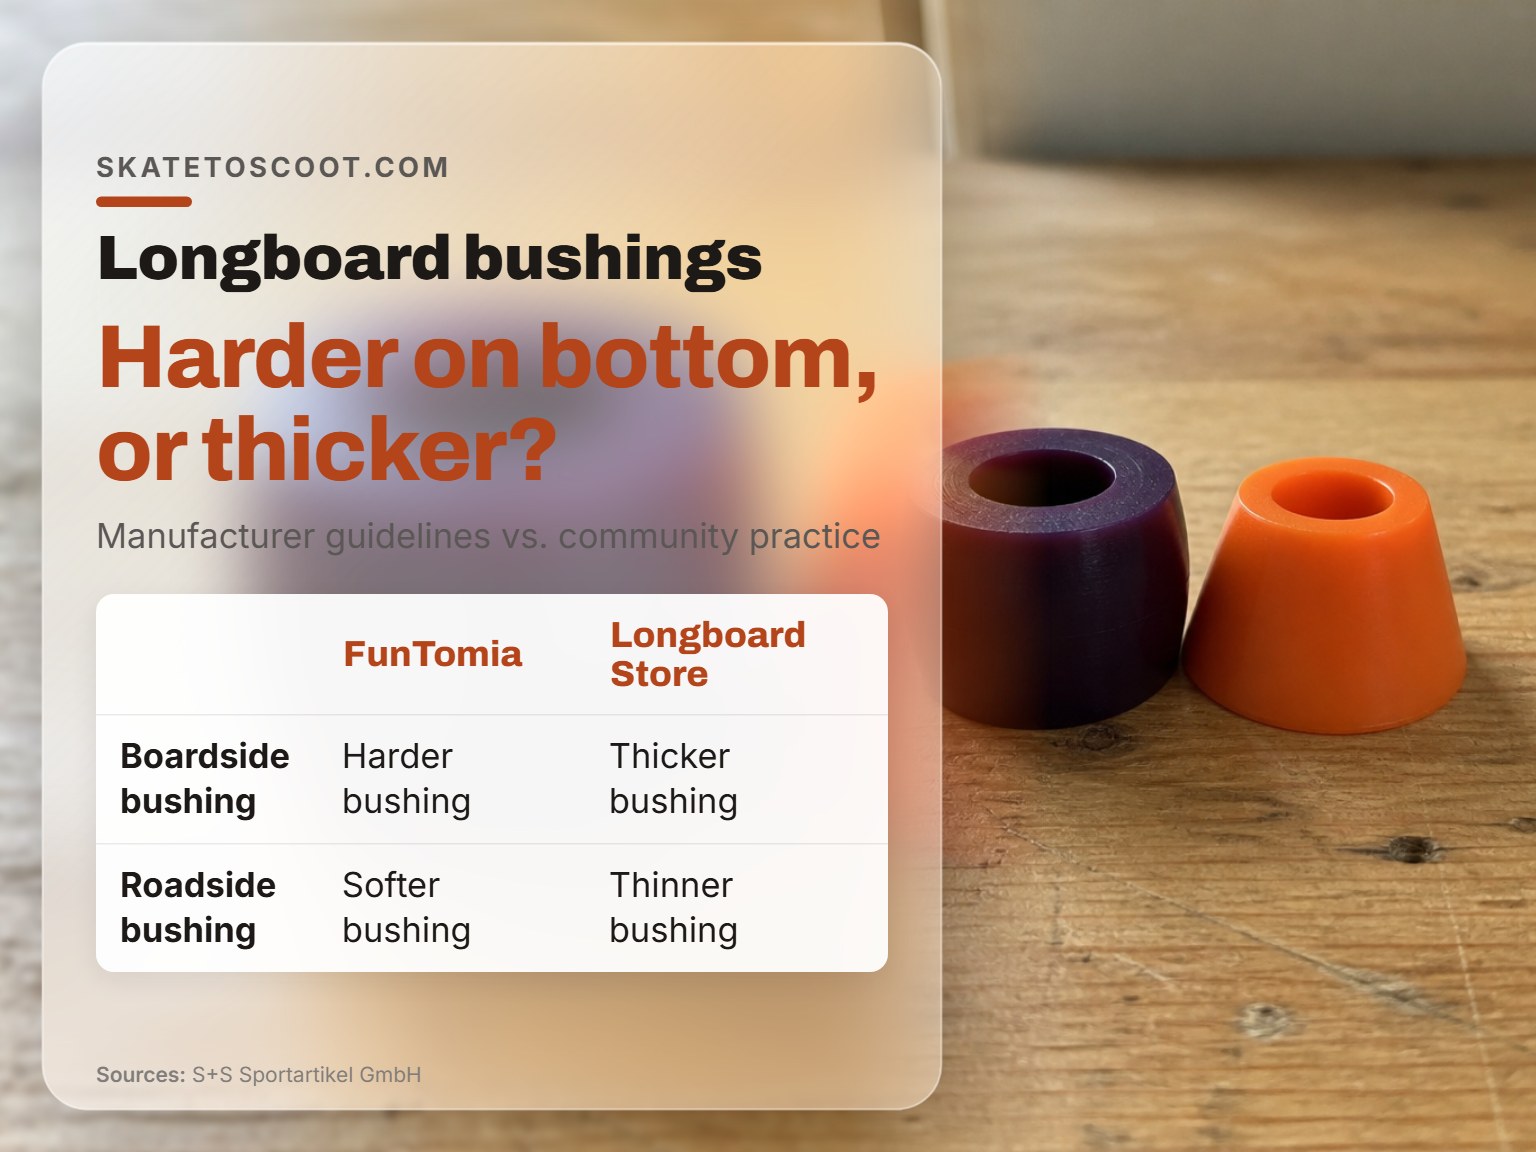
When you buy replacement bushings, a key step in how to change longboard bushings, they often come in a set with two different shapes or durometers (hardness ratings). The OEM rule from FunTomia is clear: “The harder bushing goes on the bottom (Bottom-Bushing). The softer bushing is placed on top (Top-Bushing).” The Longboard Store blog offers a different guideline, advising to put “the thicker of the two bushings at the bottom.”
The physics is simple, and a key part of how to change longboard bushings: a harder or thicker bushing boardside provides more resistance against lean, adding stability. A softer or thinner bushing roadside makes the initial turn easier, giving you maneuverability. This is the standard setup for a reason, it works.
But the Reddit communities and seasoned riders treat this as a starting point, not a rule. Some prefer a softer boardside bushing for a more surfy, dive-into-the-turn feel. Others run identical bushings on both sides for predictability. When you choose bushings, you’re buying the chance to experiment. Start with the manufacturer setup, then flip them after a week if you want to feel the difference.
| Setup | Boardside Bushing | Roadside Bushing | Best For |
|---|---|---|---|
| Standard (OEM) | Harder/Thicker Barrel | Softer/Thinner Cone | General cruising, stability at speed |
| Freeride/Downhill | Hard Barrel | Medium Barrel | High-speed control, predictable lean |
| Carving/Surfskate | Medium Barrel | Soft Cone or Barrel | Loose, flowing turns, pump tracks |
To Boil or To Replace: The Refurbishment Debate
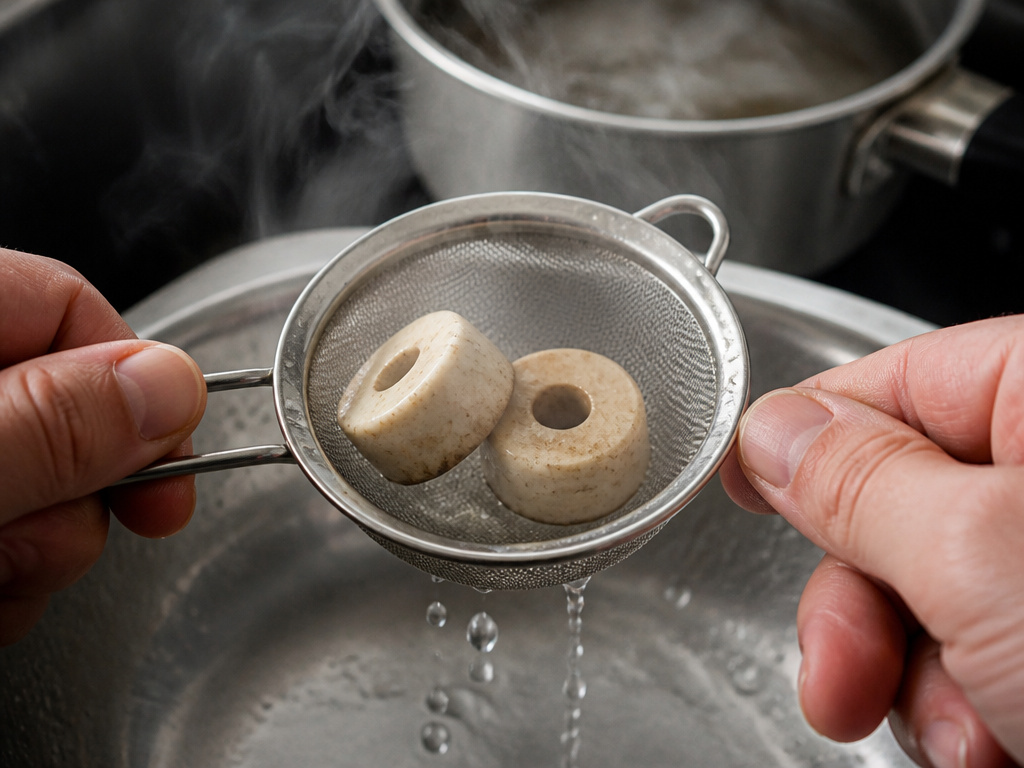
Your old bushings are cracked and worn. The manufacturer manuals. Decathlon, FunTomia, say one thing: “Replace damaged bushings promptly.” The iFixit repair guide says another: you can boil old bushings in water for 10-15 minutes to restore performance.
Here’s the split. Boiling works on the principle that heat temporarily relaxes the urethane, letting it rebound to a less-compressed shape. It can bring back some life to bushings that are merely worn, not cracked. The iFixit guide is detailed: boil for 10-15 minutes, clean with soap, rinse.
No manufacturer recommends this. Their stance is safety-focused: if the bushing is compromised, replace it. The cost of a new set of bushings is low compared to the cost of a bushing failing during a hard turn.
My rule? If the bushings are visibly cracked, split, or deeply deformed, replacement is the only answer. If they’re just feeling mushy and tired after a year of use, boiling is a legitimate, owner-level field fix. It’s a stopgap, not a permanent solution, but it can get you through a weekend trip. For a long-term fix, consult a review of the best skateboard bushings to find a durable upgrade.
When to Change Your Bushings (It’s Not Just About Cracks)
Manufacturers understandably focus on visible damage. The FunTomia manual says to “regularly check the bushings for cracks or wear” and replace them if damaged. That’s the safety baseline.
Riders replace bushings for feel long before they crack. The community advice on Reddit is practical: “Replace them when they don’t perform the way you want them to.” Signs include:
- Loss of rebound (the truck doesn’t spring back to center).
- A “dead” or mushy feeling in turns.
- Inconsistent steering from one side to the other.
- The board feels twitchy or develops speed wobbles at previously stable speeds.
Your mileage depends on your weight, riding style, and bushing formula. The key is to pay attention to the feel, not just the look.
Frequently Asked Questions
Can I use any brand of bushings on my trucks?
Yes, in most cases. Bushings are standardized by size (height and diameter) more than by brand. The critical thing is to match the bushing’s shape and size to your truck’s geometry. A bushing that’s too tall or too short will change how the truck leans. When you selecting the right bushings, focus on the specs, not the logo.
Why are my new bushings so squeaky?
This is normal. New bushings need a break-in period of a few sessions. The urethane needs to wear in slightly against the washers and the kingpin. The squeak will diminish and usually disappear. If it persists, a tiny amount of dry lubricant (like bar soap shavings) on the bushing contact faces can help, but avoid greasy lubricants that attract dirt.
What if I lose the pivot cup?
Don’t ride without it. The pivot cup centers the hanger and takes the shear force of your turns. Without it, the metal pivot pin grinds directly against the baseplate, damaging both and creating dangerous play. Replacement cups are cheap and specific to your truck brand. It’s a necessary spare part to keep in your kit.
How do I know if I’ve overtightened the kingpin?
The tell is a lack of rebound. When you lean the board to one side and let go, it should snap back to center. If it returns slowly or just stays leaned over, the nut is too tight. Loosen it in small increments (eighth of a turn) until the rebound feels lively. This is the core of finding your ideal truck tightness.
The Bottom Line
Changing bushings is the single most effective tuning mod for your longboard. The process is simple: disassemble, replace, reassemble. The art is in the final adjustment.
Follow the manufacturer sequence, respect the pivot cup, and start with the “no play, threads showing” tightness rule. Then, forget the rules for a minute. Stand on your board and lean. Does it turn when you want it to? Does it come back to center with a snap? That’s your answer. The right tightness makes the board disappear under your feet so you can think about the ride, not the hardware.
Trust the process, not just the trick. A perfect bushing swap feels like discovering a new setting on your favorite board.
