How to Disassemble a Longboard: Step-by-Step (With Specs)
This post contains affiliate links. As an Amazon Associate, we earn from qualifying purchases.
To disassemble a longboard, you may need a T-tool, a 3 mm hex wrench, and a Phillips screwdriver. The process is straightforward: remove the wheels, then the trucks, followed by the bearings. The critical step everyone misses is identifying your truck type, drop-through or top-mount, as it dictates the entire disassembly sequence.
Mechanically, a longboard comes apart in a logical order because each component is mounted to the next. Wheels sit on axles, which are part of the truck hanger, which is bolted to the deck. The real work isn’t force; it’s matching the right tool to the right fastener and knowing which parts come off first, which is the essence of how to disassemble a longboard.
What follows is the full breakdown: the exact tools from manufacturer service manuals, the step-by-step sequence for both main truck types, and the one field repair trick that saves a flooded board.
Key Takeaways
- You need a T-tool, a 3 mm hex wrench, and a Phillips screwdriver. The hex wrench is for frame bolts on some electric boards; the Phillips is for side panels.
- The truck mounting style (drop-through vs. Top-mount) changes everything. Drop-through trucks must be fully taken apart to remove the deck.
- Manufacturers disagree on user service. Segway provides detailed manuals, Decathlon encourages user maintenance, while the HX310s Hoverboard manual forbids it. Check your warranty.
- Clean and lubricate every part as you disassemble, especially after exposure to water. Salt corrosion kills trucks and bearings fast.
- Reassembly order matters. For drop-through trucks, the sequence is baseplate, cup, boardside bushing, hanger, roadside bushing, washer, then kingpin nut.
The 7 Tools You Actually Need
Grab more than a skate tool. A standard T-tool handles the axle nuts and kingpin, but you’ll hit other fasteners. The Segway Ninebot One S1 service manual lists a 3 mm hex wrench and a Phillips screwdriver for body panel removal. That’s not a suggestion, it’s the spec for the four hex bolts and five exterior screws per side panel on that model.
Have a rag and some isopropyl alcohol ready for cleaning.
The Segway Ninebot One S1 service manual specifies a 3 mm hex wrench and a Phillips screwdriver for disassembly, with four hex bolts and five exterior screws per side panel. Some screws may be concealed under a “Warranty Void sticker,” which technicians are instructed to pierce with a screwdriver to break the seal.
Wheel and Bearing Removal: The First Layer
Start with the wheels. Place your board on a stable surface, grip tape down. Use your T-tool to loosen the axle nut. Don’t remove it completely yet, just loosen it slightly so the wheel can rotate without falling off the axle. The Oxelo manual says to loosen it slightly so the wheel can rotate without falling off. Now grip the wheel firmly and pull it straight off the axle. If it’s stuck, don’t wiggle it. Re-seat it on the axle just deep enough for the bearing to be on the metal, then tilt the wheel to pry it off. This uses the axle as a lever without damaging the bearing shield.
Bearings are next. You’ll see a small metal or plastic shield clipped into the bearing’s outer ring. With the shield removed, you can push the bearing out from the inside using the axle or a dedicated bearing press. The bearing will walk out bit by bit. Just mind the spacer inside the wheel hub, it can fall out unnoticed.
Drop-Through vs. Top-Mount: The Crucial Distinction
Your truck type decides the next hour of your life. Look at where the trucks meet the deck.
Top-mount trucks bolt directly to the underside of the deck. To remove them, you simply unbolt the four baseplate screws with your T-tool or a socket wrench. The entire truck assembly, baseplate, hanger, bushings, comes off as one unit. It’s simple.
Drop-through trucks are different. The baseplate sits on top of the deck, and the kingpin sticks down through a hole. You cannot unbolt the baseplate because the nut is underneath the deck. The Oxelo support page is clear: “You cannot mount the trucks without their disassembly.” The entire truck must be taken apart while it’s still attached to the deck.
Here’s the procedure from the Oxelo manual:
- Use your T-tool to loosen and remove the kingpin nut.
- Take off the roadside washer and bushing.
- Lift the hanger free.
- Remove the boardside bushing and its cup.
- Now you can lift the baseplate off the deck.
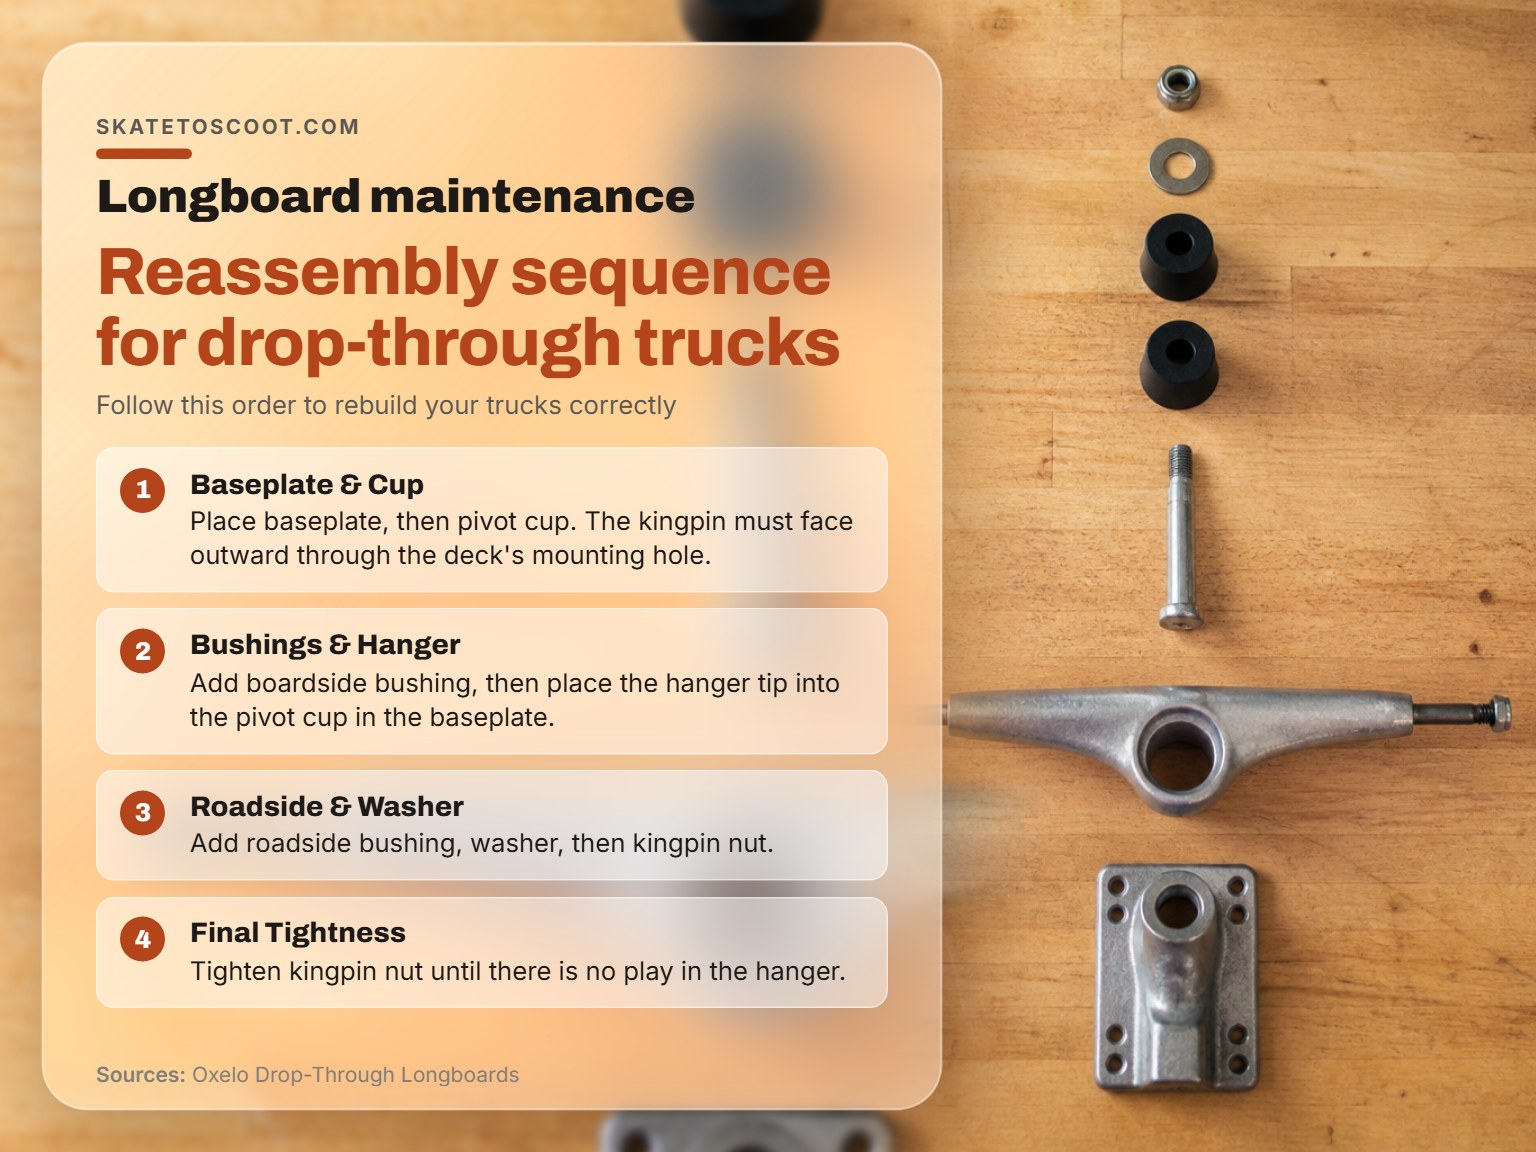
Reassembly is the reverse, but the manual specifies the exact order: baseplate, cup, boardside bushing, hanger, roadside bushing, washer, then kingpin nut. Remember to point the kingpin outward through the deck’s hole.
Disassembling the Truck Assembly
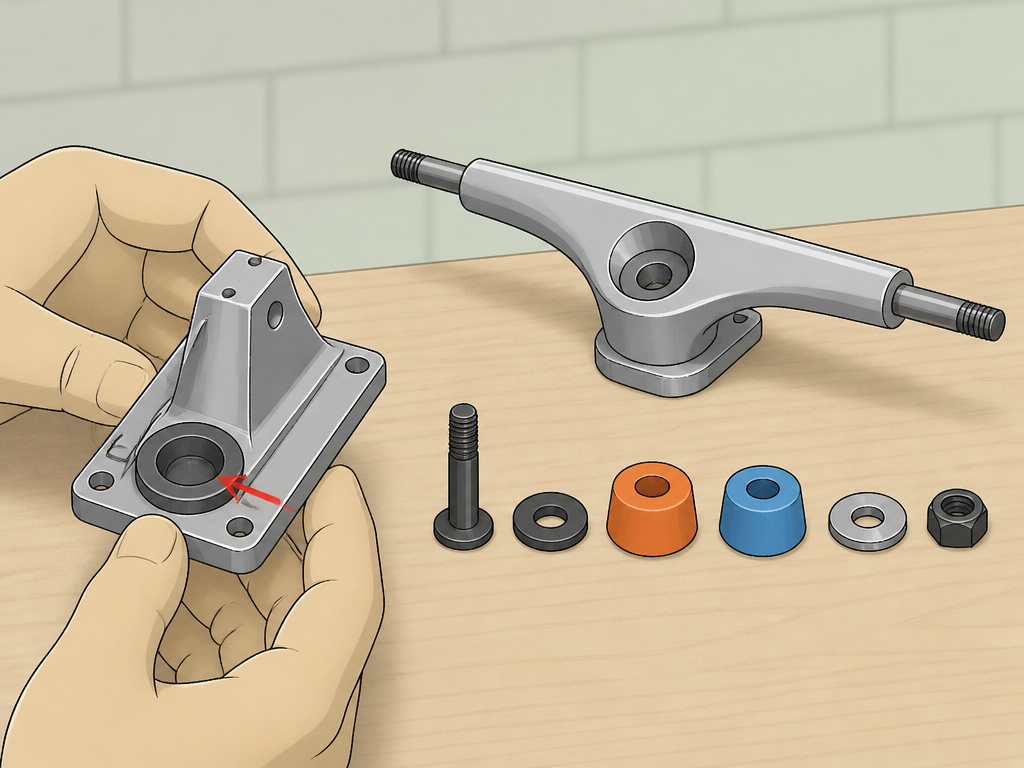
With the truck off the board (or partially disassembled if drop-through), you can service the bushings and pivot cup. Loosen the kingpin nut completely and slide off the components. Note the orientation of the bushings, the boardside bushing (closer to the deck) often has a different shape or hardness than the roadside one. The pivot cup is a small plastic insert in the baseplate; don’t lose it.
This is your chance to modify the ride. Tightening the kingpin nut compresses the bushings, making the truck turn less for more stability at speed. Loosening it gives more lean and maneuverability. The Decathlon guide warns: overtightening can damage the bushing bands, and excessive loosening risks wheel bite, where the wheel touches the deck during a turn and locks up instantly.
For a bearing replacement or a full truck removal, you’ve now done the hard part of how to disassemble a longboard. The rest is cleaning and inspection.
Cleaning and Addressing Water Damage
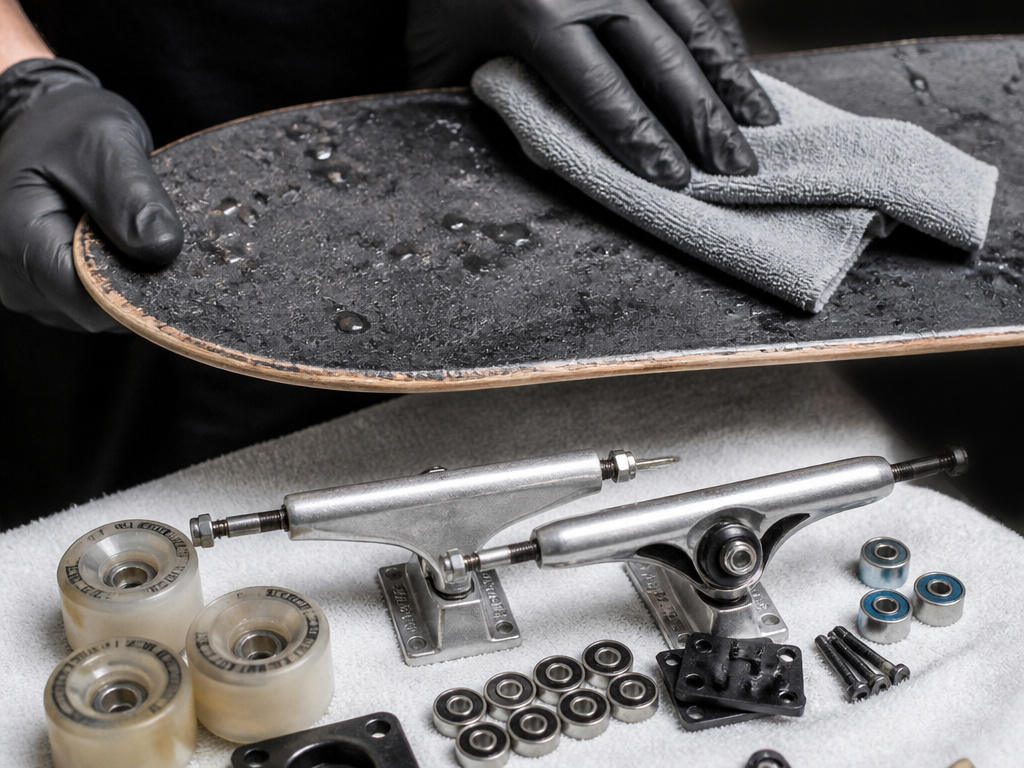
If your board has seen rain or worse, a flood, disassembly is the only way to save it.
Disassemble everything as outlined.
Reassembly and Final Adjustments
Putting it back together is where precision pays. Follow the reverse of disassembly, but with a calibrated hand.
- Bearings: Press them flush into the wheel hubs.
- Wheels: Slide them onto the axles and hand-tighten the axle nuts. Snug them with the T-tool. The Oxelo tip: you should see one or two threads protruding past the nut.
- Trucks: If top-mount, bolt the baseplate to the deck firmly. If drop-through, follow the sequence: baseplate, cup, boardside bushing, hanger, roadside bushing, washer, kingpin nut.
- Kingpin Nut: Tighten until there’s no lateral play in the hanger. The manual says tighten until the nut stops moving with the T-tool.
| Component | Tool | Torque / Tightness Tip |
|---|---|---|
| Axle Nuts | T-tool | Tighten until one or two threads protrude from the nut. |
| Kingpin Nut | T-tool | Tighten until there is no play in the hanger. |
Give the board a test roll in a safe, flat area. Listen for grinding. Feel for wobble. Make micro-adjustments. A properly reassembled longboard should roll straight and silent.
The Warranty and Manufacturer Dilemma
Here’s the messy reality. Manufacturers are not aligned. The Segway Ninebot One S1 service manual provides explicit disassembly steps, implying user or technician service is expected. It even acknowledges warranty void stickers. Meanwhile, the HX310s Hoverboard user manual flatly states, “Our device and its accessories do not require service. Any repairs you must not carry out yourself.”
This puts you in the middle. If your board is under warranty and you pierce a void sticker to access a screw, you assume the risk. For expensive electric models, that risk is real. For a standard longboard, the community has long embraced owner maintenance. The choice is yours, but go in with your eyes open. Knowing how to assemble a longboard is one thing; knowing your warranty status when you compare a how to disassemble a longboard guide is another.
How to remove and replace longboard grip tape
Start by heating the old grip tape with a hair dryer or heat gun to soften the adhesive. Carefully lift a corner with a razor blade or a dedicated grip tape tool and peel it back slowly. Work across the deck to avoid tearing the tape or damaging the wood. Once removed, clean the deck surface thoroughly with isopropyl alcohol to remove any adhesive residue. When applying new grip tape, align it carefully over the deck, press it down from the center outward to avoid air bubbles, and then use a file or the edge of a screwdriver to rub along the deck’s perimeter. This creates a clean edge you can cut with a razor blade.
How to store and care for a longboard to prevent damage
Store your longboard in a dry, temperature-stable place away from direct sunlight and moisture, which can warp the deck and rust bearings. Avoid leaving it leaning against a wall where it could fall; a horizontal rack or wall mounts are better. Regularly check and tighten hardware like truck bolts and axle nuts, as vibrations from riding can loosen them. Keep the bearings clean by wiping down the wheels and trucks after riding in wet or dirty conditions. For drop-through longboards, ensure the kingpin nut is tightened only until there is no play in the hanger, as overtightening can damage the bushings and make the board too rigid.
Frequently Asked Questions
How do I remove bearings that are really stuck?
Use the axle as a press. Slide the wheel onto the axle until the stuck bearing is seated against the truck hanger. Then, tilt the wheel sharply to apply uneven pressure, walking the bearing out. Penetrating oil can help if corrosion is the issue, but you must clean the bearing thoroughly afterward.
Can I reuse my old bearings after cleaning?
Yes, if they aren’t rusted or pitted. After removing the shields and cleaning with isopropyl alcohol, inspect the races and balls for scoring. If they’re smooth, repack them with a light skate lubricant. They won’t be as fast as new, sealed bearings, but they’ll work fine for casual riding.
What’s the difference between cleaning and a full disassembly?
Surface clean wipes down the deck and wheels. A full disassembly, like this guide details, involves removing all components to clean, lubricate, and inspect every contact point. It’s necessary after water exposure, before applying new grip tape, or when changing your bushings for a different ride feel.
My trucks still feel grindy after cleaning. What now?
The pivot cup might be worn or dirty. Remove the hanger and inspect the plastic pivot cup in the baseplate. If it’s cracked or has debris, replace it. Also, ensure your bushings aren’t deformed. A full truck removal and inspection is the only way to diagnose persistent grinding.
Is it worth disassembling a cheap longboard?
For a sub-$100 board, the hardware and bearings are often low-grade. Disassembling it is excellent practice, but investing in new tools for a one-time job may not be cost-effective. If the goal is learning the mechanics, absolutely. If you expect a performance transformation, spend the effort on a better board.
The Bottom Line
Disassembling a longboard is a systematic mechanical task, not a mystery. The gap between a functional board and a project lies in knowing your truck type and having the three specific tools. Remember the manufacturer split: some encourage it, some void your warranty for it.
Your first step this week shouldn’t be taking a wrench to your favorite rider. Take 10 minutes to identify your truck mounting style and locate your axle nuts. That alone tells you which half of this guide you need. The actual wrench-turning is the easy part.
