How to Fix an Electric Scooter: Step-by-Step DIY Repair
This post contains affiliate links. As an Amazon Associate, we earn from qualifying purchases.
To fix an electric scooter, you need a systematic approach: start with the power source (battery and charger), then test the motor and drivetrain, and finally inspect the brakes and tires. The process is less about raw skill and more about following a logical sequence with the right tools, often just a Phillips screwdriver, a set of Allen wrenches, and a multimeter.
The “right tools” part is where most guides get vague. A Razor Black Label E100 needs a 10 mm wrench for the front brake and two 13 mm wrenches for the rear wheel. A generic “toolkit” won’t cut it if your caliper bolts are metric and your motor mount uses Torx security bits. Knowing the exact fastener before you strip it is half the battle in learning how to fix an electric scooter.
What follows is a walkthrough of the five most common failure zones, grounded in actual OEM manual procedures. You’ll get the manufacturer-specified steps for battery storage (even when they contradict each other), the tool list for a hub motor swap, and the one diagnostic trick that isolates electrical gremlins from simple mechanical binds.
Key Takeaways
- Start every diagnosis by checking the battery and charger with a multimeter; a dead scooter is usually just a disconnected or depleted power source.
- Consult your scooter’s official manual for model-specific torque specs and tool sizes, using a 12 mm wrench on a 13 mm nut rounds the head and turns a simple tire change into a parts-order headache.
- Freezing temperatures permanently damage scooter batteries; Razor manuals warn against storage in freezing temperatures and, for some models, against charging at or below 32°F (0°C), though the Razor C35 SLA specifications list a charging range down to 14°F (-10°C).
- A systematic diagnostic flowchart beats random part-swapping; the motor won’t engage on a Razor E100 unless the scooter is moving at least 3 mph, a safety feature often mistaken for a fault.
- Before investing in professional repair, weigh the scooter’s age and replacement part cost; fixing a $300 scooter with a $200 motor rarely makes financial sense.
The Step-by-Step Diagnostic Flowchart
Ever wondered why your scooter is dead but the battery light is on? Or why the motor whines but the wheel doesn’t turn? Skipping straight to the throttle or controller is how you spend $80 on a new part that wasn’t broken.
Start with the absolute basics. Is the scooter charged? Is the charger light behaving correctly? Razor’s own troubleshooting states a solid green light when plugged only into the wall means the charger is ready, a red light means it’s charging, and a green light (after red) means charging is complete. No lights or blinking lights means the charger is faulty. This is the first branch in their official diagnostic tree.
If the charger shows no lights when plugged into the wall and the scooter, replace the charger. If it shows a solid green light when plugged into the wall only, the charger is likely functional and the fault lies in the scooter’s battery, wiring, or main fuse.
The next layer is mechanical. Lift the rear wheel off the ground and spin it by hand. Does it move freely? A dragging brake or seized bearing will stall the motor even with full power. Now press the throttle. Does the motor try to spin but can’t? That points to a mechanical bind or a faulty motor. Does it do nothing at all? That’s an electrical issue upstream, likely the battery, controller, or a safety interlock like the kickstand switch.
Here’s a quick reference to track symptoms:
| Symptom | Motor Sound/Behavior | Likely Cause | First Check |
|---|---|---|---|
| Scooter completely dead | No lights, no sound | Dead battery, blown fuse, loose wiring | Check battery voltage with multimeter |
| Lights on, motor doesn’t engage | Silent when throttle pressed | Faulty throttle, controller, brake safety switch | Test throttle output voltage |
| Motor hums/whines but wheel doesn’t turn | Audible hum or strain | Mechanical bind, seized motor, loose phase wire | Lift wheel, check for free spin |
| Scooter jerks or surges | Inconsistent power delivery | Loose connection, failing speed controller, water damage | Inspect all wire connectors |
This table isn’t exhaustive, but it covers the big four failure modes. The goal of learning how to fix an electric scooter is to move from “my scooter is broken” to “the connection between the battery and controller is broken” in three tests.
Battery and Charging: The Heart of the System
A scooter that won’t turn on or hold a charge lives or dies by its battery. The first sign is often a charger that flashes or goes green too quickly. Before you blame the battery, you need a multimeter.
Set it to DC voltage (usually 20V or 200V range). If your Razor C35 SLA battery reads significantly below its nominal voltage, it may be deeply discharged and could have difficulty accepting a charge. A reading of 0V means a dead cell or a blown internal fuse.
Where this goes sideways: Assuming a “green light” means a full battery. Razor manuals explicitly warn that recharge time is “up to 12 hours, even if the light turns green,” with a maximum charge time of 24 hours. A green light after 30 minutes on a flat battery is a lie, the charger has given up, not finished the job.
The Contradictory World of Battery Storage
Here’s where manufacturers disagree, and you need to pick a side based on your scooter’s chemistry.
The Yadea E8S manual states: “If the battery is not used for a long time, it is recommended to store the battery power at about 50%.” This is standard advice for lithium-ion packs to minimize stress.
Multiple Razor manuals (for the E100 and C35 SLA) instruct: “Fully charge battery before storing for extended periods of time.” This is typical for sealed lead-acid (SLA) batteries, like the one in the C35 model, to prevent sulfation.
| Battery Type | Manufacturer | Recommended Storage Charge | Why It Matters |
|---|---|---|---|
| Lithium-ion (Li-ion) | Yadea | ~50% state of charge | Prevents degradation at high or low voltage extremes |
| Sealed Lead-Acid (SLA) | Razor | 100% (fully charged) | Inhibits sulfate crystal formation on the plates |
If you don’t know your battery type, check the manual or the label on the battery itself. Storing a lead-acid battery at 50% for the winter guarantees a dead battery come spring. Doing the reverse with a lithium pack shortens its lifespan.
Never store the product in freezing or below freezing temperatures! Freezing will permanently damage the battery.. Razor manuals
That warning is absolute. Freezing expands the electrolyte in lead-acid batteries, cracking the case. It also permanently reduces the capacity of lithium cells. The Razor C35 SLA manual adds another rule: “Do not charge at or below 32°F (0°C).” Charging a cold battery can cause internal plating that kills it.
Motor, Drivetrain, and Why It Won’t Move
You hear the motor spin, but the scooter goes nowhere. Or it moves, but with a grating metal sound. The drivetrain is a simple chain: motor -> transmission (often a single-speed gear) -> wheel.
First, eliminate the simple stuff. Is the motor engagement switch on? Some scooters have a physical switch or require a “kick-to-start” push. The Razor E100 series has a specific cut-off: the motor will not engage unless the scooter is traveling at least 3 mph (5 km/h). Pushing off slowly is not a suggestion; it’s a requirement coded into the controller.
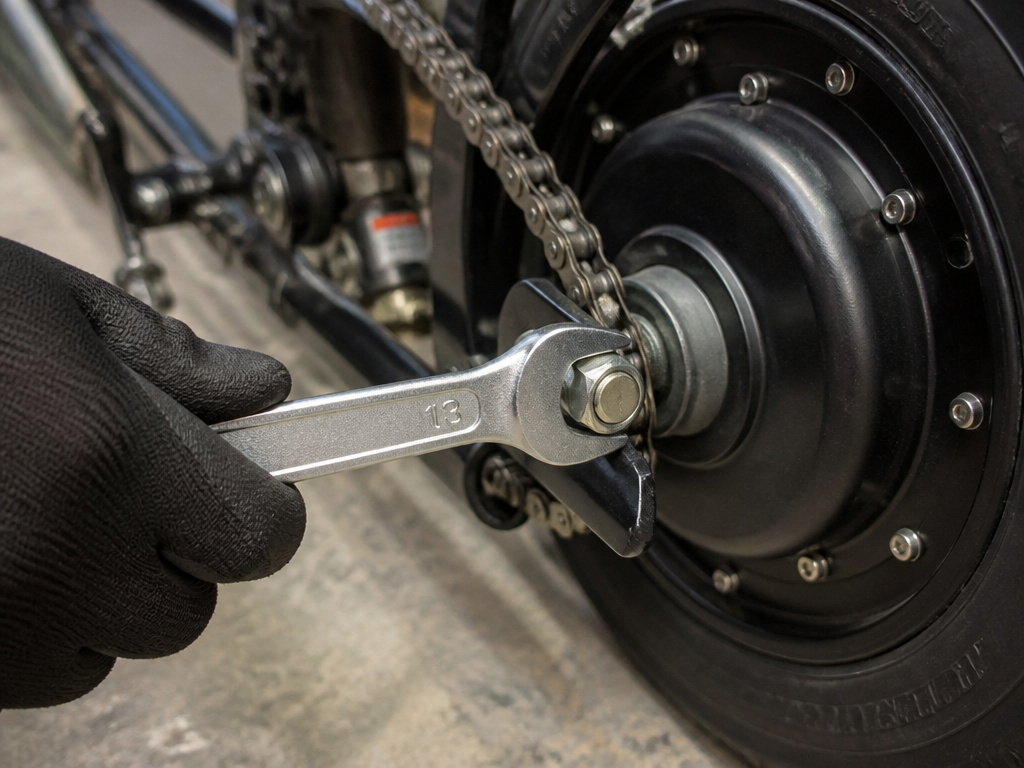
If the motor spins freely when the wheel is lifted but bogs down under your weight, the problem is likely in the transmission. On a hub-motor scooter, this means opening the motor casing, a job that requires specific tools. For a Razor Black Label E100, replacing the rear wheel/hub motor requires a Phillips screwdriver and two 13 mm wrenches. The front tire replacement needs two 5 mm Allen wrenches.
I’ve seen a dozen riders mistake a loose axle nut for a burnt-out motor. The nut backs off, the wheel develops play, and the gear drive slips. The motor screams, the scooter crawls. A 13 mm wrench and five minutes of tightening fixes what a $150 motor replacement would not.
When the Motor is Truly Dead
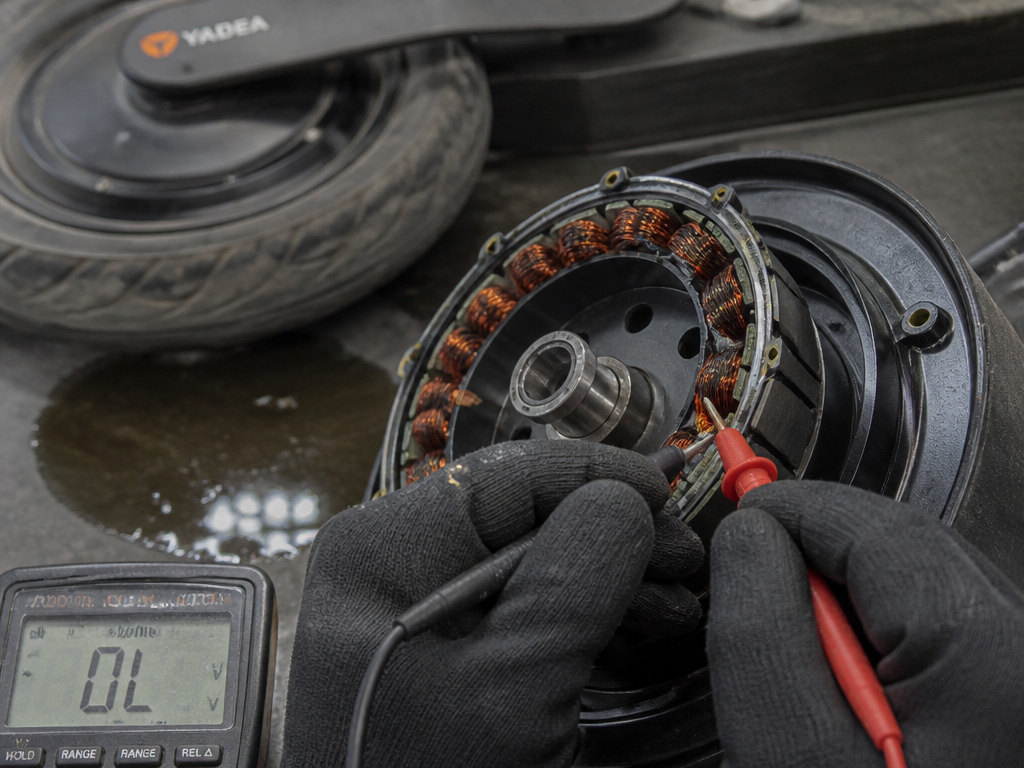
A motor that gets power (you measure voltage at its terminals when the throttle is pressed) but doesn’t even hum is likely dead. Water is the usual killer. The Yadea manual warns: “Do not wade and drive. The water level should not exceed the lower edge of the rear wheel motor bearing block.”
A motor replacement is often the most expensive repair. This is where the cost-benefit analysis kicks in. If your scooter is a budget model and a new hub motor costs 75% of its original price, you’re usually better off selling it for parts and upgrading. The repair only makes financial sense on higher-end models where the motor is a serviceable component.
Brakes, Tires, and Rolling Resistance
These are the most mechanical, skatepark-familiar parts of a scooter. A dragging brake feels like a loss of power. A flat tire feels like the motor is straining.
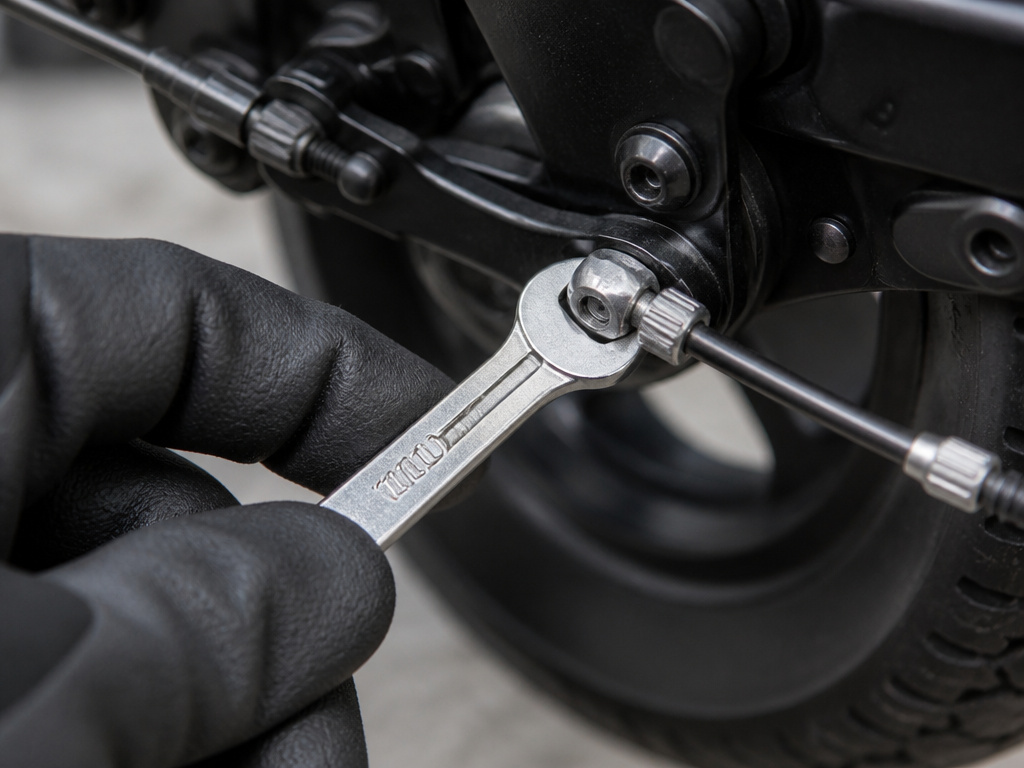
Brake adjustment on a Razor Black Label E100 requires a 10 mm wrench. You loosen the locknut, turn the barrel adjuster on the brake cable to take up slack, and re-tighten. The goal is for the brake pad to contact the rim (or disc) with about 1-2 mm of lever pull, not halfway to the grip.
A warped brake disc or a contaminated pad will cause a constant grinding sound. You’ll hear a rhythmic shush-shush-shush as the wheel spins. The fix is either bending the disc back true (a tricky job) or replacing the pads, often a 10-minute job with a hex key.
Tire pressure is the most overlooked maintenance item. Under-inflated tires increase rolling resistance, which the motor feels as a constant hill. The Yadea manual lists checking tire pressure as a pre-ride must. The recommended PSI is printed on the tire sidewall. A $10 bicycle pump is a better investment than a $100 controller you didn’t need.
Fixing a Flat: Plug, Patch, or Replace?
The Reddit debates are fierce. Fix-a-flat sealant works but makes a mess that any future repairer will hate. A tubeless tire plug kit is a cleaner, more permanent solution for small punctures in the tread.
If the flat is in the sidewall or at the valve stem, replacement is the only safe option. The process is similar to a bicycle tire but often complicated by wiring to the hub motor. You must disconnect the motor phase wires (usually a 3-pin connector) before you can fully remove the wheel. Label the connectors with tape if they aren’t keyed.
Electrical Gremlins: Throttle, Controller, and Error Codes
When the scooter has power but behaves erratically, surges, cuts out, displays an error code, the culprit is usually in the electronics.
A faulty throttle will show an inconsistent voltage output on its signal wire when you twist it (check with a multimeter). A failing speed controller might work intermittently, especially when hot. Error codes are your best friend. A Segway Ninebot Gokart document notes that error code 57 can appear if there’s “electric leakage inside balancing vehicle, which interferes with communication.” That’s a specific, actionable clue pointing to water damage or a short circuit.
It is strictly prohibited to use high-pressure water gun to wash electronic components and circuits. Wet cloth should be used to wipe.. Yadea E8S User Manual
That’s not a gentle suggestion. High-pressure water forces moisture into connectors, leading to corrosion and phantom error codes. If your scooter got soaked, dry it thoroughly with compressed air before attempting any electrical diagnosis.
The most common electrical fix is the reset. Many scooters have a soft-reset procedure (holding the power button for 10 seconds) that clears transient controller errors. It costs nothing and takes five seconds. Always try it.
When to Call a Professional (The Honest Math)
You can diagnose a loose wire, adjust a brake, and plug a tire. You might even swap a hub motor if you’re patient and have the tools. But some jobs cross a line.
Complex wiring problems that involve the main harness or the battery management system (BMS) often require specialist knowledge and equipment. If the battery pack itself is faulty, for example, if one cell is dead and the BMS is locked, most DIYers lack the spot welder and technical know-how to rebuild it safely. Sending it to a specialist or buying a new pack is smarter.
The decision boils down to a simple equation: (Cost of Parts + Your Time Value) vs. (Cost of Professional Repair vs. Value of Scooter).
If your scooter is worth $400, a professional repair costing $350 is a bad investment. If the repair is a $50 controller replacement and an hour of your time, DIY wins. The Reddit consensus is harsh but true: many technicians at repair shops are just following the same YouTube tutorials you are, but charging a premium for the labor.
Error codes (e.g., E2, E6)
Error codes are your scooter’s way of pointing you to a specific fault. For example, an alarm code can indicate an installation issue where components are improperly contacting each other. Another specific code might point to an electrical leakage problem inside a key component, which interferes with system communication. Don’t ignore these signals. Your first step is always to consult your specific model’s manual for the code definitions, as they vary by manufacturer. A code often saves you from replacing the wrong part. Check all connections related to the system mentioned by the code, looking for loose wires, corrosion, or physical damage.
Fuse/circuit breaker problems
A blown fuse or tripped circuit breaker is a common culprit for a sudden, total loss of power. The system uses these protectors to shield the electronics from a power surge or short circuit. If your scooter is completely dead, locate the fuse holder or breaker, often found near the battery compartment or within the main wiring harness. Visually inspect the fuse for a broken filament or a breaker in the tripped position. Replace a blown fuse only with one of the identical amperage rating. Before reinstalling, ensure the scooter is powered off and the charger is disconnected to prevent a spark.
Testing components (e.g., battery, brake switch)
Isolating a faulty component requires a methodical approach. For the battery, check its charge state and physical connections first. Remember that some models have a safety feature where the motor will not engage unless the scooter is moving above a minimum speed. To test a brake safety switch, lift the wheel off the ground, power on the scooter, and gently pull the brake lever while trying to engage the throttle. If the motor runs with the brake released but stops when you pull the lever, the switch is likely working. Always use the correct tools for any disassembly to avoid damaging components.
Frequently Asked Questions
Can an electric scooter be repaired?
Yes, absolutely. Most common failures, flat tires, worn brakes, loose connections, and even some motor or controller issues, are repairable at home with basic tools. The limiting factors are your willingness to follow systematic steps, access to the correct replacement parts, and the scooter’s inherent design (some cheap models are not meant to be serviced).
How to fix an electric scooter not working?
Start with the power source. Use a multimeter to verify the battery voltage is correct. Check that the charger works (solid green light when plugged into wall only, red when charging). Inspect the main fuse or circuit breaker. If power is present, move to the throttle and motor. Nine times out of ten, the problem is a depleted battery, a blown fuse, or a loose wire.
What are the common problems in electric scooters?
The most frequent issues are battery-related (not charging, not holding charge), followed by brake problems (adjustment, worn pads), flat tire punctures, and electrical faults in the throttle or speed controller. Mechanical wear on bearings and the drivetrain is also common after significant mileage.
Is it worth fixing an electric scooter?
It depends on the scooter’s value, the cost of parts, and the complexity of the repair. Fixing a $300 scooter with a $200 motor is usually not economical. However, repairing a $1,000 scooter with a $100 battery or a $30 brake caliper is almost always worth it. Always price the replacement part first and compare it to the scooter’s current market value.
The Bottom Line
Fixing an electric scooter is a process of elimination that starts with the manufacturer’s own checklist. The real cost is in the patience to follow the steps in order.
Before you order a single part, do this: find your scooter’s exact model number and download its official manual. The torque spec for the axle nut and the warning about freezing temperatures are in there. Your first repair is the hardest. Your tenth will feel like tightening a skateboard truck.
If the manual says to store the battery at 50% charge, do it. If it says to store it fully charged, do that instead. The manufacturers built the thing; their contradictory advice is still more reliable than a forum guess. And when you feel stuck, a simple reset can clear the error code that had you ready to list the scooter for scrap.
Now go check your tire pressure.
