How to Get Off a Hoverboard Without Falling: Step-by-Step
This post contains affiliate links. As an Amazon Associate, we earn from qualifying purchases.
To get off a hoverboard without falling, you must come to a complete stop, lift your dominant foot straight up and back, step down firmly behind the board, then immediately lift your other foot straight up and off. The board must be stationary, your feet must lift cleanly off the sensor pads, and your step must be a committed, confident motion, not a tentative shuffle.
That “lift cleanly” part is where most new riders fail. The pressure-sensitive pads under your feet tell the board you’re still in control. If you slide your foot off or hesitate, the board can misinterpret the signal and jerk or spin. The dismount isn’t just stepping off; it’s a deliberate signal to the machine that you’re done. A key skill is knowing how to get off a hoverboard without falling.
What follows is the full breakdown: the essential pre-dismount check, the exact footwork that prevents a tailspin, what to do if you feel yourself going over, and the model-specific quirks, from the Razor Hovertrax 2.0’s auto-shutdown to the Sharper Image board’s 35-degree tilt limit, that change the rules on sloped ground.
Key Takeaways
- Come to a complete, full stop before attempting to dismount. A moving board is the number-one cause of falls.
- Lift your foot straight up, don’t slide it off. Sliding fails to clear the pressure sensor and can send the board into an uncontrolled spin.
- Step backward, not forward. Stepping off the front pitches your weight over the wheels and guarantees a fall.
- Commit to the step. Hesitation shifts your center of gravity onto one unstable footpad. A firm, quick motion is safer than a slow one.
- Check your board’s manual. Brands disagree on technique; the Razor and Jetson manuals say step back, while Onewheel warns against it.
The Non-Negotiable Pre-Dismount Check
You wouldn’t jump from a moving car. Don’t step off a moving hoverboard. The single most important rule for how to get off a hoverboard without falling is also the most ignored: come to a complete, full stop.
A hoverboard balances by making hundreds of micro-adjustments per second. When you’re rolling, even slowly, those adjustments are based on forward or backward momentum. Stepping off interrupts that loop. The board might try to correct for weight that’s no longer there, leading to the infamous “death spin” where the wheels whip around uncontrollably. This isn’t a scare story. It’s the predictable outcome of the gyroscope and motor trying to stabilize a platform that’s suddenly missing half its input.
Before you start: Always ensure the board is on a flat, level surface before dismounting. A low battery can cause sudden shutdowns and loss of balance, check the indicator lights.
Your stopping surface matters just as much as your speed. The manuals are unanimous here. The Razor Hovertrax 2.0 states it should only be used indoors or on completely smooth surfaces. The Sharper Image Hover Board has a maximum climbing limit of 15°. Trying to dismount on a slope, especially one steeper than 15 degrees, is asking for a fall.
Finally, check your feet. Are they planted firmly in the center of the pads? The Jetson V8 Sport manual is explicit: always keep your feet firmly planted on the hoverboard pads while in operation. If you’re leaning to one side or your heel is hanging off, your weight distribution is already compromised. Center yourself, take a breath, and then move to the dismount.
The Core Step-by-Step Dismount
This is the sequence for how to get off a hoverboard without falling that works for most two-wheel, self-balancing hoverboards. It assumes a flat, smooth surface and a board that’s powered on and stationary.
- Stop Completely. Use gentle forward pressure to slow to a halt. Hold your position until you feel the board is absolutely still underfoot. No rocking, no slight drift.
- Identify Your Dominant Foot. This is usually the foot you would kick a ball with. You’ll step off with this foot first. Having a plan eliminates hesitation.
- Lift, Don’t Slide. Shift your weight slightly to your non-dominant foot. Then, lift your dominant foot straight up, breaking contact with the pressure pad cleanly. Imagine you’re stepping over a small log directly behind you. This clear, vertical motion is critical.
- Step Down Firmly Behind the Board. Plant your lifted foot firmly on the ground behind the hoverboard. Your knee will be slightly bent. This solid base of support is now your anchor.
- Immediately Lift Your Other Foot. Without pausing, lift your remaining foot straight up and off the board. You can now step fully away.
Where this goes sideways: Trying to step off to the side or front. Stepping to the side requires a complex weight shift most beginners don’t control, often resulting in the board shooting out from under them. Stepping forward is a guaranteed fall, you pitch your center of gravity right over the front wheel.
The “commitment” part is psychological, but it has a physical effect. A slow, timid lift keeps your weight hovering over the board for too long. A quick, decisive motion gets you to a stable stance faster. Your body knows the difference.
What If You Start to Tip?
Even with perfect technique, you might feel that sickening lurch of imbalance mid-dismount. The board tilts, your arms windmill, and the ground rushes up. Here’s your recovery protocol, in order of priority.
First, abort the dismount. If you’ve only just lifted your first foot and feel the board becoming unstable, try to get that foot back down onto its pad. Re-establish two points of contact. The board’s self-balancing system works best with two inputs. Once stable, recenter, and try the dismount sequence again from the start.
If you’re already committed and are falling, protect your head and wrists. This is where skating instinct pays off. Tuck your chin, and try to roll onto your shoulder and back, distributing the impact. If you can’t roll, aim to land on the meaty parts of your body, your thigh, buttock, or back, and slap the ground with your forearms to dissipate energy, keeping your wrists straight to avoid hyperextension. This is why learning to fall safely is a fundamental skill that applies here.
Common mistake: Stiff-arming the fall. Locking your elbows and letting your wrists absorb the full force is a direct route to a fracture. Practice falling on a soft surface like grass or a gym mat to build the muscle memory of a controlled collapse.
What about the board? Let it go. Trying to catch a spinning or jerking hoverboard is a good way to get whacked in the shins or twist an ankle. It’s built to take a knock; you are not. Your only job is to get clear of it.
Model-Specific Quirks and Warnings
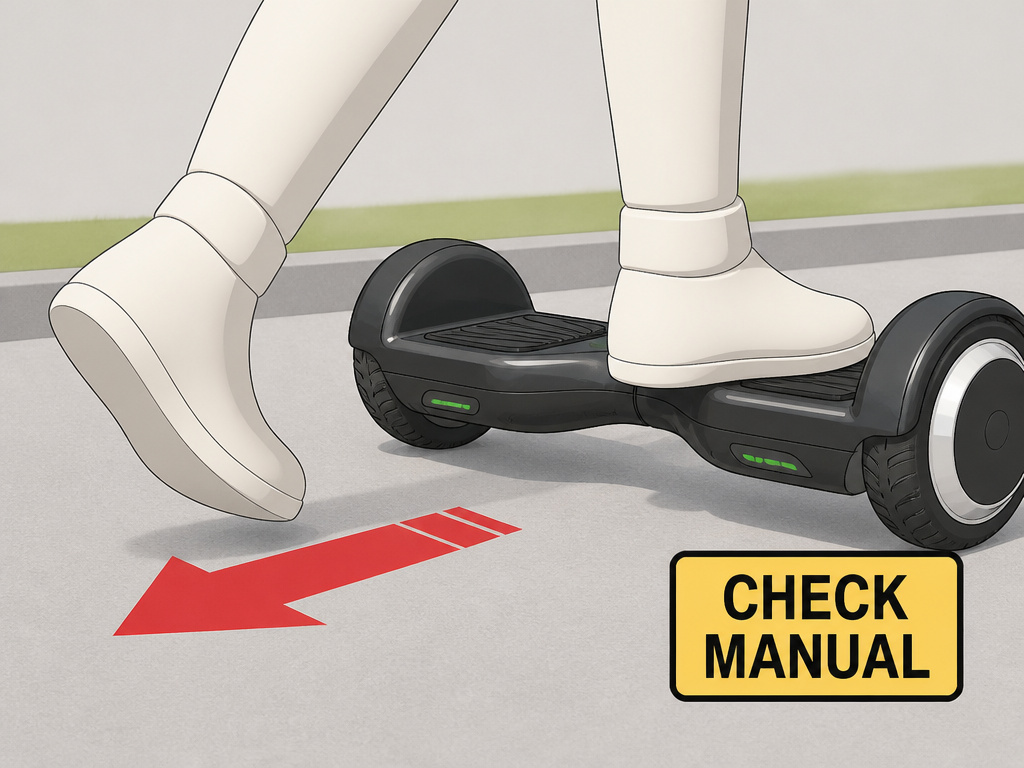
Not all hoverboards are the same. Their manuals contain specific warnings that directly impact how, and where, you should get off.
| Model | Key Dismount-Related Spec | Why It Matters |
|---|---|---|
| Razor Hovertrax 2.0 | Auto-shutdown after 5 minutes idle; max 176 lb rider | If you dilly-dally, it may beep and shut off mid-dismount. Exceeding weight limits affects stability. |
| Jetson V8 Sport | Auto-shutdown below 10% battery; “No jumping” rule | A low-battery shutdown during dismount can drop the board. Jumping off is explicitly forbidden. |
| Sharper Image (204257) | Auto-power-off if tilted >35°; 250 lb max load | Dismounting on a slope >15° risks a sudden power-off. Know your weight relative to its high limit. |
| Hoverzon S/XLS | Withstands small splashes only | Dismounting into a puddle or wet grass is fine; submerging it is not. |
The most glaring disagreement between manufacturers is on direction. The Razor Hovertrax 2.0 and Jetson V8 Sport manuals instruct riders to step backward off the device. However, the Onewheel+ manual explicitly warns to never step off with your back foot first, stating it increases fall risk. Always defer to your specific product’s manual.
Other quirks involve the board’s behavior. The Sharper Image Hover Board will automatically power off if tilted forward/backward more than 35 degrees, which could happen if you dismount on a steep slope. The Razor Hovertrax 2.0 will automatically turn off if left on for more than 5 minutes, which could startle a rider practicing slowly.
Common Beginner Mistakes (And How to Fix Them)
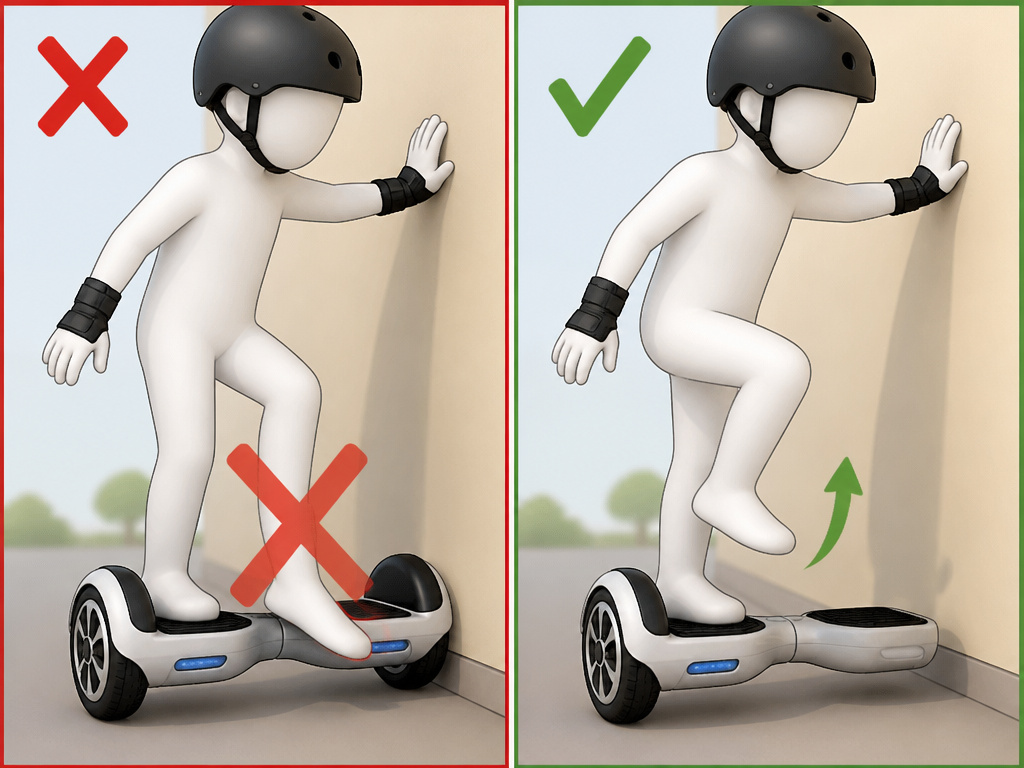
Most falls happen for a handful of repeatable reasons. Recognizing them cuts the learning curve in half.
Mistake 1: The Shuffle Slide. Instead of lifting their foot, the rider tries to slide it off the pad while keeping contact. The sensor reads this as a command to turn or move. Fix: Practice the “lift” motion while holding onto a wall or railing. Get used to the feeling of breaking contact cleanly.
Mistake 2: The Forward Bail. Panic or momentum carries the rider forward, over the front of the board. Fix: Consciously think “step back” before you even start to dismount. Your natural instinct might be to go forward; you must override it.
Mistake 3: The Hesitation Hover. The rider lifts one foot but then hovers it over the board, unsure where to place it. This leaves them balanced on one moving platform. Fix: Pick your landing spot before you lift. Look at a point on the ground behind the board and step directly to it.
Mistake 4: Ignoring the Surface. Trying to dismount on gravel, grass, or a slope. Fix: Scout your stopping area. Always aim to begin and end your ride on a smooth, flat patch.
Mistake 5: No Safety Gear. Thinking that because dismounting is a low-speed maneuver, pads aren’t needed. Fix: Wear your wrist guards and helmet every single time. The most common hoverboard injuries from falls are wrist fractures and head knocks, and they happen at standing height.
Using Support and Drills for Beginners
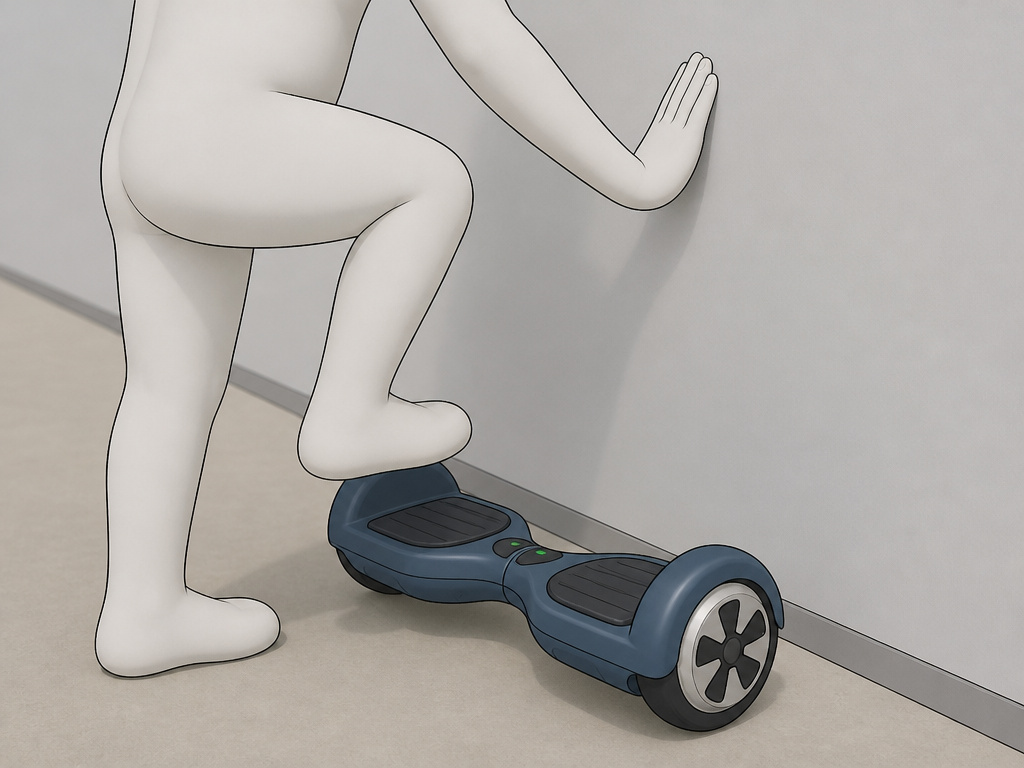
If the standard dismount feels too intimidating, use support. This isn’t cheating; it’s smart training.
Find a long, smooth wall or a sturdy fence. Ride the board slowly alongside it until you can comfortably stop while keeping one hand on the support. Then, practice the dismount sequence while maintaining that light touch. The support prevents a full fall, building confidence. Once you can do it ten times in a row without gripping tightly, try it with just a fingertip touch. Then try it without any support.
A simple drill is the “Mount/Dismount Cycle.” With the board off, practice stepping on and off it, finding your balanced standing position. Then, power it on and, while holding a support, practice stopping and the lift-step-lift sequence. Do this for five minutes at the start of each practice session. It builds the muscle memory so that when you’re in the open, your body knows the drill.
For younger riders, the rules change slightly. The Razor Hovertrax 2.0 manual recommends the product not be used by children under the age of 8, and that’s not just about riding.
How to get on a hoverboard without falling
Start in a wide, open area with a smooth, flat surface. Ensure the board is powered on and has a sufficient charge; a low battery can cause shutdowns or unintended movement. Place the board directly in front of you, wheels parallel. With one hand on a stable support like a wall or railing, step onto the board one foot at a time. Place your first foot firmly on its pad, then immediately bring your second foot up. Keep your feet planted near the wheels and your body upright. Once both feet are on, release your grip on the support and focus on keeping your weight centered. Avoid any jumping motion when mounting.
Frequently Asked Questions
How do you not fall off a hoverboard at all?
You build foundational balance first. Start by just standing on a powered-off board against a wall to find your center. Then, practice the basic riding guide movements, gentle forward, backward, and stopping, in a wide-open area. Consistent, short practice sessions focusing on control, not speed, build the stability that prevents falls during riding and dismounting.
Why is my hoverboard not turning off?
Most hoverboards have an auto-shutoff feature when idle (like the Razor’s 5-minute timer) or when the battery is critically low. If it won’t turn off via the power button, the battery or control board may be faulty. First, consult your manual. Ensure you are pressing the button correctly, often a long press is required. If it persists, stop using it and contact the manufacturer, as a stuck-on board is a safety hazard.
Are hoverboards safe for a 10 year old?
They can be, with strict supervision and the right model. A 10-year-old is above the age of 8 suggested by Razor for use., but maturity and coordination vary hugely. The most important factors are a full set of protective gear (helmet, wrist guards, knee pads), practice in a controlled environment, and direct adult supervision until the child demonstrates consistent control and safe dismounts every time.
Are hoverboards difficult to get off of?
They are unintuitive at first. The act of stepping off a self-balancing platform goes against your natural instinct to step forward. However, the physical skill itself is not complex. The difficulty is almost entirely mental, overcoming the hesitation and committing to the backward step. With focused practice of the lift-step-lift sequence, most people can learn a reliable dismount within a single practice session.
The Bottom Line
Mastering the dismount is the final, critical skill in any hoverboard riding basics session. It’s the gatekeeper between a fun ride and a painful finish. The rule is simple: stop clean, lift straight up, step back with commitment.
If you only remember one thing, let it be the clean lift. Sliding your foot off the sensor is the root cause of most “weird” board behavior during dismount. That, combined with the essential safety tips like wearing wrist guards, transforms a potentially risky maneuver into a routine, controlled action.
Start every session by practicing five perfect dismounts while holding onto something. End every session the same way. That repetition builds the confidence that replaces hesitation, and confidence is what keeps you upright.
