How to Lubricant or Grease Longboard Bearings
This post contains affiliate links. As an Amazon Associate, we earn from qualifying purchases.
To lubricate longboard bearings, you must first clean them thoroughly, choose between oil or grease, and apply the correct amount, either 1-2 drops of oil or fill 15-20% of the bearing’s internal space with grease. Oil suits high-speed applications but requires frequent reapplication; grease stays put longer. Avoid WD-40, as it’s a solvent that leaves bearings dry and prone to rust.
That 15-20% figure from SMB Bearings is the first thing most guides miss. They tell you to add “a few drops” and call it a day, which can lead to over- or under-lubrication. The difference between a smooth, silent roll and a gritty, slow grind comes down to matching the lubricant’s physical properties to your actual riding. A key part of this is knowing how to lubricant or grease longboard bearings correctly.
What follows: a breakdown of the oil vs grease trade-off, the exact cleaning steps that prevent solvent damage, and how to spot the moment your bearings are too far gone to save, all centered on the core question of how to lubricant or grease longboard bearings. By the end, you’ll know whether to reach for the grease tube or the oil bottle before your next session.
Key Takeaways
- Clean bearings before lubricating, dirt mixed with new lube creates an abrasive paste that grinds components down.
- Grease beats oil for most skate applications because it stays in place, seals out contaminants, and doesn’t require re-lubing as often, according to SMB Bearings’ technical guide.
- Use only 1-2 drops of oil or fill 15-20% of the space with grease; over-lubricating attracts dirt and creates drag, slowing your wheels.
- Never use WD-40 as a lubricant, it’s a solvent that breaks down grease, wears off quickly, and leaves bearings vulnerable to rust, as noted by Tactics.com.
- A new bearing should free-spin for about 60 seconds; if yours spin for less than 30 seconds after cleaning, they likely need a deeper clean or replacement.
Tools and Materials You Actually Need
You don’t need a specialty kit. A skate tool, a container that won’t melt, and the right solvent get you 90% of the way. The last 10% is choosing a lubricant that matches how you ride.
Your skate tool is essential. It’s the only thing that reliably removes wheels without stripping axle nuts. For the container, use one that is solvent-safe, such as glass, metal, or polyethylene. An old mason jar works perfectly.
For solvents, the sources disagree. SMB Bearings recommends white spirit, while Tactics.com lists isopropyl alcohol or acetone. Isopropyl alcohol is easier to find and less toxic, but white spirit cuts through heavy grease better. Pick based on your bearing’s grime level.
Common mistake: Using a plastic food container with acetone. The solvent can cloud or dissolve the plastic, leaving a residue that re-contaminates your freshly cleaned bearings.
Lubricant choice is the big fork in the road. You have Bones Speed Cream, Bronson Speed Co. High-Speed Ceramic Oil, or a Klueber grease. Your decision here dictates your maintenance schedule.
The Oil vs Grease Decision That Changes Maintenance
This isn’t about brand loyalty. It’s about viscosity and where you skate. Oil flows easily and is thin, which is why the SMB Bearings guide states grease is better for skate bearings, it stays put.
If you’re a downhill racer chasing every fraction of a second, a light oil like Bones Speed Cream might be your pick. It creates less drag at very high RPMs. But that thinness is its weakness; it spins out of the bearing faster and offers less protection. You’ll be re-lubricating every few weeks.
Grease is oil with a thickener. The SMB Bearings guide notes that low-viscosity grease creates minimal extra drag under load and actually softens as it warms up. It forms a physical seal against dirt and water. For street skaters, park riders, or anyone who doesn’t want to service bearings monthly, grease wins.
Using a light oil can allow it to spin out of the bearing, letting dust into the raceways. Grease tends to stay in place better.
| Lubricant Type | Best For | Re-Lube Frequency | Key Trade-Off |
|---|---|---|---|
| Oil (e.g., Bones Speed Cream) | High-speed disciplines, dry conditions | Every few weeks | Maximum speed, minimum protection |
| Grease (e.g., Klueber) | Street, park, wet/grity conditions | Every few months | Maximum protection, minimal speed penalty |
The International Inline Skating Association gear guide echoes this, noting that the right lubricant extends component life. Your choice directly decides how often you’ll be doing this job again.
Step-by-Step Cleaning Process
Stop here if your bearings have staked or crimped metal shields. These are non-serviceable; trying to open them ruins the seal. For serviceable bearings with removable rubber shields or C-clips, here’s the full process.
First, get the bearings out. Use your skate tool to remove the wheel nuts. Pop the wheels off the axle. You can usually push bearings out with your fingers or the axle itself. Have a tray ready for small parts.
Next, remove the shield. A flathead screwdriver tip or a pin can pry under a rubber seal. For metal shields held by a C-clip, use a pin to lift and remove the clip first, then the shield. Go slow, bent shields won’t reseal properly.
Now, clean. Place the bare bearings in your solvent-safe container. Cover them with your chosen solvent, white spirit or isopropyl alcohol. Sources disagree on soak time: the iFixit guide says 2-4 hours, while SkatePro suggests shaking for a few minutes. For heavy grime, soak. For light cleaning, a vigorous shake works.
After soaking, agitate them. Swirl the container or use a brush to dislodge grit inside the raceways. Remove the bearings and spin them to flick off solvent. Dry them immediately. Use compressed air, a hair dryer on cool, or spin them vigorously on a clean towel. Any leftover solvent will dissolve your new lubricant.
Where this goes sideways: Letting bearings air-dry. Solvent evaporates slowly, leaving a residue that mixes with your new lube and turns into a gummy, abrasive sludge. You’ll hear grinding within a day.
Finally, inspect. Spin the inner ring by hand. It should turn freely with a soft, metallic whirr. If you feel grinding or hear a crunchy sound, repeat the cleaning with fresh solvent, or learn more about how to fix longboard bearings if the issue persists. If it’s still gritty after two cycles, the bearing balls or raceways are likely pitted and need replacement.
Applying Lubricant: How Much Is Right?
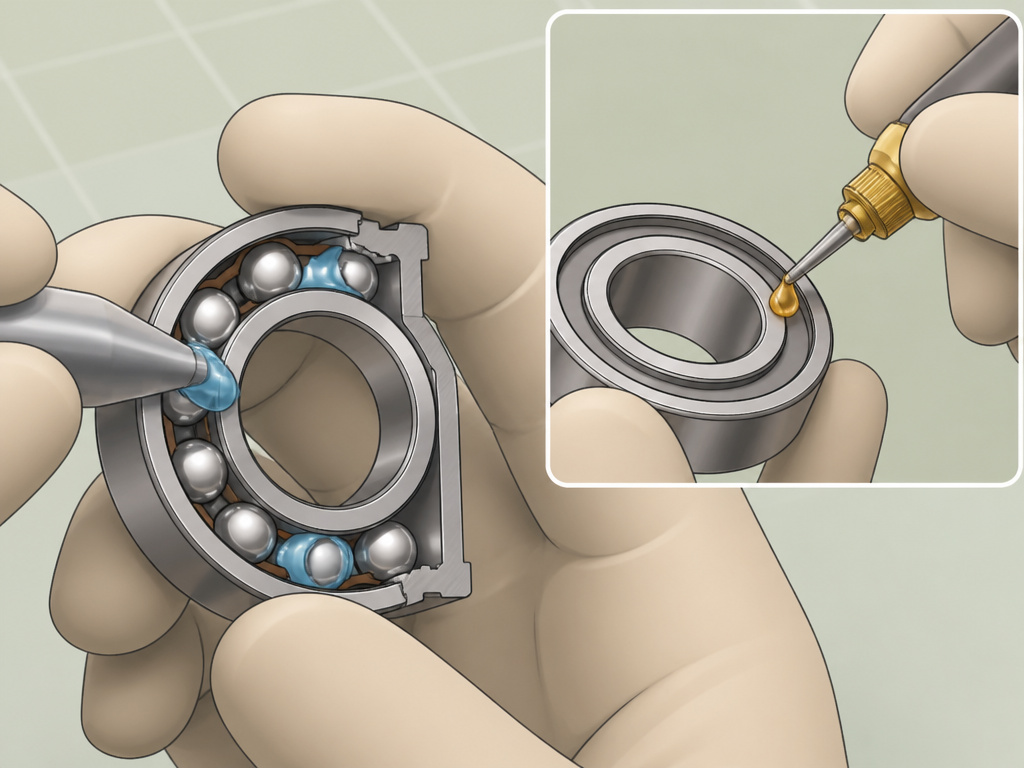
This is where the guides diverge loudly. SMB Bearings says fill 15-20% of the internal space. SkatePro and Tactics.com say 1-2 drops of oil. IFixit says two drops on opposite sides. Who’s right? They all are, for their specific lubricant.
For grease, the 15-20% rule is visual. Imagine the bearing’s interior cavity. You want a small bead of grease squeezed between the balls and onto the raceways, not packed solid. Too little and it won’t coat; too much and it creates drag.
For oil, the 1-2 drop rule is critical. Oil spreads. A single drop on the edge of the inner race will wick through the entire bearing. A second drop on the opposite side ensures even coverage. More than two drops will seep out, attract dirt, and create a mess.
The technique matters. After applying, rotate the bearing several times by hand to distribute the lubricant. Some guides suggest mounting it on a drill shaft to spin it. I’ve found a few manual spins work fine, the goal is to coat the balls and raceways evenly.
Reassemble in reverse order. Press the shield back on until it clicks into place. If you had a C-clip, reinstall it carefully. The bearing should now spin smoothly with a slight viscous drag from the new lubricant. That drag is good, it means the lube is in place.
What Most People Get Wrong (and How to Avoid It)
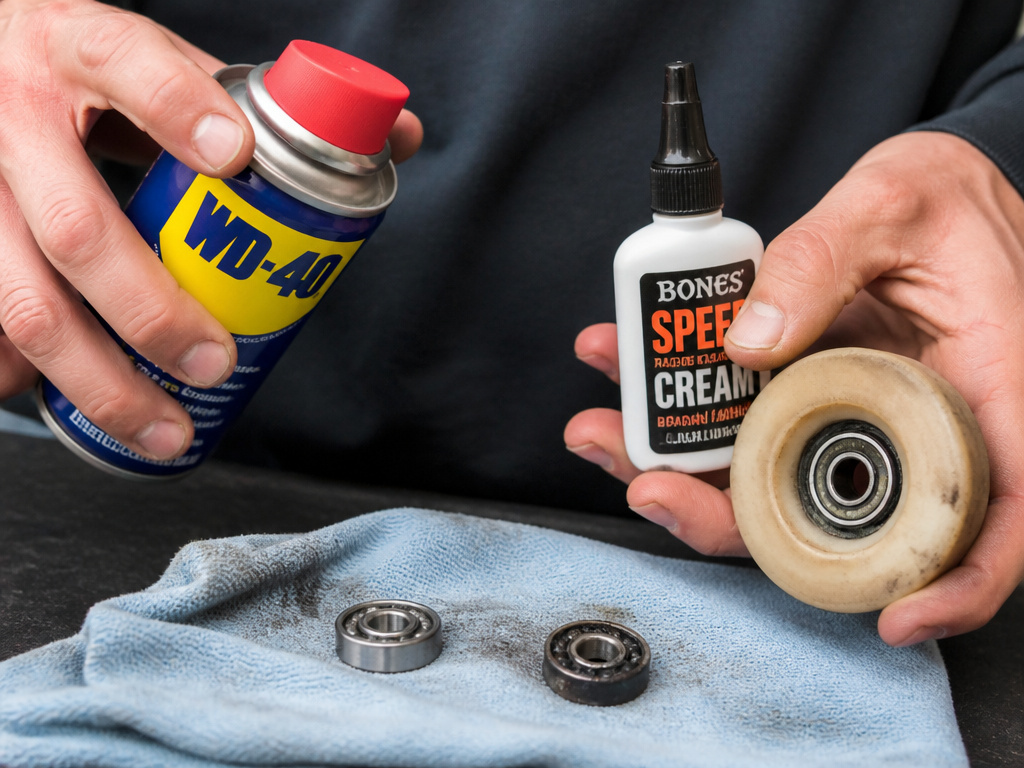
The biggest error is using WD-40. Using WD-40 as a lubricant leads to bearing failure. WD-40 is a water-displacing solvent, not a lubricant. It breaks down existing grease, provides a thin film that evaporates, and leaves the metal exposed. Tactics.com explicitly warns against it for this reason.
Another common mistake is not drying bearings fully. Damp bearings dilute your new lubricant, rendering it useless. You might as well have not cleaned them at all. The result is accelerated wear and a return to grinding noises.
Over-lubrication is just as bad as under-lubrication. Excess oil seeps out, collecting dust and grit at the shield’s edge. This grime eventually works its way inside. Excess grease creates so much internal drag that your wheels won’t spin freely, costing you speed and effort (for tips on maximizing spin, see how to make wheels spin longer).
Finally, people try to service non-serviceable bearings. If the outer metal ring is staked or crimped over the shield, it’s a sealed unit. Forcing it open destroys the seal integrity. Just wipe these clean externally and accept they have a finite life.
Testing and Troubleshooting After Maintenance
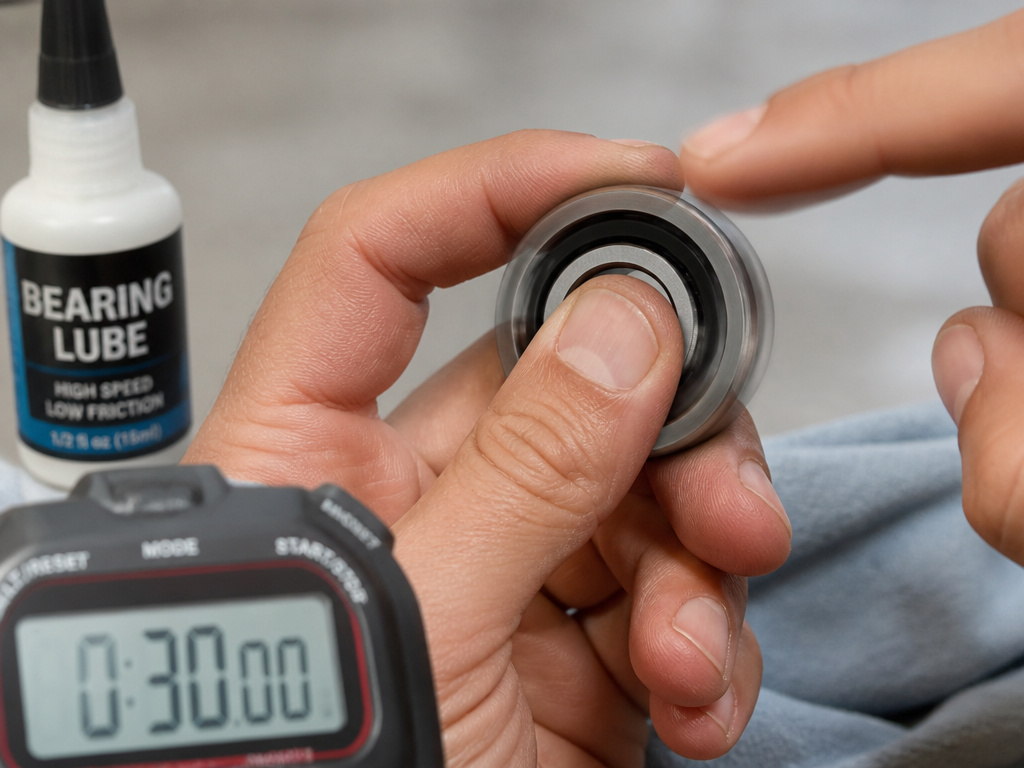
A new bearing, per the iFixit guide, should free-spin for roughly 60 seconds. That’s your gold standard. After cleaning and lubricating, you should get close.
Hold the inner ring and give the bearing a light flick. Time it. If it spins for less than 30 seconds, something’s wrong. It could be residual solvent, too much lubricant, or dirt still inside. If you hear a gritty or grinding noise, the bearing is likely damaged.
If the spin is short but silent, you probably have too much grease or oil creating drag. Wipe away any visible excess from the shield edges and retest.
If the spin is noisy, you need to re-clean. The abrasive sound means particulate matter is still in the raceways, grinding away. A second cleaning with fresh solvent might save it.
Sometimes, a bearing is just done. Pitting on the balls or raceways feels like definite bumps or clicks as you spin it. No amount of cleaning will smooth that out. When you feel that, it’s time for a new set. Knowing when to stop is as important as knowing how to clean.
How to dry bearings after cleaning
After soaking in a solvent, your bearings must be completely dry before you add any lubricant. Any leftover moisture will dilute your lube and can lead to rust inside the bearing. Wait until you are absolutely certain no liquid remains. Only a perfectly dry bearing will properly accept new grease or oil.
Frequently Asked Questions
Can I use vegetable oil or WD-40 on my bearings?
No. Vegetable oil gums up and turns rancid. WD-40 is a solvent, not a lubricant. It will break down any existing grease and evaporate, leaving your bearings dry. Stick to purpose-made skate lubricants like Bones Speed Cream or a high-speed grease from our recommended best skate bearing lubricants.
How often should I lubricate my longboard bearings?
It depends on your lubricant and riding conditions. Oil-based lubricants need reapplication more frequently. Grease can last longer. Lubricate when your wheels start to sound gritty or lose their spin time.
Do I need to remove the shields every time I clean?
For a deep clean, yes. Dirt gets behind the shield. For a quick field maintenance, you can add a drop of lubricant to the shield edge and spin the wheel to draw it in. This is a temporary fix until you can do a deep clean.
Is it worth cleaning cheap bearings?
Usually, no. Cheap bearings often have lower-grade steel and poor seals. The time and materials spent cleaning them often cost more than a new set of budget bearings. Invest your maintenance effort on quality, serviceable bearings.
What’s the best way to dispose of used solvent?
Let the used solvent evaporate in a well-ventilated area outdoors, away from sparks or flame, in a disposable container. Do not pour it down the drain. Once the residue is dry, you can dispose of the container with regular trash. Local hazardous waste facilities are the best option for large quantities.
Before You Go
Your bearings are the only moving part between you and the pavement (learn more about what longboard bearings are and how they work). A methodical clean-and-lube beats buying new ones every season, but only if you match the lubricant to the job. Grease for durability, oil for pure speed, pick one.
If your bearings spin for less than 30 seconds after a cleaning, they’re likely pitted. No amount of lube will fix that. That’s your signal to replace them.
One final tip most guides skip: after reassembly, go for a short, easy ride. The motion and load help distribute the lubricant fully inside the bearing. That first ride is the final step in the process. Then you’re set for miles.
