How to Replace a Tire on an Electric Scooter: Step-by-Step
This post contains affiliate links. As an Amazon Associate, we earn from qualifying purchases.
To replace a tire on an electric scooter, you need the right tools, a methodical approach, and an understanding of your specific model’s design. The job breaks down into removing the wheel, breaking the tire bead, swapping the tire or tube, and reseating the bead at the correct pressure. The hardest part isn’t brute force, it’s avoiding damage to the motor cable, the rim, or yourself.
The difference between a frustrating afternoon and a successful repair often comes down to three things most guides gloss over: your scooter’s motor connection, the exact bead seating pressure, and whether your tire is tubed or tubeless. Miss one, and you’re either wrestling a tire that won’t budge or dealing with a dangerous air leak later. This is why understanding how to replace a tire on an electric scooter is essential.
What follows is a walkthrough of the universal steps for how to replace a tire on an electric scooter, punctuated with the model-specific warnings and manufacturer specs that actually decide whether your tire change works. We’ll cover the tools that aren’t optional, the safety steps you cannot skip, and how to know when it’s smarter to hand the job to a pro.
Key Takeaways
- Always disconnect power first, remove the battery and, for models like the Okai Neon, use an Exacto-knife to disconnect the motor cable before wheel removal to avoid shorting the controller.
- Bead seating pressure isn’t universal; the Vida manual says 1.5x standard pressure (~33 psi), while the VMAX VX5 guide says 44 psi, check your manual.
- Never install a tube inside a tubeless tire; the Vida workshop manual warns this causes excessive heat buildup and can lead to a burst tube during hard acceleration.
- A rim protector and proper tire levers save your rim from gouges and make the job possible; standard screwdrivers will damage both the rim and tire bead.
- Expect to spend a significant amount of time on your first attempt, and know that a professional service costs around $50 plus parts if you get stuck.
The Core Tools You’ll Actually Need
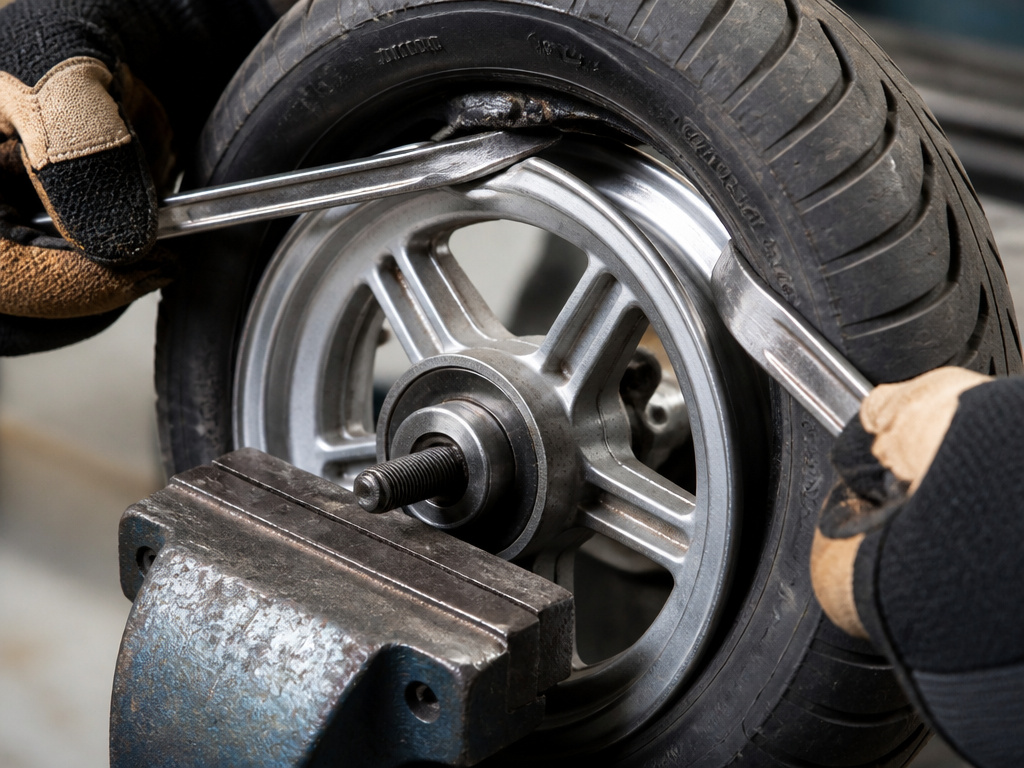
You can’t muscle a scooter tire. The right tools provide the needed force and protect delicate parts. What “tire levers” means varies wildly by manufacturer.
The Segway One S1 service manual lists “Two tire irons” and “Safety glasses” as required. The Okai Neon guide calls for “tire spoons (or heavy-duty metal tire levers)” plus a 2.5mm hex key and an Exacto-knife. The VMAX VX5 procedure requires mounting levers, tire mounting soap, and a compressor. Notice a pattern? Generic “tire levers” from a bike shop are often too short and weak for a scooter’s stiff rubber.
A proper motorcycle tire lever is long with a smooth, rounded tip. It won’t slice the tire bead or slip off under pressure like a screwdriver will, which is how people chip their rims.
Your toolkit should include: * Long, sturdy tire levers. Plastic bike levers usually snap.
- Tire mounting soap or dish soap. Lubrication is essential for sliding the bead on and off.
- A compressor or high-volume pump. Seating a tubeless bead often needs a burst of air a hand pump can’t deliver.
- Zip ties. Useful for compressing the tire to get the second bead over the rim, as noted in the VMAX guide.
- A rim protector. This can be a dedicated tool or a piece of an old tire. The Vida manual specifically advises using one “on the section of the rim close to the valve” during lever use.
- Model-specific tools. For the Okai Neon, that’s the 2.5mm hex key and Exacto-knife. For others, it might be a specific socket for the axle nut.
Skipping any of these turns a methodical job into a brutal fight. I’ve watched students chew up brand-new rims because they thought a flathead screwdriver was a suitable substitute for a tire spoon. The cost of the right tools is always less than the cost of a new wheel.
Before You Start: The Non-Negotiable Safety Steps
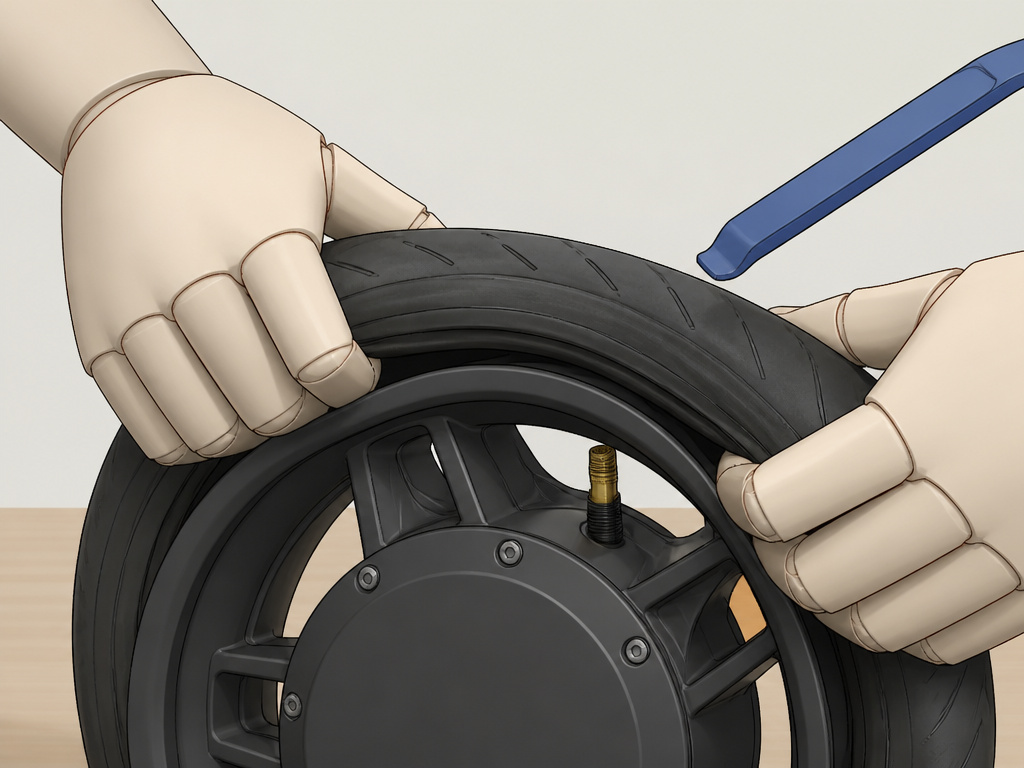
This isn’t a bicycle. The presence of a lithium battery and an electric motor adds real hazard. The safety warnings in OEM manuals are severe for a reason.
For the Segway One S1, the service manual is unambiguous: “Always remove the batteries before servicing.” After removal, you must “press the ON/OFF button to discharge any residual energy.” Furthermore, it warns, “Do not allow any metallic object to touch the pins of the battery connector.” A short there can cause a hazardous energy release. Finally, it says not to use a battery if it’s damaged, leaking, or emitting unusual odor or heat.
Common mistake: Leaving the battery connected while working on the wheel. A slipped tool that shorts the motor cable pins can fry the controller instantly, a repair that often costs more than the scooter itself.
The procedure extends beyond battery safety. For scooters with internal drum brakes, you must secure the brake arm before removing the wheel to prevent it from springing apart. For hub motors, you are handling a dense, expensive component; dropping it can crack the casing or damage the stator. Set up a clean, soft workspace.
This is also the moment for a pre-repair inspection. Check the rim for large dents, distortion, or cracks. The Vida manual states that such damage “may cause air leak” and dictates rim replacement. Measure tread depth; the same manual gives a minimum service limit of 1.5 mm. If your tire is worn past this, replacement isn’t optional, it’s a safety issue.
Model-Specific Disassembly: Where Guides Diverge
Here’s where a generic video fails you. Getting the wheel off the scooter can be a five-minute job or a complex electrical disassembly, depending on your brand.
For many rear motors, you simply undo the axle nuts, minding any washers or spacers, and slide the wheel out. The front wheel is usually even simpler. But for models like the Okai Neon, the official guide throws a curveball. It requires using an Exacto-knife or utility blade to disconnect the motor cable from the controller before the wheel can be removed. It notes that removing the controller itself is “optional but recommended for better maneuverability.” This isn’t a suggestion, it’s a necessary step to avoid straining and breaking a fragile electrical connection.
| Scooter Model | Key Disassembly Step | Tool Needed | Risk If Skipped |
|---|---|---|---|
| Segway One S1 | Remove battery, press power button | None (hands) | Electric shock, controller damage |
| Okai Neon/Neon II | Disconnect motor cable from controller | Exacto-knife, 2.5mm hex key | Torn cable, permanent motor damage |
| Generic Hub Motor | Remove axle nuts, note spacer order | Socket wrench | Misaligned wheel, brake rub |
| VMAX VX5 | Remove axle, secure motor | Wrench, clamp | Dropped motor, damaged axle |
The lesson is to find your scooter’s official service manual or support article before you turn a single bolt. A half-hour of research can save you from ordering a $200 replacement part.
The Step-by-Step Process
With the wheel secured in your hands or clamped gently in a vise (never clamp the motor casing directly), the tire change itself follows a mechanical logic. Patience beats strength every time.
1. Deflate and Break the Bead.
Deflate the tire completely via the valve. Then, squeeze the sidewalls together with your hands all the way around the circumference. You may need to stand on the tire or use a lever to pop the bead loose from the rim shelf. Listen for a faint cracking sound, that’s the bead letting go.
2. Remove the First Bead.
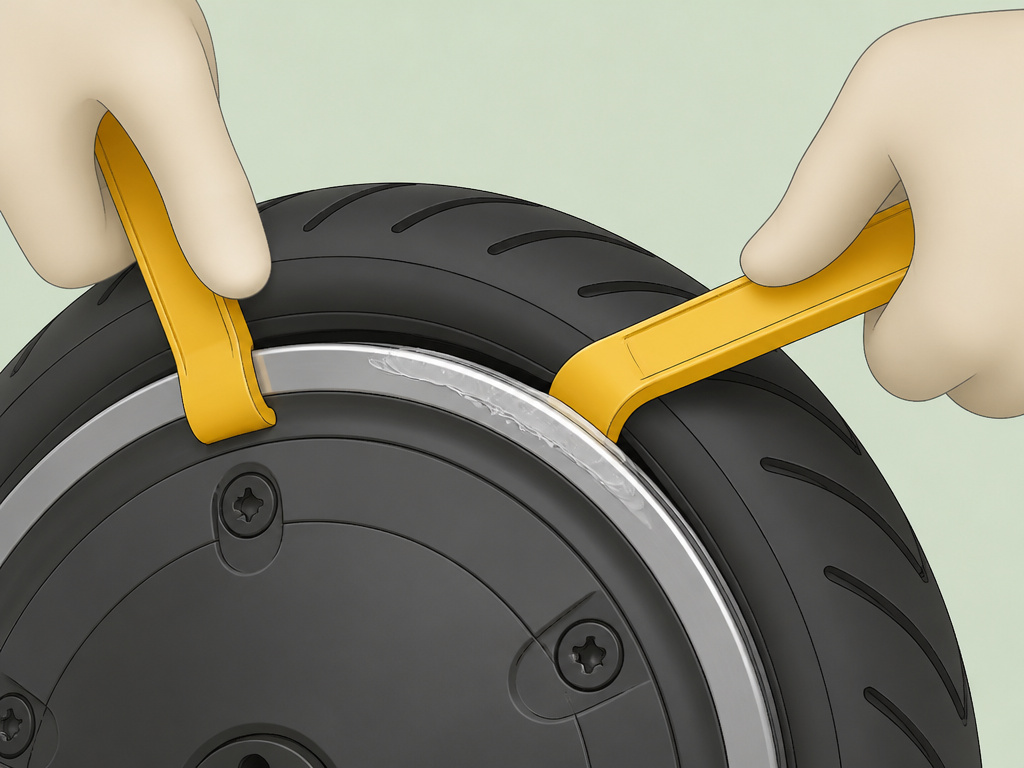
Lubricate the bead and rim edge with soap. Insert a tire lever under the bead, hook it onto the rim, and hold it. Take a second lever a few inches away and do the same. Work your way around, “walking” the bead up and over the rim edge. Once one side is off, the tube (if present) can be removed. For tubeless tires, you can now often pull the whole tire off.
3. Remove the Second Bead (or Tire).
Flip the wheel and repeat the process for the opposite bead. If the tire is incredibly stiff, use the zip-tie method: place several zip ties around the tire’s circumference to compress it into the rim’s center groove, creating slack. This is a technique mentioned in the VMAX guide.
4. Install the New Tire.
If it’s a tubed setup, place the new tube (lightly inflated to just hold its shape) inside the new tire. Start seating one bead of the tire onto the rim by hand as far as you can. Use your levers and soap for the last section, taking care not to pinch the tube. Then, work the second bead on. The last few inches will be the toughest, ensure the opposite bead is sitting in the deep center channel of the rim to maximize slack.
5. Seat the Bead and Inflate.
This is the critical moment where sources disagree. You must inflate the tire rapidly to snap the bead into its sealed seat on the rim.
- The Vida manual says: “inflate the tyre to 1.5 times the standard recommended pressure to seat the bead.” For a front tire with a 22 psi rating, that’s 1.5 times the standard pressure.
- The VMAX VX5 guide says to inflate the tire to about 3 bar (44 psi) after mounting to seat the bead.
The principle is the same: a quick, high-volume burst. Use a compressor if you have one. You’ll hear two distinct, loud pops as the bead seats. Then deflate and set your final, correct pressure.
Tubeless vs. Tubed: A Critical Distinction
Mixing up tire types isn’t just inefficient, it’s dangerous. The warnings in the Vida workshop manual are stark.
A tubeless tire is designed to form an airtight seal directly against the rim. A tube is a separate inflatable bladder. The manual explicitly states: “Do not try install a tube inside a TUBELESS TYRE. Excessive heat build up can cause the tube to burst… during hard acceleration or braking a tube installed in TUBELESS TYRES could slip on the wheel.” The result is a sudden, catastrophic loss of pressure.
Conversely, a tire designed for a tube has a more open carcass. Putting a tubeless tire on a rim not designed for it (without a tube) will simply not hold air. Always match the tire type to your rim’s design. When installing a new tubeless tire, the Vida manual also commands you to “Replace the rim valve whenever installing a new tubeless tyre.” The old valve seal is often compromised.
Setting the Correct Pressure and Final Checks
Your job isn’t done when the bead pops. Under or over-inflation affects handling, range, and puncture risk. These numbers are not suggestions; they’re engineering specifications for load and stability.
For the Vida scooter, the cold tire pressures are: * Rider only: Front: 22 psi (1.50 kgf/cm²), Rear: 29 psi (2.00 kgf/cm²) * Rider & pillion: Front: 22 psi, Rear: 36 psi (2.50 kgf/cm²)
Use a accurate pressure gauge. After inflating, spin the wheel and check for any visible wobble in the tire. Look at the tread line near the rim; it should be equidistant from the rim all around. If it “walks,” the bead isn’t fully seated. Re-inflate to the seating pressure and massage the tire sidewall.
Before reinstalling the wheel, do a systems check. Manually spin the wheel to ensure it doesn’t rub against the brake caliper or fork. Reconnect any motor cables securely. Only after everything is mechanically sound should you reinstall the battery.
When to Call a Professional
There’s no shame in tapping out. This is a physically demanding, technically detailed job. The Okai support article pegs the average professional service cost at around $50 plus parts.
You should call a pro if:
- The rim is visibly bent or damaged (runout exceeds the Vida-specified service limit of 2.0 mm).
- You’ve attempted bead seating multiple times and the tire still won’t seal.
- The motor cable or connector is damaged during disassembly.
- You lack the core tools, especially a compressor for tubeless tires.
- Your time and frustration are worth more than the service fee.
Many local bike shops now service scooters, and dedicated micro-mobility repair shops are becoming more common. Paying for one successful repair is cheaper than buying a new wheel, tire, and tube after a botched DIY attempt.
Frequently Asked Questions
Can I use Slime or a sealant instead of changing the tire?
For small punctures in tubeless tires, yes, sealants like FlatOut can be effective. However, for tubed tires or larger gashes, sealants are a temporary fix at best. They also make a future proper tire change a messy cleanup job. For a definitive repair, replacing the tube or tire is the only permanent solution.
How often should I replace my scooter tires?
Replace them when the tread wears to the wear indicators or below the manufacturer’s minimum depth. For Vida scooters, that’s 1.5 mm. Also replace immediately for sidewall cracks, bulges, or repeated flats. Aggressive riding on rough surfaces will wear tires out much faster than casual commuting.
What’s the difference between a split rim and a solid rim?
Split rim is a wheel that unscrews or unbolts into two halves. Changing a tire on a split rim is dramatically easier, you simply separate the halves instead of fighting the bead. Solid rims are one-piece and require tire levers. Knowing which you have changes your entire approach and tool requirement.
Is it really that much harder than a bike tire?
Yes, significantly. Scooter tires are smaller, with a tighter fit and stiffer sidewalls. The presence of a hub motor adds weight and complexity, and you often have to disconnect electrical cables. It requires more force, more patience, and more attention to detail than a standard bicycle tire change.
Can any bike shop do this for me?
Not necessarily. Many traditional bike shops refuse to work on electric scooters due to liability and lack of expertise with the electrical systems. Call ahead. Seek out shops that advertise e-bike or e-scooter service specifically.
The Bottom Line
Replacing an electric scooter tire is a rite of passage. It’s frustrating, physical, and immensely satisfying when you finish. Your success hinges on respecting the specifics of how to replace a tire on an electric scooter: your model’s disassembly, the tubeless vs. Tubed rule, and that initial bead-seating burst.
If you remember one thing, let it be this: find your official manual first. The Segway, VMAX, Vida, and Okai guides aren’t just advice, they are the documented, safe procedure. The 44 psi vs. 1.5x pressure debate is a perfect example of why you can’t rely on a single universal tutorial.
For your first time, block out two hours, gather every tool on the list, and work on a soft surface. When you hear that final, satisfying pop of the bead seating and your pressure gauge reads exactly 29 psi, you’ll have earned more than a repaired scooter. You’ll have the confidence to tackle the next maintenance job, and the next flat tire will be an inconvenience, not a crisis.