Why Wont My Hoverboard Turn on After Charging?
This post contains affiliate links. As an Amazon Associate, we earn from qualifying purchases.
Your hoverboard won’t turn on after charging because of one of five issues: a completely dead battery, a faulty charger, a damaged charging port, internal wiring or component failure, or a software glitch requiring a reset. The most common culprit is a Li-ion battery that has dropped below its minimum safe voltage after prolonged storage, which the board’s protection circuit then refuses to charge.
That “won’t charge” threshold is the mechanical line between a fixable board and a brick. The board’s battery management system (BMS) is designed to stop charging if it detects a cell voltage so low that forcing current in could cause overheating or swelling. It’s a safety feature, but it leaves you with a board that acts dead. This is a common reason why wont my hoverboard turn on after charging.
What follows is a coach’s walkthrough. We’ll start with the simple, external checks, the ones that don’t require a screwdriver, and work inward to the component-level diagnostics. You’ll learn how to read your charger’s lights like a diagnostic code, when a multimeter is your best friend, and the one reset trick that works for brands like Hover-1 and Jetson. We must start with the essential safety steps, because opening a hoverboard without them risks more than just voiding a warranty.
Key Takeaways
- A solid green charger light often means the board’s battery has dropped below the BMS’s rechargeable threshold, signaling a deeply discharged or failed battery.
- Never charge a hoverboard unattended, especially overnight, and always use the supplied charger, the U.S. Consumer Product Safety Commission (CPSC) links over 250 fire incidents to these devices.
- If the board powers on only when plugged in but dies instantly off-charger, the battery is almost certainly dead and needs replacement; this is a common failure mode.
- Before opening the casing, check for a recall at CPSC.gov and verify your board’s UL 2272 certification label; boards bought before January 2016 are likely non-compliant and higher risk.
- A simple recalibration (often holding the power button for 10-15 seconds on a level surface) can resolve software glitches that mimic power failure, especially after a fall or knock.
Safety First: What Not to Do
Before you start: Opening a hoverboard involves a lithium-ion battery pack. A punctured or swollen battery can release toxic fumes or ignite. Work on a non-flammable surface, have a Class D fire extinguisher nearby, and never force open a case that feels stuck, you might be pressing on a swollen cell.
This isn’t scare talk. The CPSC is aware of more than 250 self-balancing scooter incidents related to fires or overheating, including a 2017 house fire that resulted in two fatalities. Their safety alert is the first place any responsible owner should look.
Your first diagnostic step isn’t with a tool. It’s online. Check if your hoverboard has been recalled at the CPSC’s official recall database. If it has, stop using it immediately and follow the manufacturer’s remedy. Next, verify the holographic UL 2272 certification label is on the bottom of the board. This standard covers the entire unit’s electrical system. The CPSC notes that many sellers claim individual components are “UL-compliant,” but UL 2272 covers the entire hoverboard unit, not just individual parts. If you bought your board before January 29, 2016, it is likely not UL 2272 compliant, which elevates the risk.
When you do proceed with troubleshooting, follow these CPSC mandates: use only the charger supplied with the hoverboard, only charge when you are present to watch it, and keep it away from anything flammable while charging or even storing it. These aren’t suggestions. They are the documented line between a routine fix and a news headline.
The Charger Light Tells a Story
If the LED on the charger remains green when the board is plugged in, unplug the board, press the power button, and then put it on the charger right after pressing the power button. These may seem like similar steps but they are important to do in the right order. One of these steps may make the board start registering the charger. . Future Motion Inc. (Onewheel) Official Support
Your charger’s LED is the most immediate diagnostic tool you have. Don’t just glance at it; observe its behavior from the moment you plug the board in.
| Charger LED Behavior | What It Typically Means | Your Next Action |
|---|---|---|
| No light at all | Faulty charger, dead outlet, or broken cable. | Test the charger in a different outlet. Visually inspect the cable for kinks or cuts. |
| Solid red light | Normal charging in progress. The board has recognized the charger and is taking power. | Let it charge fully. A full charge can take a couple of hours or more for some models. |
| Solid green light | Charger is receiving power, but the board’s battery is not accepting a charge. This indicates a deeply discharged battery or a BMS fault. | Try the Onewheel sequence above: unplug, press power button, re-plug immediately. If still green, the battery likely needs service or replacement. |
| Blinking red/green light | Often indicates a communication error between charger and board, or a faulty battery cell. | Unplug everything, wait 60 seconds, and retry. If blinking persists, internal diagnosis is needed. |
| Light goes from red to green after a normal cycle | The board is fully charged. This is the expected, healthy sequence. | Unplug the board. Leaving it charging after the light turns green can, over many cycles, lead to a swollen battery. |
The solid green light is the most common and frustrating symptom for the why wont my hoverboard turn on after charging question. It means power is flowing to the board, but the board’s internal battery management system is blocking it from the battery cells. This is a protective stop. When a Li-ion battery sits for months (like the Reddit user’s board stored for two years), its voltage can drop so low that the BMS considers it unsafe to charge. The charger sees an “open circuit” and defaults to a green “standby” light.
Step-by-Step External Diagnosis
Start here. These steps require no disassembly and will solve a significant number of “won’t turn on” issues.
- Verify the Power Source. Plug a different device (like a phone charger) into the same wall outlet to confirm it’s live. Try a different outlet in another room to rule out a tripped GFCI.
- Inspect the Charger and Port. Look closely at the charger’s cable for fraying or damage. Examine the charging port on the hoverboard for debris, lint, or bent pins. A can of compressed air can clean out dust. A damaged port is a common hoverboard charging issue that prevents electrical contact.
- Listen and Feel. When you plug in the charger, you might hear a faint click from inside the board (the relay engaging). Feel the charger brick; after 10-15 minutes, it should be slightly warm, not cold or hot. A stone-cold charger indicates no power draw.
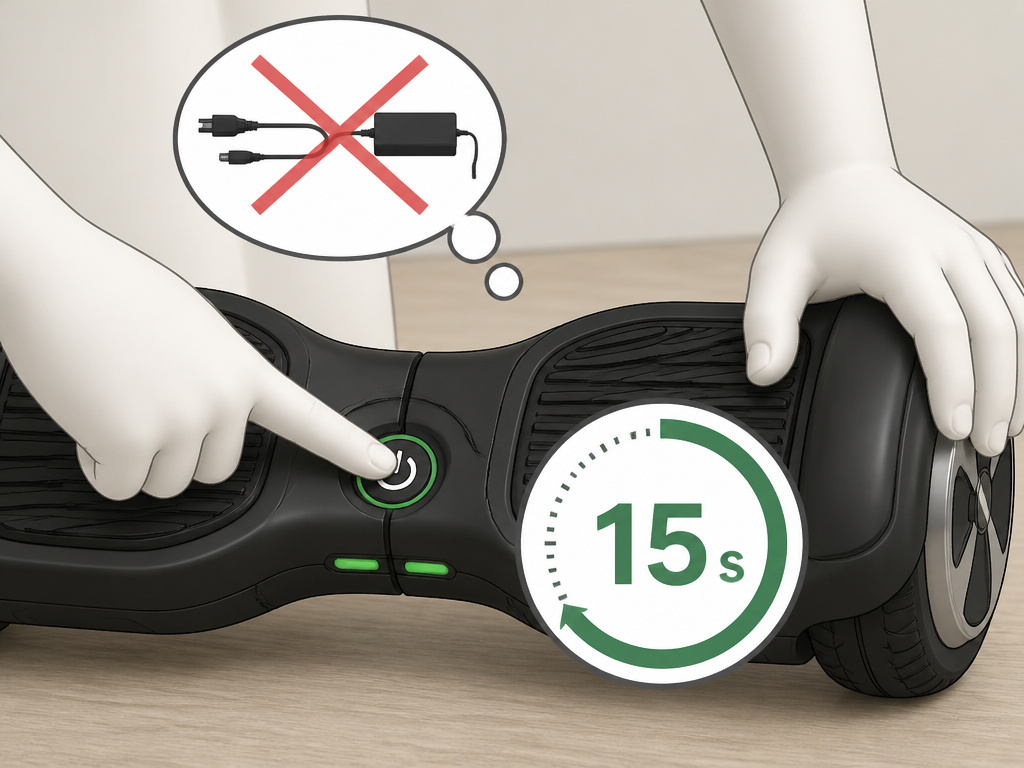
- Perform a Hard Reset. This is the most overlooked fix. The procedure varies by brand but often involves:
- Ensuring the board is off.
- Placing it on a perfectly level surface (use a spirit level if you have one).
- Holding the power button for 10-15 seconds until you hear a series of beeps or see all lights flash.
- Releasing the button, waiting 30 seconds, then trying to power on normally. This resets the gyroscopes and mainboard, which can lock up after a hard knock.
If the board shows any sign of life after these steps, a beep, a flashing light, you’re on the right track to solving why wont my hoverboard turn on after charging. If it’s completely silent and dark, the problem is more fundamental.
When You Need to Open the Case
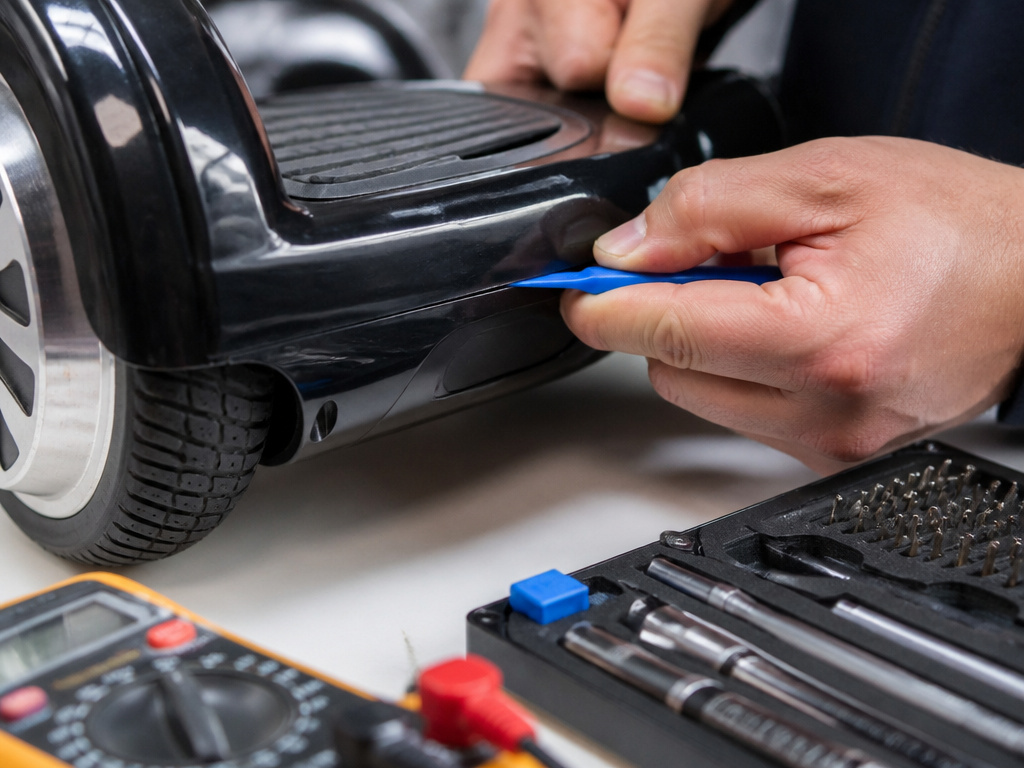
If external checks fail, the problem is inside. Opening the case is a major step that voids most warranties and introduces real risk. Your goal here is visual inspection and a few safe connection checks.
Tools you’ll need: A precision screwdriver set (Phillips #1 and #2), a plastic spudger or guitar pick for prying, a multimeter, and a clean, well-lit workspace.
- Where this goes sideways: Prying the case open with a metal screwdriver. You will almost certainly slip and puncture the battery pack or scratch a circuit board. Use plastic tools only.
- The part nobody mentions: Before disconnecting the battery, take a clear photo of every connector with your phone. A single plug reconnected backward can fry the mainboard.
Once the case is open, follow this sequence:
- Locate the Battery. It’s usually a rectangular pack in the center, with a main connector leading to the control board.
- Check the Obvious. Is the main battery connector firmly seated? Gently unplug and replug it. Owners on forums have solved “dead” boards simply by re-seating this cable.
- Look for Physical Damage. Scan for burnt spots on circuit boards, swollen or leaking battery cells (the battery pack will look puffy or distorted), and corroded or loose wires. A swollen battery is a stop-immediately hazard. The retailer Hoverboards NZ states this voids warranty and is caused by “leaving it charging for hours on end.”
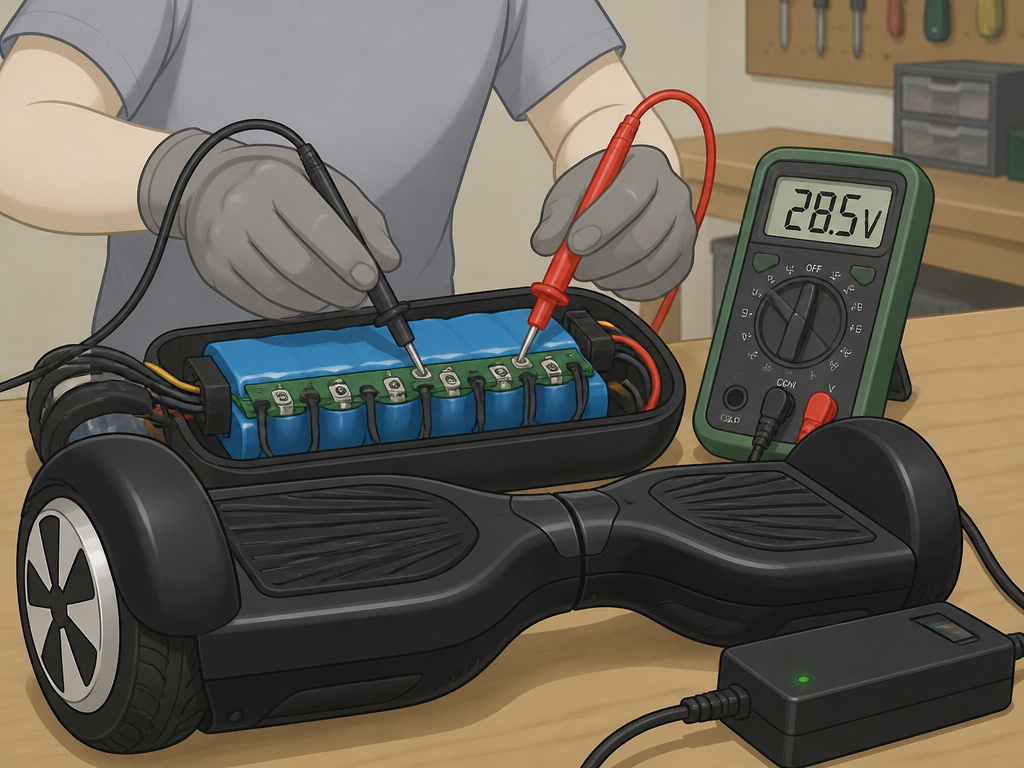
- Use a Multimeter. This is the definitive test. Set your multimeter to DC Volts (likely the 200V range). With the battery connector plugged in, touch the red probe to the red wire terminal and the black probe to the black wire terminal on the board side of the connector. A healthy, chargeable battery should read above its nominal voltage (e.g., 36V for many boards). A reading below 30V often indicates a deeply discharged or dead pack.
If you confirm the battery is dead, your path is clear: you need a hoverboard battery replacement guide. If the battery voltage is good, the fault lies upstream in the mainboard, power button, or wiring.
The Five Most Likely Culprits (and How to Confirm)
Not all “no power” faults are equal. This table breaks down the common causes, how to identify them, and the realistic fix.
| Likely Cause | Key Symptoms | How to Confirm | Typical Fix |
|---|---|---|---|
| 1. Dead Battery | Board does nothing. Charger light stays green. May power on only when plugged in, then instantly off. | Multimeter shows pack voltage far below nominal (e.g., <30V on a 36V pack). | Battery replacement. |
| 2. Faulty Charger | Charger LED is dead or behaves erratically. Board may have been charging slowly before total failure. | Test charger output with multimeter (caution: AC to DC). Voltage should match label (e.g., 42V DC). | Replace with official charger only. |
| 3. Bad Charging Port | Wobbly port, visible debris/bent pins, or scorch marks. Cable doesn’t “click” in securely. | Visual inspection. Use multimeter to check for continuity from port pins to mainboard. | Port replacement or professional solder repair. |
| 4. Internal Wiring/Component Failure | Evidence of past water damage, burnt smell, or visible damage on circuit boards. Board may have failed after a crash. | Visual inspection for corrosion, burnt chips, or broken solder joints. Advanced diagnostics needed. | Component-level repair by a specialist, or mainboard replacement. |
| 5. Software/Calibration Glitch | Board beeps or flashes lights but won’t engage motors. Happens after a fall or impact. | Board responds to hard reset procedure (extended power button hold). | Successful recalibration via brand-specific reset steps. |
Consider water damage seriously. If you’ve ever ridden through a puddle or stored the board in a damp garage, look for white or green corrosion on the metal connectors and a musty smell. That’s a telltale sign moisture reached the electronics. Do not charge a board you suspect has water damage. You could short the BMS.
Specific Brand Considerations
While the core principles are universal, some brands have quirks.
- Hover-1 / Jetson: These often share similar firmware. A common fix for a non-responsive board is the 15-second power button hold recalibration (with the board level and no weight on it). The official Jetson Electric subreddit moderators post this as a first step.
- Swagtron: Models like the T580 have documented model-specific fixes for power issues, including a known mainboard connector that can work loose. Their customer support often points to online guides.
- Onewheel: As cited in the fact sheet, Future Motion has a specific procedure tied to the charger LED. Their boards are more complex, and a “green light” fault often points to a battery module or BMS needing professional service.
- Generic/Off-Brand Boards: These present the highest risk. If it lacks a UL 2272 label and you can’t find a brand name, your safest option may be to recycle it responsibly. The CPSC warns against buying from kiosks or secondhand sellers without proof of this certification.
You’ll often find a forum or video with the exact sequence.
When to Call a Professional
You’ve checked the outlet, tried a reset, opened the case, and seen a swollen battery or a multimeter reading of 0 volts. Now what?
Know your limits. Soldering a new charging port is a precise job. Diagnosing a faulty motor driver on the mainboard requires expensive equipment. If you’re facing any of the following, it’s time to find a repair shop.
- A visibly swollen or punctured battery pack.
- Burnt components or scorch marks on any circuit board.
- A confirmed good battery (full voltage) but the board still won’t power on, pointing to mainboard failure.
- Any sign of water damage across multiple components.
A professional can also verify compliance. They can check if your older board can be retrofitted with a UL 2272-certified battery pack, which is a worthwhile upgrade for safety. Reporting an incident to the CPSC at SaferProducts.gov helps them track hazards and issue recalls, making the ecosystem safer for everyone.
Is my power button broken?
Sometimes the power button itself isn’t the problem, but the board’s system needs a simple reset. One common fix involves the charger. If your charger’s light stays green when you plug the board in, try this: unplug the board, press and hold the power button for a few seconds, and then immediately reconnect it to the charger. This can wake up a board that seems completely dead. Always use the charger that came with your hoverboard for this process. If the board still shows no signs of life after trying this reset, the issue likely lies deeper in the battery or main control system.
Frequently Asked Questions
Why won’t my hoverboard turn on after charging?
The most common reason is a lithium-ion battery that has self-discharged below its minimum safe voltage during storage, triggering an internal protection circuit that blocks charging. Other causes include a faulty charger, damaged charging port, or internal software glitch.
Is there a reset button on hoverboards?
Most hoverboards do not have a dedicated physical reset button. Instead, you perform a “hard reset” by holding the main power button for an extended period (often 10-15 seconds) while the board is off and on a level surface, until you hear beeps or see lights flash.
How to reset hoverboard battery?
You cannot reset the battery itself. If the battery is physically dead, it must be replaced. The term “battery reset” usually refers to the board’s system recalibration (the hard reset procedure above), which can clear error codes that prevent the board from using a healthy battery.
My Hover-1 hoverboard isn’t turning on. What can I do to fix this?
First, perform the standard hard reset: hold the power button for 15 seconds on a level surface. If that fails, check the charger light. A solid green light suggests a dead battery. Inspect the charging port for damage.
Can a hoverboard battery die from not being used?
Yes, absolutely. Lithium-ion batteries slowly self-discharge over time. If a hoverboard sits unused for many months (especially in a cold or hot environment), the battery voltage can drop so low that the battery management system permanently disables it for safety. This is the fate of many boards pulled from storage after a year or two.
The Bottom Line
Start with the charger light and a hard reset, that solves more problems than people think. If you get a solid green light, the battle is likely with a deeply discharged battery. Before you open anything, check CPSC.gov for recalls and verify the UL 2272 hologram. That’s your safety receipt.
If you open the case and see a puffy battery or smell burning, stop. That’s your signal to seek a pro. For everyone else, a multimeter is the tool that turns guesswork into a diagnosis: a reading far below the nominal voltage means your next click should be for a replacement battery guide, not more troubleshooting.
One final, contrarian stance: if your board is from before 2016, lacks a UL sticker, and needs a new battery, consider recycling it instead of repairing. The cost and risk of putting a new battery into an old, non-compliant system often outweighs the benefit. The government hoverboard fire hazard report cites over 250 incidents for a reason. Sometimes, the fix is knowing when to walk away.