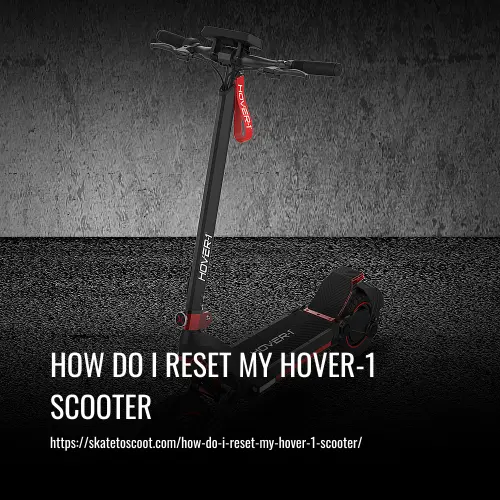
How Do I Reset My Hover-1 Scooter
This post contains affiliate links. As an Amazon Associate, we earn from qualifying purchases.
If you own a Hover-1 scooter and are experiencing some issues with it, or simply want to reset it to its original settings, you’ve come to the right place. Resetting your Hover-1 scooter can help resolve minor glitches and get it back to working smoothly.
To Reset Your Hover-1 Scooter, Follow These Steps:
- Turn off the scooter
- Press and hold the power button
- Plug in the charger
- Release the power button and turn on the scooter

How Do I Reset My Hover-1 Scooter
Experiencing problems with your Hover-1 scooter? Performing a reset can help recalibrate its settings and restore peak performance. Here is a simple step-by-step guide to reset your Hover-1 scooter:
1. Turn off the scooter: Make sure the scooter is powered off and disconnected from the charger.
2. Press and hold the power button: Find the power button on your scooter and press and hold it for 10 seconds. This will initiate the reset process.
3. Plug in the charger: While still holding the power button, plug in the charger to the scooter. Continue to hold the power button for another 10 seconds while the charger is connected.
4. Release the power button and turn on the scooter: After 10 seconds, release the power button and turn on the scooter. The reset is now complete.
It’s important to note that while a reset can be a helpful troubleshooting step, it may not solve all issues.
Where is the Reset Button on the Hover 1 Scooter
The reset button on the Hover-1 scooter is located on the underside of the control panel. To access it, you’ll need to remove the control panel from the scooter. Look for a small button that says “reset” once the panel is removed.
This reset button can help troubleshoot and resolve any issues that may arise with the scooter’s functionality. It is important to follow the manufacturer’s instructions and guidelines when using the reset button to avoid any potential damages or voiding of the warranty.
Why Does My Hover 1 Scooter Say e2
Hover-1 scooters may display an error message “e2” when there is a problem with the scooter’s functionality. To address this issue, you need to reset the scooter. Start by finding a flat and level surface to ensure stability during the reset process.
Locate the power button on your scooter and turn it off. After a few seconds, turn it back on and make sure the battery has enough charge. If the scooter still displays the “e2” error, consult the warranty policy provided by Hover-1 to determine if the issue is covered.
If so, contact an authorized Hover-1 service center or retailer for assistance. Avoid unauthorized repairs or tampering as it may void warranty protection and result in further damage.
What Does e9 Mean on a Hover 1 Scooter?
If your Hover-1 scooter displays the “e9” error message, it indicates that the motor has been overloaded. This can occur when the scooter is used on a slope that is too steep or when the battery is running low. To resolve this issue, you will need to reset the scooter.
Find a level surface to park the scooter on and turn off the power button. Wait for a few minutes, then turn on the scooter again. If the issue persists, you may need to consult the warranty policy or contact an authorized Hover-1 service center for further assistance.
When Should I Reset My Hover 1 Scooter
You should reset your Hover 1 scooter in the following situations:
1. When you first receive it
Resetting your Hover 1 scooter upon receiving it ensures that all settings are back to their default state and that any potential issues during shipping or handling are addressed.
2. After every firmware update
Firmware updates may introduce new features or fix bugs, and resetting the scooter after each update helps to ensure that the new firmware is properly installed and functioning.
3. Whenever you experience an issue with the scooter
If you encounter any issues such as error codes, performance problems, or connectivity issues, resetting the scooter can help resolve these problems by restarting the system and clearing any temporary glitches.
How Do I Know If My Hover 1 Scooter Needs a Reset
If your Hover 1 scooter is not working properly, not charging properly, not holding a charge, or experiencing a reduced range, it may be time to reset your scooter. These issues can arise due to firmware glitches or incorrect settings, and performing a reset can help resolve them.
A reset ensures that all settings are back to their default state and can address any potential software or firmware issues. By resetting your Hover 1 scooter, you can restore its functionality and optimize its performance.
Benefits of Resetting My Hover-1 Scooter
Resetting your Hover-1 scooter can provide several benefits, including improved performance, better battery life, increased range, and fewer maintenance issues.
1. Improved Performance
Resetting your Hover-1 scooter can help resolve any software or connectivity issues that may be affecting its performance. This can result in smoother acceleration, better control, and an overall improved riding experience.
2. Better Battery Life
Resetting your scooter can also help recalibrate the battery management system, which can extend the battery life. This means you can enjoy longer rides without having to recharge your scooter as frequently.
3. Increased Range
Resetting the scooter can also optimize the power consumption and efficiency of the lithium-ion battery. This can lead to an increased range, allowing you to travel farther on a single charge.
4. Fewer Maintenance Issues
Performing a reset can help identify and resolve any minor issues that may be affecting your scooter’s performance. It can help fix connectivity issues, loose cables, or any other software glitches, reducing the need for frequent maintenance and repairs.
FAQs
To fix a dead battery on your Hover-1 scooter, start by ensuring that it is turned off and disconnected from any power source. Next, locate the charging port on the scooter and plug in the genuine Hover-1 charger. Allow the battery to charge fully before attempting to use the scooter again.
If you are experiencing a low voltage problem with your Hover-1 scooter, try resetting the scooter by turning it off and on again. Additionally, make sure that the battery is fully charged and properly connected. If the issue persists, it is recommended to contact an authorized Hover-1 service center for further assistance.
If the power button on your Hover-1 scooter is damaged, it is important to refrain from attempting any repairs yourself. Contact an authorized Hover-1 service center or the retailer you purchased the scooter from for assistance. They will be able to guide you on how to properly fix or replace the power button.
If you have identified broken solder joints on your Hover-1 scooter, it is recommended to seek professional assistance. Contact an authorized Hover-1 service center or the retailer you purchased the scooter from for guidance on how to fix the broken solder joints. Attempting to repair it yourself may cause further damage.
To fix the overheating problem of your Hover-1 scooter, start by ensuring that it is not being used in extreme weather conditions. Avoid riding the scooter for extended periods or on hills for a prolonged time. Give the scooter some time to cool down if it becomes too hot. If the problem persists, contact an authorized Hover-1 service center for professional assistance.
If your Hover-1 scooter is beeping, it may be indicating a low battery or an error message. Check the battery level and charge the scooter if necessary. If the beeping continues or if you see any error messages on the display, it is recommended to contact an authorized Hover-1 service center for further diagnosis and troubleshooting.
The best Hover-1 scooter depends on individual preferences and needs. Consider factors such as speed, range, battery life, and features like LED lights or Bluetooth connectivity. Reading reviews and comparing different models can help you determine which Hover-1 scooter is best suited for you.
The speed of a Hover-1 scooter can vary depending on the model. Generally, Hover-1 scooters can reach speeds between 9-15 mph. It is important to familiarize yourself with the speed capabilities of the specific model you own and ride responsibly within the recommended speed limits.
Conclusion
In conclusion, resetting your Hover-1 scooter is a fairly straightforward process that can resolve many common issues you may encounter. By following the steps outlined in the user manual or referring to online resources, you can easily reset your scooter and get it back up and running smoothly.
Remember to always ensure you are on a flat, level surface before attempting to reset your scooter. Additionally, make sure you have a genuine Hover-1 charger and that your battery is not damaged or restricted by any warranty policies. If you are still experiencing issues after resetting your scooter, it may be necessary to contact an authorized Hover-1 retailer or service center for further assistance.
Keep in mind that unauthorized repairs or modifications can void your warranty and may lead to additional damage or safety hazards. It is always best to consult with professionals who can accurately diagnose and fix any issues with your scooter.
