How to Carry a Longboard on a Bike: Step-by-Step
This post contains affiliate links. As an Amazon Associate, we earn from qualifying purchases.
You can carry a longboard on a bike with a dedicated side rack, a bike trailer, or a DIY strap setup. The choice hinges on board weight, your route, and your budget. A commercial rack like the Moved By Bikes (MBB) Longboard Rack, rated for boards up to 25 lbs, offers the most stable, hands-free ride for most surf longboards.
That 25-pound rating is the ceiling for the aluminum and stainless steel construction on the MBB rack. Exceeding the manufacturer’s weight rating risks damaging the rack or losing the load. Your board’s actual weight decides everything, including how to carry a longboard on a bike.
What follows: a breakdown of the three main methods, the specs that make or break them, and the handling quirks nobody mentions until you’re wobbling down a bike path with eight feet of fiberglass hanging off your side.
Key Takeaways
- Match your board’s weight to the rack’s rating — the MBB Longboard Rack handles up to 25 lbs (11.34 kg), which covers most surf longboards.
- Frame-mounted side racks like the MBB offer the best stability, while bike trailers excel on soft sand or for carrying multiple boards.
- Always secure the tail with a secondary strap or bungee; relying solely on the rack’s clamps invites a wobble that can throw your balance.
- Your turning radius widens significantly; practice low-speed maneuvers in a parking lot before hitting traffic or tight paths.
- Check local regulations; some areas have rules about load width protruding from a vehicle, which can apply to bicycles.
The 25-Pound Weight Limit: Why Your Board’s Specs Matter
The Moved By Bikes (MBB) Longboard Rack is manufacturer-rated for Stand Up Paddle Boards (SUPs) up to 25 lbs (11.34 kg). Its construction uses aluminum and stainless steel, and it features patent-pending quick-release bars with a splined design and push-button release. The rack mounts to the bike frame at the headtube and seatpost (or a rear cargo rack) for stability.
That rating is your starting point. A typical XJD Cruiser longboard weighs in at 6 lbs (2.72 kg), a Freeride model at 7 lbs (3.18 kg), and a Downhill board at 8 lbs (3.63 kg). Many common surf longboards weigh less than the MBB rack’s 25-lb limit. So why the fuss? Because the rack’s engineering — the alloy thickness, the bolt torque, the bar splines — is calibrated for that 25-lb dynamic load. Exceeding the manufacturer’s weight rating risks damaging the rack or losing the load.
The quick-release mechanism is the star. You push a button, the bar slides out, you slide your board in, and you click it shut. It’s fast. But that speed relies on a precise fit between the splined bar and the receiver. Grit, sand, or a forced-overweight board wears that fit. The result is a subtle play, a millimeter of shift that translates to a noticeable wobble at speed. Over time, wear on the rack’s components can introduce play, affecting stability.
It’s crucial to know your board’s exact weight before choosing a method for how to carry a longboard on a bike. If you’re close to that 25-lb limit, a trailer is the safer bet. The MBB rack is designed for boards within its specified weight and length limits.
Method 1: The Dedicated Side Rack (The “Set It and Forget It” Approach)
This is the solution for the regular surfer with a single board who wants a definitive answer to how to carry a longboard on a bike. Companies like Moved By Bikes (MBB) offer dedicated side racks for this purpose.
The MBB system comes in three versions: Longboard (for boards over 7ft), Shortboard (for boards less than 8ft), and a Moped version for motorized two-wheelers. For a surf longboard, you want the Longboard rack. Installation requires a 5mm and 3mm Allen key. The front mount clamps to your bike’s headtube, and the rear mount attaches to your seatpost or an existing rear cargo rack.
| Pro | Con |
|---|---|
| Maximum stability from frame mounting
| Quick release allows fast board on/off | |
|---|---|
| Hands-free riding; no need to hold board | |
| Durable aluminum/stainless construction |
The rear mount choice matters. Attaching to a seatpost is simplest, but if you have a dropper post or a carbon seatpost, avoid it. Use the rear cargo rack option instead. The goal is a rigid connection; a flexing seatpost turns your board into a pendulous mass that fights every pedal stroke.
Method 2: The Bike Trailer (The “Haul Anything” Solution)
When your board is heavy, you have multiple boards, or your route involves soft sand or rough terrain, a trailer is king. Single-wheeled bike trailers designed for boards are available from various manufacturers.
A trailer changes the physics completely. The load is low and behind you, not up high and to the side. This makes the bike itself more stable, but it creates a long wheelbase. Turning becomes a deliberate, wide arc. Backing up is nearly impossible.
Where this goes sideways: Trying to take a trailer over soft beach sand. The narrow tire digs in, and you’ll end up dragging 50 lbs of board and trailer. Scout your route first.
Trailers excel for:
- Carrying a Stand Up Paddleboard (SUP) or a kayak.
- Transporting multiple boards for a group session.
- Adding extra gear like a cooler, wetsuit, or picnic blanket.
- Long-distance rides on paved paths where stability trumps agility.
Trailers can be bulky to store and often represent a significant investment. But for the surfer with a very large SUP or multiple boards, a trailer is often the best solution.
Method 3: The DIY Strap or Bungee Setup (The “Make It Work” Hack)
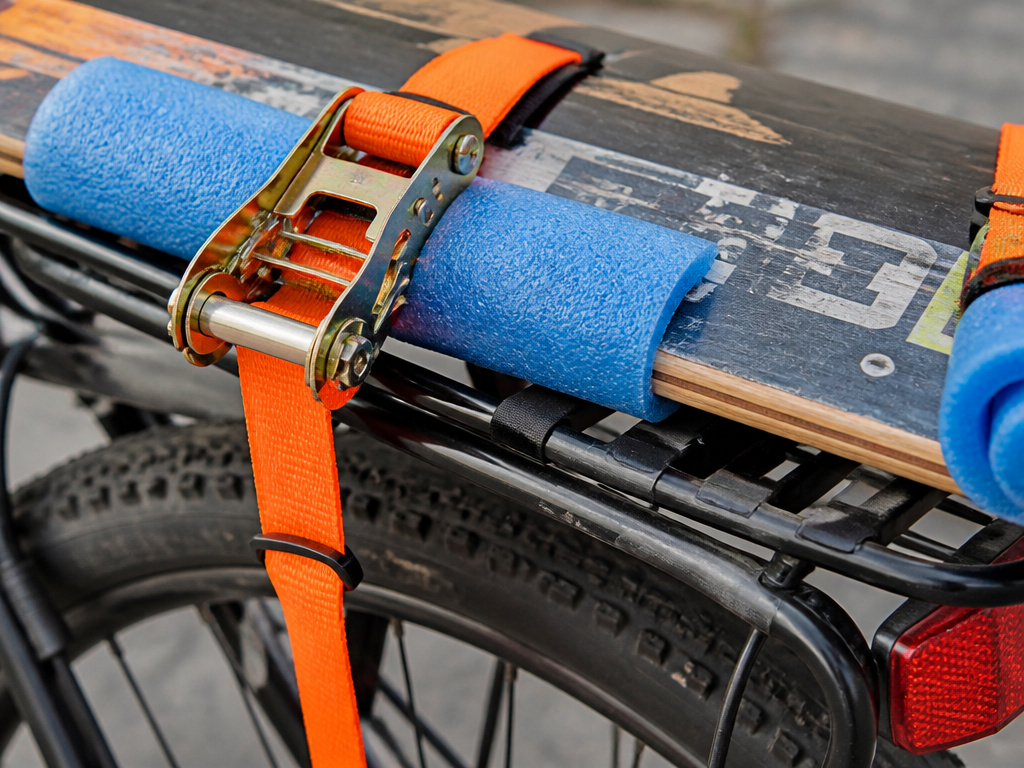
Sometimes you just need to get your board to the beach once, or you’re on a tight budget. This method uses straps, bungee cords, and existing bike racks (like a rear cargo rack) to lash the board in place.
The Washington Area Bicyclist Association guide on carrying cargo is a great primer on the principles of secure load fastening. The core idea is triangulation: secure the board at multiple points to prevent shifting in any direction.
This is where sources disagree on philosophy. Moved By Bikes (MBB) recommends a rigid, frame-mounted rack for stability. XJD and other DIY guides discuss flexible, low-cost methods using bungee cords or straps, acknowledging they ‘may not provide the same level of stability as a dedicated surfboard bike rack.’
If you go the DIY route, follow this checklist:
- Pad all contact points between board and bike frame (use foam pipe insulation or a pool noodle).
- Use ratchet straps, not bungees, for primary hold. Bungees stretch and lose tension.
- Create a three-point tie-down: one strap near the nose, one near the tail, and one diagonally across the board’s midpoint.
- Do a shake test. Before you ride, grab the board and try to move it in every direction. If it shifts more than an inch, tighten your straps.
This method is temporary and riskier. But for a short trip on calm streets, it can work. Just know its limits.
Stability and Maneuverability: The Real-World Trade-Off
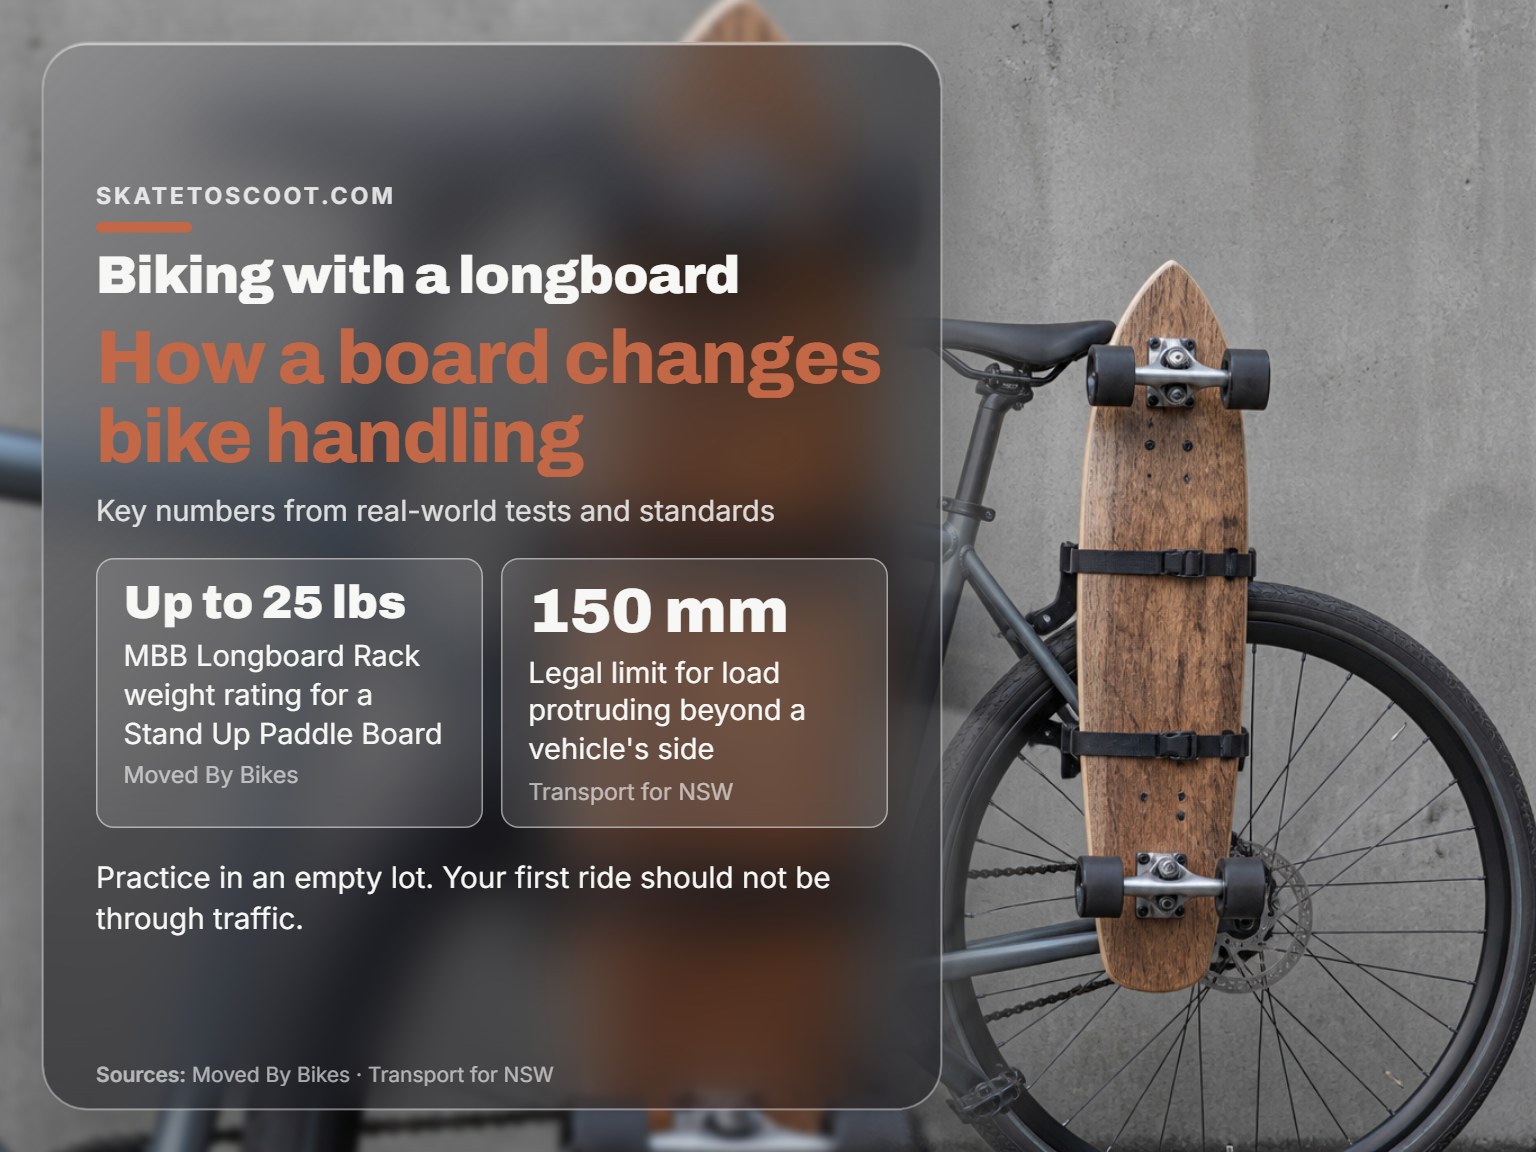
Mounting a board changes your bike’s handling instantly. It’s not just heavier; the center of gravity shifts up and out. This isn’t theoretical. You feel it in the first pedal stroke.
Your turning radius increases by about a third. A tight U-turn you could make on a clear path now requires a three-point turn. Your knees become a clearance gauge. Failing to account for the increased width can lead to the board striking the rider’s knee during sharp turns.
Wind can significantly affect handling, as a longboard acts like a sail. Crosswinds may push you sideways, and headwinds increase effort.
| Maneuver | Standard Bike | With Side-Mounted Board |
|---|---|---|
| Sharp Turn | Tight radius, lean-in | Wide radius, must keep board elevated |
| Emergency Swerve | Quick, instinctive | Sluggish, can induce tail-swing |
| Riding No-Handed | Possible | Not recommended; induces immediate instability |
Practice in an empty parking lot. Practice mounting and dismounting with the board on. Practice slow, controlled turns. Your first ride should not be through traffic.
Securing Your Board: Beyond the Rack
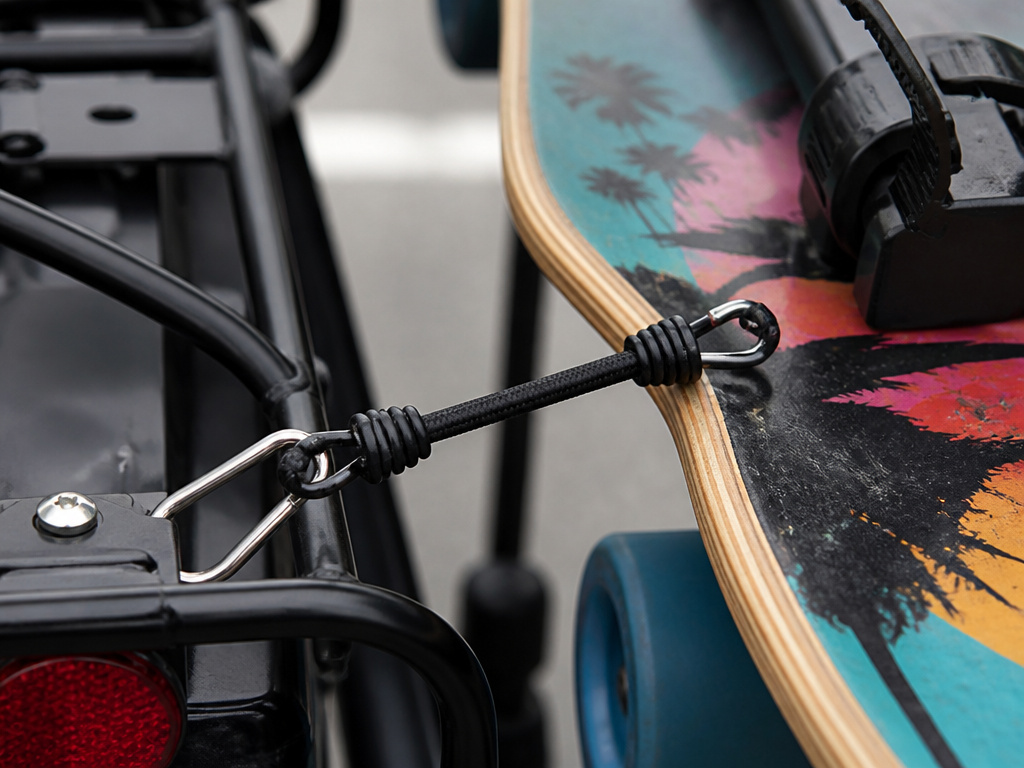
Even the best rack needs a backup. The MBB installation video notes you may need a bungee cord. That’s for securing the tail. The rack’s quick-release bars clamp the board amidships, but the nose and tail can still vibrate or bounce.
A simple bungee with hooks, wrapped around the tail and attached to your rear rack or seatpost, eliminates this. That high-frequency flutter you sometimes feel isn’t the rack failing; it’s the unsupported tail resonating. Securing it dampens the whole system.
For a trailer, the securing is built-in, but you still need to prevent fore-aft sliding. Use a strap over the top of the board, cinching it down to the trailer bed.
Common mistake: Assuming the rack’s clamps are enough. On bumpy roads, the inertia of a long board will work against those clamps. The secondary strap is non-negotiable for anything longer than a shortboard.
This is also the moment to think about board protection. A simple rail guard or a soft board sock prevents scratches from the rack’s pads and straps. It’s a small step that preserves your board’s resale value.
Legality and Local Regulations: The 150mm Rule
This is the most overlooked part of the equation. While laws vary, a useful benchmark comes from an unlikely source: the Transport for NSW VSI.10 standard. This document, which regulates carrying bicycles on motor vehicles, states the legal dimensional limit for a load protruding beyond the side of a vehicle is 150 mm.
Why does that matter for carrying a board on a bike? Because it establishes a principle that many local traffic codes share: loads shouldn’t extend too far laterally. While not directly applicable, it’s a smart guideline. If your board extends more than about 6 inches (150mm) from the side of your bike, you might be violating local ordinances about obstructing traffic or creating a hazard.
Check your city or county codes. Some coastal towns with strong bike-to-beach cultures are lenient. Others, especially urban areas, may have strict rules. It’s better to know than to get a citation on your way to a sunrise session.
Installation and Maintenance: Keeping It Tight
Installing a rack like the MBB model is straightforward with the included Allen keys. Installation is the first step in a maintenance routine.
Vibration is your enemy. Every bump in the road works to loosen bolts. After your first ride, and then again after every few rides, check all mounting points for tightness. Pay special attention to the quick-release bar receivers and the clamps that grip your bike frame.
Aluminum and stainless steel resist rust, but salt air is corrosive. Rinse the rack with fresh water after beach trips. A drop of light lubricant (like Tri-Flow) on the quick-release splines every few months keeps the action smooth and prevents seizing.
A rack that starts to feel loose or develops play is signaling that it’s time for a tune-up. Ignoring that message is how small problems become failures.
DIY rack/trailer options
If you’re looking for a flexible, low-cost method to carry your board, you can use bungee cords or straps directly on your bike. This approach may not provide the same level of stability as a dedicated rack. For a more robust DIY solution, you could build a simple rack that mounts to your bike frame, similar to commercial designs that secure to the headtube at the front and the seatpost or a rear cargo rack at the back. The goal is to create a rigid mounting point to prevent the board from swinging. Always ensure your homemade solution is securely fastened before riding.
Quick-release features on racks
Some commercial racks feature patent-pending quick-release bars with a splined design and a push-button release. This mechanism allows you to securely lock your longboard onto the rack’s bars and then remove it quickly when you reach your destination. The splined design helps prevent the board from rotating or shifting during your ride. This type of system is part of a rigid, frame-mounted philosophy for stability, contrasting with simpler strap-based methods. It’s a feature designed for convenience without sacrificing a secure hold.
Pros and cons of racks vs. Trailers
A rigid, frame-mounted rack keeps the board’s weight centered on the bike, which can improve handling and stability compared to a trailer that adds length and pivots separately. Racks are generally less cumbersome for storage and navigating traffic. However, a trailer can be an option if you need to carry multiple boards or exceptionally long or heavy equipment that exceeds a rack’s weight rating. Trailers also keep the load completely separate from your bike’s balance, which some riders prefer for very bulky cargo. Your choice depends on your typical load and desired ride feel.
Frequently Asked Questions
Can you carry a longboard on any bike?
Technically, yes, but some bikes are better suited. Beach cruisers, hybrid bikes, and mountain bikes with sturdy frames are ideal. Road bikes with thin tires and carbon frames are less stable under a side load and may not have robust enough mounting points. The bike’s ability to handle the weight and altered balance is key.
Is it safe to carry a longboard on a bike?
It can be safe if you use appropriate, rated equipment and practice proper technique. A dedicated, frame-mounted rack like the MBB Longboard Rack, used within its 25-lb weight limit, provides a high degree of stability. Safety hinges on secure mounting, awareness of the bike’s changed handling, and choosing safe routes away from heavy traffic.
How do you carry a longboard without a rack?
You can use a DIY strap system. Securely lash the board to a rear cargo rack using ratchet straps, padding all contact points. This method is less stable and only recommended for short, slow trips on smooth paths. It requires constant vigilance to ensure the straps haven’t loosened.
What is the best way to carry a SUP on a bike?
For a Stand Up Paddleboard (SUP), which is often wider and heavier than a surf longboard, a single-wheel bike trailer is typically the best solution. It keeps the load low and centered. The MBB Longboard Rack is also rated for SUPs up to 25 lbs, but this is only suitable for lighter, smaller paddleboards.
Do you need a special rack for a longboard versus a shortboard?
Yes, rack dimensions differ. The MBB Shortboard Rack is designed for boards under 8ft, while the Longboard Rack is for boards over 7ft. Using a shortboard rack for a longboard can leave too much board overhanging, creating a dangerous lever effect. Always match the rack to your board’s length.
The Bottom Line
If you surf regularly and own a standard surf longboard under 25 lbs, invest in a dedicated side rack like the Moved By Bikes Longboard Rack. Its frame-mounted stability and quick-release convenience are worth the cost. For everyone else — the SUP owner, the gear-hauler, or the budget-conscious — a bike trailer or a meticulously executed DIY strap setup are your viable paths.
Before you buy anything, do this: weigh your board, measure your bike’s clearances, and map your regular route to the beach. The right choice isn’t the fanciest gear; it’s the one that matches your specific board, bike, and journey. Everything else is just cargo.