How to Change Grip Tape on Longboard: Step-by-Step
This post contains affiliate links. As an Amazon Associate, we earn from qualifying purchases.
To change grip tape on a longboard, you need to remove the old tape with heat, clean or prepare the deck surface, align and apply a new sheet sized for longboards (up to 12″ x 4′), then trim the excess and poke mounting holes. The grit you choose, from 24 for downhill to 80 for cruising, decides your board’s feel and safety.
Most guides treat this as a generic skateboard job. They miss the size mismatch, a standard 9″x33″ shortboard sheet leaves longboard tails and noses bare, and the grit choice that actually matters when you’re pushing 30 mph on a hill. Your feet tell you when the grip is gone, but they don’t tell you why the replacement bubbled or peeled after three rides. Understanding how to change grip tape on longboard is key to avoiding these issues.
What follows: the tool shortlist every pro uses, the two schools of thought on cleaning old glue, and the grit table that matches your riding style to the sandpaper under your shoes when you learn how to change grip tape on longboard. We’ll also cover the specific failure mode for electric boards that nobody mentions until the tape bridges over the tail.
Key Takeaways
- Remove old tape with a hairdryer held three inches away, heating in horizontal lines until the glue softens enough to peel in one piece.
- For a longboard, you need a sheet sized up to 12″ x 4′; a standard shortboard sheet (9″x33″) won’t cover the full deck.
- Match your grit to your discipline: 24–40 grit for downhill/freeride, 50–80 grit for cruising, dancing, and street.
- When marking your cut line, you can scrape the edge (as Stoked Ride Shop and iFixit suggest) or use the white-line method (as Titus suggests); both work.
- Don’t waste time removing every bit of old adhesive. Grip over the leftover glue; the new tape will stick fine and you save an hour of scraping.
The Tools You Actually Need (It’s a Short List)
You don’t need a workshop. A hairdryer, a sharp razor blade or utility knife, a screwdriver or skate tool, and your new grip tape sheet are the core. A heat gun is faster but risks melting the deck’s epoxy if you linger. The iFixit guide recommends using your screwdriver (or a truck bolt) to poke holes in the grip tape for your trucks.
If you’re cutting a complex shape, like a pintail or a board with deep concave, a file or a piece of the old grip tape to sand the edges smooth is helpful. That’s it. Fancy applicators and special trimming tools are for shops doing volume; your hands and a blade are what the tutorials from Motion Boardshop and Titus rely on.
Before you start: A razor blade is sharp. Cut away from your body and keep your fingers clear of the cutting path. Heat guns get extremely hot, keep them moving to avoid scorching the wood or, worse, starting a fire.
Removing the Old Grip Tape (The Heat-and-Peel Rule)
Your feet slip. Ollies and kickflips get harder. That’s the signal. The iFixit guide states it plainly: change grip tape whenever your feet begin to slip on the board, or when tricks become more difficult due to lack of grip.
Plug in the hairdryer on its highest setting. Hold it about three inches from the board and sweep it across the tape in horizontal lines. You’re warming the glue, not baking the deck. The glue softens with a faint, sweet smell, that’s your cue. Start at a corner, peel slowly, and keep the heat moving ahead of your pull. If the tape tears, reheat the stuck section and continue.
The goal is one large piece. It’s satisfying, but not strictly necessary. What matters is getting the tape off without taking chunks of the deck’s top veneer with it. Rushing this step is how you end up with a gouged deck that needs filler before the new tape will sit flat.
What most people get wrong: They crank the heat gun to max and hold it still. You’ll hear the glue sizzle, then the tape will come off in brittle flakes that leave the adhesive welded to the wood. Slow, even heat wins.
The Leftover Glue Debate: To Scrape or Not to Scrape?
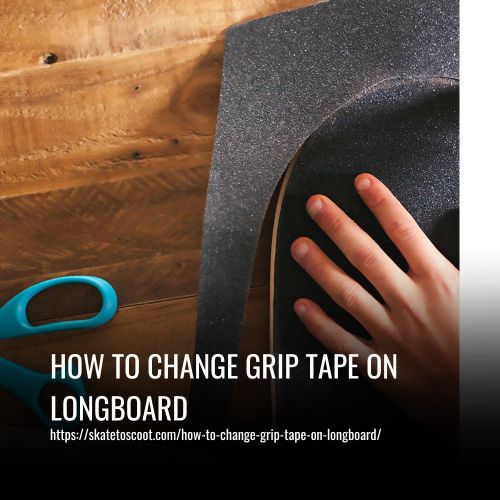
Here’s where sources split. The iFixit method assumes you’ll remove the old adhesive. The Stoked Ride Shop guide takes a pragmatic stand: “Don’t worry about leftover glue… It is going to take an incredible effort to remove it all, so we recommend just gripping over it. The new grip will stick to the glue just fine.”
I’ve done both. Scraping glue is a 45-minute fight with a putty knife and citrus solvent, and you’ll still have a ghostly smear. Gripping over it works, but only if the old layer is thin and solid. If it’s thick, globby, or peeling, the new tape will telegraph those lumps. My rule: if the glue is smooth and mostly intact, tape over it. If it’s peeling or overly thick, spend the time to scrape. Your new tape’s longevity depends on a flat, continuous bond.
After removal, you need to clean the deck. A quick wipe with a damp cloth removes dust and grit. Let it dry completely. Any moisture under the tape will weaken the adhesive over time.
Choosing Your New Grip Tape: Grit Is Everything
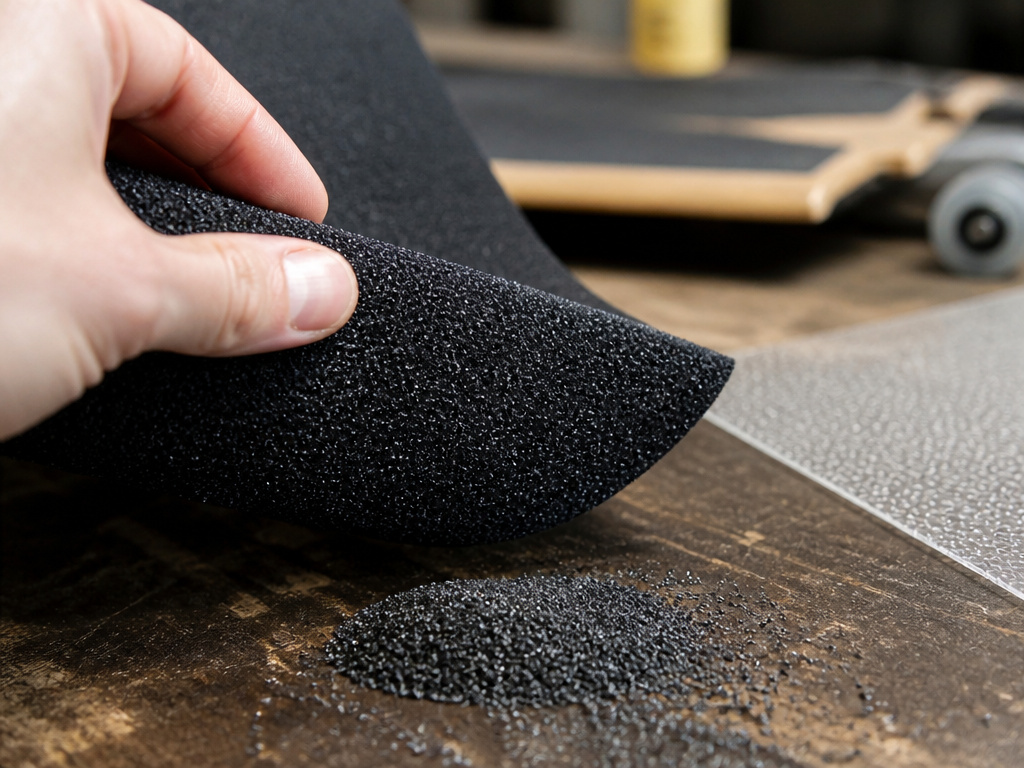
This is the section most “how-to” pages skip. They tell you to buy grip tape, not which one. For longboarding, grit decides everything from your slide control to how long your shoes last.
Grip tape grit ratings range from 24 grit to approximately 1000 grit, with grip tape for skateboards ranging from 24 grit to about 80 grit. The lower the number, the coarser and more aggressive the grip. Here’s the breakdown from Stoked Ride Shop, mapped to longboard styles:
| Grit Rating | Best For | Feels Like |
|---|---|---|
| 24–40 Grit | Downhill, Fast Freeride | Coarse sandpaper. Maximum foot lockdown. |
| 50–60 Grit | Technical Freeride, Longboard Dancing, Cruising | Aggressive but breakable. Good slide initiation. |
| 80 Grit | Street, Park, Vert, Casual Cruising | Standard skateboard feel. Less abrasive on shoes. |
Technical Snippet: Grip tape is a silicon-carbide or aluminum-oxide abrasive bonded to a pressure-sensitive adhesive backing. Standard shortboard sheets measure 9″ x 33″, per Warehouse Skateboards. Longboard sheets run larger, up to 12″ x 4′, to accommodate wider decks and longer wheelbases.
Why the grit layer matters: A 24-grit tape has big, sharp particles that dig into your shoe rubber. On a downhill run, that’s security. For a cruiser or a dancer, that same grip will feel like Velcro, making subtle foot adjustments and pivots difficult. I see beginners buy the coarsest tape because it looks “pro.” Then they struggle to shift their feet for a simple carve. Match the grit to your actual speed and style.
Clear grip like Clear Vicious (36 grit) has a noted quirk: in cold or wet weather, it stays sticky. In dry, warm conditions, it loses some bite compared to its black counterpart. If you ride in variable climates, that’s a real factor.
For a deep dive on brands and performance, our review of the best grip tapes breaks down durability, adhesive quality, and which brands cater to longboard shapes.
Applying the New Grip Tape (Center Outward Is Law)
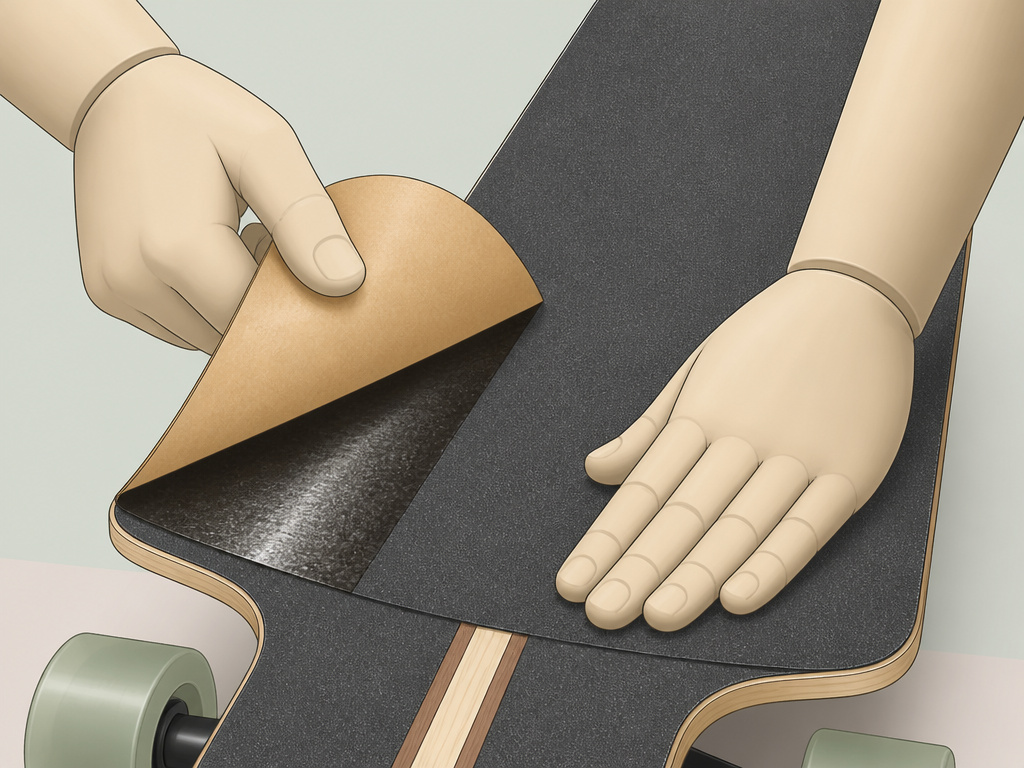
Peel back a few inches of the backing paper. Align the sheet so it overhangs the deck evenly on all sides, this is crucial for a longboard. A standard sheet might not cover a 42″ pintail; check the dimensions. Warehouse Skateboards notes longboard grip can measure up to 12″ x 4′.
Place the exposed sticky section at the deck’s center. Press it down firmly with your palm. Now, the universal rule from Motion Boardshop: starting at the center of the board, press down on the grip tape and work your way outward. Unroll the backing as you go, smoothing with your hand from the center to the edges to push out air bubbles.
If a bubble stubbornly stays, prick it with a pin or the tip of your razor blade and press the air out. The goal is full, uniform contact. Any raised section will wear faster and catch debris.
Where this goes sideways: Letting the tape touch the deck before you’re ready. The adhesive is aggressive; a misaligned touch means peeling back and resticking, which weakens the bond. Get your alignment right before that first contact.
For complex concave or a drop-through deck where the truck mount area is cut out, take extra care to smooth the tape into the curves. You might need to make small relief cuts later so the tape lays flat around the mounting holes. This is part of the broader skill of how to assemble a longboard correctly from the deck up.
Trimming the Excess: The Cutting Guide Wars
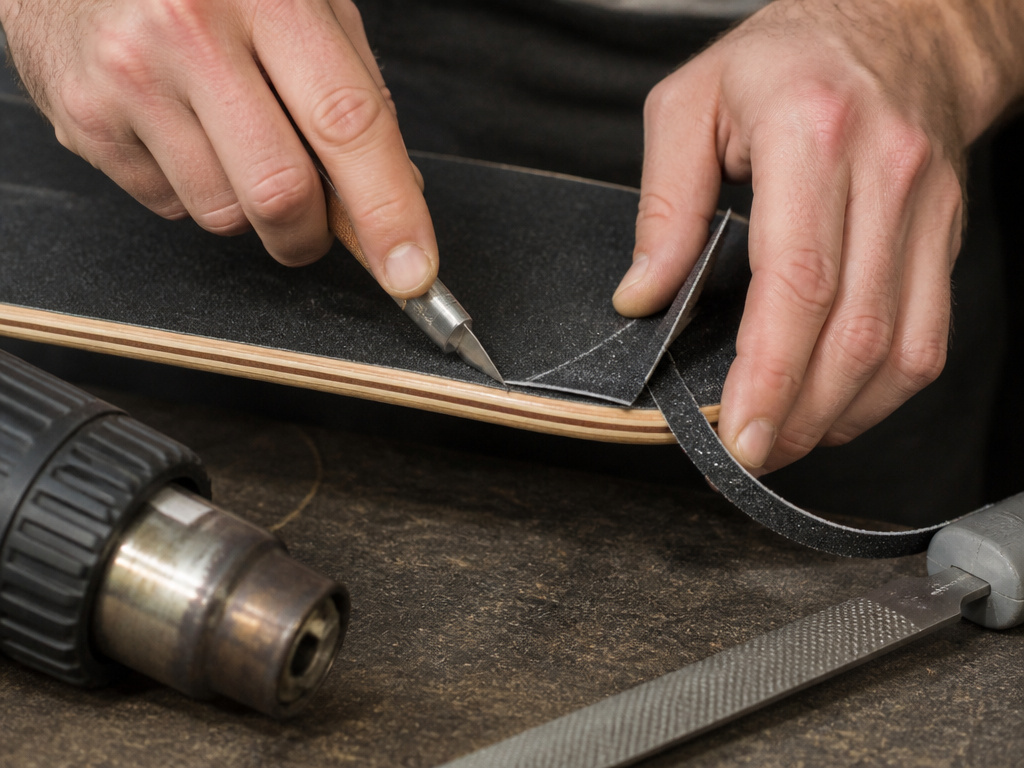
Now the deck is covered in an oversized sheet of sandpaper. You need to cut it flush with the edge. This is where the community diverges on technique. You have three proven methods to create a cutting guide.
| Method | How It Works | Best For |
|---|---|---|
| Scraping / Rasping (Motion Boardshop, iFixit) | Use a screwdriver or file to scrape the deck edge through the tape, creating a visible indentation. | Beginners. Provides a physical channel for the blade. |
| White Line (Titus) | Run a blunt metal object along the deck edge at a 45° angle. This leaves a white abraded line on the tape. | Visual learners. Clean, clear line. |
| Heat & Cut (Motion Boardshop) | Lightly heat the tape at the deck edge with a heat gun to make it more pliable before cutting. | Complex shapes, cold workshops. |
Sources offer different methods: scraping (Stoked Ride Shop, iFixit) or creating a white line (Titus). Choose one and be consistent around the entire board.
Hold your razor blade at a 45-degree angle to the board. Cut using slow, controlled pulls, following your guide. The angle creates a beveled edge that’s less likely to peel. For sharp corners or wheel wells, make relief cuts so the tape can lay flat without bunching.
The part nobody mentions: Cutting against the wood grain on the nose or tail can cause small splinters to tear up. It doesn’t affect performance, but it looks messy. If you see wood fibers lifting, you’re pressing too hard or cutting at too steep an angle. Ease up.
After cutting, use a scrap of the leftover grip tape to sand the fresh edge smooth. This removes any loose abrasive particles and slightly rounds the edge, making it more comfortable for your hands.
Poking Mounting Holes and Finishing Up
Flip the board over. Use a truck bolt or a screwdriver to poke holes through the tape where the truck mounting hardware will go. Press firmly and twist slightly to cleanly puncture the tape. If you have a drop-through deck, you’ll be cutting out larger rectangles or circles around the mounting area, do this carefully with the razor blade after the holes are poked.
Before you reassemble everything, inspect the tape for any lifted edges or bubbles you missed. If you find one, it’s not too late. Peel back that section carefully, re-smooth, and if needed, apply a tiny drop of super glue under the edge with a toothpick. Clamp it briefly.
Your board is now gripped. You can ride immediately, the adhesive is pressure-sensitive and doesn’t need curing time. However, for a professional grip tape application that lasts, let it sit under some books for an hour to ensure full bond formation, especially in colder environments.
The Electric Longboard Caveat
Cycleboard’s service guide points out a specific failure mode for e-boards: “The material can shrink due to temperature changes which can cause bridging near the transition between the main standing area and the tail of the deck.” The heat from the motor and battery can cause repeated expansion and contraction. If you grip an electric board, pay extra attention to smoothing the tape over any transition areas, and consider a grip tape designed for higher temperature ranges.
How to clean a skateboard deck after removing grip tape
After peeling off the old grip tape, you’ll be left with a deck covered in dried adhesive. One school of thought is to not clean it at all. Guides recommend just gripping over the leftover glue, as the new tape will stick to it just fine and removing it all requires an incredible effort. If you choose to clean the deck, use a hairdryer on its highest setting held a few inches away to warm any remaining glue, making it easier to scrape off. The goal is a relatively smooth surface, not a perfectly clean one, before you apply the fresh sheet.
Frequently Asked Questions
Can you put new grip tape over old grip tape?
Technically yes, but it’s a bad idea. You’ll feel every seam and bubble from the layer underneath. The new adhesive bonds poorly to the old tape’s backing, leading to premature peeling. Always remove grip tape completely for a clean, reliable result.
How do I grip a drop-through longboard?
The process is identical until you reach the truck mounting area. After poking the bolt holes, you’ll need to cut out the rectangular or oval openings that allow the trucks to mount through the deck. Use the razor blade to carefully cut along the inside edge of the cutout. Take your time, rushing can lead to a jagged edge that catches.
What’s the difference between longboard and skateboard grip tape?
The material is the same. The difference is size. Skateboard grip tape typically comes in 9″ x 33″ sheets. Longboard grip tape is sold in larger sheets, up to 12″ x 4′, to accommodate the longer and sometimes wider decks. Using a skateboard sheet on a longboard will leave unprotected areas at the nose and tail.
How often should I change my longboard grip tape?
There’s no set mileage. Change it when the abrasive particles are visibly worn smooth, or when your feet slip during normal riding. There’s no set mileage. Change it when the abrasive particles are visibly worn smooth, or when your feet slip during normal riding. Inspect it visually and trust the traction feedback from your shoes.
The Bottom Line
Changing grip tape is a maintenance skill, not an art project. The right grit keeps you safe at speed; a cut at a 45-degree angle keeps the tape from peeling. If you remember nothing else, remember this: buy a sheet sized for your board, press from the center out, and cut at a 45-degree angle.
Most mistakes happen in the first and last steps, rushing the removal or hacking at the trim. Slow down there. The middle part is just careful unrolling. Once you’ve done it, you’ll never pay a shop $30 for a job that takes you 20 minutes and a hairdryer.
And if you’re looking to go beyond a simple black sheet, this skill is the foundation for longboard customization with cut patterns, multiple colors, and personalized designs. Start with a solid base layer. Everything creative builds from there.