How to Fix Electric Scooter Wiring: Step-by-Step
This post contains affiliate links. As an Amazon Associate, we earn from qualifying purchases.
To fix electric scooter wiring, you need a multimeter, basic tools, and a systematic approach to isolate the fault. Start by disconnecting the battery, then visually inspect the entire harness for damage. Next, test key voltages: battery output, throttle signal (should vary from ~1V to ~4V), and controller inputs. Most wiring failures are broken wires, corroded connectors, or internal shorts.
That voltage check is the whole game. A dead scooter or one that cuts out randomly isn’t a mystery, it’s a circuit waiting for you to find the break. The difference between a two-minute fix and a weekend of frustration is knowing where to put your probes, which is the core of how to fix electric scooter wiring.
What follows is the sequence I use in the shop: five diagnostic steps that work on everything from a kid’s toy to a commuter scooter, the right way to repair a wire so it never fails again, and the specific voltage numbers from service manuals that tell you exactly what “good” looks like when you compare a how to fix electric scooter wiring.
Key Takeaways
- Always disconnect the battery first. Working on live wiring can weld your tools, fry components, or start a fire.
- A digital multimeter is essential. You can’t guess voltages or find breaks without one. A basic model is fine.
- Never trust wire colors alone. Manufacturers use different schemes. Use your meter to identify the 5V supply, ground, and signal wires.
- Solder and heat shrink every connection. Electrical tape and twist-on connectors vibrate loose and let in moisture.
- The problem is usually simple. Focus on connectors, fuses, and the last place the scooter was stressed (a crash, a curb strike, water ingress).
The 5-Step Diagnostic Sequence
Skip the guesswork. When a scooter won’t go, won’t stop, or acts erratically, follow these steps in order for how to fix electric scooter wiring. They work because each test rules out a whole category of problems before you move to the next, more complex one.
Step 1: Power Down and Visual Inspection
Turn the scooter off. Locate the main battery connector, usually a large pair of wires (red and black) coming from the battery pack, and disconnect it. This is your single most important safety step. Now, with power completely removed, follow the wiring harness from the battery to the controller, then out to the motor, throttle, and brakes. You’re looking for the obvious: melted insulation, cuts, crushed sections, or corroded, green connectors. Pay special attention to spots where wires bend or rub against the frame. A sharp edge can wear through insulation in a matter of weeks.
Step 2: Check the Fuse and Circuit Breaker
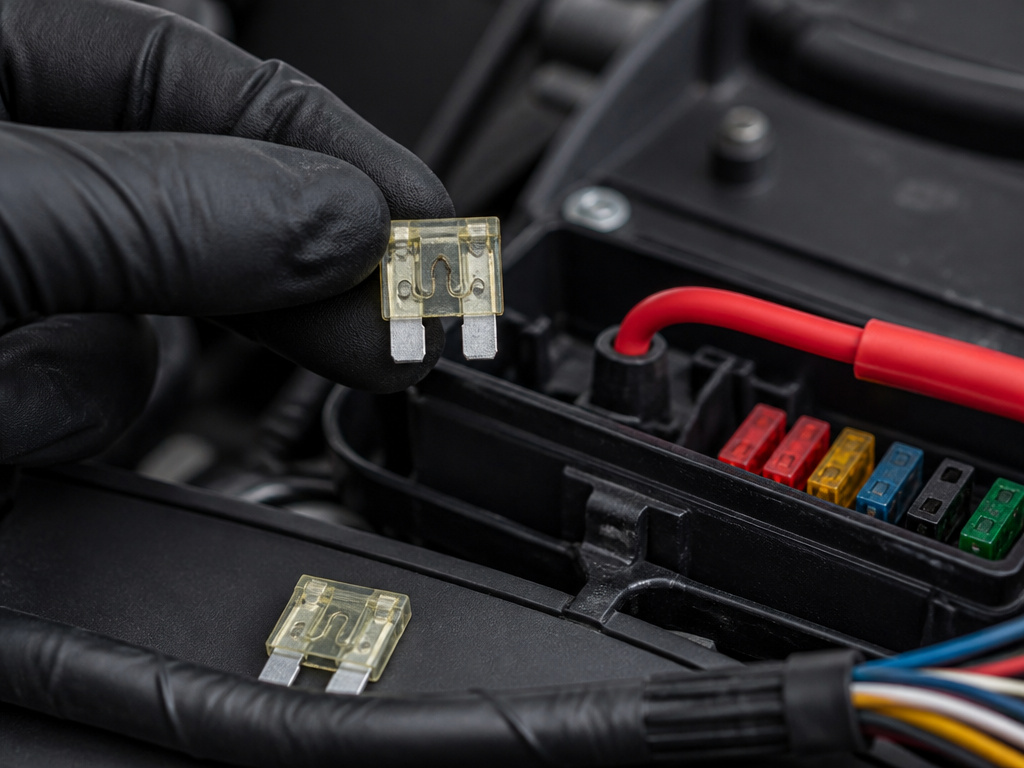
Find the main fuse or circuit breaker. It’s almost always on the positive battery cable, close to the battery itself. Pull the fuse and look at the metal strip inside, if it’s broken or blackened, it’s blown. A circuit breaker will have a little button that pops out when tripped. This simple check solves a huge percentage of “no power” problems. If you find a blown fuse, replace it with one of the exact same rating. Never install a larger fuse; it’s there to protect the rest of the wiring from melting.
Step 3: Battery Voltage Under Load
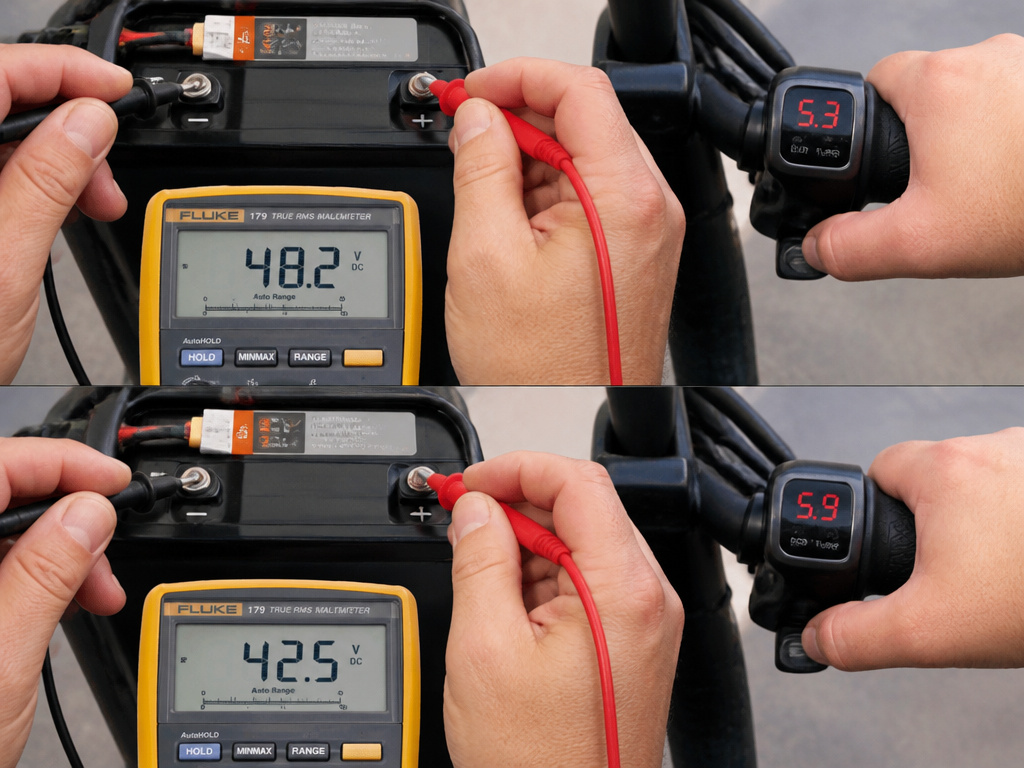
Reconnect the battery for this test only. Set your multimeter to DC volts, with a range higher than your scooter’s rated voltage (e.g., 200V for a 48V scooter). Touch the probes to the battery’s main output terminals. Note the reading. Now, try to operate the scooter, press the throttle while watching the meter. A healthy battery will drop only a few volts under load. If the voltage plummets significantly the instant you demand power, the battery may be failing internally. This “voltage sag” under load is why a scooter can show a full charge but die as soon as you try to ride it.
Step 4: Signal Voltage Tests
This is where you move from power delivery to command signals. Leave the battery connected but be careful, you’re now probing smaller wires.
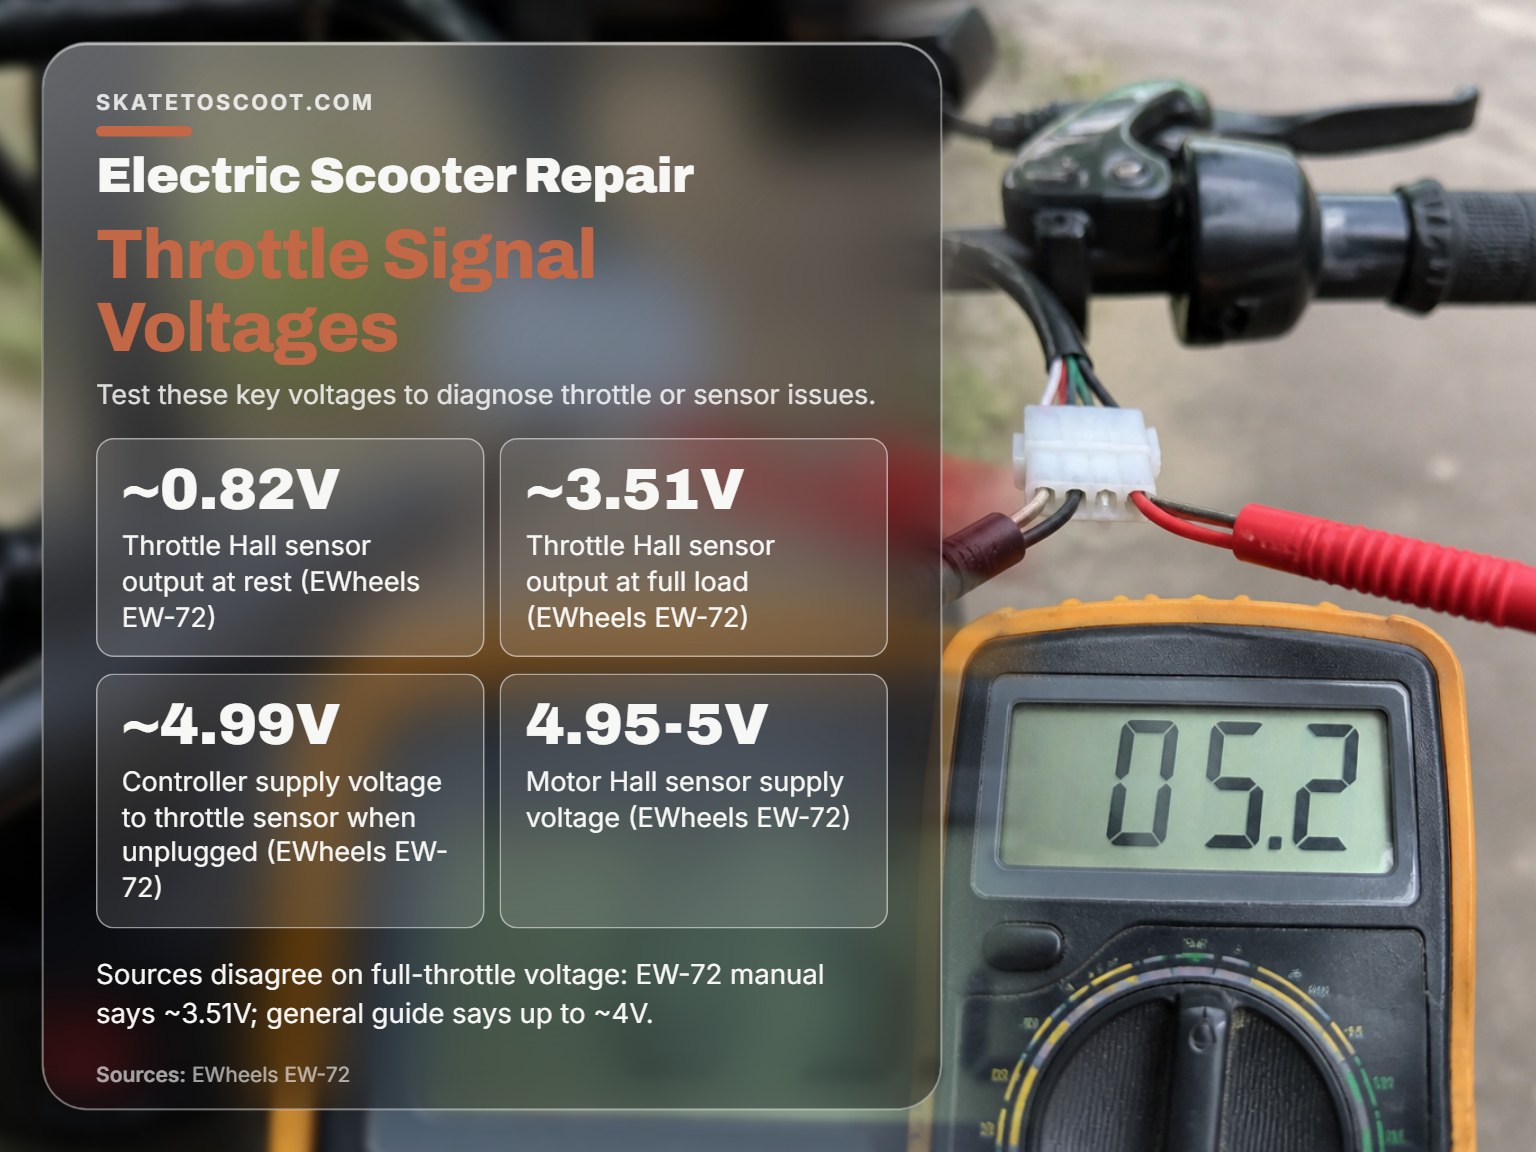
- Throttle: Find the throttle’s 3-pin connector (usually near the handlebar). Turn the scooter on. Set your meter to DC volts (20V range). The three wires are the supply, ground, and signal wires. Probe between the supply and ground pins; you should see the controller’s supply voltage (often around 5V, but consult your scooter’s manual for specifics). Now, probe the signal wire against ground. With the throttle at rest, you should get around 1V. Slowly squeeze the throttle. The voltage should smoothly rise to about 4V at full throttle. If it doesn’t change, or jumps erratically, the throttle or its wiring is bad.
- Brake Sensor: With the scooter on, probe the two wires of a brake sensor. Most are simple switches. You should see either 0V (circuit open) or 5V (circuit closed). Pull the brake lever; the reading should flip. If it doesn’t, the sensor is stuck or broken, which tells the controller to cut motor power.
Step 5: Controller and Motor Check
If all signals are good but the motor doesn’t run, the issue is downstream. First, listen. When you turn the scooter on, many controllers emit a soft beep or chirp, a sign they’re getting power and passing their internal self-check. Silence can mean a dead controller. For a more advanced test, check the voltage the controller sends to the motor’s Hall sensors. At the motor connector, you should find a red wire supplying the Hall sensor voltage (typically 4.5-5.5V, but the EW-72 manual specifies 4.95-5V). No voltage here points to a controller problem. Finally, the three thick motor phase wires should have continuity from the controller plug to the motor. A break in one can cause the motor to stutter or not run.
Common mistake: Testing the battery with no load. A battery can show perfect voltage sitting still but collapse when asked to deliver current. Always test under load, try to run the motor while watching the meter.
Step-by-Step Wire Repair
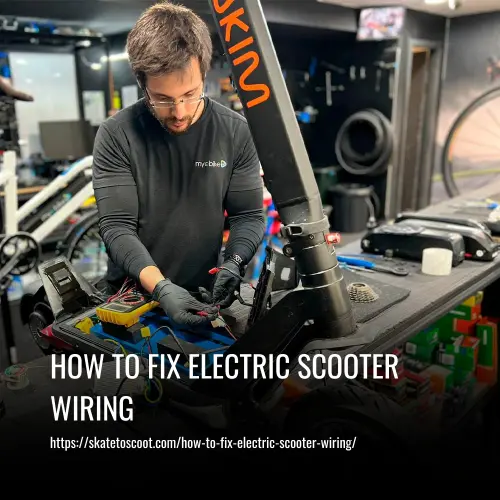
Finding the fault is half the battle. Fixing it so it stays fixed is the other half. Here’s how to make a connection that will outlast the scooter itself.
Gather Your Tools
You need a soldering iron with temperature control (recommended setting 650-750°F for electrical wiring), rosin-core solder (60/40 or 63/37 tin/lead), and heat shrink tubing. Don’t use a lighter for the heat shrink, it’s too easy to overheat one spot and weaken the insulation. A helping-hands tool or a small vise is also invaluable.
Strip, Solder, and Seal
- Cut and Strip: Cut out the damaged section of wire. Twist the exposed strands gently to keep them together.
- Slide on Heat Shrink: This is the step everyone forgets until it’s too late. Before you connect anything, slide a piece of heat shrink tubing onto one of the wires. Make sure it’s long enough to cover the joint and extend onto the insulation on both sides.
- Splice the Wires: Twist the two bare wire ends together firmly. Heat the joint with your soldering iron for 2-3 seconds, then touch the solder to the wire, not the iron. The solder should flow smoothly into the joint, coating all the strands. A good joint is shiny and smooth, not lumpy or dull.
- Insulate: Slide the heat shrink tubing over the soldered joint. Use your heat gun, moving it constantly around the tubing until it shrinks tightly around the connection. You’ll see the adhesive inside (if using dual-wall tubing) ooze slightly from the ends. This creates a watertight, vibration-proof seal.
Where this goes sideways: Using only electrical tape or a twist-on wire connector. Vibration and moisture will defeat both within a few months, leading to the same failure all over again. Solder and heat shrink is the only permanent fix.
Routing and Securing the Harness
Reinstall the wiring correctly. Don’t pull wires tight. Leave a little slack in a gentle loop at every connection point, this is strain relief. Route wires away from moving parts, sharp edges, and heat sources like the motor or controller heatsink. If you’re rebuilding a scooter from scratch, following a detailed scooter wiring guide can prevent these issues from the start.
Understanding Wiring Diagrams and Voltages
You don’t need to be an electrical engineer, but knowing a few basics helps you understand the scooter.
Most diagrams are simpler than they look. The battery (power source) is at the top. Thick lines represent the high-current paths to the controller and motor. Thin lines are the signal wires for throttle, brakes, and lights. Dots where lines cross mean those wires connect; lines that cross without a dot don’t connect.
The current (amperage) your system draws dictates the wire gauge you need, and the system voltage dictates what components are compatible. Mixing voltages destroys parts.
| System Voltage | Typical Battery Configuration | Common Use Case |
|---|---|---|
| 24V | 6S Lithium (22.2V nominal) | Kids’ scooters, light-duty models |
| 36V | 10S Lithium (37V nominal) | Most adult commuter scooters |
| 48V | 13S Lithium (48.1V nominal) | Performance scooters, longer range |
| 60V+ | 16S+ Lithium | High-speed, high-power builds |
Wire Gauge is Critical
Using wire too thin for the job is a fire hazard. It overheats under load. Follow this guide:
Common Wiring Problems and Fixes
Not every issue requires a full rewire. Often, it’s one specific failure point. This table matches symptoms to the most likely culprits and how to confirm them.
| Symptom | Most Likely Cause | How to Test |
|---|---|---|
| Scooter won’t turn on, no display | Blown main fuse, disconnected battery, dead battery. | Check the main fuse visually and for continuity. |
| Throttle does nothing, but display works | Faulty throttle, broken throttle wire, stuck brake sensor. | |
| Motor stutters or vibrates but won’t run smoothly | Damaged motor phase wire, faulty Hall sensor connection, water in connectors. | |
| Scooter runs then suddenly cuts out | Loose connection overheating, failing battery under load, faulty controller. | Check all connectors for looseness or damage. |
| Intermittent power, works when wiggling wires | Broken wire inside insulation, corroded connector. | Test for continuity while flexing the wire harness to find an internal break. Inspect connectors for green corrosion. |
The Throttle Signal Disagreement
Here’s a case where sources don’t fully agree. The general wiring guide states a throttle signal ranges from approximately 1V to 4V. However, the EW-72 service manual gives very specific readings for its throttle: ~0.82V at rest, ~1.54V at engagement, and ~3.51V at full load. Which is right? Both are. The general range is correct for most aftermarket and generic scooters. The EW-72 numbers are the exact, verified specs for that particular model. The lesson: if you have the service manual for your scooter, use its numbers. If not, the 1V-4V range is your best guide.
Dealing with Water and Corrosion
Water is wiring’s enemy. If your scooter got wet and now has problems, disconnect everything. Dry all connectors with compressed air or a hair dryer on a cool setting. Check for the tell-tale white or green crust of corrosion on metal pins, clean it off with isopropyl alcohol and a toothbrush. As the Shimano dealer manual advises, check for foreign matter inside plugs before reconnecting. For the future, after any repair where a connector is open, protect the plugs with masking tape if the scooter will be stored or used in dirty conditions.
Safety Protocols You Cannot Skip
This isn’t scare talk. I’ve seen the results when these rules are ignored: melted plastic, blackened wires, and one controller that literally popped like a firecracker.
- Disconnect the battery before any work. This isn’t a suggestion. A accidental short between battery terminals can pump hundreds of amps in an instant, welding your wrench to the frame and starting a fire in seconds.
- Use the fuse specified for your scooter. The fuse is a sacrificial part. It’s cheaper than a new controller or battery. Install a fuse or circuit breaker on the main positive line, as close to the battery as you can get it.
- Never exceed voltage ratings. Plugging a 48V battery into a 36V-rated controller will destroy the controller in a puff of magic smoke. Know your system voltage.
- Have a fire extinguisher nearby. A Class D extinguisher for metal fires is ideal for lithium batteries, but an ABC extinguisher is acceptable. Never use water on a lithium battery fire.
- Lithium batteries demand respect. Store them at a 40-60% charge in a cool, dry place. Never puncture or crush a cell.
Before you start: The battery can deliver lethal current even at low voltages. A short circuit can cause severe burns or fire. Always disconnect the main battery connector first and keep it disconnected until all other work is done. Secure the scooter so the wheels are off the ground before any functional testing.
How to check and replace scooter wiring connectors
Always disconnect the battery before you start. Check every plug for foreign matter like dirt or water inside. If you find any, clean it out before reconnecting. When you’re servicing the scooter and a connector is open, protect the plugs with masking tape to keep new debris out. For a permanent repair, cut the old connector off and strip the wire ends. Use a temperature-controlled soldering iron and rosin-core solder to make a solid joint. Slide heat shrink tubing over the wire before you solder, then move it over the joint and apply heat. Let the joint cool completely without moving it to avoid a weak connection.
How to find a short circuit in an electric scooter
Start by disconnecting the battery. A short in accessory wiring for lights or turn signals can sometimes prevent the scooter from driving at all. For diagnostics, leave all accessories switched off. If the scooter has random power loss, one quick check is to lightly tap the brake lever while watching the taillights. If they flicker, a loose handle is activating the brake sensor and cutting power. Intermittent drive can also be a sign of a faulty battery that only fails under load, not during a simple static voltage check. Visually inspect all wires for pinched insulation or melted spots where they rub against the frame.
Frequently Asked Questions
How do I know if a wire is broken inside the insulation?
The wire looks fine from the outside, but the scooter has an intermittent fault. Set your multimeter to continuity mode (the symbol that looks like a sound wave). Touch one probe to each end of the wire in question. If you get a beep, the wire is intact. If there’s no beep, there’s a break. Now, flex the wire along its length while testing, if the beep comes and goes, you’ve found the spot where the internal strands are fractured.
Can I just use electrical tape instead of heat shrink?
You can, but you shouldn’t. Electrical tape adhesive dries out, unwinds, and allows moisture in over time. It’s a temporary fix at best. Heat shrink tubing, especially the dual-wall kind with a sealant inside, creates a permanent, waterproof, and mechanically tight seal. The five minutes it takes to solder and shrink is worth never having to reopen that connection.
Why does my scooter work sometimes and not others?
Intermittent problems almost always point to a bad connection. It could be a wire broken inside the insulation (see above), a corroded connector that makes contact only when wiggled, or a loose terminal screw. A less common but sneaky cause is electromagnetic interference (EMI). The Afiscooter S manual cautions that cell phones, two-way radios, and other transmitters can cause unintended movement. If your scooter acts up only near certain radio towers or with a specific device in your pocket, EMI might be the culprit.
When should I call a professional instead of fixing it myself?
If you’ve gone through the diagnostic steps, replaced the obvious parts like fuses, and the problem persists, especially if it involves the battery pack itself, it’s time for a pro. Opening a lithium battery pack is extremely dangerous if you don’t know exactly what you’re doing. Similarly, if you smell burning plastic, see melted wiring, or the controller is visibly damaged (bulging capacitors, burn marks), the repair is beyond a simple wiring fix.
How do I prevent wiring problems in the first place?
Regular maintenance is key. Every few months, visually inspect the harness for chafing. Keep connectors clean and dry. After riding in the rain, dry the scooter off thoroughly. Avoid modifying your scooter in ways the manufacturer didn’t authorize, adding high-power lights or accessories can overload circuits not designed for them. Finally, when you do make a repair, do it right with solder and heat shrink so you only have to do it once.
The Bottom Line
Fixing scooter wiring is more about patience and process than deep expertise. Start with the battery disconnected. Let your multimeter tell you the story, chase the voltage until it disappears. And when you make the repair, solder it. Cover it with heat shrink. Secure it to the frame.
That said, know your limits. If your diagnosis points to a faulty controller or a failing battery with internal damage, replacing the whole component is often safer and more reliable than attempting a component-level repair. For most other issues, a broken throttle wire, a corroded connector, a snapped phase wire, the process here will get you rolling again. The goal isn’t just a fix for today, but a connection that will last for thousands of rides.
