How to Get Bearings Out of a Longboard Wheel: Step-by-Step
This post contains affiliate links. As an Amazon Associate, we earn from qualifying purchases.
To get bearings out of a longboard wheel, you have two main paths: use the truck axle as a lever or use a dedicated bearing puller. The axle method is the most common and requires no extra tools, you pry the wheel off the bearing by positioning the axle tip halfway into the first bearing and levering at a 45-degree angle. A bearing puller is safer for the bearing shield but is a specialized tool most riders don’t own. Both methods start with removing the wheel from the truck using a 13mm wrench.
That 45-degree angle isn’t just a suggestion; it’s the difference between a clean pop and a bent bearing shield. The axle is designed to fit the bearing perfectly, turning your truck into the ideal removal tool. This is a mechanical advantage, not a hack, and it’s the core of how to get bearings out of a longboard wheel.
What follows: a side-by-side look at the axle method versus the puller, the specific steps for dealing with rust-seized bearings, and the one reassembly rule that sources disagree on, and why that matters for your ride.
Key Takeaways
- Use a 13mm wrench to remove the axle nut and free the wheel from the truck.
- For the axle method, insert the axle halfway into the first bearing and pry at a 45-degree angle; this uses the truck’s design against the wheel hub.
- A bearing puller is the safest tool for the job if you plan to reuse the bearings, as it grips only the bearing edges and protects the shield.
- If bearings are rusted and seized, soaking in white vinegar can dissolve corrosion, but be prepared for the bearings to be trash.
- During reassembly, axle nut tightness depends on bearing spacers: sources disagree on the method when spacers are not used. Motion Boardshop advises tightening until the wheel stops, then loosening a half-turn, while iFixit advises tightening firmly without over-tightening so the wheel spins freely.
The Truck Axle Method: A 45-Degree Lever
This is the method you’ll see in most garage workshops and online tutorials. It turns your longboard’s truck into a custom removal tool. The key is understanding the point of force.
First, get the wheel off the board. Grab a 13mm wrench, that’s the standard size for axle nuts on most skate and longboard trucks. Loosen the nut and slide the wheel off the axle. Set the nut and any washers aside where you won’t lose them.
Now, flip the board over or hold the loose truck in your hand. You’re going to use the axle tip as a fulcrum. According to the Motion Boardshop guide, you place one bearing over the end of the axle so the axle tip is about midway through the first bearing. Don’t push it all the way through. This positioning is critical.
The part nobody mentions: If you push the axle all the way through the first bearing and into the spacer, you’re prying against the spacer, not the bearing. The wheel won’t budge, and you’ll just strain the plastic. The axle tip must stop inside the metal bearing race.
With the bearing seated halfway on the axle, grip the wheel firmly with both hands. Now, pry the wheel away from the axle at a 45-degree angle to the side. Think of it as levering the wheel off, not pulling it straight. You should feel a sudden release, a distinct pop, as the bearing separates from the wheel’s hub.
Rotate the wheel and repeat the process on the other side. Sometimes, removing the first bearing will let the spacer fall out, making the second side easier. If the bearing feels stuck, work your way around the circumference, prying a little at a time. Don’t force it; that’s how you crack a wheel core.
| Step | Action | Why This Works |
|---|---|---|
| 1. Position Axle | Slide wheel onto axle tip until axle is halfway through the bearing. | Creates a fulcrum point inside the bearing race, not the spacer. |
| 2. Apply Leverage | Pry wheel away from axle at a 45-degree angle. | Converts downward/outward force into a lateral pop against the wheel hub. |
| 3. Listen & Feel | A clean pop means success; grinding means stop. | The bearing shield is metal on plastic; a grinding sound is metal bending. |
| 4. Remove Spacer | Let the spacer fall out after the first bearing is removed. | Clears the path for the second bearing and prevents cross-loading. |
Never use a screwdriver to put bearings in or pop them out. The Motion Boardshop guide is adamant on this (while iFixit recommends a thin blade for seal removal), as a screwdriver could end up bending the bearing shield. A bent shield creates friction points that will grind your spin to a halt within a few rides. The axle is the right tool; a screwdriver is a last resort for a bearing you’ve already decided to sacrifice.
The Bearing Puller: Precision Over Force
If you’re maintaining high-end bearings or simply want the safest possible removal, a bearing puller is the professional choice. It’s a dedicated tool that applies even, inward pressure on the bearing’s outer race, minimizing the risk of damaging the shield or the wheel.
The process is straightforward. After removing the wheel from the truck, you place the wheel flat on a work surface. The puller’s jaws are designed to grip the very outer edge of the bearing. You tighten a central screw, which draws the bearing straight out of the wheel hub.
Where this goes sideways: Grabbing the bearing’s face or shield with the puller. The Warehouse Skateboards guide specifies to only grab the edges of the bearing with your tool, not the surface. Clamping down on the shield will deform it, ruining the bearing’s seal and letting grime in immediately.
The advantage is clear: no prying, no angled force, no risk of cracking the wheel, which is a key benefit when learning how to get bearings out of a longboard wheel. The disadvantage is that it’s a single-purpose tool most riders won’t buy unless they’re doing frequent bearing swaps. For the once-a-season clean, the axle method is sufficient. But if you own a set of Bones Reds or Zealous bearings you plan to keep for years, the puller pays for itself in preserved performance.
When Bearings Fight Back: Rust and Seizure
You’ll know a bearing is seized when the axle method produces no pop, just a worrying creak. Rust is the usual culprit, especially if the board has been stored in a damp garage or ridden through wet streets.
The community fix, noted in a Reddit discussion, is a white vinegar bath. Submerging the wheel-and-bearing assembly in white vinegar overnight can dissolve the rust enough to break the corrosion’s grip. It’s a salvage attempt, not a guarantee. The vinegar will also strip any remaining lubricant, so you must clean and relube the bearing thoroughly afterward.
If the vinegar soak fails, you’re in last-resort territory. One Reddit user described a method using a hammer and flathead screwdriver: set the wheel on its side, place the screwdriver tip into the bearing hole at an angle against the bottom bearing, and tap the screwdriver with a hammer, working around the circumference.
Common mistake: Soaking the entire wheel in vinegar or using a petroleum-based lubricant like WD-40. Petroleum breaks down the urethane in wheels, making them brittle. WD-40 is a water displacer, not a long-term lubricant, and it won’t fix a seized bearing.
Honestly, if you’re at the hammer-and-screwdriver stage, the bearings are likely trash. The goal shifts from preservation to simple removal so you can install new ones. Zealous or Atlas Blackout bearings with built-in spacers are a good upgrade here, as they simplify reassembly.
Reassembly and Axle Nut Tightening
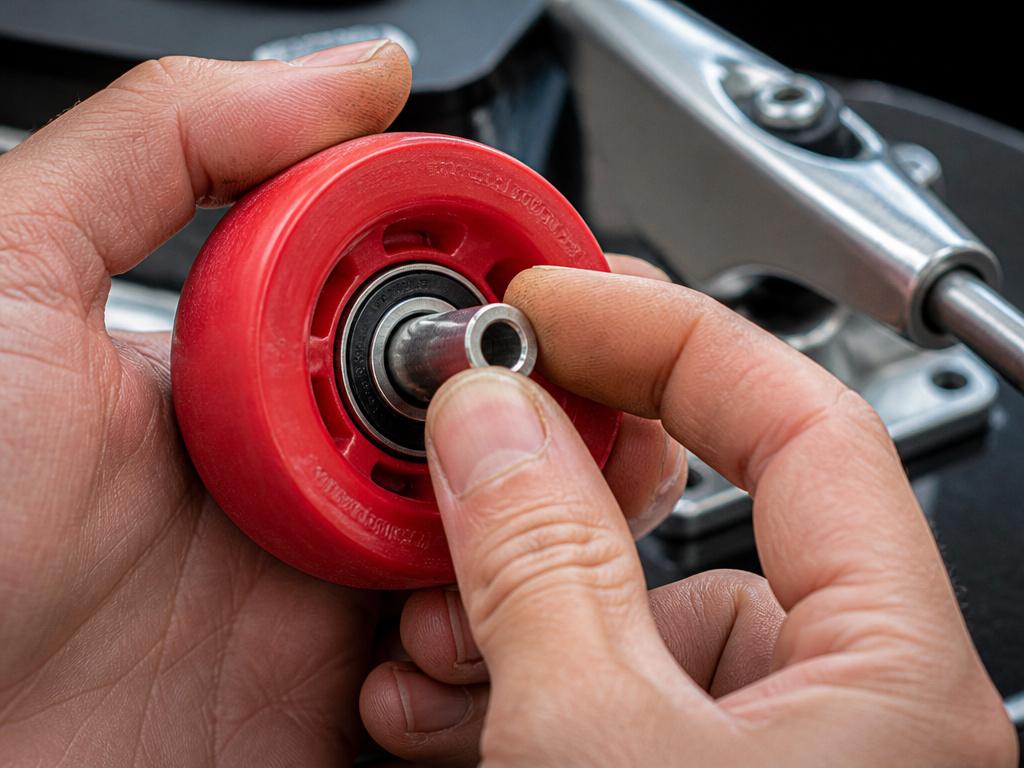
Getting the bearings out is only half the job. Putting everything back together correctly is what determines whether your board rolls smooth or feels draggy. Order matters.
First, if you’re reusing your old bearings, give them a visual inspection. Spin them by hand. If they feel gritty or sound raspy, they need a cleaning before they go back in. If they’re shot, that’s a replacement job.
Assuming the bearings are good, start reassembly on a flat surface. Press the first bearing into the wheel hub by hand until it’s flush. According to the iFixit PDF guide, the bearing’s outside edges should be flush with the inside bottom edge of the wheel. A firm, even press with the palm of your hand usually seats it. Don’t hammer it.
Next, insert the bearing spacer into the center of the wheel. This small aluminum tube is crucial, it keeps the two bearings aligned under load. If you have Zealous or Atlas Blackout bearings, they have spacers built in, so you skip this step. Press the second bearing into the opposite side of the wheel.
Now, slide the wheel onto the truck axle. The axle should go through both bearings and the bearing spacer. This is the test of a correct installation: if the axle binds or won’t go through, a bearing is crooked. Back it out and reseat it.
Here’s where sources disagree, and it’s the most important mechanical decision you’ll make.
| Scenario | Motion Boardshop Advice | iFixit PDF Guide Advice |
|---|---|---|
| Using Bearing Spacers | Tighten axle nuts down enough that your wheels are snug. | Tighten the axle nut firmly. Do not over tighten. The wheel should spin freely. |
| Not Using Spacers | Tighten until the wheel doesn’t spin, then un-tighten about a half turn. | Tighten the axle nut firmly. Do not over tighten. The wheel should spin freely. |
The disagreement hinges on pre-load. Spacers allow you to tighten the axle nut firmly without squeezing the bearings’ inner races together, which causes drag. Without spacers, overtightening will create drag. My take? If you have spacers, follow the “snug” rule. If you don’t, use the “tighten-then-loosen” method. It’s a preventative measure against a common issue.
After tightening, give the wheel a spin. A newly serviced set, per the iFixit guide, should allow for roughly 60 seconds of uninterrupted free-spin. Less than 30 seconds indicates a problem, likely drag from overtightening or a dirty bearing.
Tools and Methods Compared
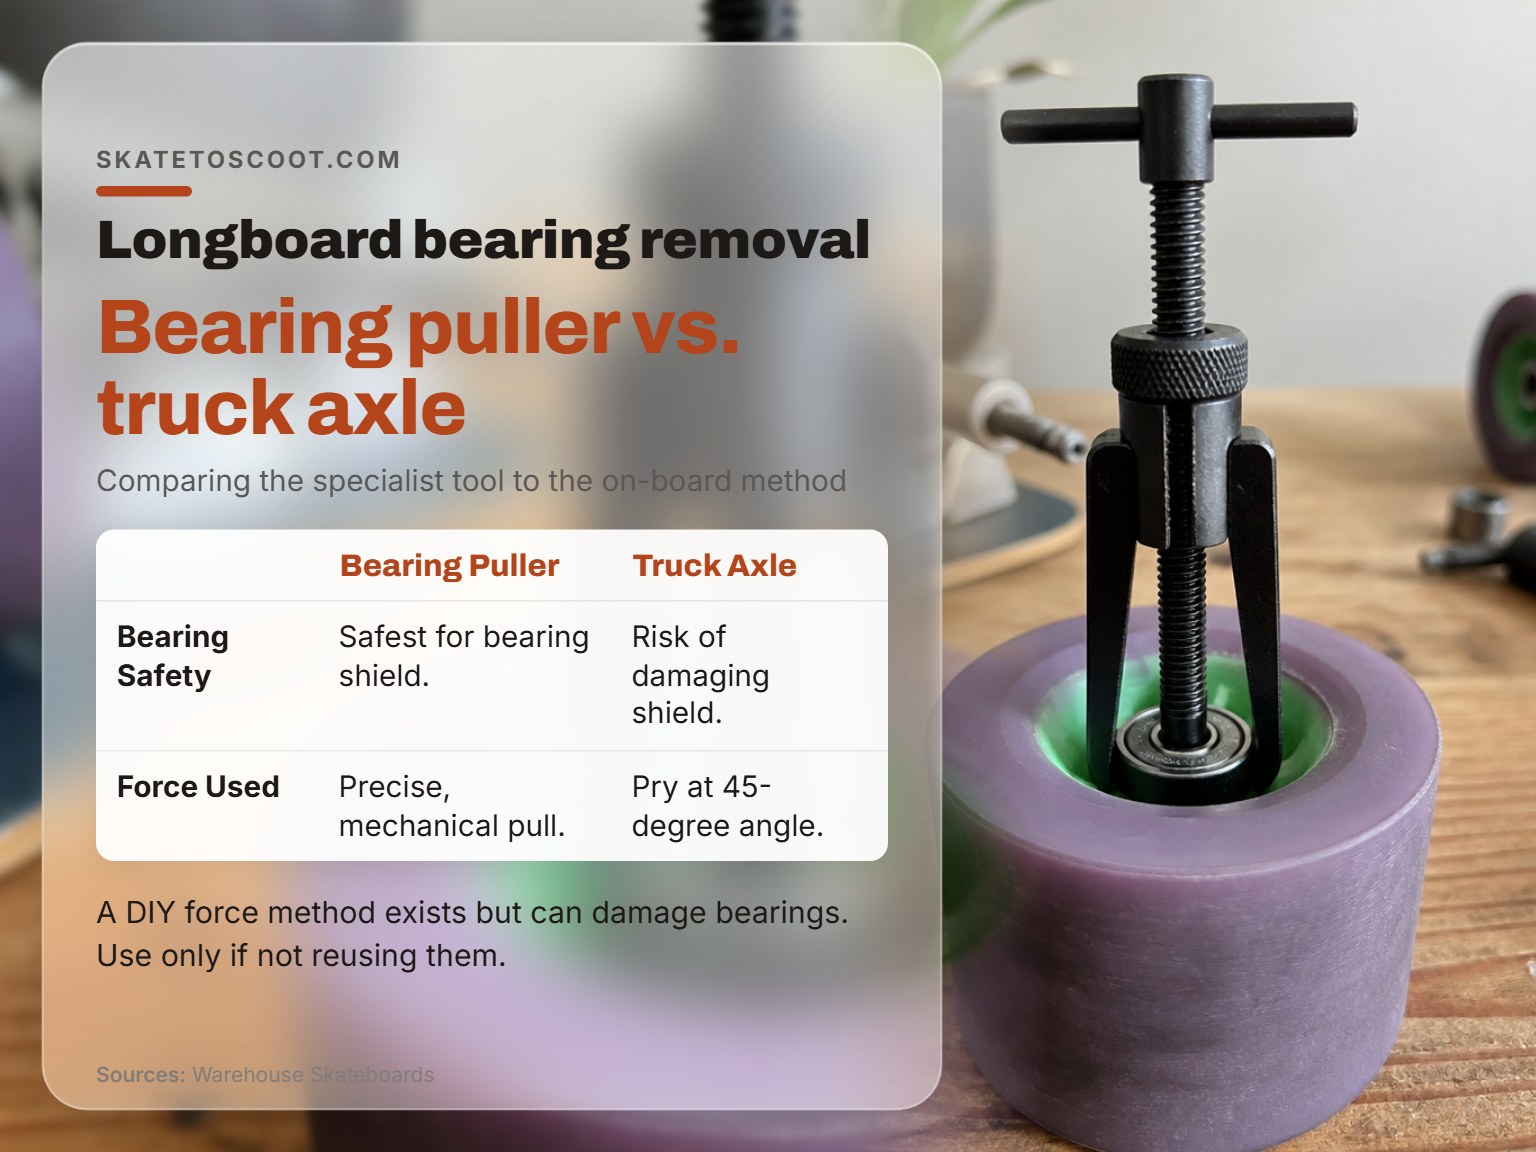
You have options. We will compare which one fits your situation.
The truck axle is the default. It’s free, it’s always with you, and it works for most removals. The risk is damaging the bearing shield if you pry incorrectly or use a screwdriver instead. It’s best for general maintenance where you might be cleaning or inspecting bearings.
A bearing puller is the specialist. It’s the safest method for the bearing itself, ideal if you’re swapping expensive bearings between wheels or are particularly concerned about preserving shield integrity. It’s an extra cost and an extra thing to store.
The DIY force method described by Warehouse Skateboards, using hands and force, is explicitly labeled as potentially damaging if you don’t plan on reusing the bearings. Use it only if you don’t plan to reuse the bearings. It’s a method of last resort.
What about a performance check? After you change wheels and reassemble, proper adjustment and lubrication can improve spin time. But it all starts with getting the bearings out cleanly.
The ‘bottle opener’ twist method for faster swapping
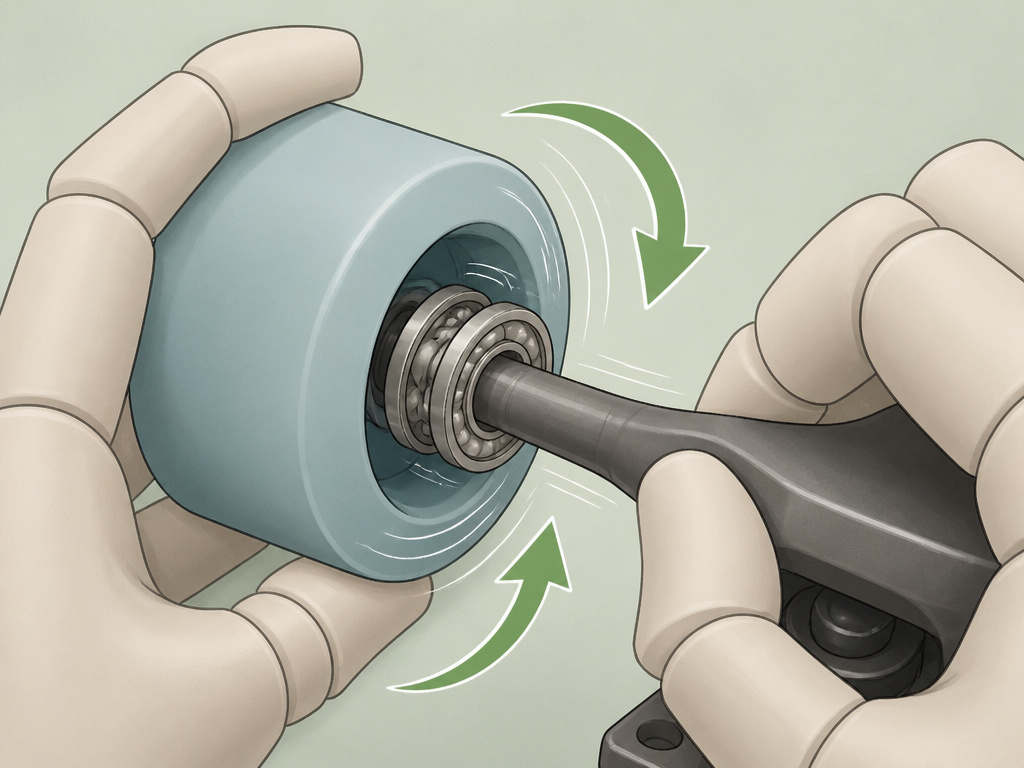
This method uses your truck axle as a lever, like a bottle opener, to quickly pop bearings out. First, slide the wheel onto the axle tip so it’s about halfway through the first bearing. Then, tilt the wheel at a 45-degree angle and pry it downward against the axle. The bearing should pop out with a firm twist. This is a common DIY technique, but it’s best used only if you don’t plan on reusing the bearings, as the force can damage them. For a cleaner removal that preserves your bearings, a dedicated bearing puller is the recommended tool.
Frequently Asked Questions
How do I remove bearings from a longboard wheel without a bearing puller?
Use the truck axle as a lever. Remove the wheel from the truck with a 13mm wrench, then slide the wheel back onto the axle tip until the axle is halfway into the first bearing. Pry the wheel away from the axle at a 45-degree angle. A distinct pop means the bearing is free. Repeat on the other side.
How to get stuck bearings out of wheels?
For bearings seized by rust, try soaking the wheel (with bearings still in) in white vinegar overnight to dissolve the corrosion. If that fails, you may need to use a hammer and flathead screwdriver as a last resort, working around the bearing’s edge to tap it out. This will ruin the bearing, so only use this method if replacement is the goal.
Can I use a screwdriver to pop bearings out?
You can, but you shouldn’t. Both the Motion Boardshop guide and experienced riders warn that using a screwdriver easily bends the thin metal bearing shield. A bent shield creates immediate drag and lets debris into the bearing. The truck axle is a better-shaped tool for the job.
Do I need to remove bearings to clean them?
Not necessarily. You can perform a basic surface clean and relube without removal. However, for a deep clean that removes ingrained grit and old grease, removing the bearings is necessary. This allows you to pop off the shields and clean the ball bearings and races directly, which is the core of any deep cleaning process.
What is the bearing spacer for?
The spacer is a small aluminum tube that sits between the two bearings inside the wheel. It keeps the bearings perfectly parallel under load when the axle nut is tightened. This prevents the inner races from being squeezed together, which causes friction and slows the wheel. Some bearings, like Zealous and Atlas Blackouts, have spacers built in.
Before You Go
One rule cuts through the disagreement on axle nut tightness: if your wheels don’t have bearing spacers, tighten the nut until the wheel just stops spinning, then back it off a half-turn. That half-turn is the margin between a locked bearing and a free-spinning one. It’s a tactile adjustment you’ll feel in the wrench before you ever see it on the road.
If you only take away one thing, let it be the 45-degree angle. That specific mechanical move, prying sideways, not just pulling, is what separates a clean removal from a broken part. Everything else, from the vinegar soak to the spacer debate, comes from that basic mechanical advantage.
And if you’re ever unsure, the foundational what are longboard bearings guide explains why this small part demands such specific care.