How to Ride a Longboard: Step-by-Step Beginner Guide
This post contains affiliate links. As an Amazon Associate, we earn from qualifying purchases.
Learning to ride a longboard requires mastering four connected skills: finding a stable stance, pushing efficiently, turning with control, and stopping reliably. A drop-through or drop-down deck with softer 70mm+ wheels and RKP trucks offers the most stable platform for beginners. Before your first push, a certified helmet is essential, and wrist guards are highly recommended.
That stability from the right gear buys you time to learn. The gap between standing still on carpet and rolling on pavement is where most new riders quit, not because it’s impossible, but because they skip the drills that build confidence before speed. A key part of this is learning how to ride a longboard.
What follows is a seven-step sequence for how to ride a longboard, built from official safety guidelines and technical coaching manuals, that turns shaky first attempts into smooth, controlled rides. It includes a daily practice plan, the real cause of speed wobbles, and the one pre-ride check that prevents most mechanical failures.
Key Takeaways
- Your first board should be a drop-through or drop-down deck with softer, larger wheels (70mm+) for stability and a smooth ride over cracks.
- Foot braking is your primary stop; practice it on flat ground until you can stop on command before attempting any slope.
- Speed wobbles start when weight shifts back; bend your knees and shift weight forward to regain control, and slightly tighten your trucks if they persist.
- Wrist guards are critical for beginners who instinctively catch falls with their hands, according to both the CPSC and Longboard Bible.
- Never ride faster than you can reliably stop; this single rule prevents the majority of serious beginner injuries.
The 60-Second Pre-Ride Safety Check
Before every session, spend one minute on this checklist. A loose truck or a cracked deck isn’t just a nuisance, it’s a failure point that shows up at speed, not while you’re pushing in a parking lot.
Before you start: A helmet must fit snugly with the chin strap fastened and sit level on your head, not tilted back. The CPSC recommends wearing a helmet designed for skateboarding (hard shell with foam interior). Wrist guards are especially important for beginners.
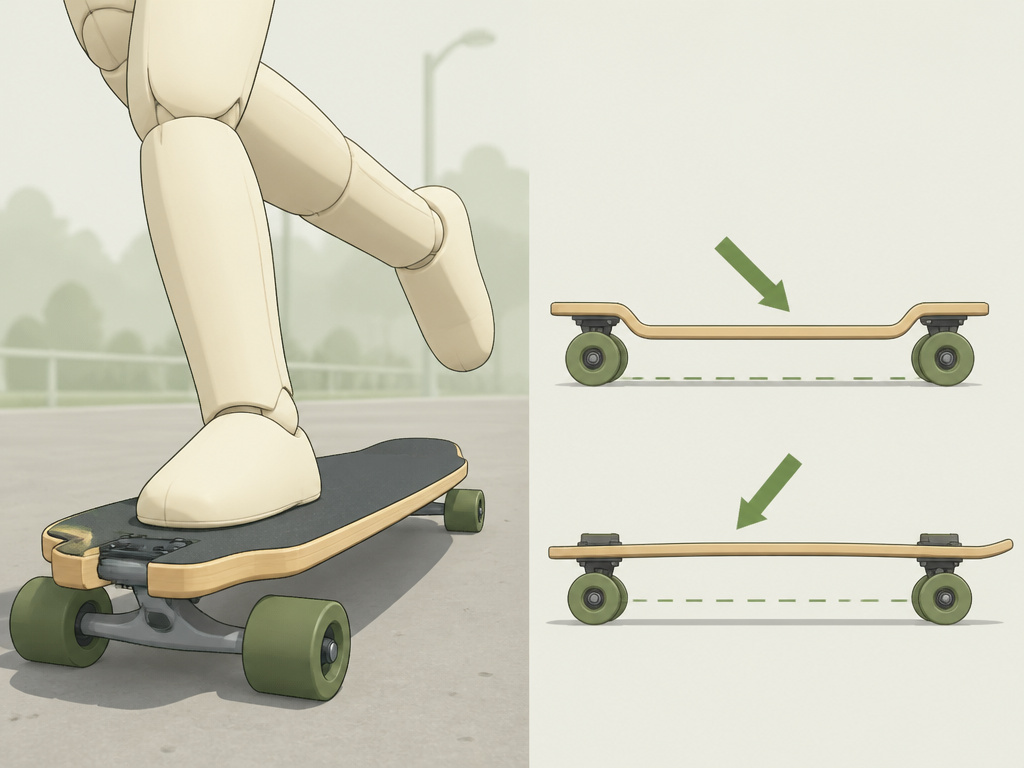
First, inspect the deck. Look for cracks or delamination, especially around the truck mounts. All mounting bolts should be present and tight, a missing bolt can let a truck shift under pressure. Next, check the trucks. Ensure they’re facing the correct direction and firmly attached. Squeeze the bushings; they shouldn’t be split or badly deformed. Give each wheel a spin. It should rotate freely without rubbing against the deck or truck hanger. Finally, test for wheelbite. Lean the board hard to each side through its full turning range. If any wheel touches the deck, you need riser pads or tighter trucks, wheelbite locks a wheel instantly and will throw you.
Where this goes sideways: Skipping the wheelbite check. On your first deep carve, a touching wheel acts as a sudden brake. The board stops; you keep going over the front. It happens fast.
Step 1: Find Your Stance and Foot Placement
Don’t overthink regular versus goofy. Your natural inclination is usually right. Step onto the board without rolling a few times. If you consistently put your left foot forward, you’re regular. Right foot forward is goofy. If both feel equally awkward, that’s normal, your brain is new at this.
On the board, keep your feet roughly shoulder-width apart, positioned near the front and rear truck bolts. Keep your knees softly bent and your weight centered. Avoid locking your knees or gripping the deck tightly with your toes; tension travels up your legs and kills balance. When you’re ready to push, your front foot should point more toward the nose of the board. Once your back foot is onboard after a push, you’ll rotate your front foot sideways into a comfortable, stable riding position across the deck.
Common mistake: Assuming your skating stance matches your handedness. Plenty of right-handed people ride goofy. Test both on carpet before committing.
Step 2: Build Balance Before Speed
This is the secret most guides gloss over. Pushing before you can balance on the board is like trying to sprint before you can stand. It leads to the frantic, wobbly “baby deer” stage that makes people quit.
First drill: Static balance. Place your board where it can’t roll, on grass, carpet, or with a wheel lodged in a pavement crack. Just stand on it. Get used to the feeling of the deck under your feet, bend your knees slightly, relax your shoulders, and look up. Do this to get used to the feeling of the deck under your feet. You’re teaching your body that this position is normal. Second drill: One-foot balance. This is the single most effective exercise for both pushing and braking. Stand on the board with your front foot only. Hover your back foot beside the board, keep your core tight and knees soft, and hold for 5–10 seconds. Reset and repeat. If you can do this comfortably, shifting weight to push or tap a foot brake becomes intuitive.
I’ve seen this common mistake more times than I can count. Riders try to learn pushing while still balancing on their pushing foot. Your front leg is the pillar. All your weight must be on it the moment your back foot leaves the ground to push.
Step 3: Pushing Technique and Posture
Now you can add motion. The sequence is simple but easy to get wrong: Front foot on the board near the front bolts, angled slightly forward. Shift your weight onto that front leg. Your back foot pushes lightly, don’t stomp. Place your back foot on the board. Once rolling, rotate your front foot sideways for stability.
Your posture dictates control. Knees stay soft and bent. Hips should be slightly lowered. Keep your chest relaxed and your eyes looking where you’re going, not at your feet. Your weight should be slightly forward, not leaning back. Arms stay loose for balance, not held out stiffly. This posture is your foundation for everything that comes next, from how to push faster on a longboard to managing slopes.
| Pushing Error | What It Looks/Sounds Like | The Fix |
|---|---|---|
| Weight on back foot | Board wobbles side-to-side after each push; rider struggles to get back foot on. | Practice one-foot balance. Consciously think “front leg is a post” before pushing. |
| Stomping the push | A loud slap with each push; rider loses momentum quickly and tires out. | Push lightly and glide. Focus on smooth, sustained contact, not power. |
| Looking down | Rider’s shoulders hunch; board drifts off course because torso isn’t aligned. | Pick a visual target ahead and keep looking at it. |
What most people get wrong: They try to learn pushing and how to stop on a longboard as separate skills. They’re two sides of the same coin, both require you to balance on your front foot while the rear foot interacts with the ground. Drill them together.
Step 4: Turning and Carving Basics
Longboards turn when pressure through the deck compresses the truck bushings. It’s a lean, not a twist. Toeside turn: apply gentle pressure toward your toes. Heelside turn: apply gentle pressure toward your heels.
Carving is just linking these turns into gentle S-shaped paths. It’s your first tool for speed control because it increases friction and bleeds off momentum naturally. Start wide and slow on a flat, open area. Only tighten your turns when your balance is stable and you can foot brake if needed. The Longboard Bible emphasizes a pressure-based turning method, while some other guides suggest lifting the nose to turn if trucks are extremely tight.
Pro tip: Look where you want to go. Your head leads your shoulders, your shoulders lead your hips, and your hips lead the board. If you stare at a crack in the pavement, you’ll probably hit it.
Truck tuning for beginners: If the board feels too twitchy and unstable, tighten the kingpin nut a quarter-turn, then test again. If it’s too stiff to turn smoothly, loosen it slightly. Make small adjustments. One full crank can make a stable board unrideable or a turny board dangerously loose. The goal is progressive steering, not a binary on/off switch.
Step 5: Stopping Is Your Most Important Skill
Stopping confidently is the gatekeeper to every other part of longboarding. If you can’t stop, you can’t control your speed, which means you can’t safely cruise on a longboard or try gentle hills.
Foot braking is the fundamental method. On flat ground, practice supporting all your weight on your front leg while your rear foot hovers beside the board. Then, skim the sole of your rear shoe lightly against the pavement, heel-first, and increase pressure gradually. Keep your eyes ahead and your weight forward. Never stamp the foot down, that’s a surefire way to trip and fall. Carving can help manage speed on a gentle, open slope, but it is not an emergency brake. Sliding is an advanced technique that requires slide gloves and separate practice. The Longboard Bible advises beginners to avoid hills.
The part nobody mentions: Foot braking will destroy the sole of your shoe. It’s not a maybe. Use a dedicated pair of skate shoes with a flat, grippy sole for learning, and accept that they are consumable safety equipment.
Speed Wobbles: What They Are and How to Prevent Them
Speed wobbles are rapid, uncontrollable side-to-side oscillations of the trucks. They feel like the board is trying to shake you off, and they can throw you in seconds. Understanding them is the best prevention.
The Longboard Bible lists the five most common causes: going faster than your current skill level, weight too far back on the deck, trucks too loose for your setup, stiff legs (locked knees), and rough or uneven pavement. The CPSC notes that longer boards increase stability and boards with wider hangers give riders greater control, and that keeping hardware tightened properly improves stability at higher speeds. However, the Longboard Bible cautions against over-tightening, which can make steering inconsistent.
What to do if wobbles start: Don’t panic and lean back, that worsens it. Get lower by bending your knees deeply. Shift your weight slightly forward over your front truck. Slow down with controlled foot braking if possible. If you can’t brake safely, try to reduce speed gradually by carving wider, gentler turns, no sharp, panic swerves.
| Symptom | Likely Cause | Immediate Action | Long-Term Fix |
|---|---|---|---|
| Wobbles start at a speed beyond your control | Trucks too loose for current speed/weight | Bend knees, shift weight forward, attempt light brake | Slightly tighten trucks (1/4 turn), test |
| Wobbles only on rough pavement | Stiff legs absorbing no shock | Get low, relax legs, let knees act as suspension | Softer wheels, practice relaxed stance |
| Sudden violent wobble after a bump | Weight was already too far back | Fight urge to lean back; crouch and center weight | Drill stance with weight forward; check for loose hardware |
Choosing and Setting Up Your First Longboard
Your first board should match your goal. For most beginners, that goal is simply learning to ride comfortably and safely.
Best beginner styles:
- Cruising/Commuting: The most common starting point. Look for drop-through or drop-down deck mounts. These sit lower to the ground, making pushing and foot braking easier and boosting stability.
- All-Around Progression: A top-mount deck with stable trucks offers more responsiveness for learning carves and slides later, but it has a taller feel.
Beginner-friendly specs cheat sheet:
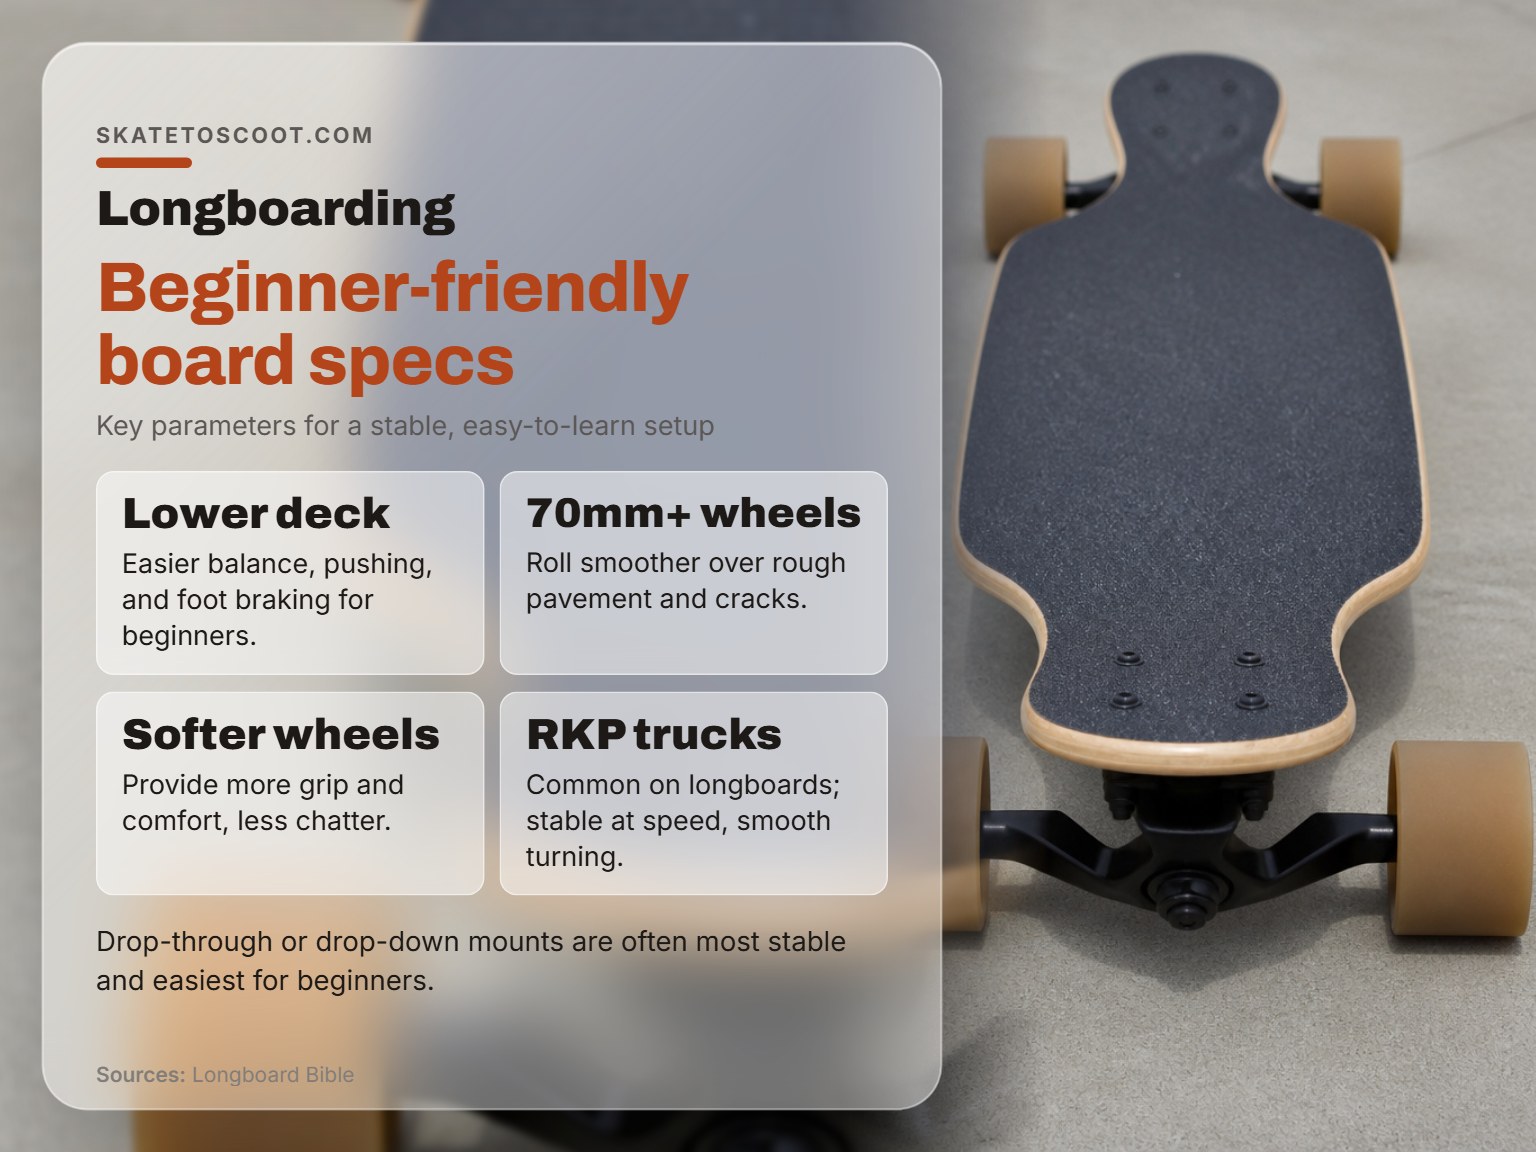
- Deck: Lower deck height = easier pushing and braking. Wider deck = more room for foot placement.
- Trucks: RKP (Reverse Kingpin) trucks are standard on longboards and provide smooth, stable turning. TKP (Traditional Kingpin) trucks are snappier, more common on skateboards and mini-cruisers.
- Wheels: Softer wheels provide more grip and comfort. Larger wheels (70mm+) roll smoother over rough pavement and cracks.
- Bearings: Don’t obsess over upgrades initially. If the board barely rolls on smooth ground, then consider a bearing swap.
The process of how to choose a longboard involves more than specs, but starting with these parameters narrows the field to manageable, confidence-building options.
Your First Week: A 7-Day Practice Plan
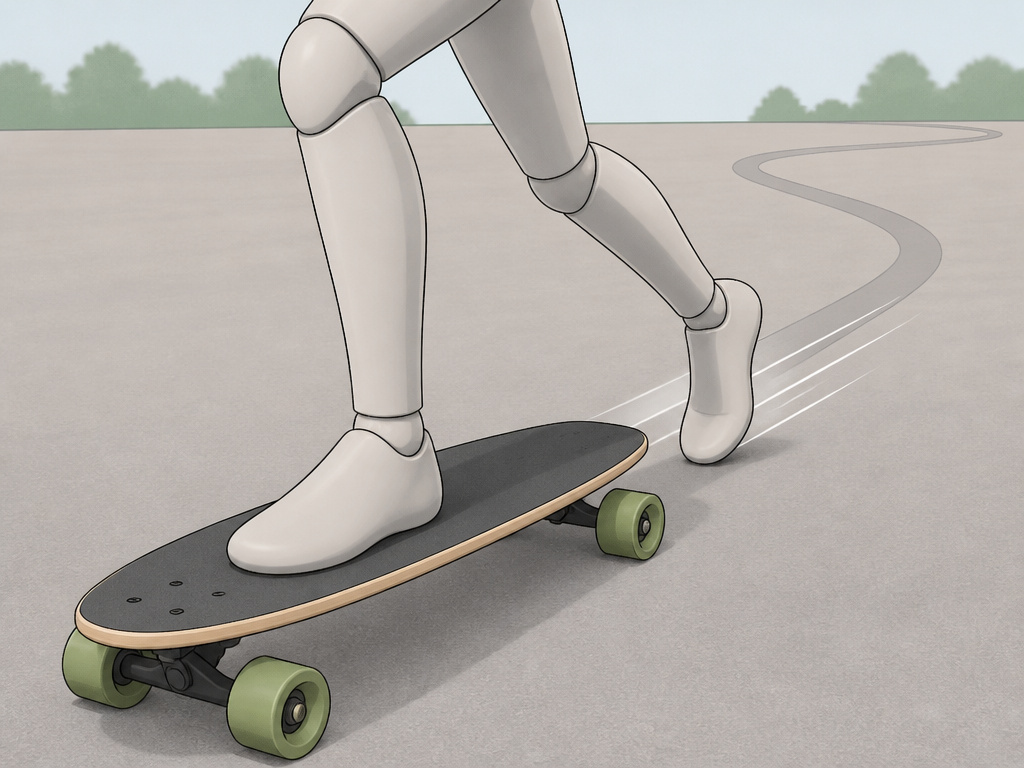
Knowing the steps is one thing. Linking them together without overwhelm is another. This daily plan, sourced from the Longboard Bible, builds skills sequentially.
Day 1: Stance and static balance. Practice stepping on and off the board on grass or carpet. No rolling.
Day 2: One-foot balance and slow rolling. Find a slight decline on smooth pavement (or a gentle push) and just coast to feel the motion.
Day 3: Pushing basics and controlled stops. Focus on one or two clean pushes, getting your back foot on, and then stepping off smoothly.
Day 4: Foot braking drills. From a slow roll, practice the touch-and-lift motion, progressing to a full, gradual stop.
Day 5: Turning basics. On a wide, flat area, practice wide heelside and toeside arcs. Then link two into a gentle “S” carve.
Day 6: Combine the skills. Push twice, carve a gentle “S”, foot brake to a stop. Repeat.
Day 7: Slight incline practice. Only if your foot braking from Day 4 is consistent and reliable. Pick a very mild, traffic-free slope with a flat runout at the bottom. Start halfway down, not at the top.
This structured approach to how to ride a longboard prevents the common rush to hills that ends in fear or injury. It turns practice into measurable longboarding progression.
What safety gear do I need for longboarding?
A helmet is essential. It should be designed for skateboarding, fit snugly with the chin strap fastened, and sit level on your head, not tilted back. Wrist guards are especially important for beginners, as they protect against common falls. Knee and elbow pads are optional, but they can speed up your learning because you’ll fear falling less. This gear is your first layer of defense, allowing you to practice with more confidence.
How do I fall safely off a longboard?
Try to fall forward or to the side, not backward. Don’t lock your arms straight out to catch yourself, as this is a common cause of wrist injuries. At low speeds, simply stepping off the board and running it out is often the safest move. If you do go down, aim to roll with the momentum rather than bracing stiffly against it. Practicing these reactions in a safe, open area can make them instinctive when you need them most.
Frequently Asked Questions
Is it easy to ride a longboard?
You can learn the basic motions, stance, pushing, turning, in a few sessions. Achieving confident control, especially stopping, takes longer. A stable beginner board and a flat practice area make the initial learning curve much gentler than on a standard skateboard.
How do I know if I’m regular or goofy?
Step onto the board several times without thinking about it. Whichever foot naturally goes forward most often is your front foot. Left foot forward is regular; right foot forward is goofy. If you’re still unsure, try both while holding a wall or railing for support.
What’s the easiest type of longboard for a beginner?
Generally, a drop-through or drop-down longboard is easiest. These designs place the deck closer to the ground, lowering your center of gravity. This makes balancing, pushing, and foot braking feel more stable from day one.
Can a beginner use a longboard on the street?
Only if the street is quiet, smooth, and you can stop reliably. Otherwise, start in an empty parking lot, on a smooth bike path, or a tennis court. The CPSC skateboarding safety fact sheet explicitly warns riders to stay clear of moving vehicles and to inspect their riding terrain for hazards like rocks and debris.
Why does my longboard feel shaky?
The most common reasons are speed beyond your comfort level, your weight being too far back on the deck, and trucks that are too loose for your current setup. Slow down, consciously shift your hips forward, and consider a slight quarter-turn tighten of the kingpin nuts.
Is longboarding easier than skateboarding?
For cruising and commuting, yes. Longboards are typically more stable, have smoother-rolling wheels, and are designed for comfortable riding over distance. Standard skateboards are built for tricks and quick turns, which can feel twitchy to a new rider. Your safety, however, always comes from your control, terrain choice, and stopping ability.
Before You Go
One threshold decides your entire next step: if you cannot foot brake to a complete stop on flat ground three times in a row without thinking, stay on the flat. Everything else, carving, gentle slopes, how to turn on a longboard with style, builds from that single, automatic skill.
Most instructors won’t tell you this, but I’d rather see a rider spend a whole week mastering a slow, controlled stop than watch them nervously ride a mild hill they can’t exit. That braking confidence is what turns a scary wobble into a manageable correction, and a long walk back up a hill into just another part of the ride. Now go try it.
