How to Get Better at Longboarding: Step-by-Step
This post contains affiliate links. As an Amazon Associate, we earn from qualifying purchases.
Getting better at longboarding comes down to three connected skills: a balanced, athletic stance that lets you absorb bumps; a reliable, automatic foot brake; and the board setup knowledge to keep your gear from fighting you. Master those, and you control your speed, your line, and your confidence on any pavement.
That control changes everything. It turns a wobbly push across a parking lot into a smooth commute, and it’s the only thing standing between a fun carve and a panic stop. Most guides list the skills but skip the order, they tell you to foot brake, but not how to build up to it when you can barely stand still. They mention speed wobbles, but not the quarter-turn truck adjustment that often fixes them before you ever hit a hill. A key part of how to get better at longboarding is learning these foundational adjustments in the right sequence.
What follows is a coach’s progression path. It’s a seven-day plan that layers stance, balance, pushing, turning, and braking in the only sequence that keeps you safe, directly answering the how to get better at longboarding question. It includes the board checks and setup tweaks most riders learn the hard way, and it grounds every recommendation in manufacturer specs and medical safety standards. By the last section you’ll know not just how to ride, but how to practice.
Key Takeaways
- Foot braking is your most important skill. Dedicate ten minutes every session to it until stopping is automatic before you add speed or hills.
- Lower deck boards (drop-through or drop-down mounts) make balancing and braking easier for beginners, per the Longboard Bible‘s beginner-friendly rule.
- Speed wobbles usually start with a weight shift. If they happen, bend your knees, shift weight slightly forward, and tighten your trucks a quarter-turn if needed.
- A 60-second board check before each ride prevents mechanical failures that undermine skill development, look for wheelbite, loose hardware, and worn bushings.
- Your front leg is your anchor. Whether pushing or braking, most of your weight should stay over that foot; letting it drift back is a common cause of instability like speed wobbles.
The Foundation: Your Stance and Your Board’s Setup
You don’t fight the water to surf. You shouldn’t fight your board to skate. A stable, comfortable stance and a board that’s set up correctly let you focus on skill, not survival.
Your stance is more than regular or goofy. It’s an athletic ready position: feet shoulder-width apart near the truck bolts, knees soft, weight centered over the balls of your feet. Your shoulders should be loose, and your eyes should be looking where you want to go, not at your feet. If your knees are locked or your toes are gripping the deck, you’re already fighting for balance.
Your board either helps or hurts this. The American Academy of Pediatrics notes longboards range from 42 to 80 inches, but for learning, the mount style matters more than length. A drop-through mount, where the trucks pass through the deck, sits you lower to the ground. A drop-down mount drops the deck lower between the trucks. Both, according to the Longboard Bible, make balancing and foot braking easier because they lower your center of gravity. A top-mount board can feel taller and more responsive, which is great later, but it asks more of your balance on day one.
The technical snippet: For beginner longboarding, deck mount style significantly influences stability. Drop-through and drop-down designs lower the rider’s center of gravity relative to the trucks, reducing the effort required for balance and increasing leverage for effective foot braking, as outlined in the Longboard Bible’s beginner guide.
Trucks and wheels are the other half of the equation. Most longboards use RKP (Reverse Kingpin) trucks for stable, smooth turning at speed. Skateboards and some cruisers use TKP (Traditional Kingpin) trucks for a snappier, quicker turn that feels less stable when you’re new. Your wheels also decide your comfort. The Longboard Bible specifies that bigger wheels (70mm and up) roll smoother over rough pavement, and softer wheels provide more grip and absorb chatter from cracks. Harder wheels slide easier, save those for later.
Before you start: A helmet meeting ASTM F1492 or Snell N-94 skateboard standards is non-negotiable, per AAP guidelines. Wrist guards are highly recommended for beginners, who instinctively catch falls with their hands. Practice only on flat, smooth, traffic-free pavement like an empty parking lot.
Your First Three Practice Sessions
Skill builds in layers. Trying to foot brake before you can balance on one foot is like trying to run before you can stand. This three-session sequence on flat ground builds the muscle memory in the right order.
Session 1: Control at Walking Speed. Don’t even push at first. Place your board on grass or in a crack so it won’t roll. Practice stepping on with your front foot, finding your stance, and stepping off. Then, try the one-foot balance drill: stand on the board with only your front foot, hover your back foot beside it, and hold for 5–10 seconds. This is the cheat code for pushing and braking. Once that feels steady, take one light push and coast, focusing on keeping your weight over your front foot. Move on when you can step on and off without grabbing anything for support.
Session 2: Link the Skills. Now you connect movements. Take two or three pushes to get a slow roll. Practice switching from your pushing stance to a parallel, coasting stance. Set up two markers a short distance apart and practice riding a slow figure eight around them. The goal here isn’t sharp turns, but getting used to looking ahead through the turn, not at your feet. Mix in light foot braking, just skimming your rear shoe sole on the ground. End this session when you can complete the figure eight while looking ahead.
Session 3: Route Awareness. Expand your space to a larger flat area. Practice starting, making wide turns, and stopping on command around imaginary hazards. Scan the pavement ahead for cracks or debris. The final test: can you step off the board at a slow, jogging speed smoothly? If you have to jump off, you’re going too fast. Your session is done when you can stop intentionally, every time, before you feel tired.
| Session | Primary Focus | Move On When… |
|---|---|---|
| 1 | Static balance, one-foot drills, coasting | You step on/off without grabbing for balance. |
| 2 | Linking pushes, wide turns, light foot braking | You ride a figure eight looking ahead, not down. |
| 3 | Controlled stops, hazard scanning, dismounts | You stop on command every time before fatigue. |
The Non-Negotiable Skill: How to Foot Brake Reliably
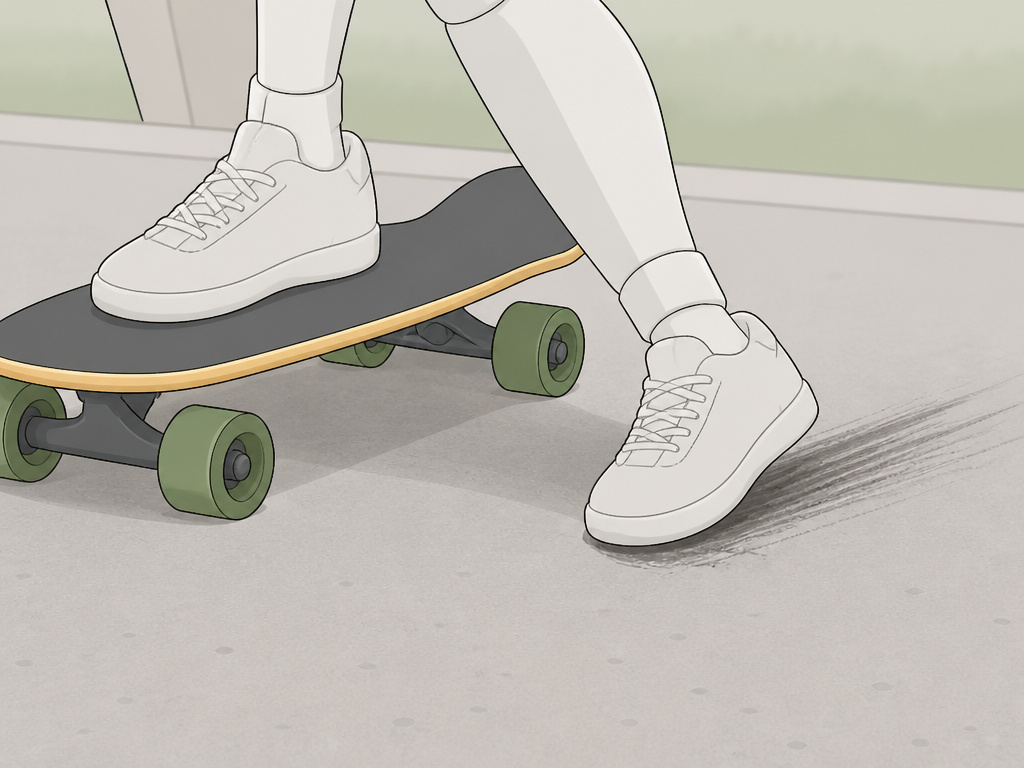
Carving manages speed. Sliding stops it. Foot braking is how you stop. It’s the skill that makes everything else possible, because once you can stop, you’re no longer riding scared.
The mechanics are simple but counterintuitive. Most of your weight stays over your front foot, your anchor. Your rear foot lightly skims the pavement, gradually increasing pressure until you slow to a stop. The instinct is to stamp down or shift weight back. Both cause instability.
The Longboard Bible’s progression is the one I use with every new student. Start stationary: balance on your front foot and practice tapping your rear foot on the ground and lifting it back up. Do this until you don’t twist your torso. Next, at a slow roll, practice the same touch-and-lift, feeling the slight drag. Finally, commit to a full brake, increasing pressure until you stop. A dedicated ten minutes of this drill every single session is the fastest path to confidence.
Common mistake: Skipping braking practice to practice going faster. Fix: dedicate 10 minutes every session to foot braking until it’s automatic. Speed without a stop button is just a longer crash.
Why does this matter so much? The AAP notes longboards can reach speeds over 30 mph. Even a gentle slope can get you moving faster than you can run. If your only stopping plan is to ride into grass or jump off, you’re one unexpected pebble or pedestrian away from a hard lesson. Foot braking is your control valve.
Speed Wobbles: What They Are and How to Prevent Them
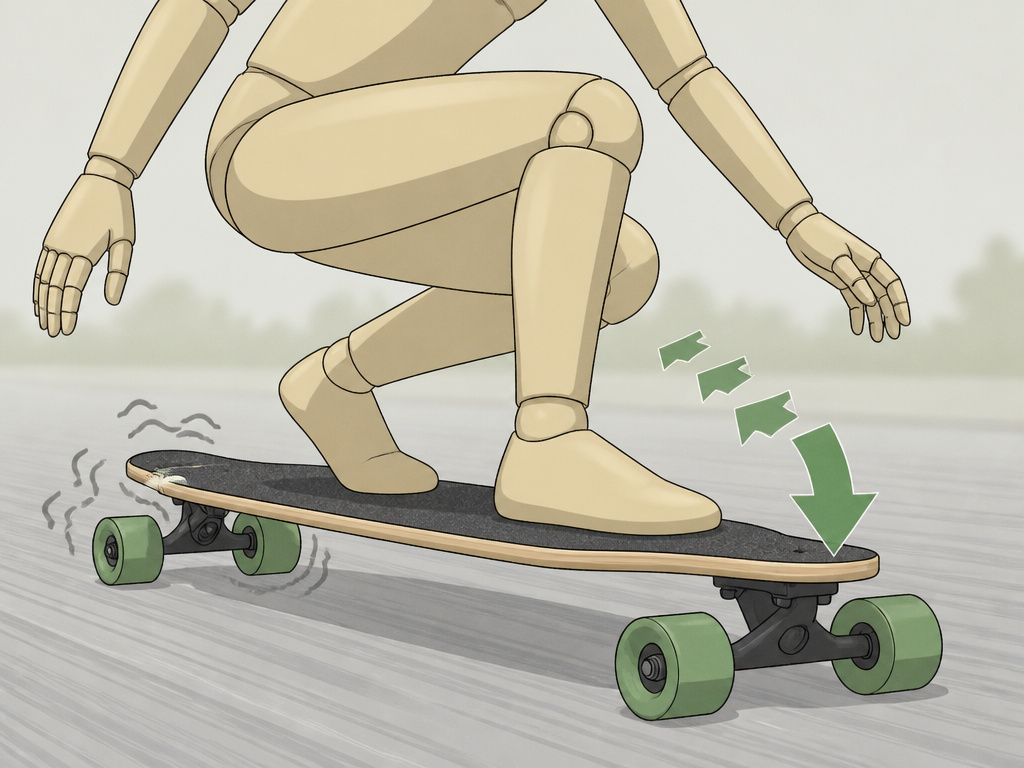
Speed wobbles feel like the board is trying to shake you off. They’re rapid, uncontrolled oscillations of the trucks that start small and can amplify in a second. They’re terrifying, but they’re almost always a feedback loop you started.
The Longboard Bible lists the five most common causes: going faster than your current skill level, weight too far back, trucks too loose for your setup, stiff legs (locked knees), and rough pavement. See the pattern? It’s usually a body position problem amplified by your setup. Your weight drifts back, the front trucks get light, and they start darting side-to-side. Your legs stiffen in panic, which removes any damping from your knees, and the wobbles feed on themselves.
If wobbles start, don’t lean back. That makes it worse. Get lower by bending your knees deeply and shift your weight slightly forward over your front truck. Try to slow down with controlled foot braking if you have room. If you can’t brake, focus on relaxing your legs and riding it out until you naturally slow down.
Where this goes sideways: Overtightening your trucks to try and eliminate all wobble. The Longboard Bible warns that excessive compression can make the setup feel inconsistent and harder to turn smoothly. Small adjustments are key.
For setup, a quarter-turn tighten of the kingpin nut on each truck can add stability. Also check that your bushings aren’t cracked or deformed and that all wheel nuts are snug. These tweaks help, but the real fix is in your stance and speed management. Don’t outride your ability.
Board Maintenance for Performance and Safety
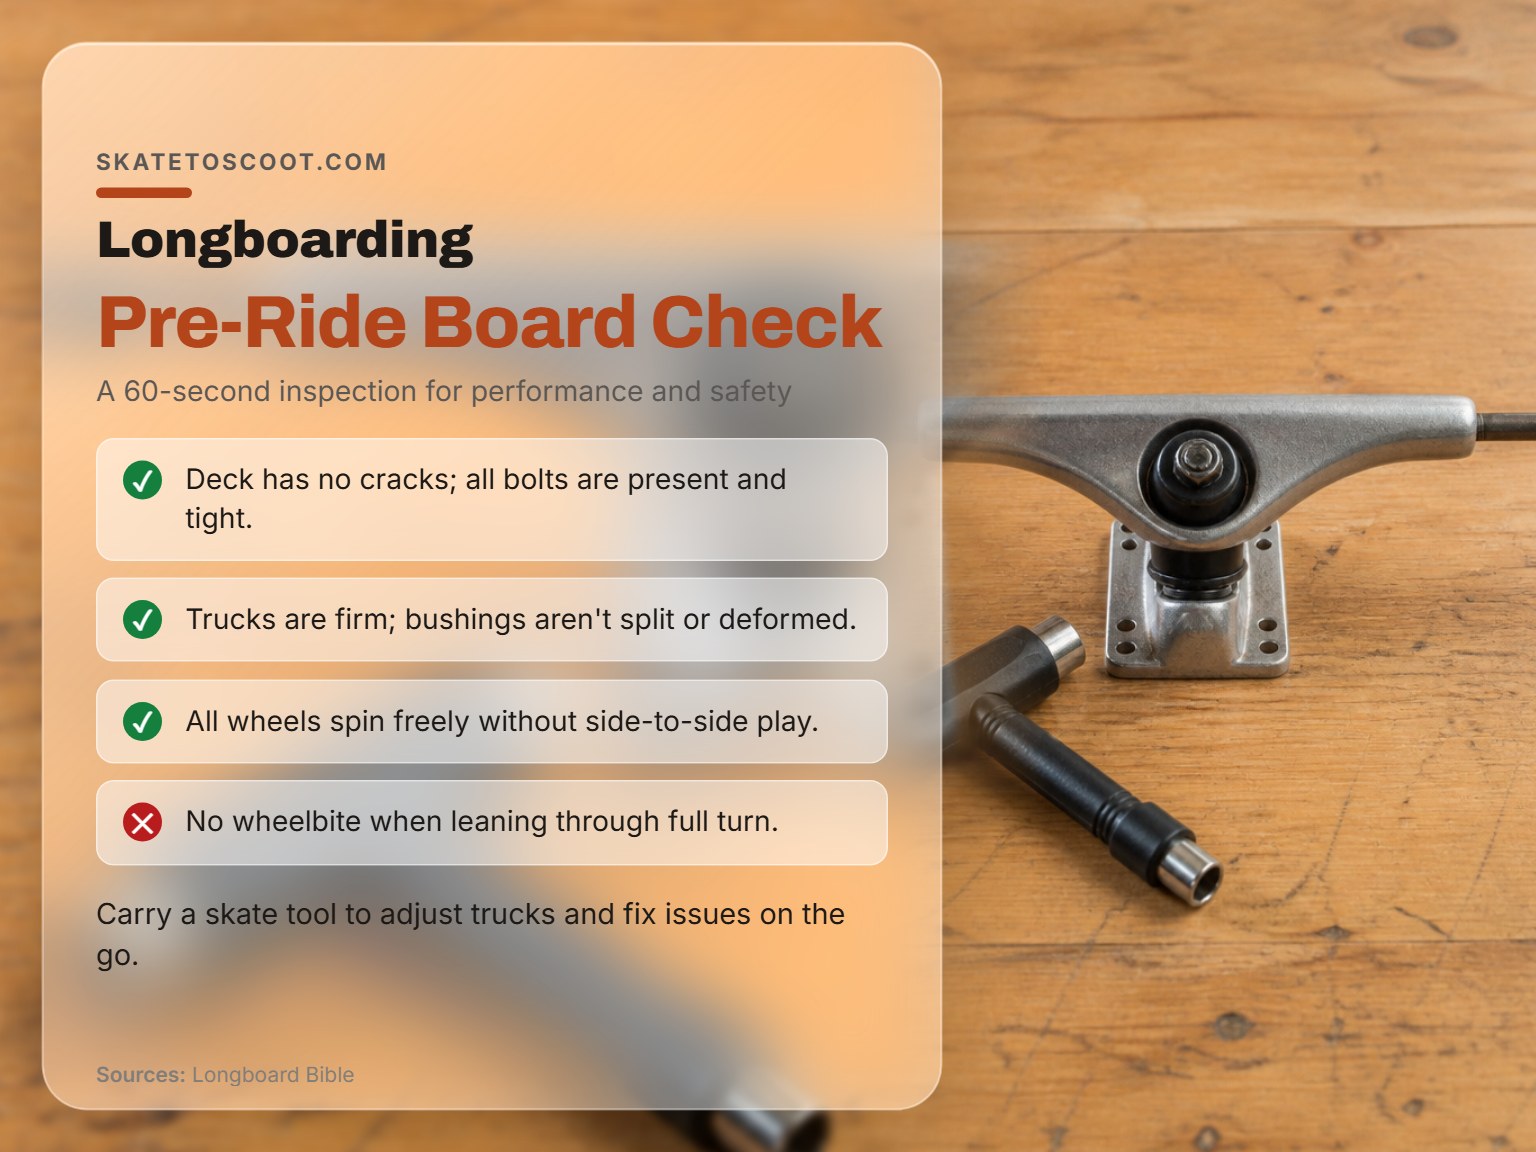
Your board is a mechanical system. Loose bolts, stuck wheels, or deformed bushings don’t just feel bad, they actively prevent you from improving when you compare a how to get better at longboarding plan.
Here’s the checklist:
- Deck: No cracks or delamination. All mounting bolts are present and tight.
- Trucks: They’re facing the right way and firmly attached. The rubber bushings aren’t split or badly deformed.
- Wheels: Every wheel spins freely without rubbing. The axle nuts hold the wheel snug without side-to-side play.
- Wheelbite: Lean the board through its full turning arc. No wheel should touch the deck.
Carrying a skate tool means you’re never stuck with a problem that kills your session. A board that turns harder one way often just has uneven truck tension, a few turns of the skate tool fixes it. This isn’t advanced mechanics; it’s the equivalent of checking your tire pressure. Doing it builds a deeper understanding of how your setup affects your ride, which is the first step toward tuning your board to match your growing skills.
A 7-Day Progression Plan to Structure Your Practice
Motivation fades without structure. This plan breaks the skills from the Longboard Bible into daily sessions you can repeat as needed. It prioritizes braking and control over speed.
| Day | Focus & Drills | Key Goal |
|---|---|---|
| 1 | Stance, static balance on grass, stepping on/off. | Comfort standing on the stationary board. |
| 2 | One-foot balance drill, slow rolling from a single push. | Balance on the front foot alone for 10 seconds. |
| 3 | Pushing basics (front foot anchor, light pushes), controlled stops. | Link 2-3 pushes into a controlled coast. |
| 4 | Foot braking drills: stationary touch-and-lift, then light drag at slow roll. | Consistently slow the board using the rear foot. |
| 5 | Turning basics: wide heelside and toeside arcs, gentle carving. | Steer the board by shifting weight, not twisting. |
| 6 | Combination: push, carve a wide S-turn, foot brake to a stop. Repeat. | Execute a linked sequence without pausing. |
| 7 | Optional: Practice on a very slight incline only if foot braking is consistent on flat ground. | Control speed on a gentle slope with braking. |
The critical rule throughout: never ride faster than you can stop. Day 7 is optional for a reason. If you’re still relying on jumping off or running out, stay on the flat. Hills aren’t a reward; they’re a test you only take when you’re ready.
Picking the Right Longboard for Skill Development
If you’re learning on a board, the right tool helps. If you’re choosing a first board or wondering if yours is holding you back, focus on specs that aid learning, not just style.
For most beginners, the best choice is a board built for cruising or commuting. The Longboard Bible specifically recommends drop-through or drop-down setups for their stability and easier braking. An all-around top-mount can work, but it has a taller feel that demands more balance upfront.
Here’s a quick spec cheat sheet for a beginner-friendly board:
- Lower deck height: Makes pushing and foot braking easier.
- Bigger, softer wheels: Provide a smoother ride over rough pavement.
- Stable trucks (often RKP): Offer smoother, more predictable turning.
- Wider deck: Gives more room for foot placement adjustments.
You don’t need the most expensive model. You need a board that’s safe, intact, and matches these general guidelines. The performance upgrade you need most in the first month isn’t new bearings, it’s consistent practice.
How to fall safely
Falling is part of learning, and doing it correctly prevents serious injury. Always wear a certified helmet and wrist protection, as these are your first line of defense. When you feel a fall coming, try to fall forward or sideways rather than straight backward. Tuck your limbs in and aim to roll with the momentum to disperse the impact. Practicing this on grass can build muscle memory. Remember, the goal is to avoid sticking your arms out stiffly, which can lead to wrist injuries, and to protect your head at all costs.
Warming up
A proper warm-up prepares your body and your board. Start with a simple 60-second board check as advised by the Longboard Bible: check for deck cracks, tight mounting bolts, properly attached trucks, intact bushings, freely spinning wheels, and wheelbite. For your body, begin with static balance drills on the board for a few minutes, then progress to one-foot balance holds. This activates the muscles you’ll use for pushing and turning while getting you comfortable on the deck. A short warm-up like this reduces the risk of injury and improves your control from the first push.
Frequently Asked Questions
How long does it take to learn to longboard?
Most beginners can learn basic pushing and turning in a few sessions. The bigger variable is stopping. Gaining enough balance and control to foot brake confidently often takes a few weeks of consistent, short practices. Rushing this step is how people get hurt.
Should I tighten my trucks when I’m learning?
Often, a little. Slightly tighter trucks can feel more stable for a brand-new rider. The key is “slightly.” The Longboard Bible advises a quarter-turn adjustment, then test, but also cautions that excessive compression can make the setup inconsistent. Do not crank them down so hard you can’t turn smoothly. The goal is a stable platform, not a rigid plank.
What’s the best way to stop on a hill as a beginner?
For beginners, the only safe way is foot braking. Carving can help manage speed if you have wide space, but it is not a reliable stop. Sliding is an advanced technique. If you find yourself on a hill and cannot foot brake to a stop within a predictable distance, you should not be on that hill. Step off early and walk it.
Why does my longboard feel shaky at speed?
This is usually the start of speed wobbles. The most common triggers are weight too far back, stiff legs, and trucks that are too loose for your current speed. Immediately bend your knees, shift weight forward, and gently apply foot brake to slow down. Afterward, consider a slight truck tightening.
Can I learn sliding as a beginner?
No. Sliding is an advanced speed-control technique that requires protective gear like slide gloves and a separate, dedicated practice area. Lush Longboards, a manufacturer, recommends that if you are learning sliding, start with “glove down” slides before attempting any stand-up slides. Master foot braking and confident carving first.
The Bottom Line
Your progression hinges on one measurable threshold: the speed at which you can reliably foot brake to a full stop. If that speed is walking pace, your world is a parking lot. If it’s a slow jog, you can explore gentle bike paths. Earn each increment with focused practice.
The gear is secondary to the skill. A certified helmet and a board in good working order are mandatory, but a $300 setup won’t brake for you. That comes from drilling the one-foot balance and the touch-and-lift until they’re automatic. Trust that process, not the trick.
Finally, know that every skater, at every level, has sessions that feel like backsliding. When that happens, return to the pre-ride checklist. A loose nut or a dragging wheel can subtly undermine your confidence and control. Fix the machine first, then trust that the skill is still there.
