How to Choose Longboard Bushings: Step-by-Step
This post contains affiliate links. As an Amazon Associate, we earn from qualifying purchases.
To choose longboard bushings, match three things: your weight (for durometer), your riding style (for shape), and your truck geometry (for compatibility). Sources provide different starting points: Sabre Trucks recommends 88a-94a for a 145-195 lb rider, while Tactics recommends 85a-90a for 145-175 lbs and 87a-93a for 175-195 lbs. Softer bushings and cone shapes favor carving and cruising; harder bushings and barrel shapes provide stability for downhill and freeride.
That range isn’t a guess. It’s the overlap between two major manufacturer charts. Sabre Trucks puts a 145-195 lb cruiser at 88a-94a. Tactics suggests 85a-90a for the lower half of that range. Your exact spot inside that band depends on speed, truck angle, and whether your deck has flex, which is a key part of how to choose longboard bushings.
What follows is the mechanic’s view: three specs, two hidden interactions, and the one field test that reframes the how to choose longboard bushings question. By the last section, you’ll be able to read any rider’s setup and know exactly which bushing they’re running.
Key Takeaways
- Start with 85a to 94a if you weigh 145-195 lbs; adjust harder for speed, softer for carving.
- Use cone bushings or cone/barrel combos for maximum turn and a lively feel; use double barrels for maximum stability at speed.
- Cup washers dramatically increase lean resistance and reduce slop, while flat washers keep things loose and carvy.
- Deck flex and truck angle directly change bushing performance—a flexy deck needs softer bushings, and low-angle trucks often need harder ones.
- Avoid over-tightening the kingpin nut; if more than two threads are showing and you still need restriction, change your bushing or washer setup instead.
The 85a-94a Starting Point: Your Weight vs. The Charts
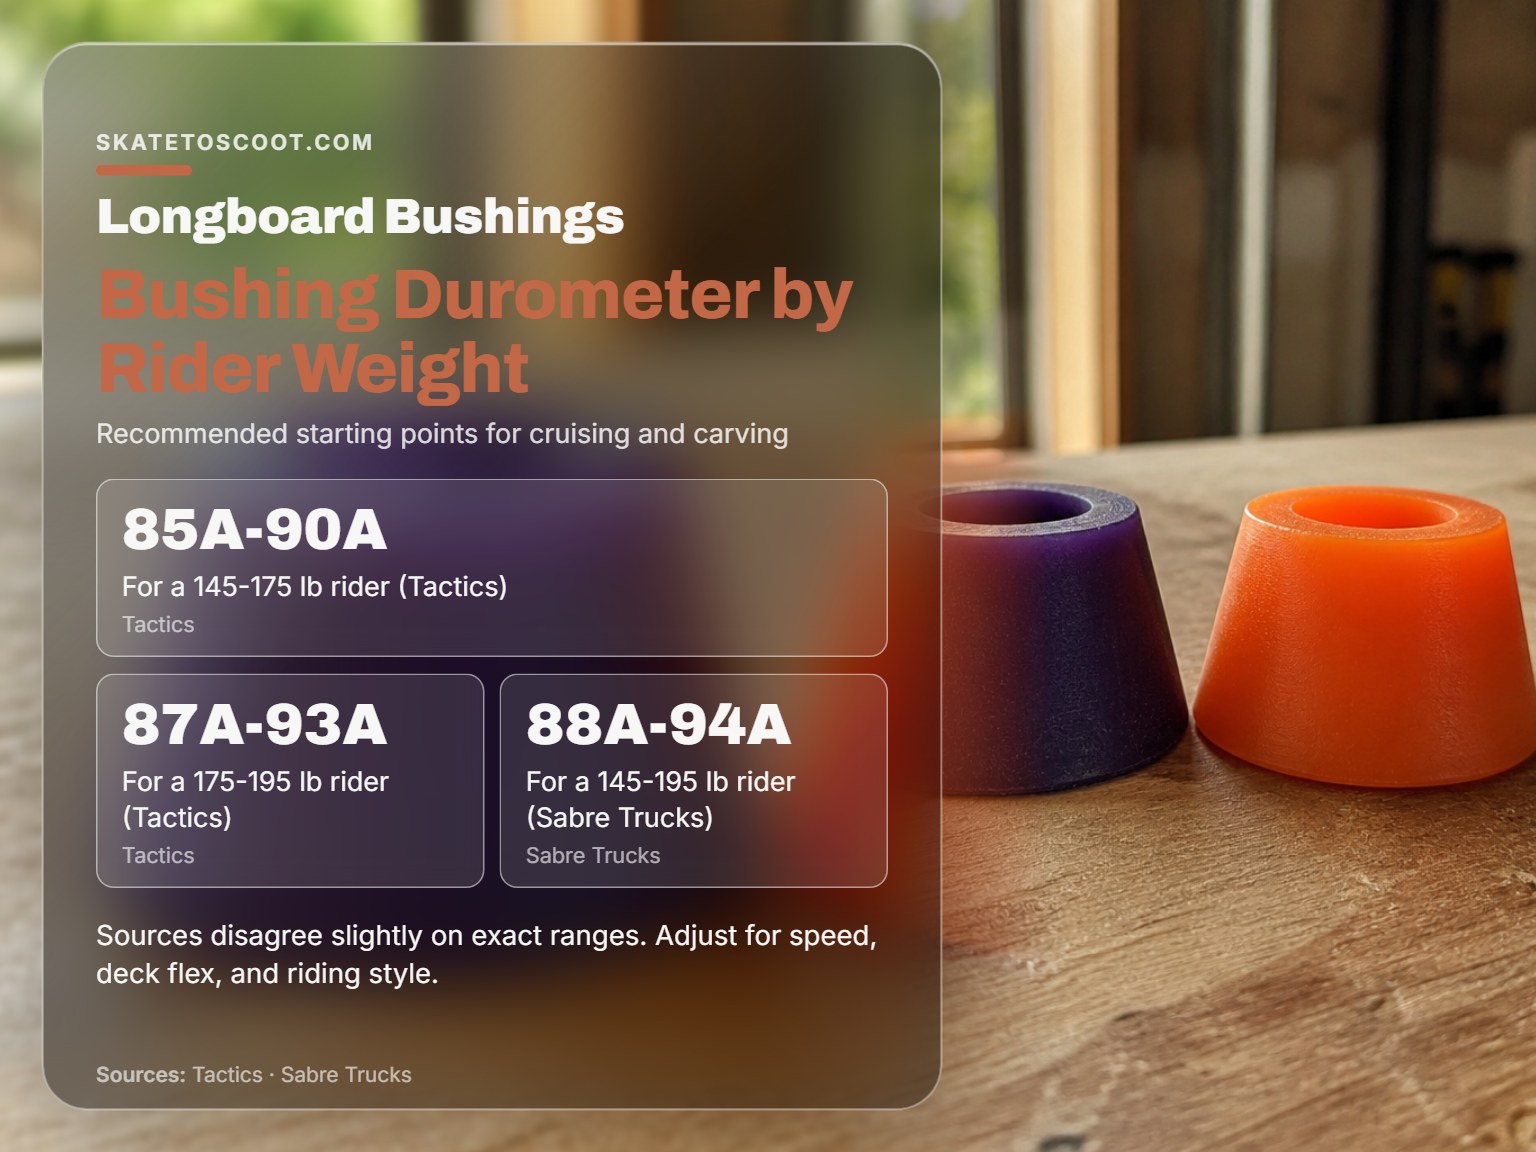
The manufacturer charts from Sabre Trucks and Tactics give us a solid overlap to start from. For a rider between 145 and 195 pounds, common starting points from major sources overlap in the 85a to 94a range.
According to Sabre Trucks, a 145-195 lb rider looking for a cruising or carving setup should start with an 88a to 94a durometer. Tactics refines this slightly, recommending 85a-90a for 145-175 lbs and 87a-93a for 175-195 lbs. This 85a-94a band is your baseline.
The performance of your bushings is also affected by the speed you are riding at. The faster you go, the more responsive your bushings will feel. This is why the charts are just a starting point.
Here’s how to adjust from that baseline:
| If you are… | Then adjust durometer… |
|---|---|
| Carving or commuting at low speed | Softer than the chart. A softer bushing gives a more playful, responsive feel. |
| Riding freeride or downhill | Harder than the chart, or choose a more restrictive barrel shape. |
| On a very flexy deck | Softer to compensate for the deck absorbing some of your lean input. |
| On very low-angle trucks (e.g., 30°) | Harder to prevent wheelbite from the increased leverage. |
The “a” stands for the Shore A scale, which runs from very soft (78a) to very hard (98a). Most longboard bushings live between 78a and 98a. You’ll feel the difference immediately. A soft 78a bushing compresses easily, initiating a turn with little effort. A hard 95a bushing resists that compression, keeping the truck stable under pressure.
I learned this the hard way on a set of reverse kingpin trucks. The stock medium-durometer barrels felt fine pushing around campus, but the first time I pointed the board down a mild hill, the trucks felt vague and nervous. Swapping to harder barrels didn’t just add stability—it added a predictable, progressive lean that told me exactly where the wheels were.
Shapes: From Cones to Barrels (and the Hybrids)
Durometer is the hardness; shape is the architecture. The shape dictates how the urethane deforms under your weight and how much support it gives at the extremes of your lean.
Cone bushings have a conical shape. They offer minimal resistance and are great for turning. This makes them the default choice for carving, cruising, and a lively, surfy feel.
Barrel bushings are cylindrical. They are designed to fill the entire bushing seat to give the rider increased stability. This makes them the go-to for aggressive freeride and downhill riding.
Most riders, and most complete boards, ship with a barrel/cone combo. This is the all-rounder. The barrel usually goes boardside (against the baseplate) for stability, and the cone goes roadside (near the kingpin nut) for easier turn initiation.
One end offers a supportive base that locks into the bushing seat; the other tapers for a wide range of motion.
| Bushing Shape | Best For | Feel & Performance |
|---|---|---|
| Cone | Carving, cruising, maximum turn | Low resistance, easy initiation, lively. |
| Barrel | Downhill, freeride, stability | High resistance, progressive lean, stable at speed. |
| Barrel/Cone Combo | All-around riding | Balanced turn and stability—the most common stock setup. |
| Stepped Cone | Versatile freeride, split-duro-like feel | Supportive base with tapered turn, good for mixed disciplines. |
Your choice of shape can have a more dramatic effect on feel than a modest change in durometer when you compare a how to choose longboard bushings approach. A soft 85a barrel will feel more stable than a hard 90a cone. For fast freeride and downhill speeds, you may want to get a slightly harder bushing durometer than the weight chart suggests or a more restrictive bushing shape.
Washers: The Secret Lever
Washers are at least as important as bushings. I’ll say that again. The washer is the interface between your bushing and the truck, and it changes everything.
You have two main types: flat washers and cup (or curved) washers. A flat washer sits flush, allowing the bushing to deform and spread out freely. This maximizes turn and gives a loose, carvy feel. A cup washer cradles the bushing, capturing it and restricting how much it can deform.
By using a cup washer, you can dramatically increase the amount of resistance that the truck offers as it gets to the end of its lean. This is exactly the moment you’d get wheelbite, so a cup washer is a primary tool in that fight.
The moment you start to go above running speed, you will want to reduce slop as much as possible. Cup washers can help reduce slop. They stop the bushings from moving around too much on the baseplate.
Here’s a quick guide to washer choice:
- For a lively, carvy feel: Use flat washers top and bottom with softer cone bushings.
- To fight wheelbite: A cup washer on the roadside bushing increases end-lean resistance right where the wheel meets the deck.
It’s very important to choose a cup washer that properly captures your bushing. To work properly, you need the bushing to fit nice and snug into the washer. A loose fit defeats the purpose.
Urethane Formulas: APS, KranK, and WFB
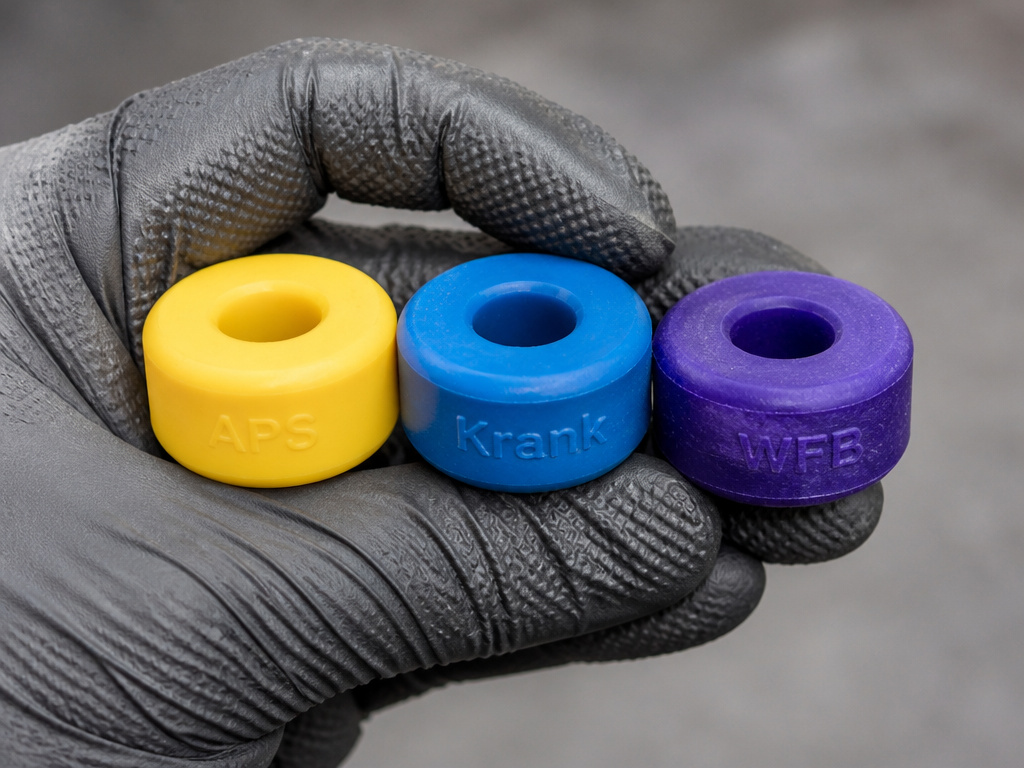
Once you know your durometer and shape, you have another choice: urethane formula. Different manufacturers use different urethane blends that change the bushing’s rebound and feel. RipTide Sports, a major bushing maker, breaks their three main formulas down clearly.
APS (Animated Polymer System) has a high rebound and a lively, bouncy feel. It’s energetic and great for carving, pumping, and a responsive ride.
KranK also has high rebound but is very even and not ‘bouncy’ feeling. It’s stable and hardens noticeably when you tighten the kingpin nut, making it a favorite for dialing in downhill setups where you want predictable progression.
WFB (Wet Formula Bushing) has an internal lubricant and the lowest rebound of the three. It feels very fluid and smooth, almost dampened. It’s a favorite for riders who want a dead, predictable lean without any springiness.
Your choice here is subjective, but it has a mechanical impact. KranK’s hardening-under-compression trait means you can run a slightly softer duro for initiation but still get support at full lean. WFB’s fluid, low-rebound feel can be preferable for a dampened, predictable lean.
The Kingpin Nut: Tightness vs. Preload
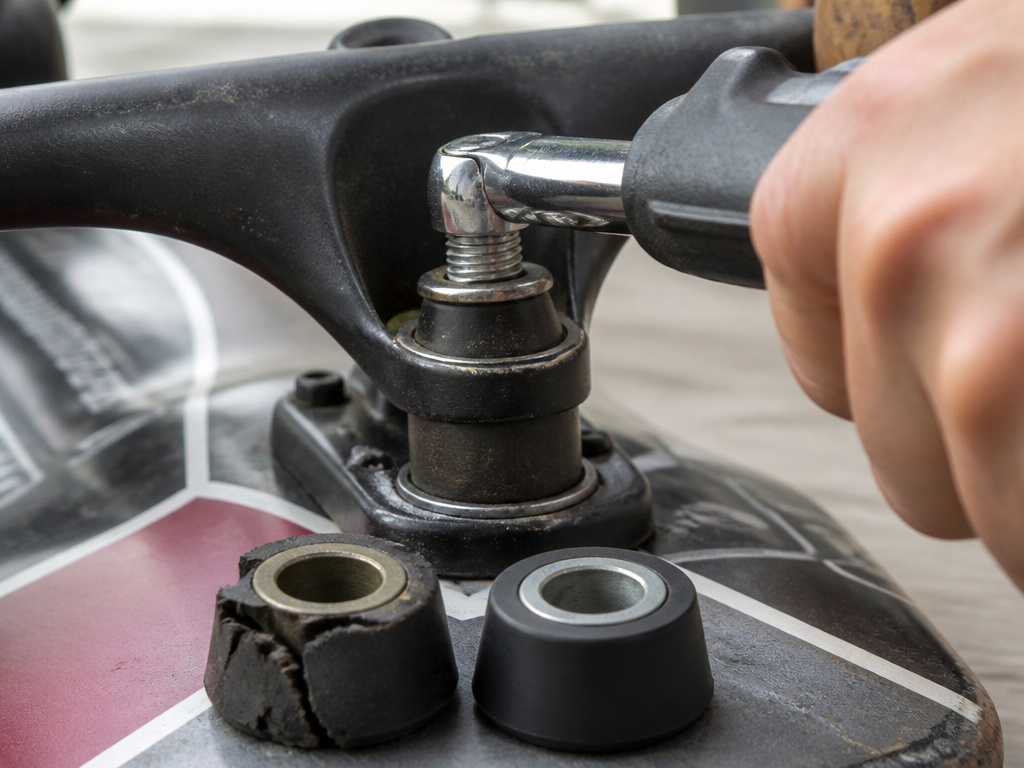
This is where most beginners wreck their bushings and their ride. The kingpin nut is for fine-tuning, not for major adjustments. Like all RKP trucks, they perform best without too much preload on the bushings. In other words—don’t tighten your trucks up too much.
Over-tightened kingpin nuts will result in destroyed bushings and pivot cups, stripped kingpins, altered geometry, and a dull-feeling truck. You’re compressing the urethane past its intended range, removing its ability to spring back.
As a general rule, if you have more than two threads showing on your kingpin and you need to restrict the turn/lean more, you need to change your bushing/washer setup. Not tighten the nut further.
If you want a slightly tighter feel without cranking the nut, you can add a small amount of preload by placing a flat washer under the bottom bushing (between the bushing and the baseplate). This gently compresses the stack before you even start leaning.
Troubleshooting Common Bushing Problems
Your setup should solve problems, not create them. Here are the three most common bushing-related issues and how to fix them with your bushing and washer choice.
Wheelbite: Your wheel touches the deck during a turn, throwing you off. Sabre Trucks lists four tools against wheelbite: tighter kingpin nuts, harder duro bushings, cup washers, and cone bushings. A cup washer on the roadside is often the most elegant fix, as it increases resistance right at the end of the lean without making the truck harder to initiate into a turn.
Speed Wobbles: The board oscillates violently at speed. This is often a geometry and weight distribution issue, but sloppy bushings can contribute. Harder duro bushings and cup washers reduce slop and increase damping. Make sure your bushings aren’t worn out and deformed.
Dead or Mushy Feel: The truck lacks spring-back or feels vague. This can be from over-tightening (which flattens the bushing), from a low-rebound formula like WFB if you wanted bounce, or from a shape that’s too restrictive for your weight. Try a higher-rebound formula like APS or KranK, or check that you’re not using a Kingcone/Eliminator in a low-angle truck where it can feel wallowy.
How to Physically Swap Your Bushings
Knowing what to choose is one thing. Getting them into your truck is another. The process is simple, but there’s one step everyone rushes.
- Gather Tools: You’ll need a skate tool or a ½” wrench for the kingpin nut.
- Remove the Kingpin Nut: Turn it counter-clockwise until it comes off. Keep track of the washers.
- Slide Off the Hanger: Remove the roadside washer and bushing, then slide the hanger off the kingpin. The boardside bushing and washer will now be exposed on the baseplate.
- Replace Bushings and Washers: Swap in your new bushings and washers in the correct orientation. Cones and stepped cones typically have the wide end against the hanger or baseplate.
- Reassemble: Slide the hanger back on, add the roadside bushing and washer, and thread the kingpin nut back on.
- Snug, Don’t Strangle: Finger-tighten the nut, then give it about a quarter to a half turn with the tool. The bushing should have a slight bit of play, not be compressed solid.
Common mistake: Cranking the kingpin nut down to “set” the bushings. This pre-loads them, ruining their designed feel and starting the wear process immediately. Snug is enough.
The whole swap takes five minutes per truck. The first time you do it, go slow. Make sure the pivot cup (the plastic insert in the baseplate where the hanger pivot sits) is in good shape. A cracked or missing pivot cup will make any bushing setup feel terrible.
Recommendations for specific brands
Brands offer distinct formulas that change how your board feels. For example, some brands have a lively, bouncy formula with high rebound. Another formula from the same brand is known for being stable and hardening when tightened, offering the highest rebound but an even, non-bouncy feel. A third formula uses an internal lubricant for a very fluid, smoother feel with the lowest rebound. The most critical factor when ordering from any brand is getting the correct bushing heights for your trucks to function properly.
When to change bushings / signs of wear
Bushings wear out over time. Physical signs include cracking, deformation, or a flattened shape. Performance issues are also clear indicators. If your trucks feel dull, sloppy, or lack their usual return-to-center snap, your bushings might be worn. Over-tightening the kingpin nut can accelerate this damage, leading to destroyed bushings and pivot cups. A good mechanical rule: if you have more than two threads showing on your kingpin and still need to restrict the turn, it’s time to change your bushing or washer setup.
Split durometer setups (different hardness boardside/roadside)
Using different hardness bushings on the boardside and roadside is a common tuning technique. This split setup allows you to fine-tune stability and responsiveness separately. A typical configuration for higher-speed riding uses a double barrel setup with a softer durometer roadside bushing. This provides the support needed for stability at speed while maintaining some lean and turn initiation from the softer roadside component. The concept extends to other shapes, letting you blend the progressive lean of a barrel with the quick initiation of a cone by using different durometers.
Frequently Asked Questions
What bushings should I get for my weight?
For a 145-195 lb rider, start with an 85a to 94a durometer. Use the lower end for carving and commuting, the higher end for stability or if you ride faster. Remember to factor in your deck flex and truck angle—a flexy deck needs softer bushings, and low-angle trucks often need harder ones.
Are barrel or cone bushings better?
Neither is universally better; they serve different purposes. Cone bushings are better for turning, carving, and a lively feel. Barrel bushings are better for stability, downhill, and freeride. Most riders use a barrel/cone combo for an all-around setup.
How tight should my kingpin nut be?
Snug, but not tight. Like all RKP trucks, they perform best without too much preload. Finger-tighten the nut, then give it a quarter to a half turn with a tool. If you see more than two threads on the kingpin and still need more restriction, change your bushing or washer setup instead of tightening further.
What’s the difference between boardside and roadside bushings?
The boardside bushing sits against the baseplate, closest to your deck. It primarily affects the initial lean and turn initiation. The roadside bushing sits near the kingpin nut and affects how the truck behaves as it gets closer to maximum lean. Many riders run a harder duro or more restrictive shape boardside for stability, and a softer duro or cone roadside for turn.
How do I stop wheelbite?
You have four main tools: slightly tightening the kingpin nut, switching to harder duro bushings, using a restrictive bushing shape (like a barrel boardside), or using a cup washer on the roadside bushing. The cup washer is often the most effective because it increases resistance precisely at the end of your lean where wheelbite happens.
The Bottom Line
Start with the 85a-94a band for your weight, pick a barrel/cone combo for all-around riding, and use flat washers. That’s a common baseline that works for many riders and boards. Ride it for a week.
Then, listen to what the board tells you. If it feels vague at speed, try a cup washer or a step up in durometer. If it’s not turning enough for the parking lot carve session, try a cone roadside or a step down in durometer. The aim is a setup that fades from notice under your feet, so you focus on riding instead of steering.
One rule most guides skip: if you’re constantly tightening your kingpin nut to the point of thread-stripping to feel stable, your bushings are too soft. Don’t fight the hardware. Change it. A cheap set of bushings and washers can change how the board feels a great deal.
