How to Go Downhill on a Longboard: The 4-Step Progression
This post contains affiliate links. As an Amazon Associate, we earn from qualifying purchases.
To go downhill on a longboard safely, you need a predictable board setup, a full protective gear kit, and a disciplined progression that builds speed only after you master braking. The core skill is controlled speed management, not just going fast. Downhill riders often hit speeds of 40 to 100 km/h, so your ability to stop dictates your safe starting speed.
That control comes from a sequence of skills you can’t skip. A board marketed for downhill doesn’t make a beginner safe at speed. The progression is fixed: flat-ground braking, then mellow hills, then linking turns, and only then adding slides for high-speed control. Learning how to go downhill on a longboard safely requires mastering each step in this sequence.
What follows is the progression path most guides leave out, the specific gear choices that matter, and the drills that build muscle memory before you ever point a board down a real hill.
Key Takeaways
- Master footbraking first. Your ability to stop in a straight line is the foundation; sliding is for higher speeds you haven’t earned yet.
- Speed dictates gear. At a minimum, you need a single-impact EPS foam helmet (rated for bicycling), leather slide gloves, and a stiff deck with reverse-kingpin trucks for stability.
- Increase speed only after control has caught up. The safe practice speed is always the speed you can consistently brake from without panic.
- Inspect your gear before every session. Check the deck, trucks, wheels, bearings, and hardware. Premium bearings cannot compensate for damaged equipment.
- Scout your hill. Never ride around traffic, wet pavement, debris, blind corners, or unknown road surfaces. Your line choice is your safety plan.
The Non-Negotiables: Gear and Mindset
You can’t out-skill bad gear on a downhill run. The consequences are broken bones or worse.
A downhill deck is normally stiff enough to avoid unwanted flex as loads change through corners. You don’t want flex when your weight shifts through a corner at speed. Top-mount decks give strong control, while drop-decks can make foot braking easier. No mounting style is automatically safer, it’s about the complete geometry.
Before you start: A single-impact EPS foam helmet must be replaced after any impact, as the foam deforms to absorb energy. Leather gloves prevent “hamburger hands” in a fall. Never substitute these for multi-impact skate helmets or bare hands.
Reverse-kingpin trucks are much more stable than traditional trucks for downhill. They are much more stable than traditional trucks, which are far more susceptible to speed wobbles. Your bushings should not be overly firm, as overly firm bushings can restrict needed steering. Overly firm bushings kill the feel you need to carve.
Wheels with high grip increase the consequences of poor line choice. If you slide, keep your board at an angle less than 90 degrees to the road. This allows the wheels to rotate for even wear. A 90-degree slide grinds one side flat fast.
Inspecting your deck, trucks, wheels, bearings, and hardware is the five-point check you do every single session. A loose truck or a dying bearing doesn’t announce itself until you’re mid-wobble.
The 4-Step Progression Path
Most people want to start with the tuck. That’s backward. The first downhill skill is controlled speed management. This path for how to go downhill on a longboard builds control deliberately, adding speed only when the previous step is boring.
Step 1: Footbraking Mastery on Flat Ground
Before you touch a hill, learn to stop. Find a smooth, flat parking lot.
The footbrake isn’t a stomp. You lower your center of gravity, balance on your front foot, and let your back heel kiss the pavement. Gradually apply pressure until you stop. The sound is a steady, gritty hiss, not a screech.
Where this goes sideways: Stomping your foot down throws your balance. You’ll likely fall backward. The goal is a controlled, silent stop from a casual push.
Practice until you can stop from a gentle push, then a harder push, without your upper body wobbling. This skill is your emergency brake for everything that comes next.
Step 2: Carving and Weight Placement on a Mellow Hill
Find a hill with a slight incline and a clear, long runoff. No traffic, no intersections.
Your goal is linking smooth, controlled carves across the road to control your descent. This is where you learn to place your weight over the front truck. As you carve, practice setting up for a speed check without actually sliding.
Step 3: Introducing the Pre-Drift
Once carving feels stable, add a pre-drift. This is a controlled slide to scrub speed before a corner. Start by carving on a longboard hard enough that your wheels briefly lose traction and chirp.
On a mellow hill, approach a gentle bend. As you initiate your carve, kick the board out slightly more to break traction, then immediately hook back up. You only need to scrub a few km/h. The feeling is a quick, controlled sideways jerk, not a long slide.
Common mistake: Trying to slide for too long or at too low a speed. The board will grip unpredictably and high-side you. Scrub off more speed than you think you need at first.
Step 4: Linking Skills on a Graduated Hill
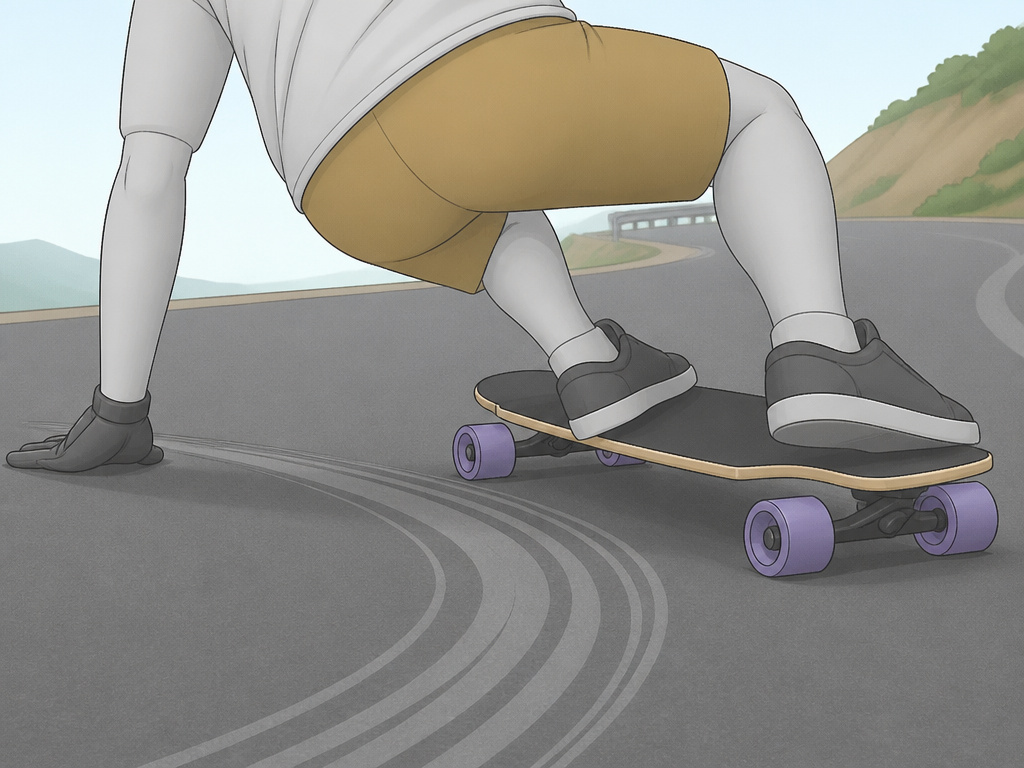
Build your cornering speed gradually, going a bit faster each successful run. Speed should increase only after control has already caught up. This is the entire discipline in one sentence.
Essential Downhill Skills, Broken Down
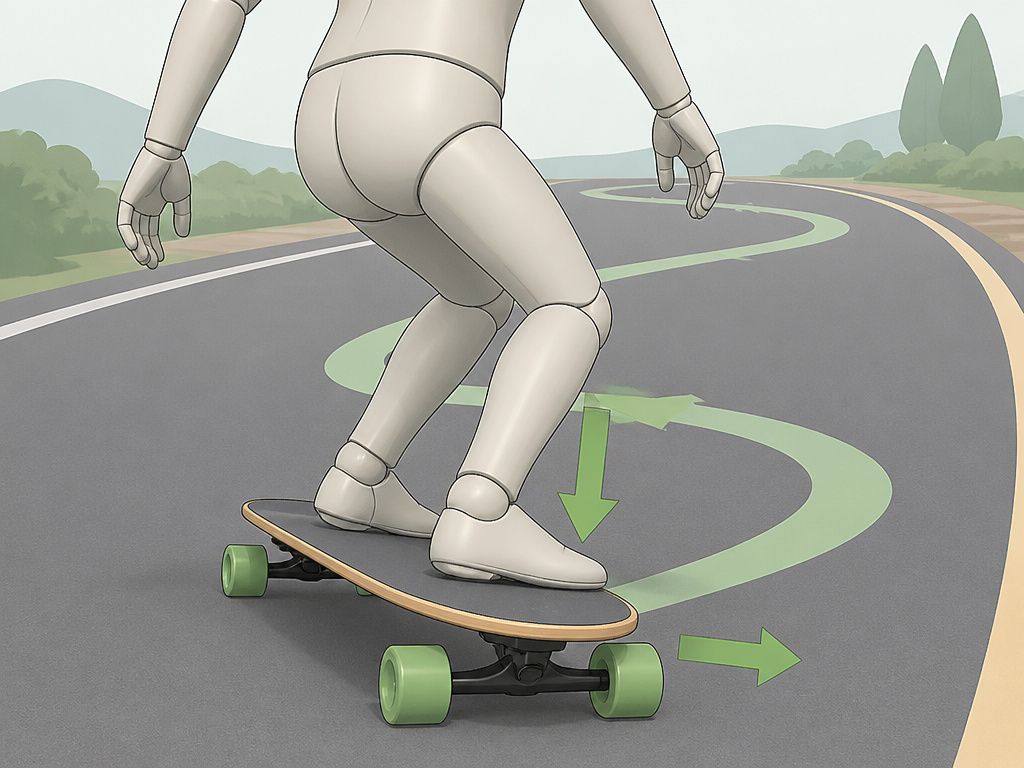
The flashy stuff, big slides, high speeds, rests on a few core techniques. Get these right on small hills.
Footbraking Under Pressure
You learned it on flat ground. Now do it at higher speeds. The principle is identical, but the wind resistance and vibration change everything. Stay low, keep your weight forward, and apply pressure progressively. It’s the safest way to stop without advanced sliding.
The Coleman Slide (Heelside Pendulum)
This is the foundational shutdown slide for most riders. It’s named after Cliff Coleman. You squat down, put your hand down (with a slide glove puck), and kick the board out heelside. It’s predictable and stable because your hand is a pivot point.
For regular-footed riders, slide heelside during left-hand turns. Practice on a mellow slope where you can comfortably slide to a stop in the runoff.
Pre-Drifts and Apex Hunting
This is where downhill becomes a dance with the road. A pre-drift is a slide to set your speed for a corner’s entry. You then “hook up” and carve through the apex, the tightest point of the turn, to maximize exit speed.
Go slower than you think you’ll need to at first when practicing hitting the apex. The goal is smoothness, not heroics.
| Skill | Primary Use | Best Practice Environment |
|---|---|---|
| Footbraking | Emergency stop, fine speed adjustment | Flat ground, then mellow hills |
| Coleman Slide | Controlled, full shutdown slide | Hill with long, clean runoff |
| Pre-Drift | Scrubbing speed before a corner | A familiar hill with a clear bend |
| Carving | Direction changes, managing momentum | Any hill, at controlled speeds |
Managing Fear and Speed Wobbles
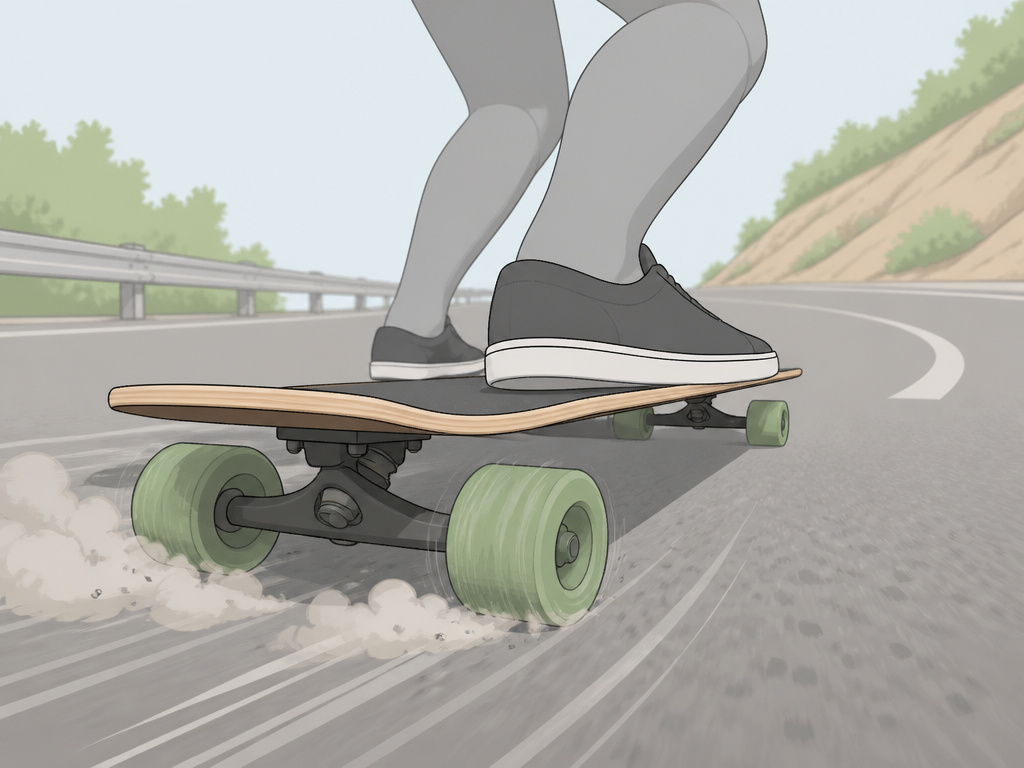
Fear manifests as a backward lean. Your instinct is to get away from the hill rushing at you. That shifts your weight to the rear truck, which is exactly what causes speed wobbles. The rear truck steers, the board oscillates, and if you don’t correct it, you crash.
The Correction: Forward, Not Back
When you feel the first wobble, do the scariest thing: lean forward. Get lower. Push your weight over the front truck. This stabilizes the steering and dampens the oscillation. Adjusting your trucks can help, but the fix is in your stance.
If you need to bail, aim for a roll. Tuck your limbs and try to distribute the impact. Learn from it, but wearing a helmet and gloves means you walk away from that lesson.
The part nobody mentions: Hand-drag carving before every skate session warms you up and gets you comfortable putting your hands down. It’s a simple drill that builds the muscle memory for sliding and falling.
How to Practice Safely and Progress
This is a skill pyramid.
Second, always scout your hill on foot first. Walk it. Look for hazards.
Organized downhill competition has specific requirements governed by World Skate downhill regulations. Organized competition may impose specific requirements; refer to current World Skate downhill regulations.
Your First Downhill Run Checklist:
When in doubt, scrub more speed.
Practicing with Others or Finding a Community
Riding with experienced riders is the fastest way to learn.
Frequently Asked Questions
How fast do longboards go downhill?
Downhill longboarders often hit speeds of 40 to 100 km/h. Beginners should focus on control, not speedometers.
What type of longboard is best for downhill?
Stiff deck with reverse-kingpin trucks is essential. Top-mounts offer control, while drop-decks can lower your center of gravity. No board makes an unskilled rider safe at speed.
How do you avoid speed wobbles?
Prevent wobbles by keeping your weight over the front truck, ensuring your trucks are appropriately tightened (not overtightened), and using a stable setup. If wobbles start, lean forward and get lower to recenter your weight and dampen the oscillation. Practicing how to avoid speed wobbles on mellower hills builds the confidence needed.
Are slides the only way to stop at high speed?
At higher speeds, slides become the primary method for scrubbing speed quickly. However, footbraking is effective for moderate speed control and emergency stops if mastered. Learning to powerslide on a longboard gives you a versatile, glove-free option for speed checks.
Can I learn downhill if I’m a beginner longboarder?
Not directly. A beginner should not start the downhill discipline until foundational riding, braking, and slide skills are dependable. Master pushing, carving, and footbraking on flat ground, then progress through the step-by-step path outlined above. Trying to bomb hills without this foundation is the most common cause of serious injury.
Before You Go
Downhill riding forces a more finely developed skill set than any other longboarding discipline. It’s not about bravery; it’s about a meticulous, patient progression.
The one rule most guides skip: if you can’t consistently stop from a speed, you have no business going faster. Your braking skill is your governor. Everything else, the tuck, the slides, the apex hits, is built on top of that ability to shut it down.
Start with footbraking on flat ground. Move to mellow hills. Add carves, then pre-drifts. Let each step become boring before you add the next. The hill isn’t going anywhere. Earn the speed through control, and you’ll find that the real thrill isn’t in the blur of the scenery, but in the silent confidence of a perfectly executed run. That’s a feeling no crash can match.
