How to Wrap a Longboard Like a Pro: Tips and Techniques
This post contains affiliate links. As an Amazon Associate, we earn from qualifying purchases.
To wrap a longboard like a pro, you match three things: the right material (grip tape for traction or vinyl for art), the right temperature (between 61-77°F for vinyl), and a dry-application technique that works from the center out. The finish depends on post-heat activation and a sharp blade for clean edges.
That temperature range isn’t a suggestion. It’s a printed spec from Avery Dennison for their MPI 1105 film, and ignoring it is why most DIY wraps fail within a season. Learning how to wrap a longboard like a pro tips and techniques includes respecting these limits. The material either won’t stick below 50°F or turns gummy and unworkable above 86°F.
What follows is the difference between a wrap that looks slapped on and one that looks sprayed on, which is the core of how to wrap a longboard like a pro tips and techniques. We will look at the temperature rule you must follow, the two material options (traction or style), the tools you really need, and the step-by-step process to avoid bubbles.
Key Takeaways
- Apply vinyl wraps between 61–77°F (16–25°C) for optimal adhesion; below 50°F (10°C) it won’t stick, above 86°F (30°C) it degrades.
- Use a 50/50 mix of denatured alcohol and water for surface prep to remove oils without damaging the deck’s finish.
- Sources disagree on the start point: Yocaher recommends starting from the center of the deck, while other sources imply a side-to-side method.
- Post-heat the entire wrap with a heat gun after application to activate the adhesive fully for a permanent bond.
- For grip tape, a sharp box cutter and a hard edge (like a screwdriver) are essential for clean trimming and hole-punching.
The Temperature Rule You Can’t Ignore
Most guides tell you to work in a “well-lit area.” That’s nice, but light won’t make your vinyl stick. Temperature will.
Avery Dennison’s technical bulletin for their MPI 1105 Easy Apply RS™ film lays out three hard lines: a minimum application temperature of 10°C (50°F), an optimal range of 16-25°C (61-77°F), and a point where performance degrades above 30°C (86°F). Apply below the minimum and the adhesive never properly bonds. Go above the maximum and the film becomes too soft, stretches unevenly, and loses its ability to be repositioned. Many workspaces can fall outside this temperature window.
Apply vinyl wrap films between 16-25°C (61-77°F) for optimal adhesion and workability. Below 10°C (50°F) the adhesive will not bond correctly, and above 30°C (86°F) the film becomes overly malleable and difficult to handle, leading to wrinkles and premature failure.
Check your forecast. If the ambient temperature is above the optimal range, consider working during a cooler part of the day.
Grip Tape vs. Vinyl Wrap: Choosing Your Weapon
Grip tape is for traction. Vinyl is for art and protection. They require different tools and mindsets.
Grip tape is a gritty, adhesive sheet you walk on. Its job is to lock your feet in place. Yocaher griptape comes in precut sheets measuring 9 inches by 33 inches. It’s a one-shot, permanent application, once it’s down, it’s down. You’ll need a sharp blade and a bit of muscle to trim it.
Vinyl wrap is a thin, printed polymer film. Its job is to look good and protect the deck’s graphic from scratches. Brands like Avery Dennison make specific films like the MPI 1105 Easy Apply RS™. It’s repositionable during application and requires heat to finalize.
| Material | Best For | Key Tool | Permanence |
|---|---|---|---|
| Grip Tape | Traction, board feel, skate function | Sharp box cutter, hard edge for trimming | High – difficult to remove cleanly |
| Vinyl Wrap | Custom graphics, deck protection, style | Heat gun, squeegee, precision knife | Medium – can be removed, but designed to last |
Want a new board feel? Go grip. Want a mural under your feet? Go vinyl (see our guide on how to customize a longboard).
Tools of the Trade (and Common Mistakes)
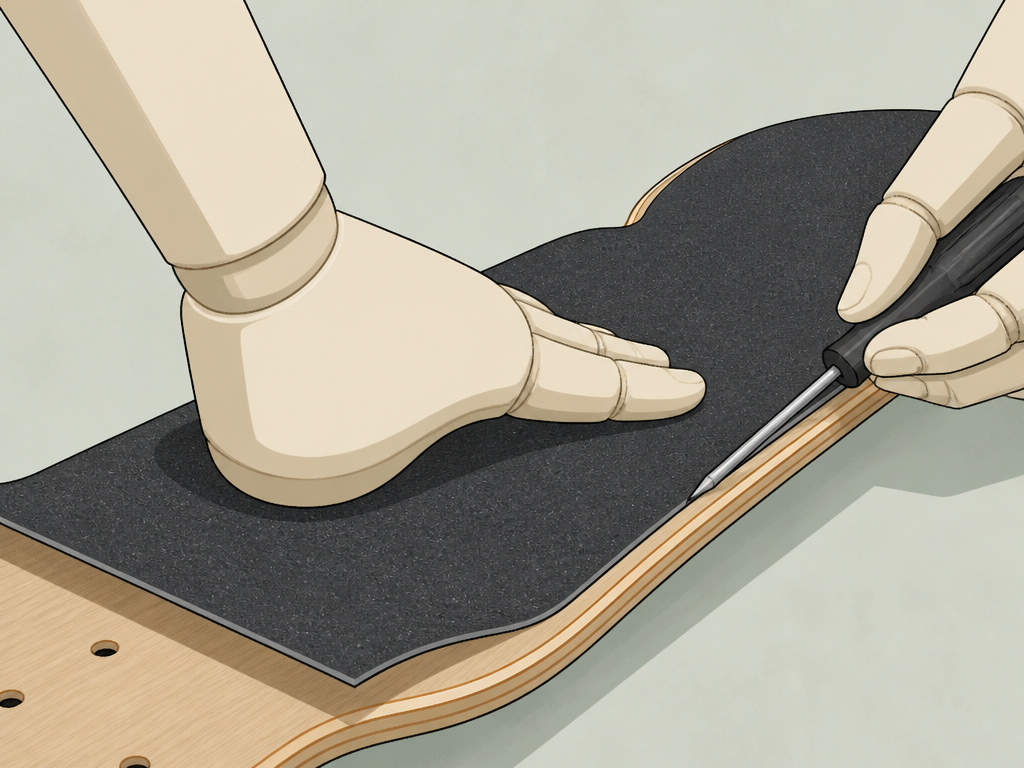
For grip tape, the Yocaher guide lists the essentials: a sharp box cutter or single-edged razor blade for trimming, a hard item like an old truck hanger or screwdriver edge to scratch the trim line, and a truck bolt or similar object to punch the mounting holes. A dull blade doesn’t cut the tape cleanly; it tears it, leaving fuzzy edges that peel up.
For vinyl wrapping, you need a heat gun (not a hair dryer, it doesn’t get hot enough), a soft-edged squeegee (felt-covered is best), and a precision knife with fresh blades. The heat gun makes the vinyl pliable to stretch over contours. The squeegee forces out air bubbles without scratching the film.
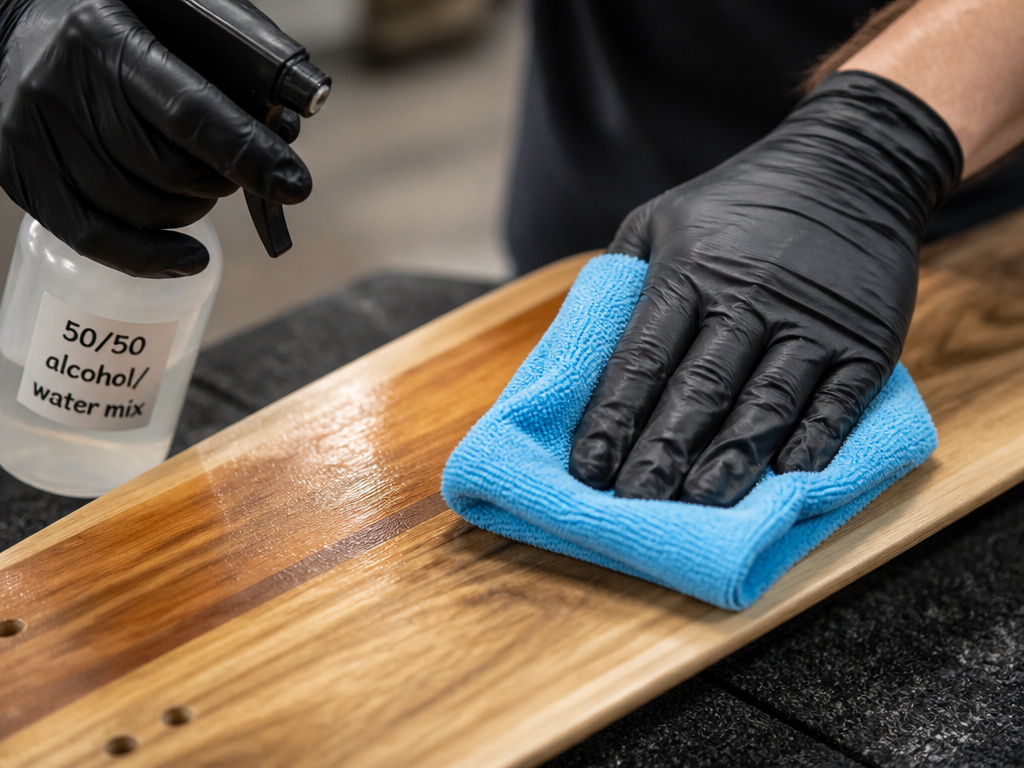
Common mistake: Using a generic cleaner like glass spray. YourBoardWrap.com specifies a 50/50 mixture of denatured or rubbing alcohol mixed with water for surface prep. This mix removes wax and oils without leaving a residue that blocks adhesion. Anything else is a gamble.
The other common error is not having a clean, flat workspace. You’ll be laying down a large, sticky sheet.
Surface Prep: The Make-or-Break First Step
A clean board is a sticky board. This isn’t about wiping off dust; it’s about removing the invisible layer of skin oils, dirt, and factory finish that repels adhesive.
The manufacturer-specific method wins. YourBoardWrap.com says to use that 50/50 alcohol/water mix. Dampen a clean, lint-free cloth (microfiber is perfect) and wipe the entire deck surface thoroughly. Let it dry completely, this takes two minutes, not twenty seconds. Any moisture trapped under the wrap will eventually loosen the adhesive.
Inspect the deck’s edges. The same source notes a critical edge case: “If your board has chips make sure the edge is cut at the chips. If not snow or water can get underneath.” This means if your deck has a gouge near the rail, you’ll need to plan your wrap’s edge to terminate at that chip, not bridge over it. Otherwise, moisture will seep in and lift the material from the inside.
The Pro Application Sequence
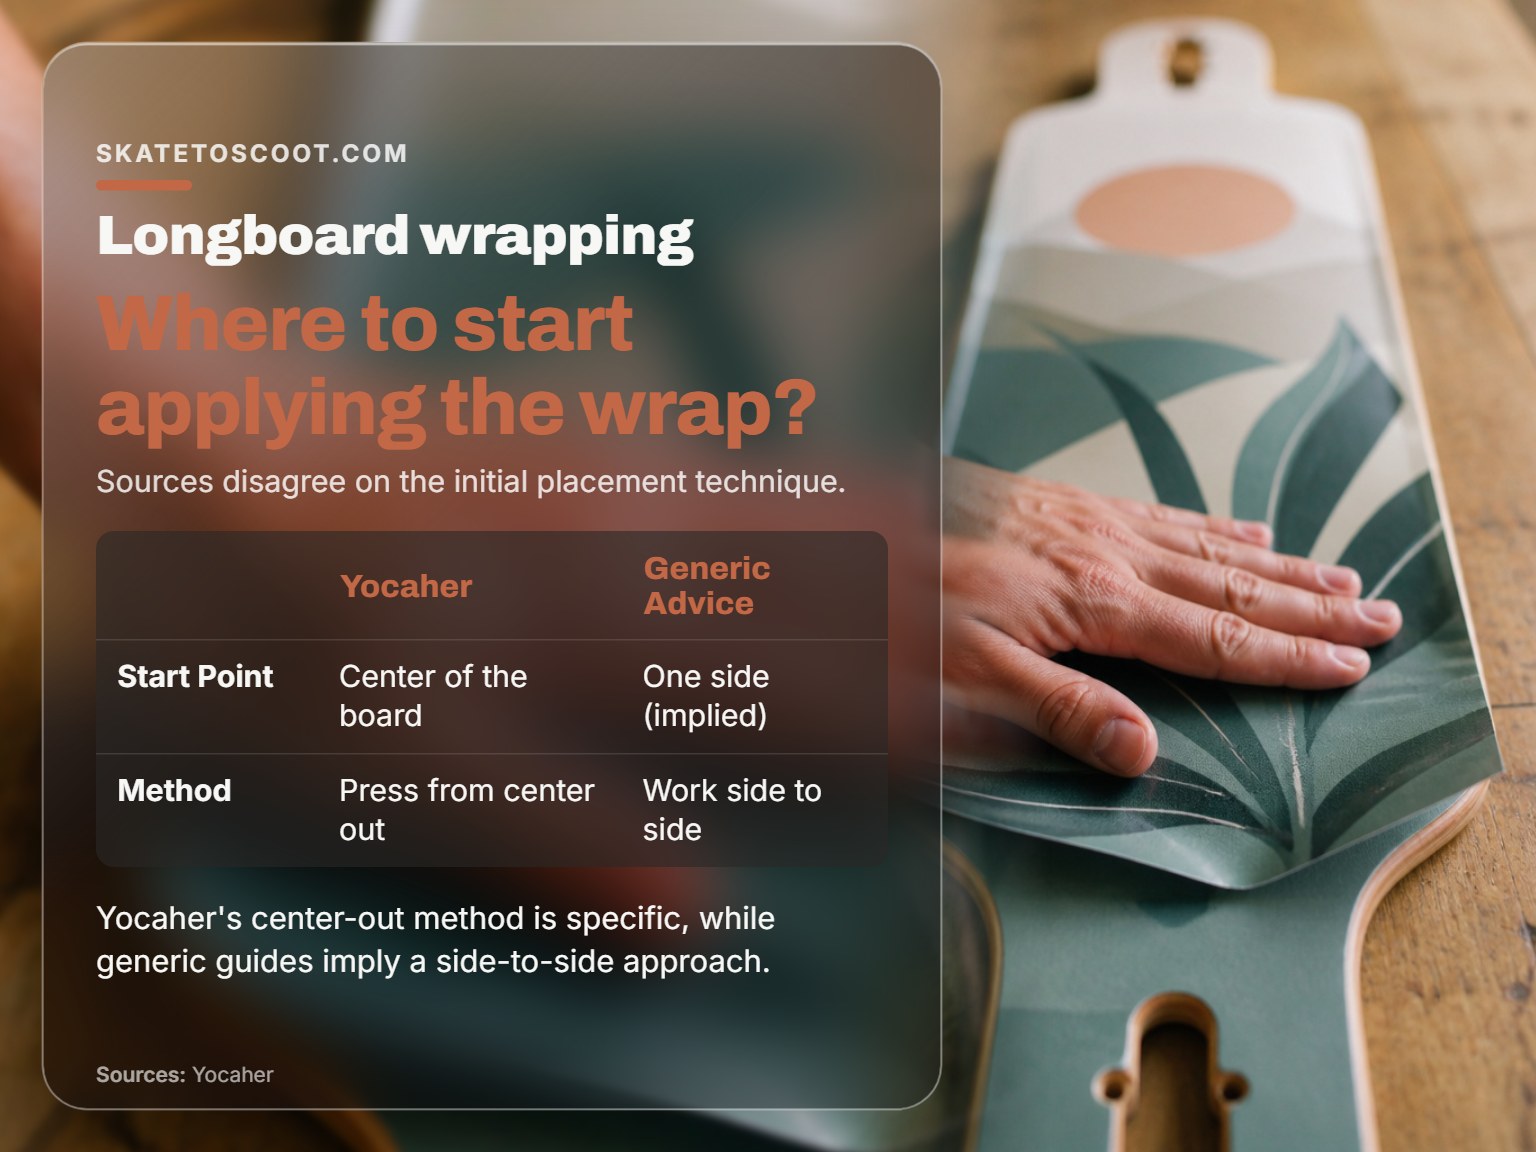
Here’s where the manuals disagree on the start point. The Yocaher grip tape guide says to start from the center. The generic web advice often implies starting at one side and working across. Sources disagree on the start point: Yocaher recommends a center-out method, while other sources imply a side-to-side method.
For Grip Tape:
- Peel the backing, hover the sheet over your board.
- Lower the center of the tape onto the center of the deck.
- Press down evenly with your hands, working from the middle out towards the nose and tail.
- As the Yocaher guide says, “press into the concave and the spoon on the nose and the tail.” Use the heel of your hand to mold the tape into every curve.
- Once it’s fully seated, use your hard edge (screwdriver) to scribe a deep line along the deck’s edge.
- Use your sharp box cutter to trim along that scribed line. Hold the blade at a shallow angle.
- Use a truck bolt to punch through the tape at the mounting holes.
For Vinyl Wrap (Dry Application):
- After your board is clean and dry, peel a few inches of the backing liner.
- Align the vinyl with your deck, then adhere the initial exposed section to the center of the deck.
- Slowly pull the liner away with one hand while using your squeegee in the other hand to press the vinyl down. Work from the center out to one side, then go back to the center and work out to the other side.
- Use the heat gun on a low setting to gently warm the vinyl as you approach tight concave curves or kicktails. This makes it stretch without tearing.
- Once the whole sheet is applied, go over the entire surface again with the squeegee, applying firm pressure.
Where this goes sideways: Starting at one edge and working across. This can trap a large air bubble in the middle that’s impossible to work out, forcing you to lift and re-stick, which stretches and weakens the material.
Dealing with Concaves, Kicktails, and Damage
For adding or accentuating concave with grip tape, Motion Boardshop’s guide is the source. They note you may need extra griptape ranging from 2 inches to a foot or more. You cut strips and stack them, building up the contour. They recommend Vicious Grip for this because its adhesive is very malleable and sticky compared to other grips. The key tip: “make sure some part of every sheet touches the board for extra reassurance.” Every layer needs a direct bond to the deck, not just to the layer below.
For vinyl over these shapes, heat is your only friend. Warm the film until it becomes pliable, you’ll see it relax and become shinier. Then stretch and smooth it over the curve with your squeegee, holding tension until it cools and sets. Trying to force cold vinyl over a sharp concave can cause bridging and adhesion issues.
The Final Act: Heat Activation and Trimming
You’ve smoothed everything out. You’re not done. For vinyl, the adhesive needs a final activation.
Take your heat gun and, keeping it moving, warm the entire wrapped surface. Don’t overheat one spot. You’re aiming to warm the film and the adhesive layer beneath uniformly. This triggers the final chemical bond. After heating, go over the entire surface one more time with your squeegee using firm, even pressure.
Now, trim. For vinyl, use a fresh blade in your precision knife. Cut along the edge of the deck, using the board itself as a guide. For grip tape, you should already have trimmed. Now use the truck bolt to cleanly punch out the mounting holes (a task easier after you disassemble your longboard). Turn the board over and tap the bolt through from the bottom; the tape will cut cleanly around the bolt head.
What safety gear do I need for longboarding?
Before you even step on the board, get your safety gear on. This means a helmet that fits snugly and protective pads for your knees and elbows. A helmet that fits snugly is your most critical piece of gear, designed to protect your head in a fall. Pads shield your joints from scrapes and impacts, giving you more confidence as you learn. Wearing this gear every single time you ride is a required habit. It turns a potentially serious crash into a simple slide on the pavement, letting you walk away ready to try again.
How do I know if I’m regular or goofy footed?
Your stance is how you naturally stand on the board. “Regular” means your left foot is forward, and “goofy” means your right foot leads. There’s no right or wrong, only what feels stable for you. A simple way to find out is to have someone gently push you from behind when you’re not expecting it; the foot you step forward with to catch your balance is likely your front foot. Once you know, keep that foot pointed straight ahead over the trucks, with your back foot ready to push. This stable base is everything for control.
How do I push and balance on a longboard?
Start with your front foot planted firmly on the deck, pointing forward. Bend your front knee slightly and keep your weight over that foot. Lower your back foot to the ground and give a smooth, controlled push, then swing it back up onto the board. The key is to shift your weight back to your front foot as you push, then redistribute your weight evenly once both feet are on the deck. Look ahead, not down at your feet, and keep your shoulders level. Practice this weight transfer on flat, smooth ground until it becomes one fluid motion.
Frequently Asked Questions
Can I use a hair dryer instead of a heat gun?
You can, but you shouldn’t. A hair dryer rarely exceeds 140°F and moves too much air, which can cool the adhesive as you try to heat it. A heat gun delivers concentrated, controllable heat.
How do I remove old grip tape without damaging the deck?
Use the heat gun. Gently warm a section of the old grip tape for 20-30 seconds. This softens the adhesive. Start at a corner and slowly peel it back, keeping the heat aimed at the leading edge. Any remaining adhesive can be removed with a citrus-based cleaner and a plastic scraper.
What if I get a bubble in my vinyl wrap?
Small bubbles can often be worked out with your squeegee towards the nearest edge. For stubborn bubbles, use a precision knife to make a tiny, inconspicuous slit in the bubble. Then use the squeegee to press the air out through the slit.
Is it better to wrap a board with or without the trucks on?
Always wrap with the trucks and wheels removed. You need unfettered access to the entire deck surface, including the mounting holes. Trying to work around hardware guarantees wrinkles and uneven edges at the bolt holes.
How long does a vinyl wrap last on a longboard?
With proper application, a vinyl wrap like Avery Dennison MPI 1105 Easy Apply RS™ film is designed to last. It will eventually fade from UV exposure and wear thin in high-friction areas (like where your foot pivots). Grip tape lasts until it’s worn smooth.
Before You Go
The one spec that reframes all the advice is that 61-77°F window in the how to wrap a longboard like a pro tips and techniques. It turns wrapping from a “whenever” project into a planned one. Check your thermometer, not just your clock.
If your deck has even a single deep chip, plan your wrap edge to cut at that chip. Letting the material bridge over damage is an invitation for moisture and a guaranteed failure point.
And for your first attempt, buy a little extra material. An extra foot of vinyl or a second sheet of grip tape costs less than the frustration of running short mid-application. Start slow, get the surface surgically clean, and let the heat gun do the stretching work.
