How to Fix a Hoverboard That Is Off Balance: Step-by-Step
This post contains affiliate links. As an Amazon Associate, we earn from qualifying purchases.
A hoverboard that’s off balance needs one of three things: a recalibration to reset its sensors, a check for loose internal wires, or a diagnosis of a failing gyroscope or pressure sensor. The fix starts with the simplest step, a model-specific recalibration, before you open anything up.
That sequence is mandatory. Recalibration is the factory reset for the board’s balance logic, and it solves many wobbling or pulling issues. But if the board still shakes after three proper calibration attempts, the problem is physical, a loose wire, a cracked sensor pad, or a failing component. This guide walks you through that exact decision tree, including how to fix a hoverboard that is off balance, with the specific button-hold times and success signals for brands like Jetson, GYROOR, and Denver.
What follows: the universal recalibration steps, the tools you need to open the shell safely, a diagnostic flowchart to pinpoint shaking vs. Pulling, and the one post-repair test you must not skip.
Key Takeaways
- Recalibrate first. The process is brand-specific: hold the power button for 3–5 seconds for most Jetson models, 15 seconds for the Jetson Sphere, 5 seconds for GYROOR, and >10 seconds for the Denver HBO-6610.
- A successful calibration is confirmed by a voice announcement (newer Jetson), three red light flashes (GYROOR), or five light flashes (Denver). If you don’t get the right signal, it didn’t work.
- Opening the shell requires a Phillips #1 screwdriver and a Torx T8 for security screws. Never pull on wiring harnesses, disconnect plugs by their bases.
- If recalibration fails, the likely culprits are loose motor hall-sensor wires or dirty/cracked pressure sensors under the foot pads. A multimeter can test continuity.
- Always perform a one-footed support test after any repair. Hold a wall, place one foot on the board, and power it on. If it tries to throw you, the fix is incomplete.
The Universal Recalibration Procedure (Step-by-Step)
Place the powered-off hoverboard on a perfectly level surface. Hold the power button for the duration specified for your brand, anywhere from 3 to 15 seconds, until you receive the manufacturer’s specific success signal (beeps, light flashes, or a voice announcement). Release the button, power cycle the board, and test.
This is your first and most important step. It resets the gyroscope and accelerometer to a neutral “level” position. The biggest mistake here is timing. You can’t just hold the button “for a few seconds.” The board’s logic board is waiting for a precise, model-specific duration to enter calibration mode, with times ranging from 3 to 15 seconds depending on the brand.
Here’s the breakdown, straight from the manuals.
| Brand / Model | Power Button Hold Time | Successful Calibration Signal |
|---|---|---|
| Jetson (Most Models) | 3–5 seconds | Series of beeps or a tune; models with a built-in Bluetooth speaker will also give a voice announcement: “calibration successful.” |
| Jetson Sphere Hoverboard | 15 seconds | Series of beeps or a tune; if the model has a built-in Bluetooth speaker, it will also give a voice announcement. |
| GYROOR | 5 seconds | Red running/left-turn indicator light flashes three times. |
| Denver HBO-6610 | >10 seconds (until lights flash five times) | Lights flash five times. |
| Hoverzon S & XLS | Use two physical levels on pedals, then follow brand steps | Manual does not specify a confirmation signal. |
The Hoverzon method is the outlier. Its manual insists you use two physical bubble levels or a smartphone app to get both pedals perfectly horizontal before initiating its calibration routine. For everyone else, the table above is your bible.
I’ve seen students force a board through a dozen failed calibrations because they were holding for 5 seconds on a Jetson Sphere that needs 15. The board never enters the right mode. You get frustrated, the board stays broken. Match the time to the model.
Step-by-Step:

- Power down the board completely. All lights must be off.
-
Find a level surface. A kitchen counter or a confirmed-flat floor section works. Don’t guess. 3.
-
Listen for the voice announcement or look for the light pattern. Release the button the moment you hear the voice (Jetson) or see the light pattern (GYROOR, Denver).
- Power cycle. Turn the board off, then back on normally.
- Test gingerly. Hold a wall, place one foot on the board, and power it on. It should stay still, waiting for your input.
If it works, you’re done. If the board still drifts or shakes, repeat the entire calibration sequence up to two more times. The Jetson source notes it can take up to three recalibration attempts to get everything aligned. If three attempts fail, the problem is almost certainly inside the shell.
Opening the Shell: A Safe Internal Inspection
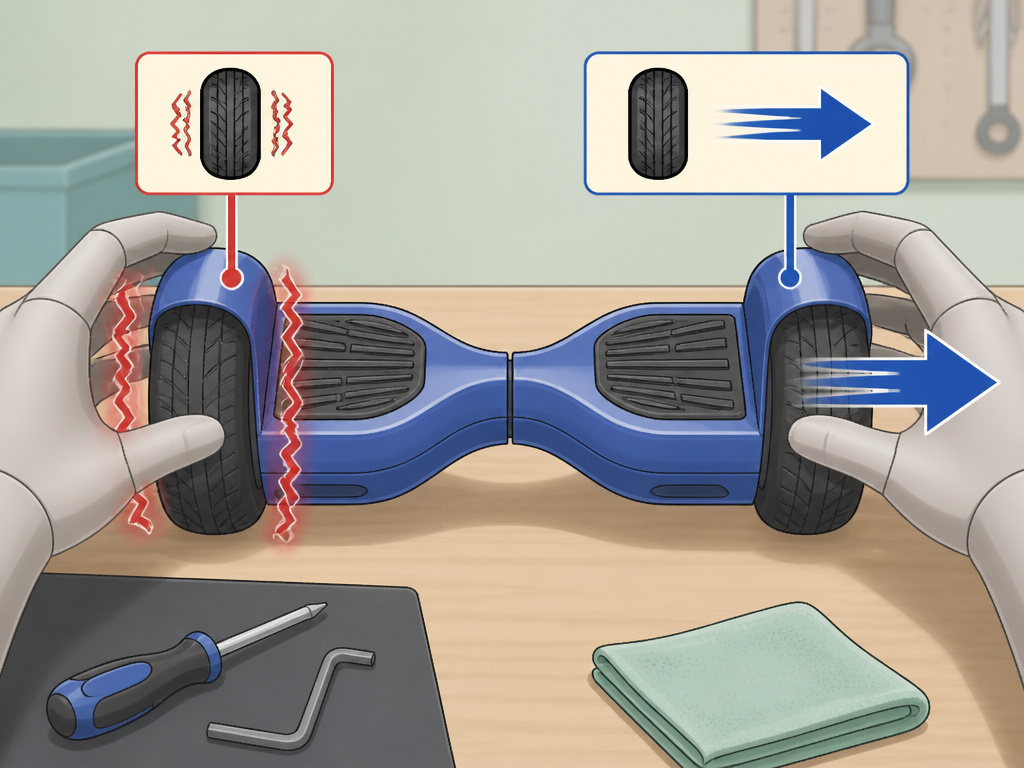
Before you start: Disconnect the battery first. The battery pack connectors carry full current and can spark or short if touched with a tool, risking fire or component damage. Work on a non-conductive surface like wood or cardboard.
You’ll need two tools: a Phillips #1 screwdriver for the main casing screws and a Torx T8 security bit for the smaller, star-shaped screws often found near the wheel axles. A plastic spudger or guitar pick helps pry the shell halves apart without cracking the plastic.
Here’s the safe disassembly sequence I follow every time I crack a board open for a student. It prevents the most common repair disasters.
- Remove all screws. Place them in a magnetic bowl or stick them to a piece of tape in the order they came out. Top-shell screws are often longer than bottom-shell screws.
- Pry the shell. Start at the seam near the wheel arch. Insert the spudger, work it a millimeter, move an inch, and repeat. Go all the way around before trying to separate. Forcing one corner will snap a plastic clip.
- Locate the battery. It’s almost always a large, rectangular pack in the center. Follow the thick red and black wires to a plastic connector.
- Disconnect the battery. Grip the plastic connector body, not the wires, and pull it straight apart. You may need to depress a small tab. This is the single most important safety step. No power, no risk.
- Inspect the wiring. Now you can safely touch everything. The motor wires run from the logic board to each wheel hub. The hall sensor wires are thinner, often bundled with the motor wires. Gently tug on every connection you see.
Look for wires that have pulled taut, connectors that are partially unseated, or any sign of a pinched or frayed cable. A common failure point is where the wiring harness passes through the frame to the motor, it can get pinched and break over time.
Diagnosing Shaking vs. Pulling to One Side
Your board’s specific symptom points to a specific subsystem. Shaking is usually a sensor issue. Pulling is usually a motor or wheel issue.
If your hoverboard is shaking or vibrating:
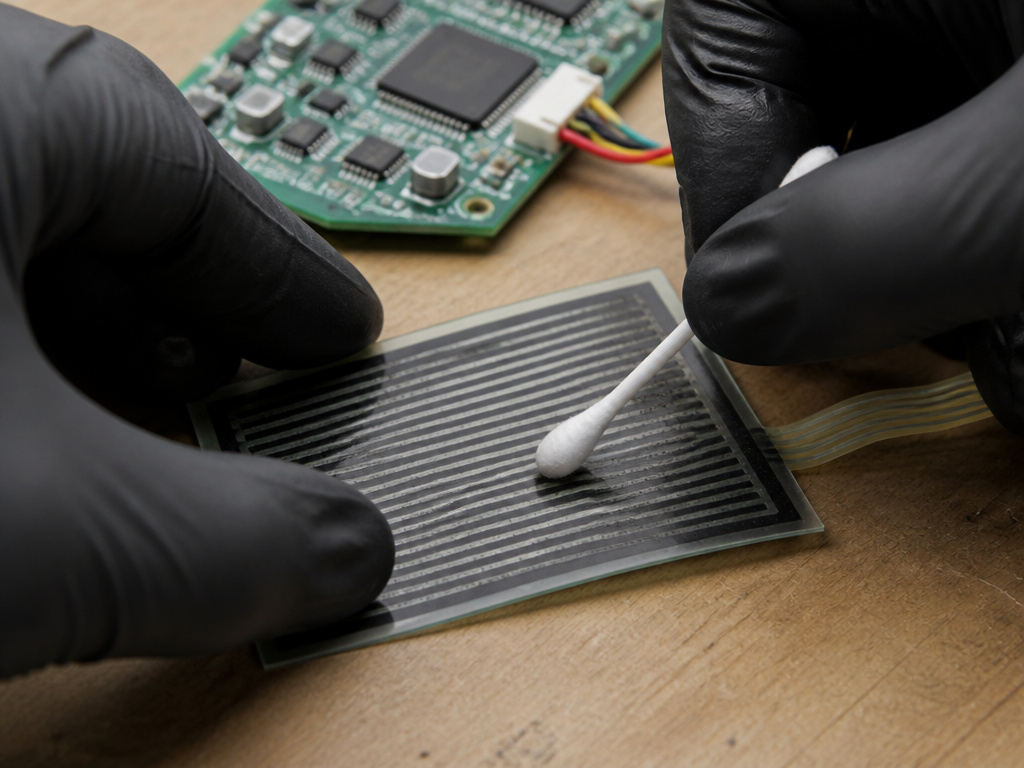
The problem is almost always in the pressure sensor pads under the footplates or the gyroscope on the logic board. Dirt, moisture, or physical cracks can make a sensor send erratic “I’m being pressed” signals to the board, which responds by jittering the motors.
- Fix: Clean the sensor pads with isopropyl alcohol and a cotton swab. Visually inspect them for cracks. If the shaking persists, the gyroscope chip on the logic board may be failing, which typically requires a board replacement.
If your hoverboard is pulling or drifting to one side:
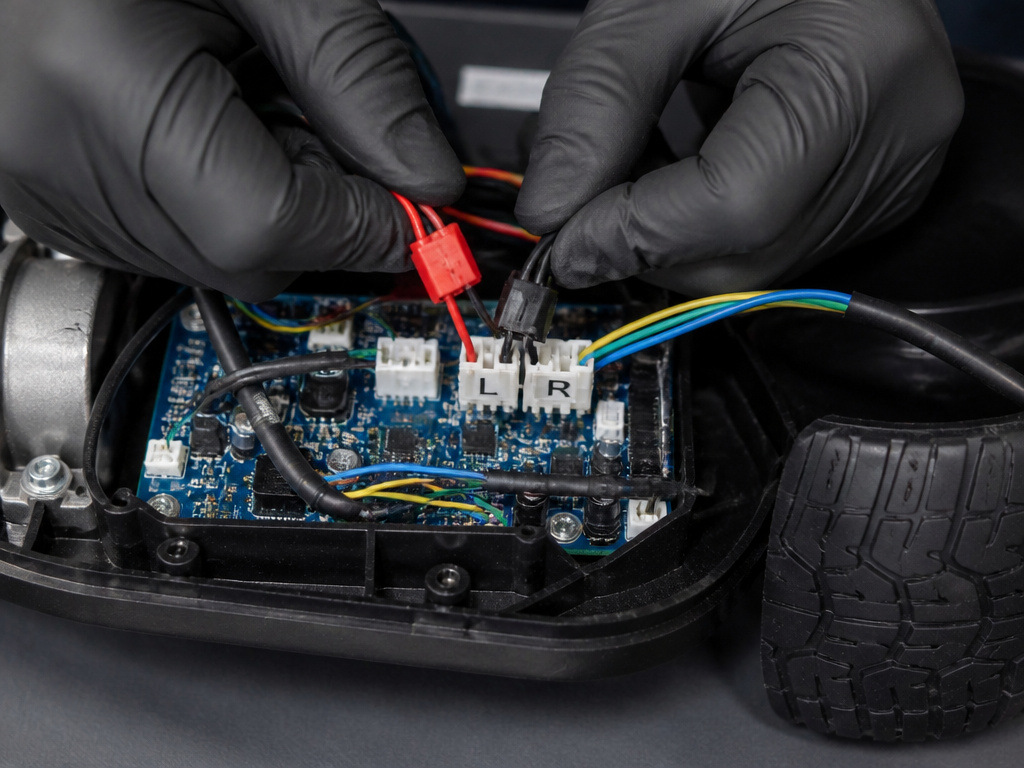
This points to a mismatch between the two motors. One wheel is receiving a different power signal or is physically obstructed.
- Fix: First, check for a stuck object wrapped around the offending wheel’s axle. Then, swap the left and right motor connectors on the logic board (with the battery disconnected!). If the pull switches sides, the motor is bad. If the pull stays on the same side, the problem is in the logic board’s motor driver for that channel.
Where this goes sideways: Assuming a pulling board just needs recalibration. If one motor’s hall sensor wire is disconnected, that wheel doesn’t know its speed. The board will constantly over-correct, causing a violent pull that feels like a balance issue but is actually a broken signal path. Recalibrating won’t touch it.
Checking and Repairing Internal Components
With the shell open and the battery disconnected, you can systematically test the most common failure points.
Loose or Broken Wires:
The thin hall sensor wires are the usual suspects. They tell the logic board how fast each wheel is spinning. If one is broken, the board thinks that wheel has stalled and pours power into it, causing a lurch.
- Test: Use a multimeter set to continuity (the beep setting). Probe each wire from the motor connector back to the logic board connector. A broken wire won’t beep.
Faulty Pressure Sensors:
These are thin, flexible pads under the rubber foot surfaces. They crack.
- Test: With the battery disconnected, disconnect the sensor plug. Use the multimeter in resistance mode. Press on the pad where your foot would go; the resistance should change smoothly. A dead sensor shows infinite resistance (open circuit) or zero resistance (short circuit) no matter what.
Failed Gyroscope:
This is a last-resort diagnosis. If all wires are intact, sensors test fine, and motors swap cleanly, but the board still can’t balance, the gyro/accelerometer chip on the logic board has likely failed.
- Reality: You don’t repair this chip. You replace the entire logic board. It’s a known weak point on many budget boards after a hard impact or water exposure.
Post-Repair Testing Protocol
You never just hop on a repaired hoverboard. A safe post-repair test is your final safety gate.
- Hold onto a sturdy wall or railing with both hands.
- Place only one foot on the hoverboard, keeping your other foot firmly on the ground.
- Power the board on. 4. The board should activate and stay perfectly still. It should not try to spin the wheels or move out from under you.
- If it passes, carefully step fully onto it while still holding the wall. Gently lean forward. It should move smoothly.
A board that jerks or tries to throw you during this test has an unresolved issue, likely a still-faulty sensor or an incorrect wiring reassembly. Power it down immediately and re-check your work.
What Do Red Flashing Lights or Error Codes Mean?
Red flashing lights or a specific error code pattern often signal a calibration issue or a sensor fault. For many models, a series of red flashes is actually part of the calibration confirmation process. The GYROOR guide notes that a successful recalibration is indicated by the red running/left-turn indicator light flashing three times. Before assuming a major fault, attempt a recalibration. One source recommends starting with the hoverboard powered off, leveled, and unplugged from the charger. Hold the power button for the duration specified for your model, which can vary significantly. If the error persists after a few attempts, the underlying imbalance in how to fix a hoverboard that is off balance may be mechanical, not just a sensor needing reset.
The Myth That Recalibration Fixes Everything
There’s a common belief that repeated recalibration can solve any persistent drift or wobble. This isn’t true. Recalibration only corrects the software’s understanding of ‘level.’ If your board still leans after three proper attempts, the problem is likely physical. Worn or damaged tire components, a warped frame, or internal motor issues can create a real, physical imbalance that software cannot override. At this point in how to fix a hoverboard that is off balance, no amount of button-holding or leveling will create a stable ride. You need to inspect the hardware. Check for uneven tire wear, listen for grinding sounds from a wheel, and ensure all screws are tight. Recalibration is a software fix; it cannot repair broken hardware.
Frequently Asked Questions
How do I reset the balance on a hoverboard?
You reset the balance by performing a recalibration. Turn the board off, place it on a level surface, hold the power button for your model’s specified time (3–15 seconds), wait for the success signal (beeps, lights, or voice), then power cycle it. This resets the gyroscope’s “level” reference point.
Why is my hoverboard shaking?
Shaking is typically caused by faulty pressure sensor pads under the footplates or a failing gyroscope. Dirt, moisture, or physical cracks make the sensors send erratic signals, causing the motors to jitter. Clean the sensors with isopropyl alcohol first. If shaking continues, internal inspection is needed.
How do you balance on a hoverboard?
To balance, stand upright with your feet shoulder-width apart near the wheels. Look forward, not down. Let the board’s self-balancing technology keep you upright; minor ankle adjustments are better than large upper-body leans. Practice near a wall until the feeling of the board holding you becomes intuitive.
Can water damage cause balance issues?
Yes. Water can corrode wire connections, short pressure sensors, and destroy the gyroscope chip on the logic board. Even small splashes can wick into connectors over time. If balance issues started after riding on wet pavement, internal corrosion is likely.
What tools do I need to fix an unbalanced hoverboard?
At minimum, you need a Phillips #1 screwdriver and a Torx T8 security bit to open the shell. For diagnostics, a multimeter is essential for testing wire continuity and sensor resistance. A plastic spudger helps open the casing without damage.
Before You Go
Start with the recalibration table. It turns a vague “hold the button” instruction into a precise, model-specific action. If that doesn’t fix it, the problem is physical. The safe disassembly steps are there to get you inside without creating a bigger problem.
The one rule I enforce with every student: if at any point you feel unsure, stop. A hoverboard’s battery and motors are not toys. There’s no shame in taking clear photos of your board’s internals and seeking help from a repair forum or a local electronics shop. The goal is a safe, working board, not a heroic story about the time you shocked yourself fixing a 36-volt battery pack.
Your fundamentals are your foundation. In this case, that means starting with the manufacturer’s exact instructions, using the right tools, and testing safely. Everything else builds from there.
