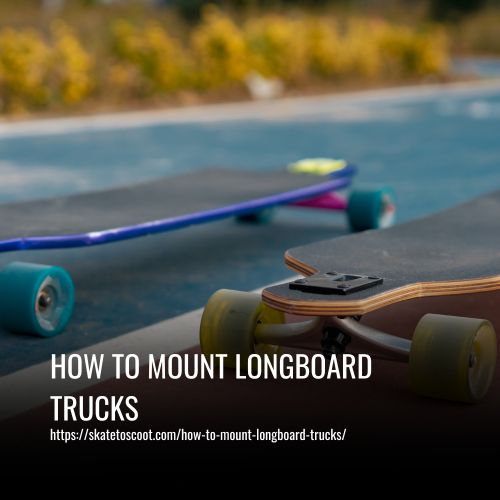
How To Mount Longboard Trucks
As an Amazon Associate we earn from qualifying purchases.
Mounting longboard trucks is a crucial step in assembling a longboard, as it directly affects the board’s stability, maneuverability, and overall ride quality. Trucks are the T-shaped metal components that hold the wheels and enable the board to turn. Properly mounting them ensures optimal performance and safety while riding.
Here’s a guide on how to mount longboard trucks, covering the necessary steps to securely attach them to the deck, allowing riders to customize their setup for a smoother and more enjoyable riding experience.

Different Longboard Truck Mounting Styles
Mounting longboard trucks can greatly affect the performance and stability of your ride. There are two common mounting styles: top mount and drop-through mount. Each method has its advantages and is suitable for different riding styles.
1. Top Mount:
To mount your longboard trucks using the top mount method, follow these steps:
- Place your longboard deck on a flat surface with the grip tape facing upwards.
- Determine your desired truck placement. For a stable ride and increased control, position the trucks closer to the ends of the deck.
- Insert the truck hanger through the truck holes in the deck.
- Attach the truck baseplate on the underside of the deck, ensuring the kingpin is correctly aligned with the truck holes.
- Secure the trucks by tightening the kingpin nut using a skate tool.
- Check for proper alignment and adjust if necessary.
- Repeat the process for the second truck.
2. Drop-Through Mount:
This method involves mounting the trucks through the deck, lowering the ride height and increasing stability. Follow these steps:
- Flip your longboard deck upside down.
- Identify the drop-through holes located near the ends of the deck.
- Place the truck hanger through the drop-through holes.
- Attach the truck baseplate on top of the deck, ensuring proper alignment with the drop-through holes.
- Secure the trucks by tightening the kingpin nut.
- Check for proper alignment and adjust if needed.
- Repeat for the second truck.
Both mounting styles have their advantages. The top mount offers better maneuverability, while the drop-through mount provides a lower center of gravity and increased stability at higher speeds. Ultimately, your choice will depend on your riding style, personal preference, and the type of longboard you have. Experiment with different mounting styles to find the setup that suits you best.
How to Drop-through Mount Your Longboard Trucks
The drop-through longboard truck mounting style has become popular due to its ability to lower the deck closer to the ground, resulting in increased stability and a more comfortable ride. Here’s a step-by-step guide on how to drop-through mount your longboard trucks:
Step 1: Tear Down Your Longboard Trucks
Using a skate tool, unscrew the nut on the kingpin and remove the top bushing. Then, take off the hanger and axle, which is the T-shaped part of the truck that attaches the wheels. Finally, remove the bottom bushing and washer.
Step 2: Align Drop-Through Pad Mount Holes with the Deck’s Holes
Ensure the holes on the drop-through pads align with the holes on the baseplate. This will allow for the bolts to be inserted through both parts.
Step 3: Put the Bolts Through the Baseplate and Drop-Through Pads
Slide the bolts through each baseplate and then through the deck, making sure they go through both the baseplate and drop-through pads.
Step 4: Put the Washers onto the Bolts
Place washers on the bolts to protect the deck from damage caused by friction between the deck and nuts.
Step 5: Place the Nuts onto the Bolts and Tighten
Put the nuts onto the bolts and use a skate tool to tighten them one by one. Tighten each nut firmly to ensure stability and prevent loosening while riding.
Step 6: Reassemble the Trucks
First, place the bottom washer (if applicable) on the kingpin, then slide the bottom bushing onto the kingpin. Next, push the hanger into the pivot and slide the top bushing and washer (if applicable) onto the kingpin.
Step 7: Tighten the Kingpin Nut to Your Preference
Use your skate tool to tighten the nut on the kingpin to your desired level of tightness. Keep in mind that tighter trucks offer more stability but less maneuverability, while looser trucks provide better maneuverability at the cost of some stability.
How to Topmount Longboard Trucks
Top-mounting refers to attaching your longboard trucks to the top of the deck, rather than the underside. This mounting style offers a different riding experience and can be preferred for certain riding styles. Here’s a step-by-step guide to top-mounting your longboard trucks:
Step 1: Poke Screw Holes Through Grip Tape
If you recently replaced your grip tape, use a screwdriver to poke through the screw holes from the bottom of the deck. This will make it easier to insert the screws later on.
Step 2: Insert Screws from the Top
Place all 8 screws into the screw holes on the top side of the deck. Insert the screws from the top, so you can see the tail of the screws on the underside of the deck.
Step 3: Optional – Use Riser Pads
If you want to prevent wheel bite, you can add riser pads between the deck and the trucks. Slip the riser pads onto the screws, following the manufacturer’s instructions.
Step 4: Align and Attach Baseplates
Align the baseplates with the screw holes and push each screw through to the other side of the plate. Make sure to place each truck correctly based on the type of trucks you have.
– For Standard Kingpin Trucks: Place them so that the kingpin and bushings face inwards. The kingpin and bushing of one truck should point towards the center of the deck.
– For Reverse Kingpin Trucks: Place them so that each kingpin and its bushing face outward. One kingpin-bushing set should face towards the tail, while the other set faces the front of the deck.
Step 5: Attach Nuts Loosely
Attach all 8 nuts to the screws, giving each nut a half-turn. The idea is to loosely hold the trucks in place before tightening the nuts fully. Use your thumb and index finger to attach the nuts.
Step 6: Tighten Nuts in a Crisscross Pattern
Using a skate tool or an adjustable wrench, tighten the nuts. Start with the first nut and then move to the nut diagonally across from it in a crisscross pattern. Continue this process until all nuts are tightened.
Step 7: Adjust to Personal Preference
The tightness of your trucks is a matter of personal preference and riding style. Take your board for a spin and adjust the tightness of the nuts accordingly. Tighter trucks offer more stability but less maneuverability, while looser trucks provide better maneuverability at the cost of some stability.
Understanding Mount Hole Patterns
When it comes to mounting longboard trucks, understanding the mount hole patterns is essential. Incompatibility between the deck and trucks’ bolt patterns can cause misalignment issues during the installation process. To avoid this problem, it’s important to know the difference between old-school and new-school mount hole patterns.
Old School vs. New School Bolt Patterns:
- Old School Hole Mount Pattern: Decks with the old-school hole mount pattern have holes positioned 2.5 inches along the deck’s length and 1.625 inches apart widthwise. This pattern was used by skateboard manufacturers in the 1970s.
- New School Hole Mount Pattern: Decks with the new school hole mount pattern come with pre-drilled holes positioned 2.125 inches apart along the deck’s length, maintaining the same 1.625 inches apart widthwise as the old-school pattern.
Drilling New Holes into the Deck
If you encounter incompatibility between your deck and trucks’ mount hole patterns, you may need to drill new holes into the deck. Here’s how:
- Place the baseplate straight and tighten the two front bolts.
- Mark where the new holes should go based on the truck’s alignment.
- Use a 3/16″ drill bit to drill new holes.
- Ensure the new holes align with the trucks’ mount holes.
Choosing Compatible Trucks and Decks
To avoid drilling new mount holes, it’s recommended to choose longboard trucks with a mount pattern compatible with your deck. Double-drilled trucks, such as Indy trucks, Mini Logo trucks, and Gullwig longboard trucks, come with two sets of holes, offering versatility and compatibility with different mount hole patterns.
FAQs
Pivot cups play a vital role in allowing the trucks to pivot smoothly. When mounting your longboard trucks, make sure the pivot cups are facing inwards towards the center of the deck. This orientation allows for optimal performance and minimizes wear and tear.
Longboard trucks consist of several key components. The axle connects the wheels to the hanger, which houses the bushings and kingpin. The baseplate attaches the truck to the deck, while the pivot cup allows for smooth turning. Lastly, the mounting holes secure the truck to the deck.
The axles provide stability and determine the width of your ride. Hangers affect your turning radius, with wider hangers offering more stability at high speeds. Bushings provide control and responsiveness, with softer bushings allowing for more maneuverability and tighter turns. The kingpin acts as a pivot point for the hanger, while the baseplate angle affects your center of gravity and stability.
Conclusion:
Learning how to mount longboard trucks may seem intimidating at first, but with the right tools and a little bit of practice, you’ll be cruising down the streets with confidence in no time.
So grab your board, tighten those bolts, and get ready to experience the thrill of the ride. Remember, the journey is just as important as the destination, so enjoy every moment on your newly mounted longboard trucks!
