How to Peter Pan Longboard: The 5-Step Breakdown
This post contains affiliate links. As an Amazon Associate, we earn from qualifying purchases.
To perform the Peter Pan longboard trick, you step across the board in a 180-degree pivot while carving. The core sequence is a front-foot pivot, a back-foot step across, and a weight transfer that keeps the board rolling smoothly. It’s a foundational dance move that requires comfort riding switch, a smooth surface, and a board with loose, carvy trucks.
That’s the clean version. The messy reality is that everyone’s first dozen attempts feel like they’re trying to pat their head and rub their stomach on a moving platform. The trick isn’t the steps, it’s the timing between them, which is the real secret of how to Peter Pan longboard.
What follows is the breakdown most tutorials skip: the three physical prerequisites you must own before you roll, the exact foot placement that prevents wobbles, and the one truck adjustment that turns a stiff commuter board into a dance partner for the how to peter pan longboard sequence. We’ll also cover how to bail safely when the steps don’t connect, because learning to fall is part of learning to fly.
Key Takeaways
- The Peter Pan is a foundational longboard dance trick recommended as a first step for beginners by coaches like Jin Kwon.
- Comfort riding switch (both stances) is an absolute requirement; trying the trick without it leads to immediate instability.
- Practice on flat, smooth ground like a basketball court or empty parking lot, hills add speed you can’t control while learning footwork.
- Adjust your truck’s kingpin nut for responsiveness; a stiffer board from an overtightened kingpin fights the carve you need.
- A moderate, consistent speed is easier than going slow; too slow makes the board unstable, too fast overwhelms your balance.
Why the Peter Pan is Your First Dance Move
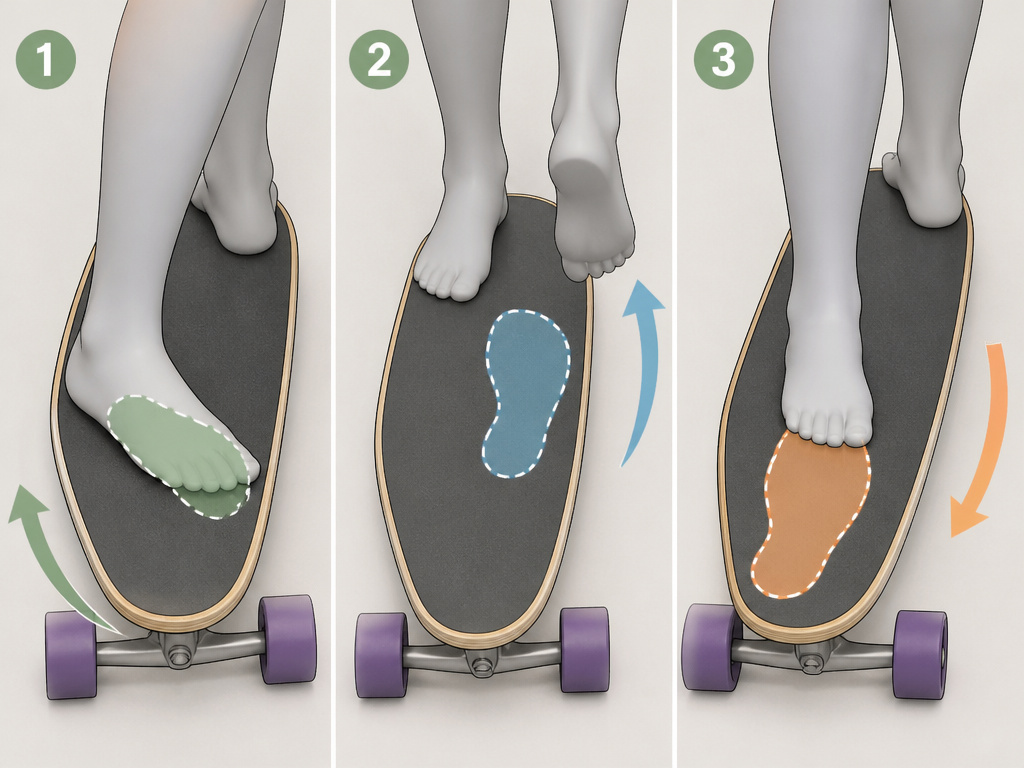
Most dance trick lists put the Peter Pan first for a reason. It’s not the easiest, that’s arguably the 180 step. It’s the most useful. Skatorial calls it “bread and butter” because it teaches you to move your feet independently of the board’s momentum. Once you own the weight shift from regular to switch stance mid-roll, more complex steps like cross-steps and pirouettes become a matter of adding layers, not learning a new language.
Think of it like learning a chord change on guitar for the how to peter pan longboard process. You struggle with the F to G transition for a week, and suddenly a hundred songs are within reach. The Peter Pan is that F-to-G change for longboard dancing. It builds the muscle memory for where your center of gravity needs to be when you’re not standing square over the trucks.
A tight kingpin nut creates a stiffer board, which fights against the deep, flowing carves essential for dance tricks like the Peter Pan. According to Decathlon’s technical manuals for boards like the Oxelo Pintail 500, overtightening can also damage the bushings’ retaining rings.
The Prerequisites Checklist (Don’t Skip This)
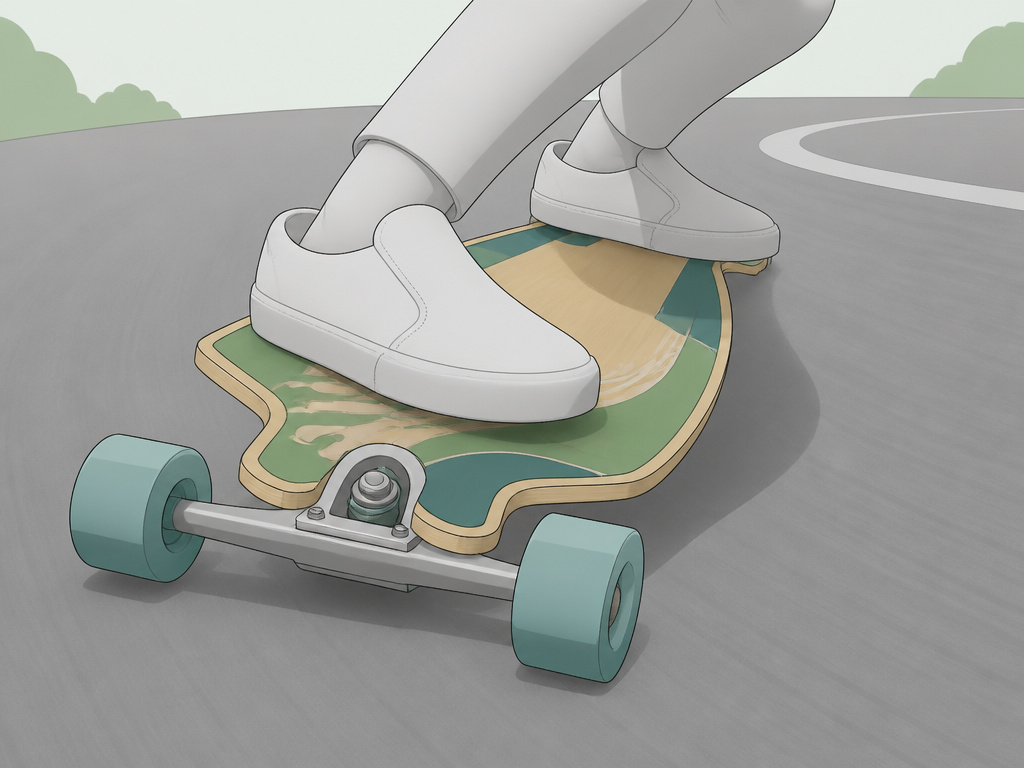
You wouldn’t try a kickflip before you can pop an ollie. The Peter Pan has its own prerequisites, and ignoring them is the fastest way to frustration. The truth is: if you can’t check these three boxes, you’re not ready to link steps. Trust the process, not just the trick.
1. You Must Be Comfortable Riding Switch. This isn’t a nice-to-have. Reddit threads are filled with learners hitting a wall because they neglected switch riding. “A prerequisite for learning the Peter Pan is becoming comfortable riding switch,” one user notes. You don’t need to be a speed demon in your opposite stance, but you must be able to roll in a straight line, carve gently, and foot-brake to a stop without stepping off. If that sounds daunting, spend a session or two just cruising in switch before you even think about the Peter Pan.
2. Own Your 180 Steps. The Peter Pan is essentially a 180 step where you don’t put your pivot foot back down in the same spot. Before linking multiple Peter Pans, you should be able to do a single, clean 180 step from regular to switch stance and back again. One dedicated learner set a goal of “180 step approximately 2000 times in the driveway at a slow roll.” That number might seem extreme, but the point is repetition. The pivot becomes automatic.
3. Find the Right Terrain. This is where most people get it wrong. Don’t use a hill to learn dancing. As advised in a Reddit learning journal, “Find somewhere flat and smooth. Basketball court, parking lot.” You need a predictable, gentle roll. A slight incline can quickly turn into uncontrollable speed when you’re focused on your feet, and rough asphalt will catch your wheels and throw your balance.
The Right Board Makes the Dance
You can learn a Peter Pan on any board that rolls. But doing it well, and achieving the fluid, graceful motion you see in videos, requires a specific setup. Most beginner boards, especially inexpensive completes, come with trucks tightened down for stability. That’s great for commuting, but it’s poison for dancing.
Truck Tightness is Everything. Your board turns by pivoting on the kingpin, the large bolt at the center of the truck. The Decathlon manuals for the Oxelo Pintail 500 and Surfskate Carve 540 state the rule clearly: “Using a T-tool, the tighter you tighten the kingpin, the stiffer the board. Conversely, the more you loosen it, the more responsive it becomes.” For dancing, you need responsiveness.
Where this goes sideways: Loosening the kingpin nut too much. Decathlon warns this creates a risk of wheel bite, where the deck touches the wheel during a turn, causing an immediate, jarring lock-up. A small adjustment of the nut can be the difference between flow and faceplant.
Board Shape and Wheelbase. While you can practice on a shorter board, a dedicated dancer or cruiser with a longer wheelbase (the distance between the trucks) provides a more stable platform. A longer deck offers more room for foot movement. The Oxelo Surfskate Carve 540 Bird, for example, uses a Drop-through/drop-mount truck system.
| Board Feature | Ideal for Peter Pan | Why It Matters |
|---|---|---|
| Truck Tightness | Responsive, loose carve | Enables the smooth S-turn rhythm the trick is built on. |
| Deck Length | Longer deck | Provides a stable platform and more room for footwork. |
| Wheelbase | Longer wheelbase | Increases stability, making the board less twitchy during steps. |
| Wheel Hardness | Softer wheels | Grips the pavement for confident carves and smoother roll. |
The 5-Step Peter Pan Breakdown
We’ll examine this step by step. Forget “just walk on the board.” The Peter Pan is a specific, timed sequence. We’ll use the progression from a TikTok tutorial by @_beyunce as our framework: carve, tap, step.
Step 1: Establish a Toeside Carve.
Start rolling at a comfortable, steady pace on smooth ground. Initiate a gentle toeside carve (leaning toward your toes). This carve sets the board’s arc and gives you a direction to move across. Your weight should be mostly on your front foot. This isn’t a sharp turn; it’s a wide, sweeping C-shape.
Step 2: Pivot on Your Front Foot.
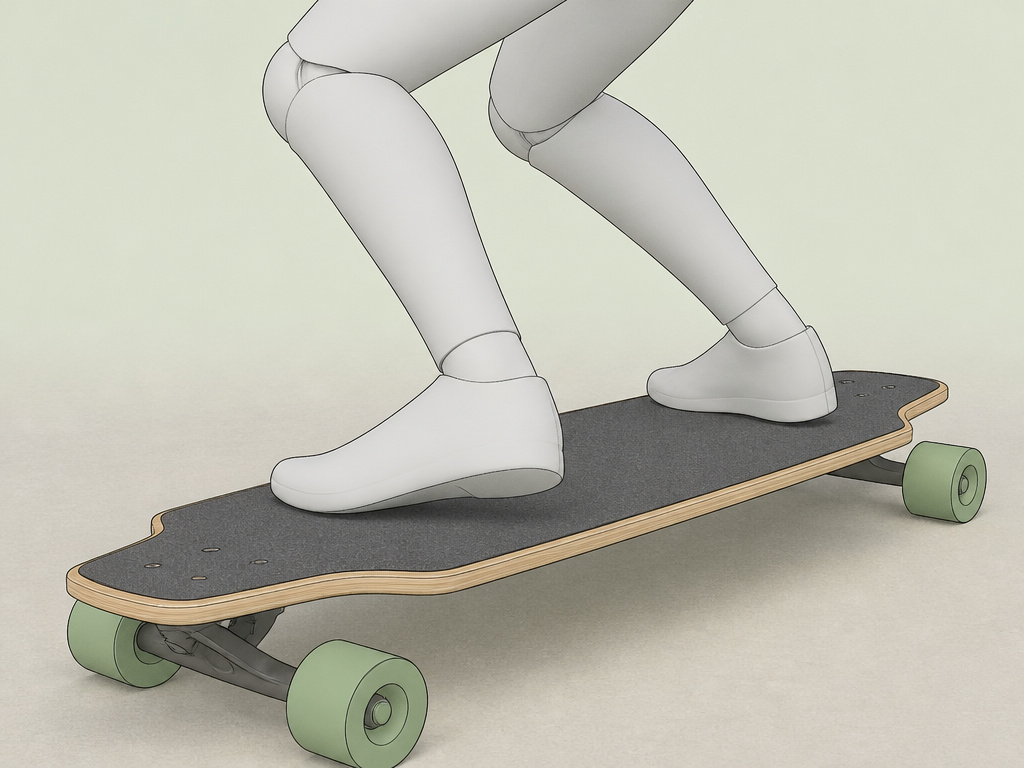
As you’re in the carve, pivot your front foot 90 degrees, so your toes point toward the side of the board. Your heel will come off the deck slightly. This pivot starts the rotation of your body and the board. Keep your knees bent.
Step 3: Step Across with Your Back Foot.
This is the “cross” moment. Lift your back foot and step across the board, placing it down near the opposite rail, in front of your now-pivoted front foot. Your body will be crossed up. The key, as noted by a Reddit user, is to “pick up your standing foot before the other one touches the board.” Aim for a momentary hover.
Step 4: Unwind and Replace Your Front Foot.
Now, lift your initial front foot (the one that pivoted) and bring it around, placing it on the board near the tail, completing a 180-degree change. You are now riding switch stance. The board should continue its carve naturally.
Step 5: Carve Back and Repeat.
To link a second Peter Pan, you simply carve back the other way (now a heelside carve from your new switch stance) and repeat the sequence, stepping across with your new front foot.
Common mistake: Trying to place your feet in static positions. The trick happens during the carve. Your foot placement is a moving target, aim for the spots that keep the board’s momentum flowing, not the spots that look correct on a stationary deck.
Peter Pan Practice Drills and Rhythm Fixes
Knowing the steps is one thing. Making them fluid is another. These drills isolate the tough parts.
The Carve-and-Tap Drill.
Before committing to the full step, practice the TikTok method: Carve on one foot, then just tap the board with your other foot where you would step. Repeat on both sides. This builds the coordination of crossing your legs while balancing. Repeat this on both sides. It builds the nerve.
The 180-Step Marathon.
As mentioned in the prerequisites, the 180 step is the atomic unit. Set a goal of clean repetitions in a row, each direction. Focus on the pivot and the weight transfer. Speed is irrelevant here; cleanliness is everything.
The “No Feet on Board” Moment.
This is the secret sauce for multiple steps. A Reddit user nailed it: “The trick to more steps is to pick up your standing foot before the other one touches the board. There will be a moment with no feet on the board.” Practice this feeling during a single Peter Pan. Exaggerate the hover. That moment of weightlessness is what allows you to redirect the board for the next step.
Finding the Speed Sweet Spot.
Going too slow makes the board unstable and hard to carve. Going too fast overwhelms your reaction time. A common tip from learners is that “going a little faster helps to keep the turns smoother and therefore make shifting your balance easier.” Find a pace where you can maintain a gentle, continuous S-curve without pushing. That’s your practice speed.
Troubleshooting Your Peter Pan
When your steps feel clunky or the board keeps shooting away, one of these three issues is usually the culprit.
Problem: The board wobbles violently when you step.
Fix: You’re stepping straight down onto the board, killing its carve. You need to step with the board’s momentum. Your foot should land while the board is still arcing. Practice the carve-and-tap drill more to feel the timing. Also, check your truck tightness, if they’re too tight, the board won’t carve enough to create a stable platform for your step.
Problem: You can’t link more than one or two steps.
Fix: You’re likely not committing to the switch stance. After your first Peter Pan, you must fully accept that you are now riding switch and initiate the next carve from that stance. Hesitation kills the flow. Also, revisit the “no feet on board” drill. Linking steps is about rhythm, not a series of isolated moves.
Problem: You keep jumping off the board.
Fix: This is a fear response, usually because you feel off-balance during the cross. Bend your knees more. A Reddit user’s tip was simple and effective: “The tip that made a world of difference to me was to bend the knees a little. It will help keep the balance.” Lowering your center of gravity gives you a much larger margin for error.
| Symptom | Likely Cause | Immediate Drill |
|---|---|---|
| Wobbly, unstable board on step | Stepping against the carve / Trucks too tight | Carve-and-Tap Drill / Loosen kingpin 1/4 turn |
| Can’t link steps | Not committing to switch stance / No rhythmic hover | “No Feet” Moment practice / 180-Step Marathon |
| Board shoots out from under you | Leaning too far over board / Looking down at feet | Bend knees, look ahead / Practice on grass stationary |
Safety and Next Steps
Learning any board trick involves falls. For dance steps, you’re typically not going high-speed, so the risks are scrapes and bruises, not road rash. Wearing a helmet is never a bad idea, and wrist guards can save you from a awkward catch-fall when a step goes wrong (similar protective gear is crucial for advanced moves like a longboard powerslide).
Once the Peter Pan is in your pocket, the longboard dance world opens up. The natural progression is to the cross step, which uses a similar weight transfer but with a different foot pattern. These aren’t separate tricks; they’re vocabulary in the same language. Mastering the Peter Pan means you’ve learned the grammar. Now you can start writing sentences.
Why you should start practicing on grass or carpet
Before you attempt the Peter Pan on moving pavement, take it to stable ground. Grass or a thick carpet lets you drill the footwork without the board rolling away. This is where you build the muscle memory for the weight shift and the crucial moment where you lift your standing foot before the other foot touches down. You can focus entirely on the sequence of carving on one foot, then tapping and crossing, without worrying about balance or speed. Mastering the step pattern here means when you transition to smooth, flat pavement, your body already knows the dance.
Frequently Asked Questions
Is the Peter Pan a good trick for beginners?
Yes, instructors like Jin Kwon recommend it as one of the first steps for beginners to learn. It’s foundational because it teaches critical balance and weight-shift skills that apply to almost every other longboard dance trick. However, it requires comfort in both regular and switch stances, which is itself a beginner skill that must be developed first.
What kind of longboard is best for Peter Pan and dancing?
Longer board (typically 40 inches or more) with a flexible deck and loose, carvy trucks is ideal. Brands like Oxelo make specific cruiser models, such as the Surfskate Carve 540, with drop-through truck mounts for stability and deep carves. The key is adjustable trucks, you need to be able to loosen the kingpin nut to achieve a responsive, surfy feel.
Why do I keep getting wheel bite when I try?
Wheel bite happens when your deck contacts the wheel during a sharp turn, locking it up. Decathlon’s technical support warns this is a risk if you loosen the kingpin nut too much. If you’re getting bite, tighten the kingpin nut a quarter-turn at a time until the bite stops, but no more. You want the loosest setting that doesn’t cause contact.
How do I transition back to regular riding after a Peter Pan?
Peter Pan ends with you riding switch. To revert, you have two options: 1) Do another Peter Pan (which will bring you back to regular), or 2) Perform a simple pivot or kick-turn to rotate the board 180 degrees under you. The first option is better for maintaining flow and is the goal for linked dancing.
How long does it take to learn the Peter Pan?
With consistent practice of the prerequisites (especially switch riding), a learner can get their first clean, single Peter Pan within a few days. Linking multiple steps fluidly can take weeks of practice. One dedicated Reddit user documented a multi-day “quest” involving thousands of 180-step repetitions. The timeline depends entirely on your existing board comfort and practice frequency.
The Bottom Line
The Peter Pan looks like magic, but it’s just mechanics. It’s the carve, the pivot, the cross-step, and the commitment to switch, all on a timer set by your rolling speed. Start by owning the prerequisites you probably want to skip. Loosen your trucks for more responsiveness. Find a sea of smooth asphalt.
Then, drill the carve-and-tap until the cross-step feels less like a threat and more like an option. Your first linked steps will be ugly. That’s fine. The goal isn’t to look like a tutorial on day one; it’s to build the neural pathway that says, “I can move my feet here, and the board will still be there.”
That pathway, once built, doesn’t just lead to better Peter Pans. It’s the on-ramp to the whole world of longboard dancing. The cross-steps, the pirouettes, the no-complies, they all live downstream from this one, foundational shift. So trust the boring stuff first. The flashy steps come later.