How to Pop a Longboard: Step-by-Step (Without Bailing)
This post contains affiliate links. As an Amazon Associate, we earn from qualifying purchases.
To pop a longboard, you perform a controlled push-up motion to swing your feet from a prone paddling position onto the board, landing in a low, stable stance. The sequence is: paddle until the wave catches you, place your hands firmly on the deck near your chest, push up while swinging your back foot then front foot under you, and land with your feet centered and knees bent. Missing the timing or rushing the footwork is how you end up in the water.
That timing, when the wave lifts and pushes the board, is the whole game. Get it right, and the pop-up feels fluid. Get it wrong, and you’re swimming back to the lineup. This isn’t about raw strength; it’s about a specific sequence your body needs to learn.
What follows: a breakdown of that sequence, the most common ways it goes wrong, and the dry-land drills that build the muscle memory for how to pop a longboard so you’re not thinking when the wave arrives. We’ll also clear up the confusion between popping a surfboard and “popping” an electric skateboard, because they are not the same movement.
Key Takeaways
- The pop-up starts when the wave lifts and pushes the board forward, not when you first feel it. Paddle until that push happens.
- Place your hands flat near your chest, not by your ribs, to create a strong base for the push-up and prevent your chest from dipping.
- Swing your back foot up first, then your front foot. Trying to move both feet at once leads to a clumsy, unstable landing.
- Land in a low, compressed stance with knees bent and weight centered. Standing up tall is the fastest way to lose balance.
- Practice the entire motion on dry land every day before you ever hit the water. Muscle memory beats conscious effort in the moment.
The Step-by-Step Pop-Up Sequence
Forget trying to muscle your way up. A smooth pop-up is a practiced choreography of weight shift and timing. Break it down into these phases, and drill each one.
Phase 1: The Paddle and the Catch
You’re lying on your board, body centered, feet together near the tail. You see your wave, start paddling hard with your arms, and feel the board start to lift. Here’s the critical part: keep paddling. You need to match the wave’s speed and feel it not just lift you, but actively push your board forward. That forward push is your green light. Stop paddling too soon, and you’ll sink right off the back of the wave.
Phase 2: The Hand Placement and Push
As you feel that forward push, transition from paddling to planting your hands. Don’t slap them down by your ribs. Bring them flat onto the deck, positioned roughly under your chest or slightly wider, with your elbows bent and pointing out. This creates a stable tripod (two hands, your chest) ready to spring.
The push-up phase is where most of the power comes from. Straightening your arms provides the lift; your legs simply swing into the space you create. A weak arm push means your legs have to do all the work, and that’s slow.
Phase 3: The Foot Swing and Landing
This is the “pop.” As you push your chest up off the board, swing your back foot up first. Aim to place it on the board about a foot behind where your hands were. Immediately after, swing your front foot forward and place it where your chest was, roughly under your center of mass. Your knees should be bent the moment they touch the deck.
Think “back foot, then front foot.” Swinging them simultaneously might look cool in a tutorial, but for most people, it leads to crossed legs or a wide, unstable stance. The sequential swing is more reliable.
Phase 4: The Stable Stance
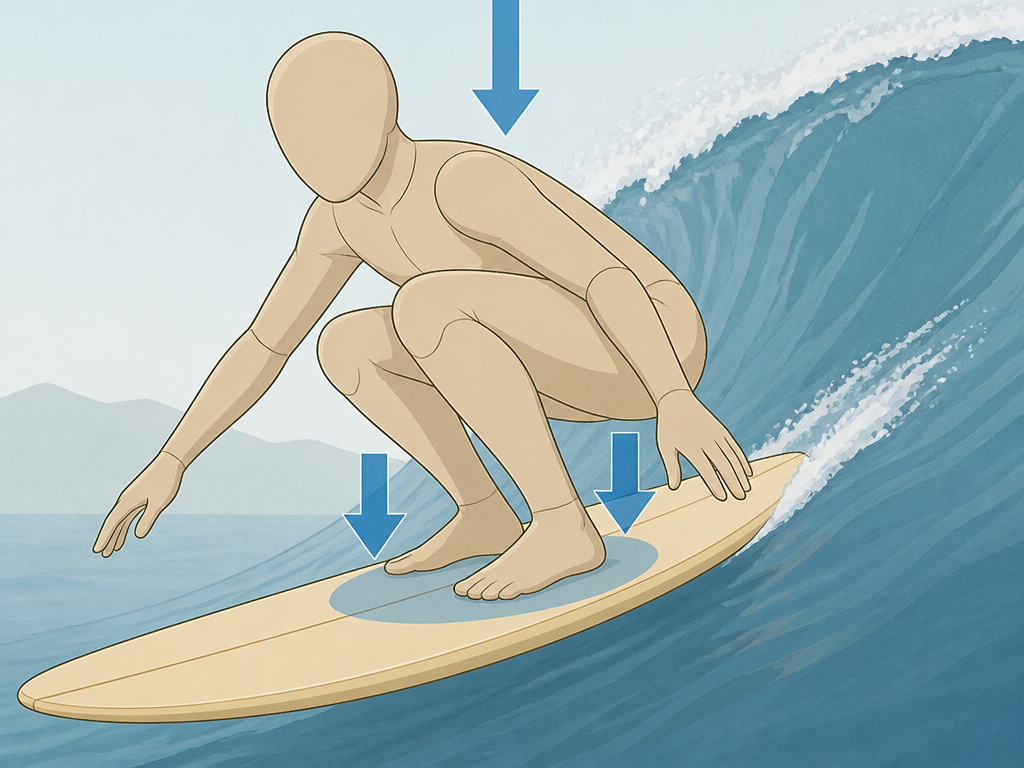
You’re up. Now, don’t stand up. Stay low. Your weight should be centered over the middle of the board, knees deeply bent, back straight, eyes looking where you want to go. This low, compact posture soaks up the wave’s power and allows you to start your first bottom turn. Standing tall turns you into a wobbling sail.
| Phase | Key Action | Common Mistake | Result If Skipped |
|---|---|---|---|
| Paddle & Catch | Paddle until wave pushes board forward. | Stopping paddle when board first lifts. | Fall off back of wave; miss the wave entirely. |
| Hand Placement | Place hands flat under chest, elbows bent. | Hands too low by ribs. | Weak push, chest dips, pop-up stalls. |
| Foot Swing | Swing back foot up first, then front foot. | Trying to swing both feet at once. | Unbalanced, slow landing; feet land crossed. |
| Stable Stance | Land in low, knees-bent, centered stance. | Standing up tall immediately. | Immediate loss of balance; blown takeoff. |
Common Pop-Up Mistakes (And How to Fix Them)

Everyone makes these errors. The trick is knowing what they feel like so you can correct them before you’re underwater.
Mistake 1: The “Pop and Flop”
You get halfway up, your arms give out, and you collapse back onto the deck. This usually means your hands were too far forward or your arms weren’t ready for the load.
- The Fix: Strengthen your push-ups. More importantly, during dry-land practice, focus on a explosive, snappy push-up motion. Don’t just go up slowly. You need speed.
Mistake 2: The “Flying Squirrel”
You push up fine, but when you swing your feet under you, you land with your feet too far apart or one foot hanging off the rail. The board becomes unsteerable.
- The Fix: This is a foot-targeting issue. On dry land, mark spots on your board or carpet with tape. Practice swinging your back foot to its mark, then your front foot to its mark, without looking down. Repetition builds accuracy.
Mistake 3: The “Panic Stand”
You make it up, but in your excitement, you straighten your legs immediately. The wave hits your now-rigid body, and you get pitched over the nose.
- The Fix: Drill the final stance. Practice popping up on land and holding that low, compressed position for a full ten seconds. Make “stay low” your default.
Where this goes sideways: Rushing the pop-up before the wave has fully caught the board. You’ll stand up into dead water and just sink. The board needs that forward momentum from the wave; if you’re not feeling it, paddle two more strokes.
Dry-Land Drills to Build Muscle Memory
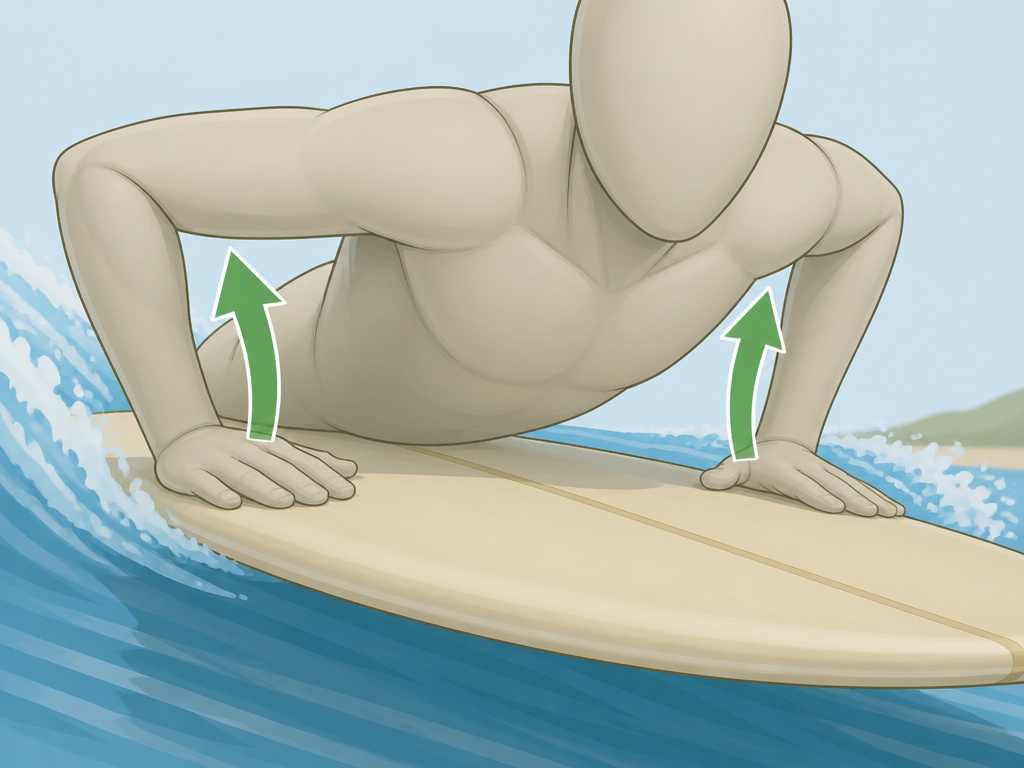
You wouldn’t try a skateboard trick for the first time in a crowded park. Don’t try the pop-up for the first time on a moving wave. These drills wire the sequence into your muscles.
- The Carpet Pop-Up: Lay your board on carpet or grass. Lie on it in your paddling position. Go through the full sequence, paddle (mock it), plant hands, push up, swing feet, land in stance, slowly at first. Do multiple reps focusing on perfect hand placement.
- The Foot-Switch Drill: Without a board, get into a push-up position on the floor. Practice the foot swing: from a plank, quickly bring your right foot to where your right hand is, then your left foot to where your left hand was. Switch sides. This isolates the leg movement.
- The Stance Holder: Pop up on your stationary board and hold the low stance. Close your eyes. Can you balance? This teaches you what a centered, stable stance feels like without visual cues. Your ankles will learn to make micro-adjustments.
Why these work: They break the complex pop-up into isolated components (push strength, foot coordination, balance). By practicing the whole sequence on a stable surface, you remove the variable of the moving wave. When you finally take it to the water, your body already knows the moves. You can focus on timing instead of mechanics.
Hand Placement and Footwork: The Devil in the Details
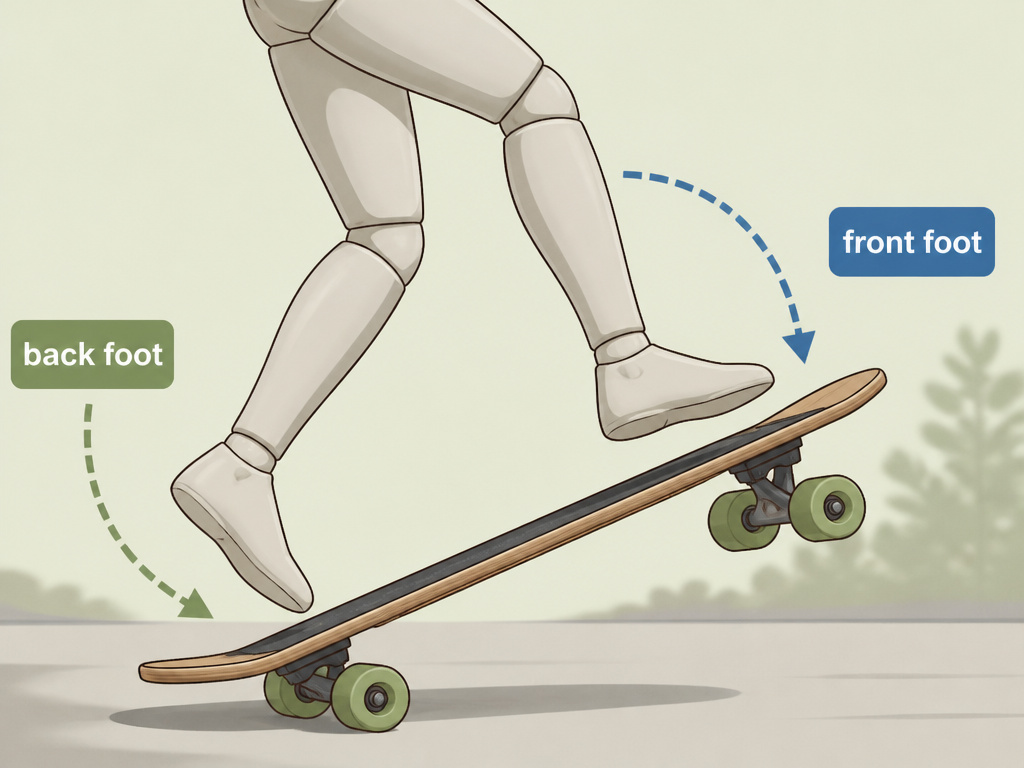
The difference between a clean pop-up and a messy one often comes down to inches.
Hands: Wide vs. Narrow
Where you put your hands decides how much force you can apply. Placing them too narrow (close together) makes the push-up wobbly. Too wide, and you can’t get your chest up high enough to swing your feet through.
- The Sweet Spot: Hands should be just wider than shoulder-width, fingers pointed forward or slightly inward. This gives a stable base and allows for a powerful, straight-arm push.
The Back-Foot-First Rule
From the YouTube analysis of pros, a clear pattern emerges: the back foot leads. Your back foot provides the initial platform; your front foot then guides direction. Ignoring this and trying to bring both feet up simultaneously often results in the “Flying Squirrel” mistake. It’s a more advanced coordination that beginners should build toward, not start with.
Finding Your Stance (Regular vs. Goofy)
If you don’t know whether you’re regular (left foot forward) or goofy (right foot forward), dry-land drills will reveal it. When you pop up instinctively, which foot naturally goes forward? That’s your stance. Forcing the other foot forward because a guide told you to will feel awkward and slow you down for months.
What to Do When Your Pop-Up Fails
You will fall. Planning for it removes the panic. Here’s how to handle a botched takeoff.
The Safe Bailout
If you feel the pop-up failing mid-move, your foot slips, your arm buckles, don’t fight it. Crumple and fall flat into the water. Try to fall away from your board to avoid getting hit by it. A flat, relaxed body creates less splash and sinks slower, giving you more time to orient yourself underwater.
The Quick Recovery
As soon as you hit the water, your first job is to locate your board leash and follow it to the surface. Once up, get to your board immediately. Use it as a flotation device, catch your breath, and get back into paddling position. Don’t waste energy swimming after an un-leashed board; that’s how you exhaust yourself in two waves.
The part nobody mentions: After a wipeout, your heart will be racing. Sit on your board for a moment outside the impact zone. Let the adrenaline pass. Paddling back out while still jacked up on nerves leads to poor decisions and another fall.
This is also where knowing how to fall off a longboard safely pays off. The principles of a controlled, relaxed bail on concrete directly translate to wiping out in the water.
Longboard vs. Shortboard Pop-Up: Key Differences
While the basic push-up motion is similar, the mechanics adapt to the board under you. Confusing them is a fundamental error.
On a longboard, you have plenty of real estate. You can pop up from your toes because your feet fit entirely on the deck. The motion can be a bit more staggered and deliberate. On a shortboard, your toes hang off in the water, so you must pop up from your knees, using a more compact, explosive spring to get to your feet quickly.
This distinction is crucial and is the source of much online confusion about how to pop a longboard, especially when electric skateboards enter the conversation. A manual for an electric board like the Parsec Aero uses “pop” to mean “power on.” It’s a completely different context from the surfing maneuver. The Parsec Aero manual says the board can be kick-pushed “with the drivetrain disengaged (belts off),” describing a manual longboarding mode, not a trick.
Clearing Up the Confusion: “Pop” Means Surfing Here
Given the research, it’s clear people are searching for “how to pop a longboard” from two entirely different angles. This article addresses the surfing technique. If you landed here wondering how to get your electric skateboard to start, that’s a simple power-button press, consult your board’s manual, like the one for the Parsec Aero.
For traditional skating tricks, the concept of “popping” a board for an ollie is a different skill set entirely, involving snapping the tail against the ground. While you can ollie on a longboard, it requires specific deck shapes and is generally more difficult than on a standard skateboard. Learning a manual on a longboard or a niche trick like the Peter Pan manual are more achievable goals for longboard freestyle than a high ollie.
Frequently Asked Questions
How do you properly push on a longboard?
Pushing on a longboard is about efficiency, not force. Place your front foot near the front trucks, pointing forward. As you step your back foot off to push, keep your weight firmly over your front foot on the board. Push smoothly with your back foot, then return it to the deck near the rear trucks before shifting your weight to coast. A wobbly push usually means you’re shifting your weight off the board.
What is the hardest board sport to learn?
This is highly subjective, but surfing is often cited due to its variable environment. You’re not just learning a physical technique; you’re learning to read moving water, weather, and tides. A skatepark is consistent; an ocean wave is never the same twice. The pop-up itself is a significant initial barrier that doesn’t exist in skateboarding or snowboarding.
Can you practice pop-ups without a wave?
Absolutely, and you must. The dry-land drills outlined earlier are essential. They build the muscle memory so that when you’re in the ocean, you can focus on wave timing instead of remembering which foot goes where. Consistency on land translates to confidence in the water.
What if my arms aren’t strong enough for the push-up?
Arm strength helps, but technique matters more. A proper pop-up uses your back and core muscles in conjunction with your arms. If you’re struggling, focus on the explosive dry-land drills and add general push-ups to your routine. Usually, the sense of being weak comes from bad hand position, which steals your mechanical advantage.
How long does it take to learn a consistent pop-up?
“Consistent” means you make it up on 7 out of 10 waves in small, clean conditions. It’s a skill that continues to refine over years.
Before You Go
The pop-up isn’t a single move you learn and forget. It’s the foundation every ride is built on, and it deserves focused, off-water practice. Pick one dry-land drill, maybe the Carpet Pop-Up, and do it for five minutes every day this week. The goal isn’t exhaustion; it’s clean repetition.
If you’re venturing into skateboard tricks on a longboard, remember that board control starts with being comfortable getting to your feet. Master this first. Everything else, from bottom turns to nose rides, flows from a stable, confident pop-up. Now go get those reps in.
