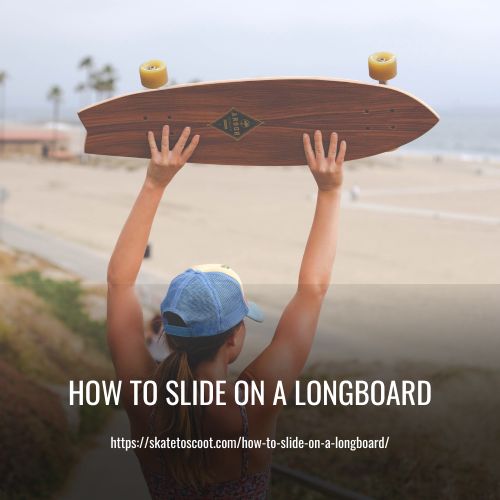
How to Slide on a Longboard: A Beginner’s Guide
As an Amazon Associate we earn from qualifying purchases.
Sliding on a longboard is a skill that requires practice, technique, and the right equipment. But once you master it, you’ll be able to tackle any hill with confidence and style. So, if you’re ready to take your longboarding skills to the next level, keep reading.
In this article, I’ll walk you through the step-by-step process of how to slide on a longboard, from choosing the right board and gear to mastering the various sliding techniques. So grab your longboard and let’s get started on this thrilling journey.
How to Do a Coleman/Heelside Pendulum Slide (Longboard Slide with Gloves)
The Coleman slide, invented by Cliff Coleman in the 1970s, is considered one of the most reliable techniques for slowing down on a longboard. Here we will provide a concise guide on how to execute a Coleman slide, also known as a heelside pendulum slide, for longboarders.
1. Setting up for the slide
To initiate the Coleman slide, start by setting up for a carve, taking a big turn toeside, intending to transition to a heelside carve afterwards. Assume a squat position with your legs and feet shoulder-width apart. A visual representation of the squat position can be seen in the accompanying image.
2. Breaking traction
As you approach the crescent of your toeside carve, swing your shoulders and arms outward to break traction. Rotate and swing your body until the board loses traction without forcefully pushing it into the slide. This controlled loss of traction allows for a smooth slide. Remember, the slide is led by your shoulders, so the movement of your shoulders affects your entire body during the slide.
3. Regaining traction and rolling away
To come out of the slide, swing your shoulders back to help the board turn in the direction of movement and regain traction. Additionally, gently apply more pressure on your front foot to encourage the board to come back. Maintain most of your weight on your heels during the slide, consciously placing pressure on them and the middle of your feet.
The Coleman slide, characterized by its controlled loss of traction, offers longboarders a reliable method for slowing down. While the technique may vary slightly between riders, focusing on proper body rotation and weight distribution will contribute to successful execution.
Some Coleman Slide Tips
Mastering the Coleman Slide is an essential skill for experienced longboarders. It involves breaking traction while maintaining control on the board. However, it can be tricky to execute correctly. Here we will provide some tips on how to perform the Coleman Slide effectively and safely.
1. Aggressive Body Movement: To break traction more effectively, one technique is to aggressively throw and rotate your body. This can help initiate the slide and reduce the chances of slipping off the board. However, caution should be exercised to prevent any accidents.
2. Setup Carve: Performing a big setup carve before attempting the Coleman Slide can make breaking traction feel smoother and easier. It helps generate momentum and sets the stage for a successful slide.
3. Grabbing the Board: Another way to assist in maintaining stability during the slide is to grab the board with your free hand. By doing so, you can improve balance and control. However, it is important to grab behind your back knee rather than between your legs to avoid any mishaps.
4. Proper Rail Grab: The picture below illustrates a good example of how to do a rail grab. Grabbing between your legs, known as Stink bug, is not recommended as it can affect your balance and potentially lead to falls. So, always opt for the correct technique.
5. Speed Matters: To execute the Coleman Slide properly, it is crucial to maintain a relatively fast speed. Without enough momentum, attempting the slide won’t allow for a continuous break in traction. While you may be able to swing the board 180 degrees, bringing it back will be challenging due to insufficient speed.
How to Do a Toeside Pendulum Slide
A toeside pendulum slide is a technique similar to the Coleman, where the rotation of the body is facilitated by swinging the shoulders. Here we provide step-by-step instructions on how to perform a toeside pendulum slide, emphasizing the role of the shoulders.
1. Carve Heelside
Begin by carving heelside with maximum force, aiming for a sharp toeside carve at the peak of the heelside carve.
2. Swing Shoulders and Shift Weight
While maintaining a grip on the board, swing the shoulders towards the right (or left for goofy riders) to initiate the rotation. Simultaneously, shift the weight onto the toes by exerting conscious pressure. Additionally, slightly extend the back foot to promote swinging out and breaking traction.
3. Initiate the 180° Turn
Executing the movements correctly should result in losing traction and commencing a 180° turn. However, before completing the full rotation, follow the next step to bring the board back.
4. Shift Pressure and Swing Shoulders in the Opposite Direction
Gradually release pressure from the back toes and increase pressure on the front toes. This shift in pressure should be smooth to maintain control. Simultaneously, swing the shoulders back in the opposite direction while being cautious not to pull the board too forcefully.
5. Anticipate the Slide Hookup
During these actions, anticipate the slide hookup, which can sometimes be sudden and forceful. To absorb the momentum, bend the knees as the hookup occurs, allowing for a safe roll away.
Some Toeside Pendulum Tips
When it comes to mastering toeside pendulum slides, there are a few key tips that can help you improve your technique and increase your control on the board. By following these tips, you’ll be able to enhance your carving skills and maintain control throughout your slides.
1. Maintain Speed for Traction: Having enough speed is crucial for successful toeside pendulum slides. Without sufficient speed, breaking traction becomes challenging. Ensure that you have enough momentum before attempting the slide to achieve smoother and controlled movements.
2. Execute Big Setup Carves: Performing big setup carves before attempting toeside slides can greatly improve your technique. These larger carves help in making your toesides smoother and easier to execute. By practicing big setup carves, you’ll become more confident in performing toeside pendulum slides.
3. Apply Pressure on Your Toes: To maintain control of the board during toeside slides, it is essential to put pressure on your toes. This pressure allows you to confidently control and manipulate the board’s movements. By applying pressure on your toes, you’ll have better control over what the board does.
4. Focus on Head and Eye Placement: To maintain proper body positioning during the slide, keep your head and eyes looking down the hill or in the direction you want to go. Your head and shoulders will naturally follow your eyes, ensuring that your body aligns correctly with the slide. This alignment is crucial as it guides the direction of the pendulum slide.
5. Be Gentle with Movements: As the board swings back during the slide, it may want to get away from you. In such instances, it is crucial to be gentle and feather-like with your movements. These subtle adjustments will help you maintain control and prevent the board from going off balance.
How to Do a Heelside Slide/Predrift
Learning how to do a heelside slide or predrift can be challenging, but with practice and the right technique, it can become a smooth and controlled maneuver. Here we will provide step-by-step instructions on how to execute a heelside slide successfully.
1. Starting Position
Begin by performing a deep toeside carve. This involves carving deeply into the turn, preparing to slide when reaching the highest point of the turn. As you approach the apex, lower your body into a “box” position and place one hand on the ground. Shift most of your weight to your front foot, ensuring approximately 65-80% of your weight is on this leg. Focus on applying pressure to your heels.
2. Initiating the Slide
To initiate the slide, gently rotate your hips or push out with your back leg. It is important to exert force and power behind this leg, but in a controlled manner. As you push your leg out, remember to push it into the board, while maintaining pressure and weight on your front foot, particularly the heel and just behind the arch. Keep your shoulders and hips pointing in the intended direction of the slide.
3. Maintaining the Slide
To hold the slide at the desired angle, maintain pressure on both feet and allow the board to glide. Keep your head and eyes focused on your intended path, ideally the apex of the turn. As you gradually reduce speed, release pressure on your back foot. You can either release pressure to pull your back foot in or physically pull it in. Both methods work, but the former provides better control and a smoother hookup.
4. Finishing the Slide
Throughout the slide, retain pressure on your front foot as you bring your front leg back. If you want to straighten the board further, gently push with your front foot at the same time your back foot pulls in. This push should be forceful yet controlled. When you feel the board starting to grip up, begin lifting your hand off the ground.
Key Heelside Predrift Tips
Heelside predrifts are a crucial skill in downhill skateboarding. Here we will discuss some key tips to improve your heelside predrift technique, focusing on body positioning, foot placement, and the role of flexibility.
1. Body Positioning: Maintaining proper body positioning is essential for successful heelside predrifts. A corner can offer a visual reference point, allowing you to aim and align your shoulders and hips. By applying pressure on your front foot, it can feel like you are pushing it out, aiding in initiating and controlling the slide.
2. Foot Placement: To enhance control while sliding, it is important to ensure full contact of your feet with the board. Your front foot should be as flat as possible, while your back foot should have its entire length in contact with the board. Some lift on your feet is acceptable, but too much can make sliding more challenging.
3. Flexibility and Stretching: Flexibility plays a crucial role in executing heelside slides effectively. If you struggle to squat comfortably, it could hinder your ability to perform the predrift. Regular stretching exercises can help improve flexibility and reduce the risk of hip and knee pain, which is commonly associated with this maneuver.
4. Smooth Transition: For a smooth transition from gripping to sliding, focus on getting as low as possible. By lowering your body position, you create a stable platform to initiate the slide, making it easier to transition seamlessly into the drift.
How to do a Toeside Predrift
Learning how to perform a toeside predrift can be a bit challenging, but with practice and proper technique, it can be mastered. Here will take you through the step-by-step process of performing a toeside predrift, with a focus on grabbing rail.
1. Weight Shifting and Carving
To start the toeside predrift, initiate a deep carve in a heelside direction. As you approach the top of the turn, shift your weight to the opposite side in preparation for sliding and kicking out your board. Keep the pressure primarily on your front foot, while also ensuring some pressure on the toes of your back foot.
2. Foot Placement and Leverage
For better leverage and control during the toeside slide, it is recommended to use a footstop. This will give you something to push against with your toes when performing the slide. Maintain equal pressure on the toes of both your front and back foot, with roughly 45-60% on the front foot, 30% on the back foot, and 10-25% on your hands.
3. Executing the Slide
To initiate the slide, at the zenith of your heelside carve, forcefully push the board out with the toes/foot of your back foot. Ensure a firm and controlled push, maintaining pressure on your front foot and keeping your weight centered over your toes. Visualize the direction you want to slide and keep your shoulders pointed in that direction.
4. Controlling the Slide
By adjusting the pressure on your toes, you can control the angle at which the board slides. However, once you start sliding, it is difficult to increase the angle. Choose the desired angle before sliding and maintain pressure on your front foot throughout the slide.
5. The Hookup and Landing
To smoothly hook up and stop the slide, release pressure on the back foot while maintaining pressure on the front foot. This will straighten out the board and prepare it for a smoother hookup. Anticipate the hookup and bend your knees to absorb the momentum, particularly bending the back knee to lessen the impact.
Key Toeside Predrift Tips
Toeside predrifts can be an exhilarating skateboarding maneuver when executed correctly. Here are some essential tips to help you master this move:
1. Proper Foot Placement: Ensure that you are going at an adequate speed before attempting a toeside predrift. Your front foot should be firmly planted on the board, exerting pressure against it. This will help create stability and control throughout the maneuver.
2. Carving Setup: To minimize the risk of high-siding, it is crucial to set up your carve properly. Put pressure on your toes, maintaining your weight on the toeside of the board. This will reduce the chances of losing control during the slide.
3. Board Angle Determination: The angle at which you want your board to slide will dictate the force with which you kick out. By loading the board with a turn before initiating the slide, you can create more momentum and control.
4. Transition Preparation: Before engaging in the slide, consider a slight hesitation to set up the maneuver smoothly. To facilitate an easier transition between gripping and slipping, bend your knees as you enter the slide and straighten them out as the slide progresses.
5. Back Foot Technique: When pushing with your back foot, it can feel like a simultaneous backward, sideways, and downward motion. By pushing downward, you enhance control as the wheels slide more evenly. Pushing backward should happen naturally as you execute the maneuver.
Key Pre-Drift Tips
In the world of sliding, mastering the pre-drift technique is essential for smooth and controlled slides. Here are some key tips to keep in mind:
1. Shoulder and Hip Work: During pendulum slides, focus on using your shoulders to dictate the slide. In contrast, when executing pre-drifts, let your hips and legs take on most of the work. This will ensure the correct balance and positioning for a successful slide.
2. Hand Placement: Utilize your arms and hands as counterbalances to help you maintain stability and hold desired angles during the slide. This small adjustment can greatly improve your overall sliding experience.
3. Setup Carve: Before entering the pre-drift, carve into the corner to set yourself up for success. This will make it easier to maintain an angle less than 90 degrees and glide smoothly through the slide.
4. Differential Tightness: Adjust your trucks accordingly by tightening the back truck slightly more than the front. This adjustment allows the back to initiate the drift before the front, enhancing control and preventing unwanted turns.
5. Direction and Body Positioning: Ensure that your board is positioned in the direction you want to go. If you can’t align the board accordingly, adjust your body positioning to absorb any potential harshness during the slide’s hookup.
6. Front Foot Assistance: At the end of the pre-drift, use your front foot to push the board out and help straighten up as you exit the slide. This technique aids in maintaining control and stability during the transition.
How to Stand-Slide Up on Your Longboard (Longboard Slide Without Gloves)
Stand-sliding on a longboard can be challenging initially, but with practice, it becomes easier. Here we will provide step-by-step instructions on how to perform a stand-up slide on your longboard without using gloves.
1. Set-Up Carve and Compress
First, initiate a set-up carve, bending your knees as you do so. When you reach the zenith of the carve, apply pressure to the relevant area of your board, either your toes for toesides or your heels for heelsides. Maintain about 60% of your weight on the front foot and 40% on the back.
2. Kick and Decompress
Give the board a nudge while simultaneously unbending your knees to transfer your weight, deweighting the board. This makes it easier for the wheels to break traction. As a result, you should be in the slide, gliding along.
3. Hold and Guide the Slide
To hold the slide, stay relaxed and keep pressure in the appropriate places. Guide the slide by looking in the direction you want to go and ensuring your shoulders are facing that direction. This will help maintain control.
4. Hook Up
When you are ready to end the slide, start by slowly releasing pressure on your back foot while maintaining consistent pressure on the front foot. Straighten out the board by gradually reducing pressure on the back foot. To absorb momentum and ensure a smooth hook up, compress your knees as you release pressure.
How to Sit Down Slide
The sitdown slide is an advanced skateboarding technique that requires precise movement and weight distribution. Unlike other slides, there is no decompression involved, making it a bit different. Here we will break down the steps to help you master the sitdown slide.
1. Set Up Carve
To initiate the sitdown slide, start with a set up carve. This involves using your back leg as a rudder to kick the board out while maintaining most of your weight on your front foot. The carve should be executed smoothly to ensure the slide begins effortlessly.
2. Weight Distribution
During the sitdown slide, it is crucial to distribute your weight properly. Approximately 70-80% of your weight should be on your front foot, while the remaining weight is placed on your back leg. This distribution helps maintain balance and control throughout the slide.
3. Sliding Technique
While performing the slide, ensure that you have pressure in the right places to keep the board sliding smoothly and prevent high-siding. As you kick the board out, aim to maintain the necessary pressure to sustain the slide and enjoy a long and controlled slide.
4. Ending the Slide
Once the slide is complete, it’s time to end it gracefully. Pull your back leg in and gently push out with your front foot to straighten out the board. This action helps the board regain grip on the pavement and allows for a smooth roll away after the slide.
Tips and Tricks for Stand Up Slides
We will explore some tips and tricks to help you master stand up slides with confidence. Practicing and perfecting 180-degree slides can improve your skills and prepare you for more challenging slides in the future.
1. Build Confidence with 180° Slides: Start by practicing and holding out 180-degree slides. This will help you gain the confidence and control necessary for attempting bigger slides. By focusing on executing a smooth 180-degree slide, you can hone your technique and reduce the fear of harsh hook-ups.
2. Maintain Proper Pressure Placement: Remember to keep pressure in the right places as you perform slides. This means maintaining a balanced distribution of weight on the board, ensuring stability and control throughout the slide. By paying attention to pressure placement, you can achieve smoother and more controlled slides.
3. Don’t Forget the Basics: As you engage in stand up slides, it is essential not to neglect the fundamental techniques. Filming yourself and reviewing the footage can provide valuable insights into your form and enable you to correct any errors. Neglecting basic elements such as compression and decompression can hinder your progress and lead to frustration.
4. Avoid Forcing the Board: A common mistake that many people make is attempting to forcefully carve and push the board out during slides. Instead, focus on executing the proper techniques, including compression and decompression. By following these techniques correctly, you can achieve better results and avoid unnecessary stress.
5. Utilize Footstops and Weight Distribution: Toeside slides can be enhanced with the help of a footstop. The footstop provides additional leverage and control, enabling you to execute smoother slides. On the other hand, for sit-down slides, avoid putting too much weight on your back leg to prevent unnecessary strain on your knees.
Necessary Gears for Learning to Slide on a Longboard
Before delving into how to slide on a longboard, it is crucial to have the right gear for your safety and comfort. Here we will highlight some basic necessary gears that every beginner should have.
1. Longboard Slide Gloves
Longboard slide gloves are essential for sliding. These gloves are equipped with plastic pucks, which provide extra grip and protect your hands from heat and particles on the road. They offer a secure grip on the pavement while sliding.
2. Helmets
Helmets are a must-have gear for safety when engaging in any form of riding. It is crucial to protect your head from potential injuries. Wearing a helmet reduces the risk of head trauma in case of accidents or falls.
3. Slide Wheels
Choosing the right wheels is essential for sliding. Stone-ground wheels are the best for this purpose. Unlike smooth-surfaced wheels that eventually wear out and form more grip, stone-ground wheels are built to slide smoothly. Beginners should opt for harder wheels with a higher durometer for better performance.
4. Rough Clothes
Learning to slide on a longboard can be physically demanding, and it’s better to wear clothes that you don’t mind tearing. Opt for rough clothes that can withstand the friction and movement involved in sliding.
5. Safety Pads
Knee and elbow pads are basic safety measures that provide additional protection during sliding. These safety pads minimize the risk of injury to these vulnerable body parts if you fall or crash.
Having the right gear is essential before attempting to slide on a longboard. Longboard slide gloves, helmets, slide wheels, rough clothes, and safety pads should be considered basic necessary gears for a beginner. With the proper gear, you can ensure your safety and enjoy a smoother sliding experience.
Types of Slides
There are various types of slides that can be performed while longboarding. Each slide requires different techniques and skills. Here we will explore some of the most commonly used slides and how to perform them.
1. The Pendulum Slide
The pendulum slide is a simple and effective slide that can be easily learned by beginners. By swinging your shoulders to the left or right, you can change the direction of the longboard. This slide is especially useful when you want to slow down while going at a fast speed.
2. The Pre-Drift Slide
The pre-drift slide is a great choice for taking corners safely at high speeds. By keeping the longboard at a 90-degree angle to the road, you can easily steer and rotate the wheels while sliding. This slide is stable and useful for racing on open roads.
3. The Sit Down and Squat Slide
The sit-down and squat slide is an easy slide that requires you to lower your body as much as possible while sliding. This slide is particularly helpful if you have a solid squat and can squat well on the longboard.
4. The Standing Slide
The standing slide is similar to the pre-drift slide but without the use of hands. It requires hard carving and balancing the longboard while it glides across the pavement. This slide is more challenging and not recommended for beginners.
5. The Coleman Slide
The Coleman slide is an easy slide that requires practice to position your body correctly. By shifting your weight and using your hands for balance, you can perform this slide smoothly. It is important to maintain the correct posture and engage your hips for a complete 180-degree turn.
6. The Power Slide
The power slide is a popular and visually appealing slide. It requires pressing the front trail with your toe, initiating a heel-side turn, and releasing pressure on both feet to perform the slide. This slide is more difficult and requires practice.
7. The Toe Side Slide
The toe side slide is similar to the Coleman slide and is performed by gaining speed, bending your knees, and carving on the side you want to slide. By placing your hand and using proper body positioning, you can perform a smooth toe side slide.
Tips and Common Mistakes for Longboard Sliding
Learning how to do a slide on your longboard can be challenging, but with proper technique and practice, you can master this skill. Here are some tips and common mistakes to keep in mind:
- Weight Distribution: One common mistake is putting too much weight in the front, which can tip your board. Instead, shift your weight towards the back foot before sliding. This will allow you to kick out and initiate the slide smoothly.
- Heelside Carve: Another mistake is simply kicking out your board with your back foot while riding straight. To improve your powerslide, start with a good heelside carve before kicking out. This helps generate momentum and sets you up for a smoother slide.
- Body Lean: Proper body positioning is crucial for a successful slide. Once you kick out and start sliding, make sure to lean back enough to allow the wheels to break traction. Leaning forward too much can cause your wheels to catch and disrupt the slide. Remember to lean forward at the end of the slide to avoid falling backward.
- Avoid Flatspots: As you progress in your sliding skills, you may encounter flat spots on your wheels. These are flat areas caused by repeated sliding at 90 degrees. To prevent flat spots and extend the life of your wheels, try sliding at an angle rather than fully perpendicular. This will create a more even wear pattern.
Mastering longboard sliding takes time and practice. Start with the basics and focus on proper weight distribution, carving, body leanness, and avoiding flat spots. With consistency and determination, you’ll improve your sliding technique and add an exciting element to your longboarding skills.
FAQs
Sliding on a longboard refers to a technique where the rider intentionally induces controlled sliding of the wheels on the ground while maintaining control of the board’s direction and speed. It is often done for style and to enhance maneuverability during turns.
To begin learning how to slide, it is crucial to have a solid foundation in riding and controlling your longboard. Start by mastering basic techniques such as carving, foot braking, and controlling speed. Once comfortable, gradually introduce sliding techniques, like Coleman slides or speed checks, in a controlled environment with proper safety gear.
When learning to slide on a longboard, safety should be a priority. You will need a good quality longboard with slide-friendly wheels, such as a softer durometer and a freeride-specific board. Moreover, wearing a certified helmet, slide gloves with pucks, knee pads, and elbow pads is highly recommended.
Yes, there are longboards specifically designed for sliding. These boards typically have features like a symmetrical shape, shorter wheelbase, and concave design to provide more grip, stability, and control during slides. Freeride longboards with a stiffer or flexible deck can also be suitable for sliding, depending on personal preferences.
Sliding on a longboard can pose risks, so practicing safety measures is crucial. Always wear appropriate protective gear, such as a helmet, slide gloves, knee pads, and elbow pads. Start in a controlled environment with a wide and smooth surface, away from traffic or obstacles, and gradually increase difficulty as your skills progress.
The time required to learn how to slide on a longboard varies based on individual skill and practice. Some riders may grasp the basics within a few sessions, while others might take several weeks or months to become proficient. Consistency, patience, and proper technique are key to mastering longboard sliding.
Performing a stand-up slide on a longboard without gloves is a skill that requires balance and practice. Instead of using your hands to assist with the slide, you rely on hard-carving and pushing out on the board to break traction. It is important to maintain your balance as the board slides across the ground. While stand-up slides can be challenging at first, with practice, they become easier to execute.
Conclusion:
Learning how to slide on a longboard is an exhilarating skill that will take your riding to the next level. It may seem daunting at first, but with practice and determination, you’ll be carving up the pavement like a pro.
So grab your board, find a smooth hill, and let the adrenaline rush of sliding take you on a thrilling journey. Remember, the key is to stay focused, stay balanced, and most importantly, have fun! Keep pushing your limits and enjoy the ride!