How to Use a Knee Scooter: Step-by-Step (Without Falling)
This post contains affiliate links. As an Amazon Associate, we earn from qualifying purchases.
Using a knee scooter correctly requires matching three things: your knee bent at 90 degrees, the handlebars at your waist, and your hands always on the grips with the brakes locked before you mount. Get those right, and you move. Get one wrong, and you risk a forward vault over the handlebars within the first week.
That 90-degree knee angle isn’t just a suggestion from Alberta Health Services. It’s the difference between gliding comfortably and straining your hip on the good side with every push-off. The mechanics are simple, a straight back and a level pelvis let your strong leg do the work efficiently. Proper form is a key part of how to use a knee scooter.
What follows: the exact adjustments from official manuals, the mounting sequence that prevents the most common tip-over, and how to use a knee scooter to handle doors, curbs, and hills when the manufacturer advice directly conflicts. We’ll also cover the one maintenance check that stops a wheel from wobbling loose.
Key Takeaways
- Set the knee platform height so your injured knee is bent at a 90-degree angle, measured from the floor to the bottom of your bent knee.
- Always lock the hand brakes and keep both hands on the handlebars before you place your knee on the pad. This stops the scooter from rolling away as you mount.
- Move by taking small, controlled steps with your non-injured leg and use the hand brakes to slow down; never coast downhill.
- Inspect the wheel axle bolts weekly, a loose front wheel is the most common cause of a sudden, forward fall over the handlebars.
- Understand the seated vs. Kneeling model conflict: some scooters like the Tuffcare R270 are designed for sitting, while brands like Novajoy warn their knee platforms are not for supporting full body weight.
The 90-Degree Rule That Stops Hip Strain
Here’s how to get it right. Stand beside a counter, bend your injured knee to 90 degrees, and have someone measure from the floor to the bottom of your bent knee. That’s your knee platform height. This isn’t about comfort; it’s about physics. A shallow angle puts pressure on your thigh and strains your pushing leg. A sharp angle cramps your hip and makes balancing precarious.
Adjust the height of the knee rest so your knee is bent at 90 degrees. Your knee rest is at the right height if your knee is comfortably supported at 90 degrees and your hips are even.
For the handlebars, stand next to the scooter on your non-injured side. The hand grips should sit level with your waist. You shouldn’t have to hunch over or reach up. A quick test: with the brakes locked, place your hands on the grips. Your elbows should have a slight bend. Now you’re ready for the part everyone rushes.
Mounting & Dismounting Without the Wobble
Most first-time falls happen here. The sequence is essential. I’ve watched people skip the brake lock, put weight on the pad, and watch the scooter shoot forward as they tumble sideways. It’s a loud, painful lesson.
According to Alberta Health Services, you must lock the hand brakes before mounting. The Roscoe manual agrees on the importance of braking before mounting, stating you should place your hands on the handlebars and apply the brake before placing your knee. This is one procedure where the sources align perfectly.
Step-by-step mounting:
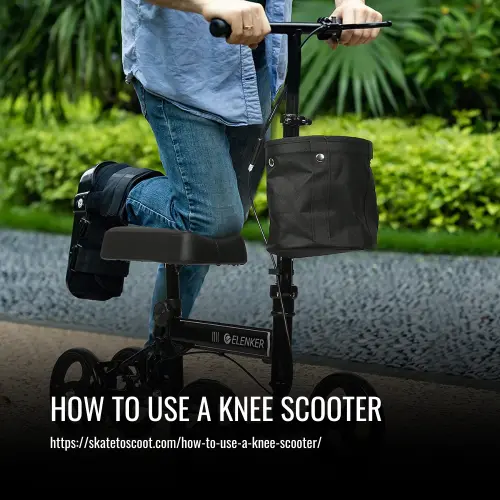
- Position the scooter beside a sturdy surface like a counter or wall.
- Lock both hand brakes. Lock both hand brakes.
- Stand with your injured leg closest to the scooter, holding the handlebars with both hands.
- Bend your knee and carefully place your injured leg onto the knee pad. Sources differ on leg placement: Alberta Health Services advises supporting the knee and upper lower leg with the foot and ankle hanging off the back, while the Roscoe manual advises placing the knee near the top of the pad.
- Keep your non-injured foot firmly on the ground. Find your balance before you even think about moving.
Dismounting is the reverse. Stop completely, lock the brakes, keep both hands on the bars, and then step off with your good foot. Never try to hop off or use the scooter to pull yourself up from a chair. Alberta Health Services specifically warns against that.
Propelling, Steering, and Braking in the Real World
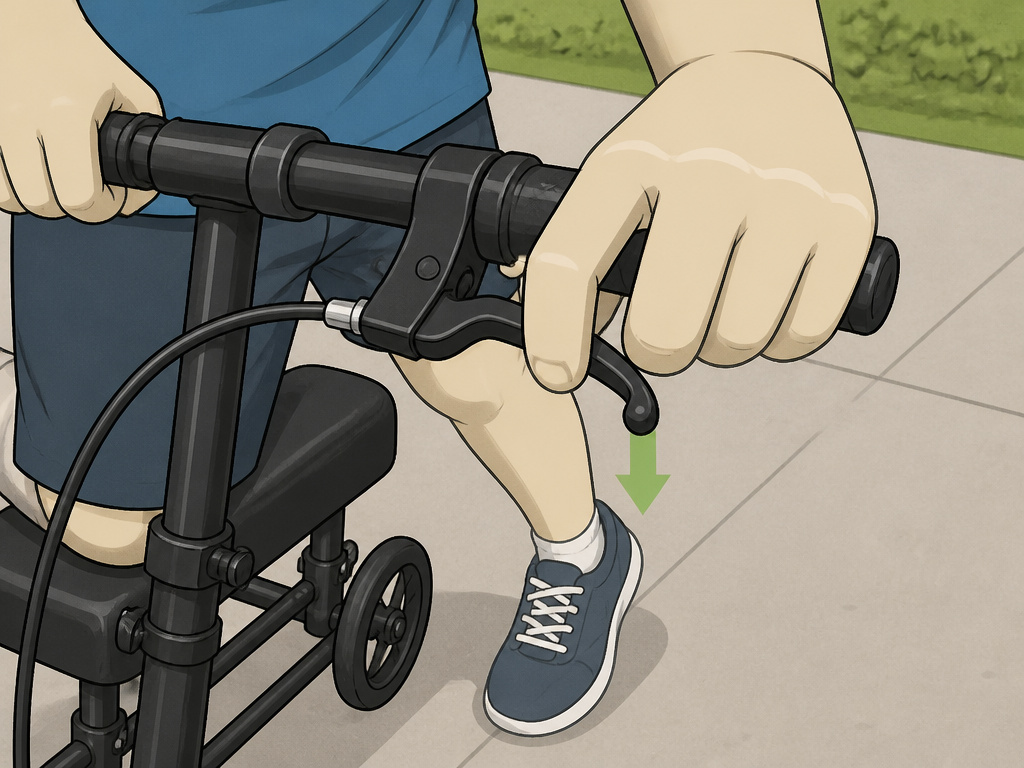
You’re mounted and stable. Now, release the brakes. The Alberta Health Services guide is clear: use your non-injured leg to push forward in small steps. You take small, deliberate steps, keeping your torso centered over the frame.
Steering happens at the handlebars, but your body position dictates stability. Lean slightly into turns. Always slow down before turning, another strict rule from the health authority.
The brakes are your best friend. Use them to control speed constantly, not just to stop. Going downhill? The advice gets specific: keep speed slow and controlled using both handbrakes and your non-injured foot, taking small, quick steps.
Common mistake: Coasting downhill. The hand brakes alone aren’t enough on an incline; you must combine them with dragging your good foot to prevent a runaway scooter.
| Action | Proper Technique | Risk If Skipped |
|---|---|---|
| Moving | Small steps with good foot, use brakes to control speed. | Runaway speed, loss of control. |
| Turning | Slow down first, then lean slightly into the turn. | Front wheels catch, causing a tip-over. |
| Stopping | Apply brakes smoothly before coming to a full stop. | Jerky stop throws weight forward, risking a fall. |
| Reaching | Lock brakes first, then reach. Keep your core over the scooter. | Shifting weight without a locked brake can roll the scooter out from under you. |
Navigating Daily Life: Doors, Bathrooms, and Curbs
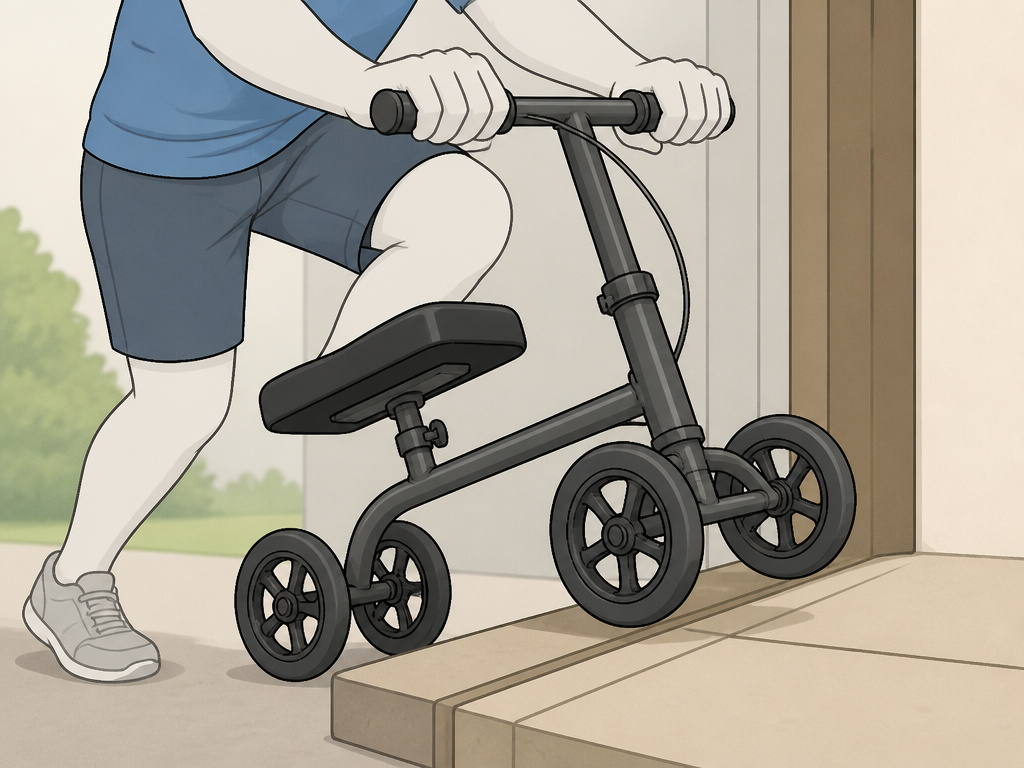
This is where forum advice on how to use a knee scooter diverges from official manuals, and you need to know both. Reddit users in the ORIF subreddit have detailed workarounds for getting a scooter over a front door threshold solo, a scenario no manual covers. One user described lifting the front wheels over while balancing on one foot, a move that requires significant strength and balance.
Bathrooms are a major hurdle. Many bathrooms aren’t designed for a four-wheeled device. The common solution is to use the scooter to the door, then use a walker or crutches for the final tight maneuvering. If you must take the scooter in, go slow, and know that backing out is harder than going in.
Curbs present a direct conflict. Alberta Health Services provides a multi-step method for ascending a curb: bring the front wheel to the curb, lean forward, lift the front wheels onto it, move forward and brake, step up with your good foot, then roll the back wheels up. However, the CanDo® Knee Scooter manual explicitly states: “DO NOT use over curbs, uneven ground, drops, or barriers.”
| Scenario | Official Guidance (Alberta Health Services) | User Workaround (Reddit Community) |
|---|---|---|
| Ascending a Curb | Step-by-step lift-and-roll procedure. | Not recommended by some manufacturers; users report using all-terrain tires and a careful, weighted “wheelie” technique. |
| Door Threshold | Not addressed. | Lift front of scooter over while balancing on good leg, then drag/push rear wheels over. |
| Tight Bathroom | Not addressed. | Use scooter to doorway, switch to crutches or a walker for interior maneuvering. |
| Car Transfer | Not addressed. | Position scooter parallel to car seat, use seat for support, sit, then lift scooter into car. |
Where this goes sideways: Attempting a manufacturer-forbidden curb climb. If your manual says “no curbs,” a failed attempt can jam the front wheel and send you over the handlebars face-first.
Safety Rules and Critical Contraindications
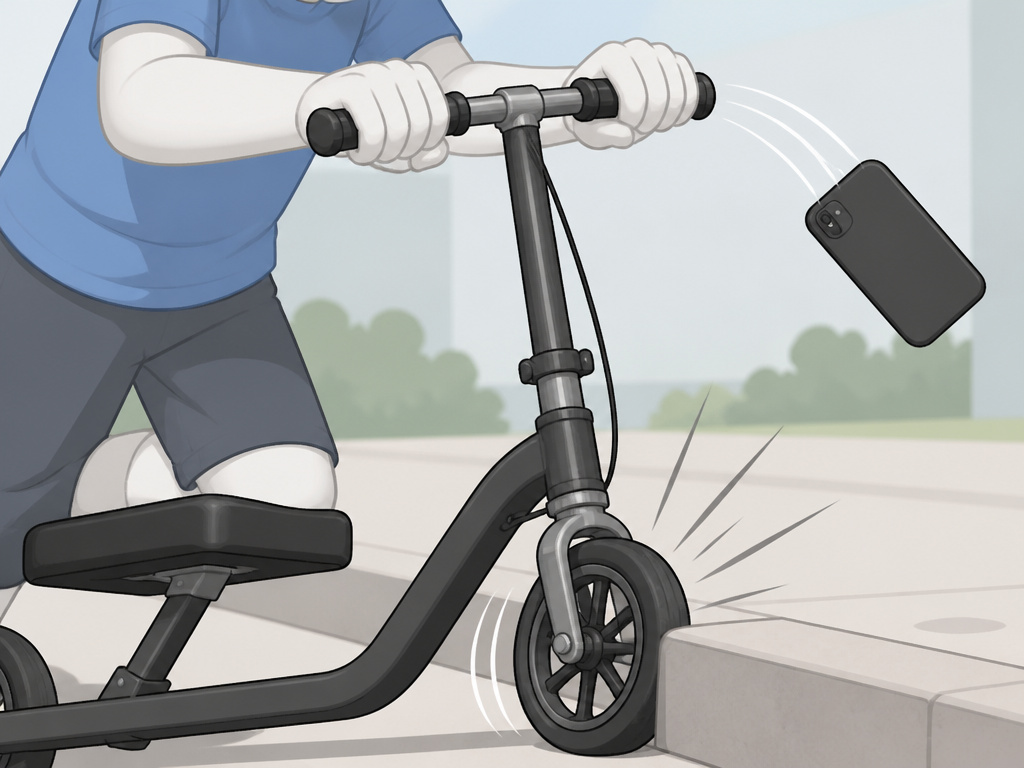
The safety list isn’t generic. It’s a compilation of specific, sourced warnings that prevent the falls and injuries real users report. The number one rule from every source: keep both hands on the handlebars. Reaching for a phone or a door handle shifts your center of gravity.
Alberta Health Services lists clear contraindications: do not use a knee scooter if you have issues with balance, coordination, or vision, or if your non-injured leg is not strong and healthy. This isn’t scare talk. A Reddit user in r/brokenankles described their wheel catching on a curb and vaulting them over the scooter, resulting in a bruised chin and sore hands. Their takeaway: “One really has to slow down and pay attention.”
The non-negotiable safety shortlist:
- Assess terrain. Avoid steep hills, gravel, wet grass, and uneven pavement.
- No stairs. Ever. Not one step.
- Speed kills. Never go faster than a slow walking pace. Some manuals, like the one from CanDo®, advise never going faster than a slow walking pace.
- Brake before you reach. Need to grab your coffee cup? Lock the brakes first.
- Add a basket. Carrying items in your hands is a direct path to a loss of control.
Maintenance: The Weekly Check That Prevents a Crash
A knee scooter is a mechanical device. It can fail. The Novajoy user guide provides a detailed inspection schedule. The most critical item for weekly checking is also the most commonly failed part in user stories: the wheels and axle bolts.
Lift and spin each wheel. It should spin freely without wobbling side-to-side. Check the wheel axle bolts to ensure they are secure. A Reddit user reported, “I just so happened to look down… My left front wheel was wobbling so bad. I had to tighten it up. That could’ve been really bad.” That wobble comes from a loose axle bolt, and it can cause a sudden, violent stop.
Weekly/Monthly Inspection Checklist (from Novajoy):
- Inspect for loose, missing, or broken hardware.
- Ensure brakes do not interfere with wheels when rolling and engage fully.
- Examine brake pads for excessive wear.
- Lift, spin, and check wheels for side movement, rubbing, or binding.
- Check knee pad for excessive wear, cracks, rips, or tears.
- Clean the knee pad with a mild detergent, then sanitize.
Have a dealer or qualified professional perform a full maintenance check at least once every six months. This isn’t an upsell; it’s about catching frame or weld cracks you might miss.
Seated vs. Kneeling: The Model Conflict You Must Resolve
Here is a fundamental disagreement between manufacturers that changes how you use the device. You must check your specific model’s manual.
The Tuffcare R270 is marketed as a “Seated Knee Scooter.” Its instructions include sitting down on the widened pad. Conversely, the Novajoy user guide states plainly: “The knee platform is not designed for sitting or supporting full body weight.”
If you have a standard kneeling scooter and try to sit on it, you risk overloading the frame and tipping sideways. If you have a seated model and only kneel, you might miss out on a more comfortable, stable option for longer periods of standing. This isn’t a matter of preference; it’s a matter of design integrity. Know which one you have.
Types of knee scooters (standard vs. All-terrain)
Knee scooters are designed for short-term use and come in variations for different surfaces. A standard model is built for smooth, indoor floors and paved outdoor pathways. You should assess your terrain and avoid steep or uneven ground. An all-terrain version typically has larger, air-filled tires meant to handle rougher surfaces like gravel or grass more comfortably, but the core safety rules still apply. Regardless of type, you must keep both hands on the handlebars, avoid high speeds, and never use the scooter on stairs or steps. Always inspect your scooter’s wheels and brakes regularly for safe operation.
Going up/down hills or ramps
Navigating slopes requires extra caution. Before attempting any hill, assess the terrain and avoid anything too steep. When scooting downhill, keep your speed slow and controlled using both handbrakes and your non-injured foot. Take small, quick steps with your good leg to maintain stability. Always slow down before making any turn on an incline. Remember, For standard kneeling scooters like those from Novajoy, the knee platform is not designed for sitting or supporting full body weight.
Frequently Asked Questions
What is the proper way to use a knee scooter?
The proper way is to follow the sequence from official health guidelines: adjust for a 90-degree knee bend and waist-high handlebars, always lock the brakes before mounting, propel with small steps using your good leg, and use the brakes to control speed constantly. Never take your hands off the handlebars while moving.
Is a knee scooter hard to use?
It has a learning curve, primarily related to balance and trusting the brakes.
How to go to the bathroom with a knee scooter?
This is a major practical challenge. If your bathroom is large enough, enter slowly, and plan your exit route, backing out is difficult.
Are knee scooters easier than crutches?
However, crutches are still superior for tight spaces, stairs, and situations where you need to sit down and stand up frequently, as you cannot use a standard knee scooter to pull yourself up from a seated position.
Can you sit on a knee scooter?
It depends entirely on your model. Seated knee scooters like the Tuffcare R270 are designed for it. Traditional kneeling scooters from brands like Novajoy are not, their knee platforms are not designed to support full body weight, and attempting to sit could damage the scooter or cause a fall.
Before You Go
The manual for your specific model is the final authority. Print it. If it says “no curbs,” that overrides any article or forum tip you read. The most common post-injury setback isn’t the original break; it’s the fall you take because a wheel bolt worked loose or you tried to navigate a step you shouldn’t have.
And attach a basket, trying to carry anything in your hands is how you learn why the “both hands on the bars” rule exists. Now go roll safely.
