How to Use Lime Scooter: Step-by-Step (Without Damage)
This post contains affiliate links. As an Amazon Associate, we earn from qualifying purchases.
To use a Lime scooter, download the Lime app, locate and scan a scooter’s QR code to start your ride, perform a quick safety check, start by kicking off, then use the throttle to accelerate and the brake lever to slow down. You must park the scooter upright in a designated area shown in the app to end your ride. Always wear a helmet, ride solo, and never operate under the influence.
The process is straightforward, but the difference between a smooth ride and a costly mistake lives in the specifics Lime publishes, which include instructions on how to use Lime scooter. Their official rules are the binding conditions of your rental, and violating them can mean fines or being charged up to $1,500 for a lost or damaged vehicle.
What follows: the exact steps from Lime’s manuals, the safety rules most riders gloss over, how to handle common app glitches, and where the advice changes if you’re on a newer Gen4 scooter versus an older Gen 2.5 model in the how to use Lime scooter guide.
Key Takeaways
- Always perform a pre-ride check on brakes, tires, and the frame before starting your ride. If anything feels loose, looks damaged, or the display shows an error code other than 02E, report it in the app and find another scooter.
- Start every ride with a manual push-off, even on electric models. Place your front foot firmly on the deck, use your back foot to push from the ground, then engage the throttle once you’re rolling. This prevents a jerky, unstable start.
- Park only in the blue “P” zones shown in the Lime app. Ending your ride outside these designated areas will fail, keep your meter running, and may incur a fee. The app’s GPS can be slow, so check for parking near your destination before you start riding.
- The 220 lb (100 kg) weight limit includes you and anything you’re carrying. Exceeding it is a direct violation of Lime’s rules.
- A helmet certified to Snell, CPSC, ANSI, or ASTM standards is “highly recommended” by Lime and legally required in many cities. Where helmets are mandated, you must wear one to use their services.
Before You Ride: The Mandatory 60-Second Check
You found a scooter on the sidewalk. Your instinct is to scan and go. Resist it.
Lime’s policy is clear: if you notice any signs of damage or need for maintenance during your safety inspection, do not use the vehicle. You must report it immediately via the app and reserve a different one. If you don’t, and the damage is later traced to your ride, you could be held responsible.
Here’s what to look and feel for, in this order:
- The Display: Is it on and showing a battery level? If it shows an error code, stop. Error code 02E means low battery; the manual advises to charge the scooter fully to resolve it. Any other error code (01E, 03E, etc.) means a system fault. Do not ride. According to the manual, you should contact the Lime support team.
- The Brakes: Squeeze the brake lever on the left handlebar. It should engage firmly, not squish to the grip. Then, with the kickstand down, try to push the scooter forward. The brake should hold it.
- The Tires: Give them a visual once-over. They should be fully inflated, not visibly flat or cracked. A soft tire affects handling and increases the risk of a pinch flat.
- The Frame & Stem: Grab the handlebars and try to wiggle them. There should be no loose, clunking movement where the stem meets the deck. Look for any obvious cracks, especially near the folding mechanism or the base of the stem.
- The Kickstand: Use your foot to pull it up and back. It should retract fully and cleanly, not stick or drag on the ground.
This is the baseline due diligence that separates a routine trip from an incident report. A brake that feels mushy at a standstill will fail you when a car door swings open.
How to Unlock a Lime Scooter with the App
The physical act is simple: open the Lime app, point your phone’s camera at the QR code on the scooter’s handlebar, and wait for the beep. The digital handshake underneath is where trips get stuck.
Common mistake: Trying to unlock a scooter that’s already in use or low on battery. The app will usually prevent this, but if the GPS is lagging, you might scan a scooter someone else just parked. If the unlock fails, check the map, the scooter icon will be solid if it’s available, faint if it’s not.
A few specifics first-timers miss:
- You need a payment method on file. The app won’t let you scan without one.
- Your phone’s location services must be on. The app uses GPS to verify you’re physically at the scooter and to define ride zones.
- Starting your ride means you’re now being charged. The clock starts the moment the scooter beeps and your ride begins. If you change your mind, end the ride immediately through the app to minimize charges.
If the scan fails, try a few things before giving up. Wipe the QR code with your sleeve if it’s dirty. Get better light. Restart the app. If it persists, that scooter is likely having a connectivity issue, find another one. Wasting five minutes troubleshooting a bricked scooter is cheaper than having your ride time tick away while you fiddle.
The 3-Step Start: Kickstand, Foot, Push
The official Lime guide breaks the launch into three mechanical actions. Skipping one leads to a wobbly, dangerous start.
Step 1: Release the kickstand. Hold onto the handles for balance. Use your foot to pull the kickstand up and back. If it doesn’t fully retract, don’t force it, park it and find another scooter.
Step 2: Place your front foot. Plant your dominant foot firmly on the baseboard, centered between the wheels. Your weight should be slightly forward, knee bent.
Step 3: Push off from the ground. Use your other foot to push off from the pavement two or three times, like a regular kick-scooter. Get the scooter rolling at a walking pace before you touch the throttle.
Why the push? Electric motors deliver torque instantly. Hitting the throttle from a dead stop can cause the scooter to lurch, especially if you’re not perfectly balanced. That initial momentum stabilizes you. It’s the difference between a confident launch and a embarrassing stumble into the street.
Riding Basics: Throttle, Braking, and Where to Be
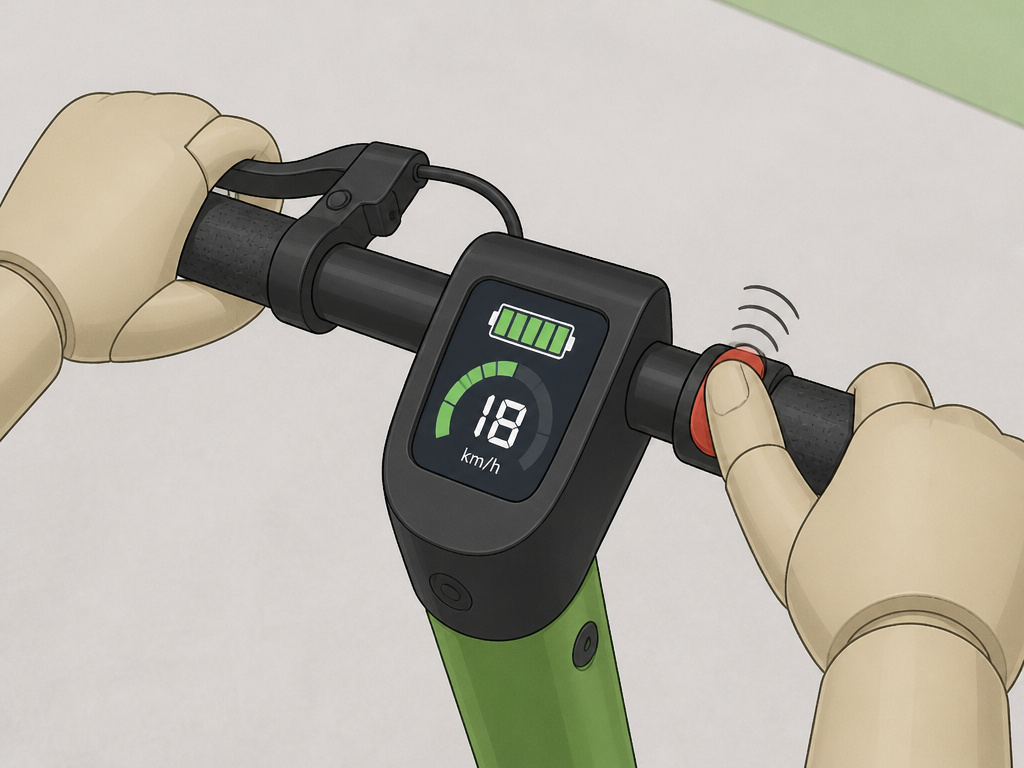
You’re moving. Now what?
Your right hand controls the thumb throttle on the right handlebar. Press it gradually to accelerate. Your left hand controls the brake lever. Squeeze it smoothly to slow down. The brake is regenerative on most models, meaning it will also feed some energy back into the battery.
The sound you’re listening for is a quiet, electric hum. Any grinding, clicking, or whining from the wheels or motor is a red flag. If you hear it, pull over safely and end your ride.
| Control | Action | What Happens If You Do It Wrong |
|---|---|---|
| Throttle (Right) | Press gradually with thumb. | A sudden jab causes jerky acceleration, loss of balance, or wheel slip on loose surfaces. |
| Brake Lever (Left) | Squeeze smoothly, don’t grab. | Grabbing the brake locks the front wheel, leading to a forward pitch and almost certain fall. |
| Body Position | Knees bent, weight centered. | Standing stiff-legged transfers every bump to your spine and reduces control. |
Where should you ride? Lime’s official advice is to ride in bike lanes or close to the curb in the street. In most cities, this is the law. Riding on sidewalks is often illegal and always dangerous for pedestrians.
We recommend riding in bike lanes or close to the curb in the street. Make sure to avoid sharp bumps, potholes, drainage grates, and rail tracks. . Lime Gen 2.5 Owner’s Manual
Check your local regulations. Some cities require helmets, some restrict scooter use in certain areas, and most have rules against sidewalk riding. You are responsible for knowing and following them. The Lime app process includes a safety center with local rules, but a quick web search for “[Your City] e-scooter laws” is smarter.
How to Park and End Your Ride Correctly
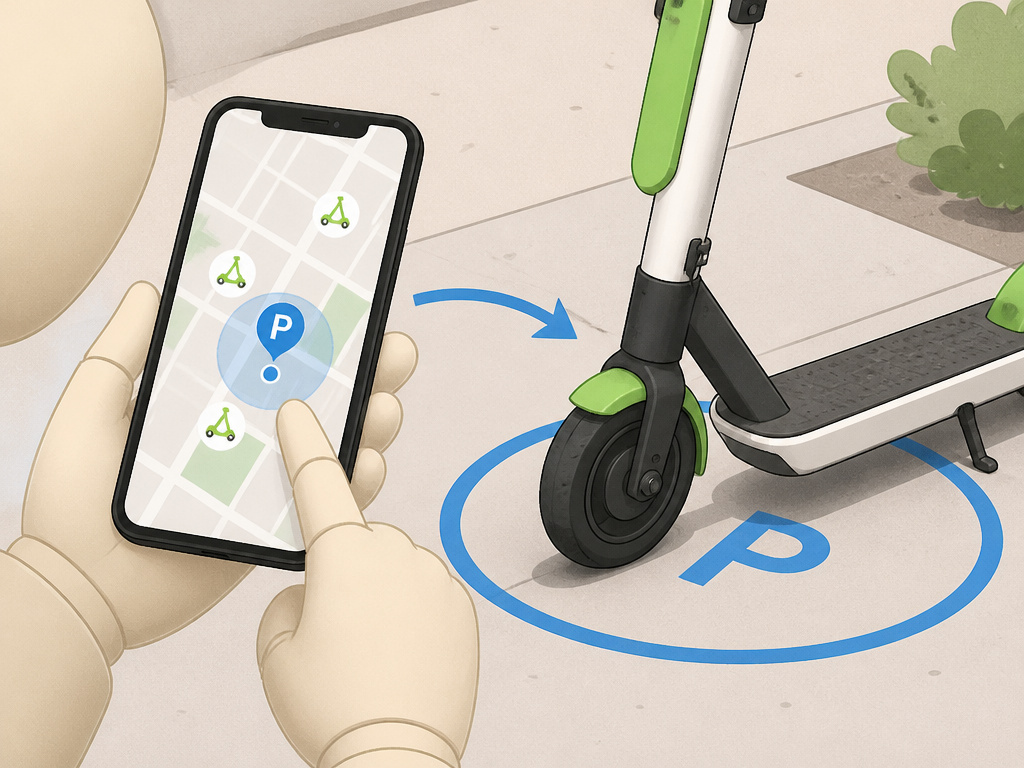
This is the step that causes the most frustration and unexpected charges. You don’t just stop and walk away.
Lime’s rule is absolute: “At the end of your ride, you must park the vehicle upright in the designated areas in the Lime App, ensuring it does not obstruct access or traffic.”
Here’s the procedure:
- Slow down and start looking for parking zones about a block from your destination. In the Lime app map, designated parking areas are shown as blue circles with a “P” inside.
- Ride completely into the zone. The app uses your phone’s GPS. If you’re on the edge, it may not register.
- Put the kickstand down. Use your foot to deploy it so the scooter stands upright.
- Open the Lime app and tap “End Ride.” Wait for the confirmation screen and the sound of the wheel locking.
- Take a screenshot of the ride summary. This is your proof if there’s a dispute about parking or overtime charges.
Where this goes sideways: Assuming you can park anywhere. You can’t. The “free parking” myth likely comes from people seeing improperly parked scooters. Those riders either got lucky with a GPS glitch, or they’ll find a fee on their statement later.
What if the app says “You cannot park here”? First, make sure you’re actually inside the blue zone. GPS can be slow, try walking the scooter a few feet in different directions. If it still fails, you may need to find the next nearest parking zone. It’s annoying, but riding around searching will add time and cost to your trip. This is why checking for parking before you start your journey is an essential part of learning how to use a Lime scooter smartly.
Lime Scooter Rules You Can’t Afford to Ignore
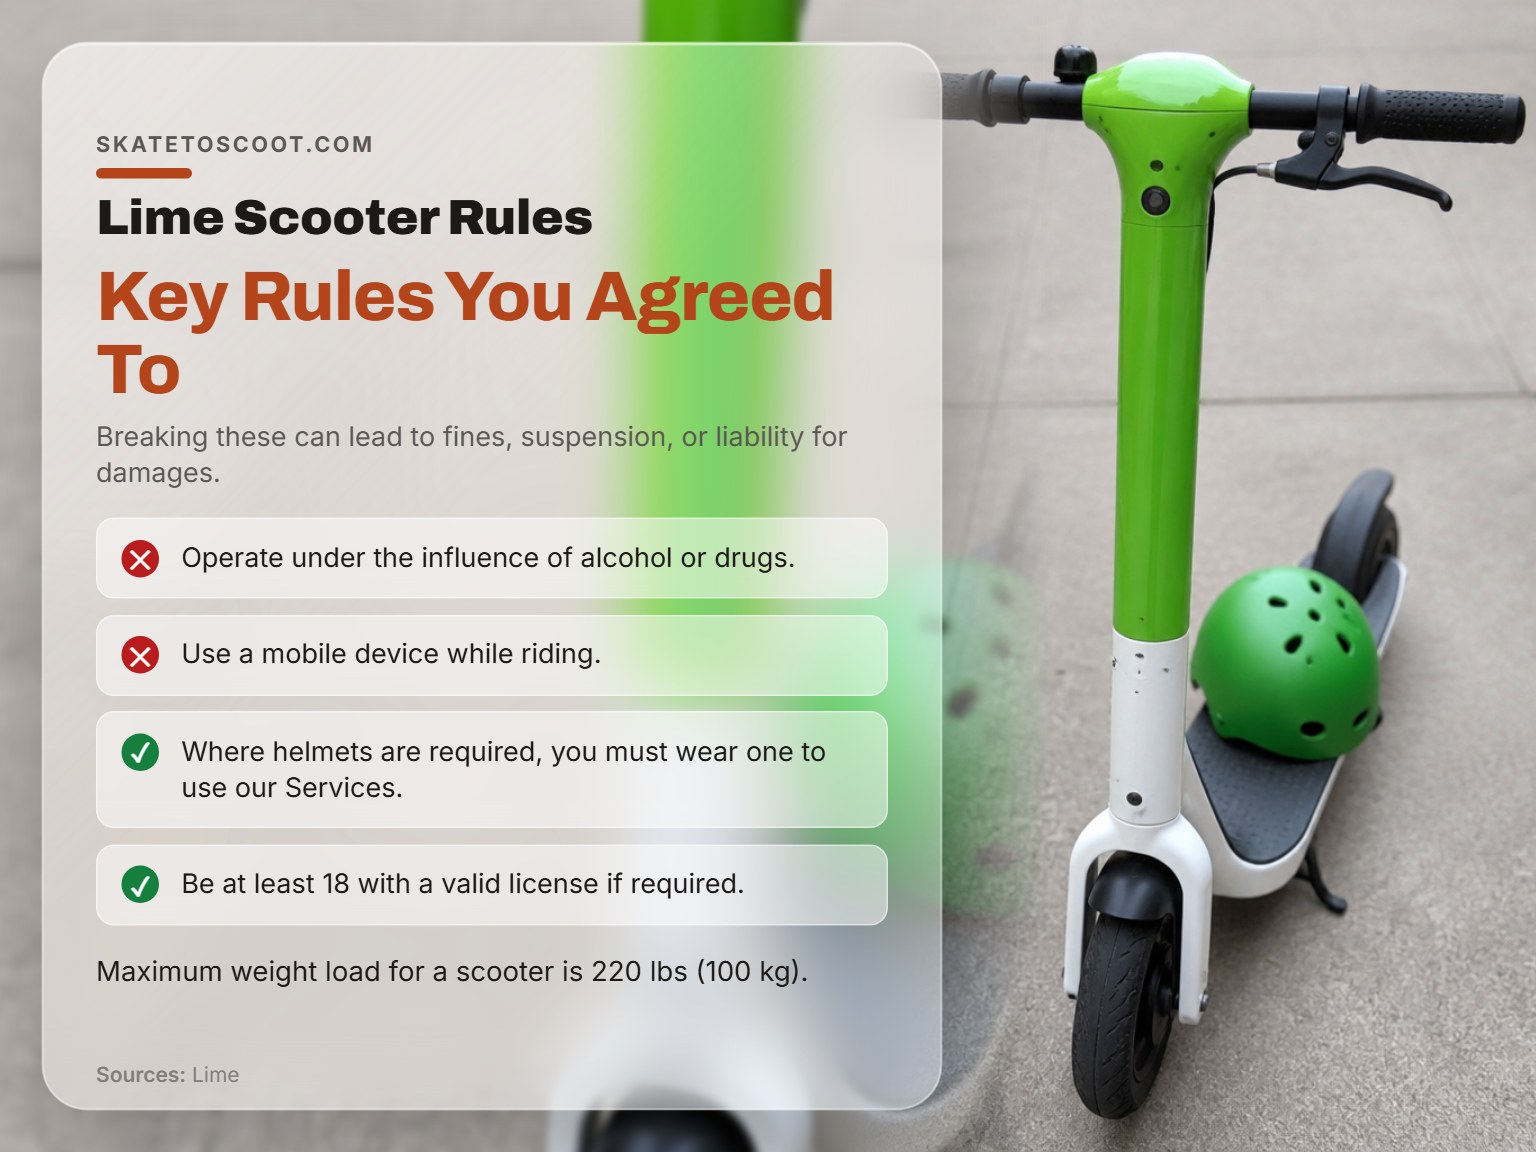
These are the terms you agreed to in the User Agreement. Break them, and you risk fines, account suspension, or liability for damages.
- One Rider Only. No passengers, children, or animals. Lime’s general rule states the maximum weight load for a scooter is 220 lbs (100 kg), and that includes you and any bag. Specific models like the Gen 2.5 also list a 100 kg load capacity.
- No Impairment. You cannot operate a Lime vehicle under the influence of alcohol, drugs, or any substance that hinders your ability.
- Helmet Use. Wearing a helmet (preferably Snell, CPSC, ANSI, or ASTM-approved) is “highly recommended.” In areas where helmets are legally required, you must wear one to use the service.
- Age & License. You must be at least 18 and have a valid driver’s license if local law requires it.
- No Phones. Do not text, call, or use your mobile device while riding. Pull over safely first.
- Weather Awareness. Rain, snow, and ice severely impact traction and braking. Ride slower, avoid leaning into turns, and brake much earlier.
The financial stakes are real. If you damage a scooter or it’s considered lost or stolen, you are responsible for the replacement cost, which Lime states is up to $1,500.
Troubleshooting Common Lime Scooter Problems
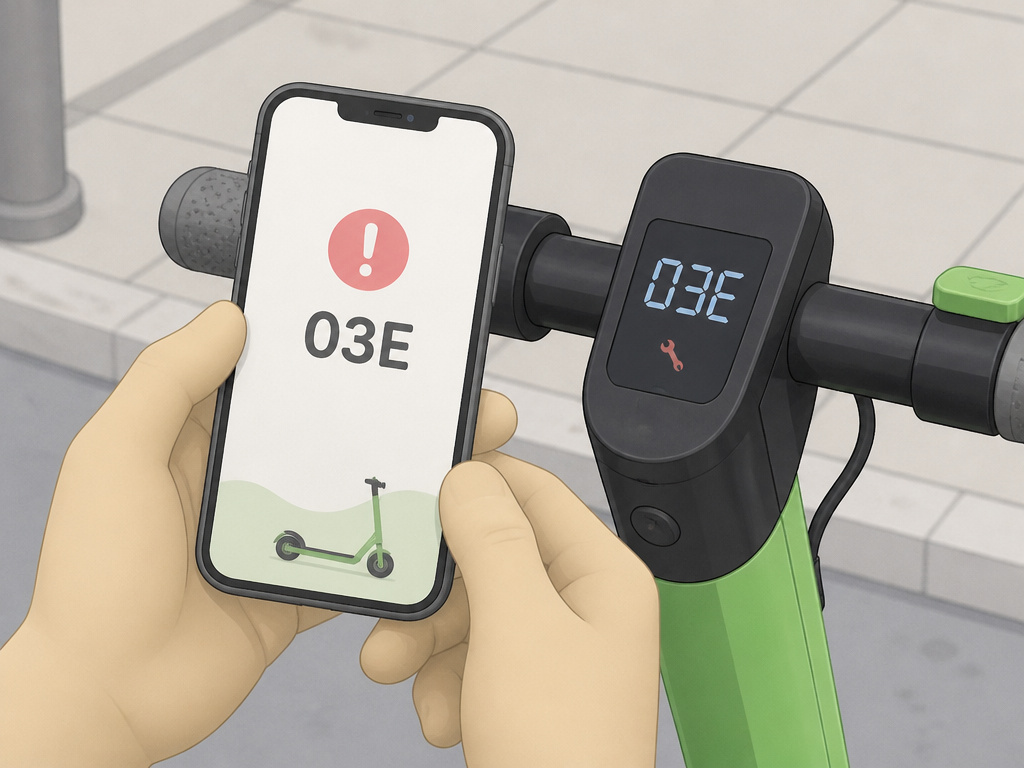
Even when you follow all the rules, things can go wrong. Here’s how to handle the most common hiccups.
Problem: The ride won’t end. You’re in a blue “P” zone, but the app refuses to end the ride.
- Fix: Force-close the Lime app completely, then reopen it. This often refreshes the GPS connection. If it still fails, take a photo of the scooter parked correctly in the zone, then contact Lime support through the app’s help menu. They can manually end the ride and adjust your fare.
Problem: Error code on the display. You see a code like 03E or 10E.
- Fix: Do not ride. According to the manual, the scooter is disabled. End your ride immediately in the app if you’ve started one, report the problem via the help menu, and find another scooter. Only error code 02E (low battery) is rideable, but with caution.
Problem: The scooter feels slow or weak. It’s not reaching the top speed you expected.
- Fix:
Problem: You’ve been charged for a ride you didn’t take.
- Fix: Go straight to the “Ride History” section in the app. Find the ride in question and tap “Get Help” or “Dispute Charge.” Provide any evidence you have (like the screenshot of your successful ride-end). Support can usually resolve this quickly.
How to ride a scooter in traffic
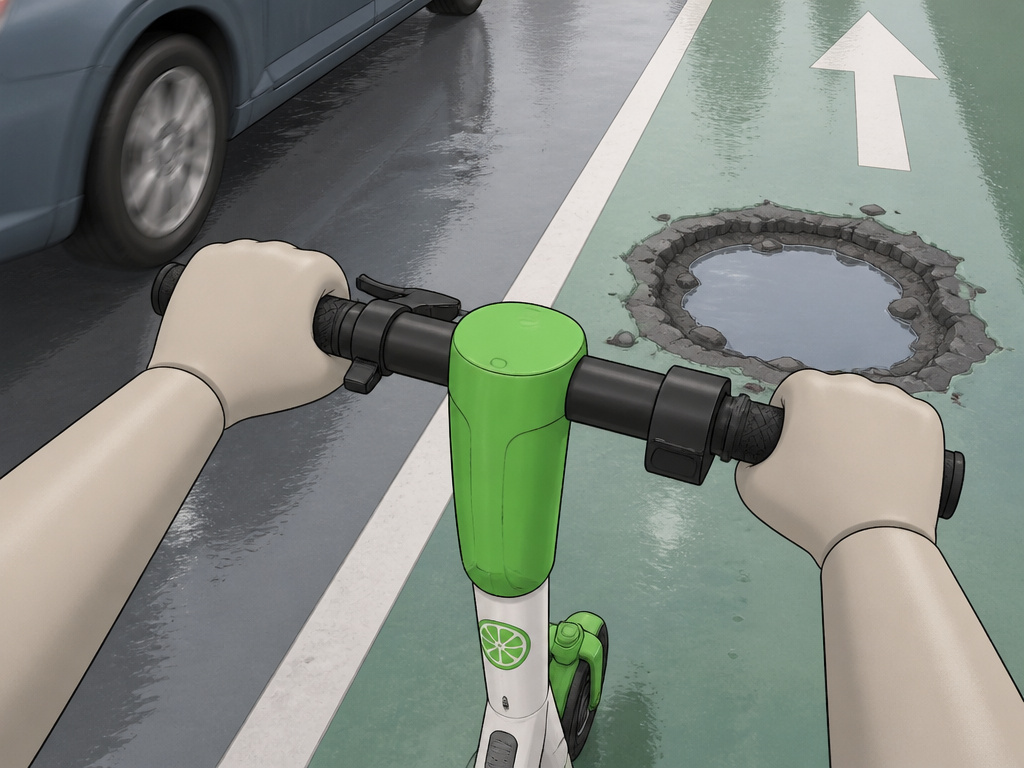
When riding in traffic, your primary goal is to be predictable and visible. You should ride in bike lanes or close to the curb in the street whenever possible. Always be on the lookout for obstacles like sharp bumps, potholes, drainage grates, and rail tracks, and navigate around them carefully. Adverse weather and road conditions like rain, snow, or ice will impact handling and braking, so you must adjust your speed and riding behavior accordingly. Use extra caution if riding at night. Do not carry any objects that may cause you to lose balance, and never use a mobile device while riding.
Frequently Asked Questions
How much does a 20-minute Lime scooter ride cost?
Lime uses a start fee plus per-minute pricing, which varies by city. Always check the exact rates shown in the app before you start your ride, as Lime pricing can differ between markets.
Can you just leave Lime scooters anywhere?
No. You must park them upright in a designated parking zone (“P” zone) shown in the Lime app. Leaving a scooter anywhere else, especially blocking sidewalks, ramps, or building entrances, is a violation of Lime’s rules and local ordinances. The app will not let you end your ride, and you may be charged additional fees.
How long does 2 miles take on a Lime scooter?
Assuming an average speed in an urban environment with stops, 2 miles would take some time. Check the scooter’s display for its current speed limit, as maximum speeds vary by model and region (e.g., Gen 2.5: up to 24 km/h, AU Gen4: 20 km/h). Always factor in time to find parking.
What’s the difference between Lime’s scooter models?
Lime operates different generations of scooters. Common ones include the Gen 2.5 (300W motor, up to 24 km/h max speed) and the Gen4 (which has a 500W motor in Australian specifications, with a speed limit of 20 km/h there). The physical Lime scooter model affects its weight, range, and power, but the basic Lime scooter operation guide remains the same.
Before You Go
One rule cuts through all the specs and steps: if you wouldn’t do it on a bicycle, don’t do it on a Lime scooter. The same traffic laws apply, the same right-of-way rules matter, and the same physical consequences for a mistake are waiting.
Your first ride shouldn’t be a long commute. Make it a five-minute loop around the block. Practice the push-off, get a feel for the throttle and brake, and locate a parking zone. That low-stakes rehearsal builds the muscle memory that keeps you upright when a car suddenly turns.
The scooters are tools, not toys. Respect the machine, the rules, and the road, and they’re a fantastic way to get around. Forget any one of those three, and the bill, whether it’s from the hospital or from Lime, will get your attention fast.
