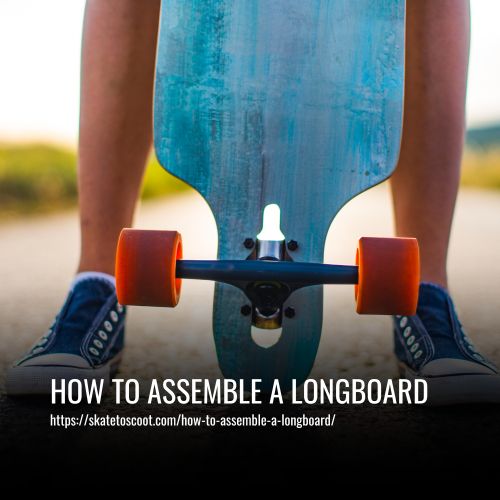
How to Assemble a Longboard: A Step-by-Step Guide
As an Amazon Associate we earn from qualifying purchases.
Longboarding is a popular and thrilling activity for individuals of all ages. Whether you’re a beginner or an experienced rider, assembling your own longboard can be a rewarding and cost-effective way to customize your ride.
To Assemble A Longboard, Follow These Steps:
- Installing a Grip Tape
- Installing Longboard Trucks
- Placing the Bearings
- Lodging the Wheels

How to Assemble a Longboard: A Step-by-Step Guide
Assembling a longboard may seem daunting at first, but with the right tools and instructions, it can be a straightforward process. In this guide, we will walk you through the steps to assemble your longboard, ensuring that you have all the necessary components and tools. From gripping the deck to installing the trucks, wheels, and bearings, we will cover everything you need to know to get your longboard ready for an exhilarating ride. So, let’s dive in and get started on assembling your longboard step by step.
1. Installing a Grip Tape
After procuring a sheet of grip tape, you are ready to install it onto your longboard deck. Start by ensuring that the grip tape is cut to the appropriate size for your deck. If needed, you can cut it using a cutter or the edge of a blade.
With the grip tape prepared, stand at one end of the deck, either the nose or the tail. Position the grip tape over the deck, aligning it with the edges. It should extend over the opposite end of the deck by at least one inch.
Begin by firmly placing the grip tape onto the deck. Working from one end to the other, smooth it down, making sure it is straight and extends a bit over the edges. To ensure a secure bond, use the rounded end of a screwdriver to firmly press and smooth down the grip tape, creating a visible white line on the surface.
After the grip tape is securely applied, use a razor or box cutter to carefully trim off the excess parts. Pay close attention to the white line you created with the screwdriver in the previous step, as it can serve as a guide for cutting. Be cautious, as the excess grip tape is easy to break.
2. Installing Longboard Trucks
There are two main versions of installing longboard trucks: the top mounted version and the drop-through version. Here’s a step-by-step guide for each:
1. Top Mounted Version:
- Start by using a screwdriver to pierce into the truck holes from underneath the deck.
- Screw the trucks onto the top of the board, making sure all screws are securely fastened.
- Flip the board upside down with the bottom facing up.
- If you’re using risers, install them first.
- For regular kingpin trucks, make sure the bushing and the kingpin face inward toward the center of the longboard deck.
- For reverse kingpin trucks, the bushing and kingpin should face outward towards the nose and edge of the deck.
2. Drop-Through Version:
- Before installing drop-through trucks, disassemble them by removing the kingpin nut, bushing, washer, and hanger.
- Make sure the kingpin is through the drop-through mounting hole.
- Position the base plate on top of the deck, aligning it with the holes.
- Reassemble the trucks by putting back the hanger, washer, and bushing according to your preference.
- Once all the base plates are set up and bushings are chosen, you can install the drop-through trucks.
Remember to tighten all nuts and bolts properly to ensure stability and safety during your longboard rides.
3. Placing the Bearings
Now that you have your longboard deck and trucks assembled, it’s time to place the bearings onto the wheels. Follow these steps to ensure a smooth and secure installation:
- Insert the bearings into the available sockets: Flip your longboard over and hold one of the axles with one hand. With your other hand, slide a bearing onto the axle.
- Use a spacer (if available): If you have spacers, place one above the bearing and before the wheel. This helps keep the bearings aligned and prevents them from seizing up.
- Push the bearing onto the tire: Apply overhead tension and start pushing the bearing into the socket of the wheel. You may need to apply some pressure, but be careful not to squeeze too hard.
- Feel the bearing move into place: As you push, you’ll gradually feel the bearing slide into position. It should fit snugly and rotate smoothly.
- Repeat for the second bearing: Set the second bearing by repeating the same process as you did with the first one. This ensures both bearings are securely in place.
- Install the remaining wheels: With the bearings in place on one wheel, continue to install the remaining three wheels following the same steps.
By properly placing the bearings onto your longboard wheels, you’ll ensure a smooth and enjoyable ride. Remember to check the bearings periodically for any signs of wear or damage, and replace them if necessary. Happy riding!
4. Lodging the Wheels
Once you have your longboard deck and trucks assembled, it’s time to connect the wheel assemblies to the platform. Here are the steps to lodge the wheels onto your longboard:
- Place a washer on each of the wheels: Before attaching the wheels to the longboard deck, slide a washer onto the axle of each wheel. This helps to distribute the pressure evenly and prevent any damage to the wheels or bearings.
- Slip on the bearings: After placing the washers, slide the bearings onto the axle of each wheel. Make sure to align them correctly with the wheel sockets.
- Put another washer on Once the bearings are in place on the axle, slide another washer onto each axle. This acts as an additional protective layer and helps ensure the wheels rotate smoothly.
- Install the lock nut: The final step is to secure the wheel and tire assembly in place by adding the lock nut. Screw the lock nut onto the axle, making sure it is tightened securely but not too tight.
- Flip the board and repeat the procedure: Flip the longboard over and repeat the same steps to attach the wheels on the opposite side. This ensures that all four wheels are securely lodged onto the longboard deck.
Now that the wheels are properly lodged, you theoretically have a rideable longboard. However, it is recommended to go through the entire assembly process again to double-check that all parts are in their proper places and everything is well-arranged. This helps ensure the safety and functionality of your longboard.
Safety Considerations When Assembling a Longboard:
When assembling a longboard, it is crucial to prioritize safety to ensure an enjoyable and accident-free riding experience. Here are some key safety considerations to keep in mind:
- Protective Gear: Always wear the appropriate protective gear, including a helmet, knee pads, and wrist guards. These accessories can protect you from head injuries, scrapes, and fractures in case of a fall or collision.
- Caution with Tools: Handle skate tools and other assembly tools with care. Sharp edges, such as razor blades or sharp cutting tools used for grip tape installation, can cause injury if mishandled. Use caution and precision when using these tools.
- Board Breakage: Be aware that longboards may break or crack under excessive stress. Regularly inspect your board for any signs of weakness, such as delamination or cracks. If any issues are found, it is recommended to replace the damaged parts or the entire board.
- Sliding Gloves: When performing slides or other advanced maneuvers, sliding gloves are highly recommended. These gloves offer additional protection for your hands and wrists while reducing the risk of injuries during slides.
- Riding Mindfulness: Whether you are a beginner or an experienced rider, it is essential to stay focused and be mindful of your surroundings while riding. Pay attention to road conditions, traffic, pedestrians, and other potential hazards to avoid accidents.
Remember, safety should always be a top priority when assembling and riding a longboard. By following these safety considerations and using common sense, you can have a safe and enjoyable riding experience.
Gather the Required Materials:
To assemble your longboard, you will need the following materials and tools:
- Gripped Deck: If your deck doesn’t have grip tape applied yet, check out our article on how to apply grip tape for step-by-step instructions.
- Trucks with Hardware: Each truck will require four screws and four nuts. These screws and nuts go through the baseplate and secure the truck to the deck. Additionally, each truck needs four axle washers and two lock nuts. Make sure you have eight screws, eight corresponding nuts, eight axle washers, and four lock nuts before starting the assembly.
- Wheels: You’ll need four wheels for your longboard. Make sure all four wheels are the same and do not mix and match different wheels.
- Bearings: Two bearings fit inside each wheel, so you will need a total of eight bearings for your longboard.
- Skate Tool or Adjustable Wrench: You will need a tool to tighten and adjust the nuts and screws on your longboard. A skate tool is ideal as it usually comes with a socket that can adjust down to 3/8″. However, if you don’t have a skate tool, an adjustable wrench can also do the job.
- Phillips Screwdriver: Most skate tools include a Phillips screwdriver, but if yours doesn’t, make sure you have a separate Phillips screwdriver on hand.
Now that you have gathered all the required materials and tools, you are ready to move on to the assembly process.
FAQs
To assemble a longboard, you will need a longboard deck, trucks, wheels, bearings, grip tape, and hardware such as bolts and nuts.
The essential tools for assembling a longboard are a skate tool (or adjustable wrench and socket wrench), a razor blade or sharp blade, and a skate key for adjusting the trucks.
Prior to assembling, apply grip tape to the top surface of the longboard deck. Start by peeling off the backing and aligning it with the deck. Using a bit of board stability, press the grip tape on the deck surface, and use a razor blade to trim excess tape.
After gripping the deck, position the trucks on the truck holes and secure them with bolts and nuts, ensuring they are tightly fastened.
Slide the bearings onto the axles of the trucks and then push the wheels firmly onto the bearings until they are secure.
To enhance stability at speed, consider using harder bushings, shock pads, and speed washers. Additionally, adjusting the trucks’ tightness and riding style can affect stability.
Conclusion:
Assembling a longboard may seem daunting at first, but with these step-by-step instructions, it’s a breeze. So go ahead, grab your tools, and get ready to hit the streets in style.
Once you’ve built your own longboard, you’ll not only have a personalized ride but also a sense of accomplishment. Remember, the only limit is your imagination, so get creative and enjoy the ride!
