How to Clean Longboard Bearings: The 7-Step Process
This post contains affiliate links. As an Amazon Associate, we earn from qualifying purchases.
To clean longboard bearings, you remove them from the wheels, take off the shields, soak them in a solvent like isopropyl alcohol, shake or agitate them, dry them immediately with compressed air, and then re-lubricate with 1-2 drops of a dedicated skate bearing oil like Bones Speed Cream. This process, which takes about 20 minutes, preserves the bearings’ durability and lifetime and restores optimal speed.
That 20-minute timeframe is from Fireball Supply Co., and it’s a realistic estimate even for a beginner.
What follows is the breakdown of that process, but also where the major sources disagree on soaking time, drying method, and even how to treat rubber shields in a how to clean longboard bearings guide. We’ll walk through the tools, the steps, and the brand-specific advice so you can choose the method that fits your gear and your risk tolerance. By the end, you’ll know how to bring a set of gritty bearings back to life and when it’s time to just replace them.
Key Takeaways
- Clean bearings whenever you hear a gritty, grinding sound, letting dirt sit grinds down the precision surfaces.
- For rubber shields, sources disagree: Bones Bearings warns not to use solvents and recommends wiping with warm soapy water, while Motion Boardshop’s method involves soaking the entire bearing, shields on, in isopropyl alcohol.
- Sources disagree on drying: Bones Bearings and iFixit recommend drying immediately with compressed air, while Motion Boardshop suggests letting them air dry for about 30 minutes.
- Use only 1-2 drops of skate-specific oil per bearing; over-lubrication attracts dirt and creates a sticky paste that slows you down.
- If you see any rust or corrosion on the bearing races, replace the entire set, cleaning won’t fix the pitted metal and it will spread.
Tools & Materials You’ll Need
You don’t need a professional kit, but you do need the right solvents and tools. The wrong container can melt, and the wrong cleaner can leave a residue that gums up the works faster than the dirt you just removed.
Your core kit for how to clean longboard bearings is simple: a solvent, a container, something to remove shields, a drying tool, and lubricant. Isopropyl alcohol (91% or higher) is the most common and effective choice, it evaporates quickly and doesn’t leave a residue. A citrus-based cleaner also works, but Bones Bearings notes it can leave a slight film, so a final rinse with alcohol is wise if you go that route.
For the container, Bones Bearings recommends polyethylene, polypropylene, or metal. They advise against glass because it can break, and they warn that some plastics may melt in certain solvents. A small, lidded jar from the kitchen is fine, but test it first with a drop of your solvent. You’ll also need a push pin or small flathead screwdriver to pry up rubber shields, a toothbrush for scrubbing, and a can of compressed air for drying. Never skip the compressed air if you use any water-based cleaner, the tiny spaces inside a bearing trap moisture.
The part nobody mentions: Your container matters. A polyethylene jar is safe; a cheap plastic one might dissolve into your bearings, leaving a gluey mess you’ll never get out.
Finally, the lubricant. This isn’t the place for WD-40 or 3-in-1 oil. You need a thin, high-speed bearing oil. Bones Speed Cream is the industry standard, but any skate-specific lubricant like Oust Met-Öl works. The difference is in the additives and viscosity; general-purpose oils are too thick and will slow your roll.
How Often Should You Clean Longboard Bearings?
There’s no strict calendar. It’s a condition-based maintenance task. You clean them when they tell you they’re dirty.
The main signal is sound. A healthy bearing spins with a low, smooth whirr. A dirty one develops a gritty, grinding noise, like there’s sand inside. That’s because there probably is. You’ll also feel it in the roll. A wheel with clean bearings will spin freely for a long time after a push. A dirty wheel will stop short, as if the brake is lightly applied. Water removes the lubricant and allows rust to form on the steel balls and races.
It’s like wearing a heavy backpack for months and then taking it off.
The 7-Step Cleaning Process (And Where Sources Disagree)
This is the core routine. The disagreements between major guides. Bones Bearings, SkatePro, iFixit, Motion Boardshop, aren’t about the sequence, but about the specifics within each step. I’ll give you the consensus step, then note the splits so you can decide.
Step 1: Remove the Bearings from Your Wheels
Use your skate tool to unscrew the axle nuts. Slide off the speed washers (keep them in order) and pull the wheels off the trucks. If the bearings are stuck, you can use the axle itself as a press: push one bearing out partway, flip the wheel, and push the other side out. Don’t hammer them directly; you’ll dent the shields.
Step 2: Remove the Bearing Shields
This is where you meet your first major fork in the road. Look at your shields. If they’re rubber, gently work the edge of a push pin under the shield where it meets the inner metal race and pry it up. It should pop out. If you have labyrinth shield bearings, Bones notes you need to remove both identical shields.
Where sources disagree: Cleaning rubber shields. Bones Bearings says: “Don’t use solvents to clean the rubber shields! Just wipe the rubber shields down with warm soapy water.” Motion Boardshop’s method involves throwing the entire bearing, shields on, into isopropyl alcohol for hours. The Bones warning is about the rubber blistering or swelling from chemical exposure. For longevity, follow the manufacturer: keep solvents away from rubber.
If you have metal shields held by a tiny C-clip, use the push pin to pop the clip off first, then remove the shield. Some metal shields aren’t removable; if that’s the case, you can clean them as best you can with the shields on, but it won’t be as thorough.
Step 3: (Optional) Remove the Cage/Ball Retainer
This is an advanced step. The cage (or retainer) holds the balls in place. Taking it out allows you to clean each ball and the raceways thoroughly. Bones Bearings recommends only pushing the retainers out with a straightened paperclip. Prying them out can damage the delicate ball cavities.
Common mistake: Prying the cage out. You’ll see a slight lip and think you can lever it. That’s how you gouge the race. Push from the opposite side, alternating spots, until it slides out. If the balls all fall out, don’t panic, it’s reassembleable on a soft towel.
Step 4: Soak and Agitate the Bearings
Place your bearings (and cages if removed) in your solvent-filled container. Here’s the second big disagreement.
| Source | Soaking Time | Agitation Method | Key Rationale |
|---|---|---|---|
| iFixit | 15-20 seconds | Submerge, then scrub | Prevents solvent from potentially damaging components over long exposure. |
| Motion Boardshop | A few hours | Soak only | Lets the solvent fully penetrate and dissolve caked-on grime. |
| SkatePro / Fireball | A few minutes | Shake vigorously | Mechanical action breaks up dirt combined with chemical dissolution. |
| Bones Bearings | Not specified | Gently agitate the jar | Protects high-precision components from impact damage. |
For most bearings, a middle ground works: shake the container vigorously, then let them sit. For very dirty bearings, SkatePro notes it can be necessary to repeat the cleaning process 2-3 times with fresh solvent.
Step 5: Dry Immediately and Thoroughly
This is the most critical step to prevent rust. As soon as you pull the bearings out of the solvent, get the liquid off.
Bones Bearings and iFixit are aligned here: dry immediately with a can of compressed air. Blow through the bearing from all angles. Motion Boardshop suggests letting them air dry for about 30 minutes after an isopropyl alcohol bath. That’s enough to start corrosion, especially if you live in a humid climate. The compressed air method is the safer bet.
Step 6: Apply Lubricant
Bearings need oil. Running them dry “for more speed” is a myth that leads to rapid failure. The lubrication amount is the third key dispute.
- SkatePro: “Use 1-2 drops of oil (not more, as it will attract dirt) or 3 mm grease.”
- Bones Bearings: “We recommend 2 drops of Bones Speed Cream per bearing for bearings with steel balls. For Bones Swiss Ceramic Bearings, only one drop per bearing is needed.”
- Motion Boardshop: “Lastly lubricate your bearings with a tiny drop of skate lube.”
The consensus for standard steel bearings is 1-2 drops. Apply the drops directly onto the balls and the inner race. Then, spin the bearing for a couple of revolutions in your fingers to work the oil in.
Step 7: Reassemble and Reinstall
Pop the clean rubber shields back on, making sure they seat evenly all around. If you removed the cages, carefully reassemble them, ensuring each ball is seated in the retainer. Press the bearings back into your wheels using the axle as a press, apply pressure only to the outer metal ring, never on the shield or inner race. Once reinstalled, give the wheel a spin. It should be quiet and free.
Cleaning Bearings With Metal vs. Rubber Shields
The shield type dictates your approach. Rubber shields are removable and protect well, but are sensitive to chemicals. Metal shields are more durable but often non-removable, which limits cleaning depth.
For rubber-shielded bearings, you have the full cleaning ability described above. Just remember the soapy water rule for the shields themselves. For metal-shielded bearings, you often can’t remove the shield. Your best bet is to soak the whole bearing and use compressed air to blast solvent through the tiny gap. It’s less perfect, but it works. Some high-end bearings use labyrinth shields, two identical rubber shields that create a tortuous path for dirt. These require you to remove both, as per Bones’ instructions, but then you clean them like standard rubber shields.
The trade-off in how to clean longboard bearings is clear: rubber shields offer maintainability, metal shields offer durability at the cost of deep cleaning. Choose based on your riding environment and willingness to maintain.
Can You Clean Bearings Without Removing Them?
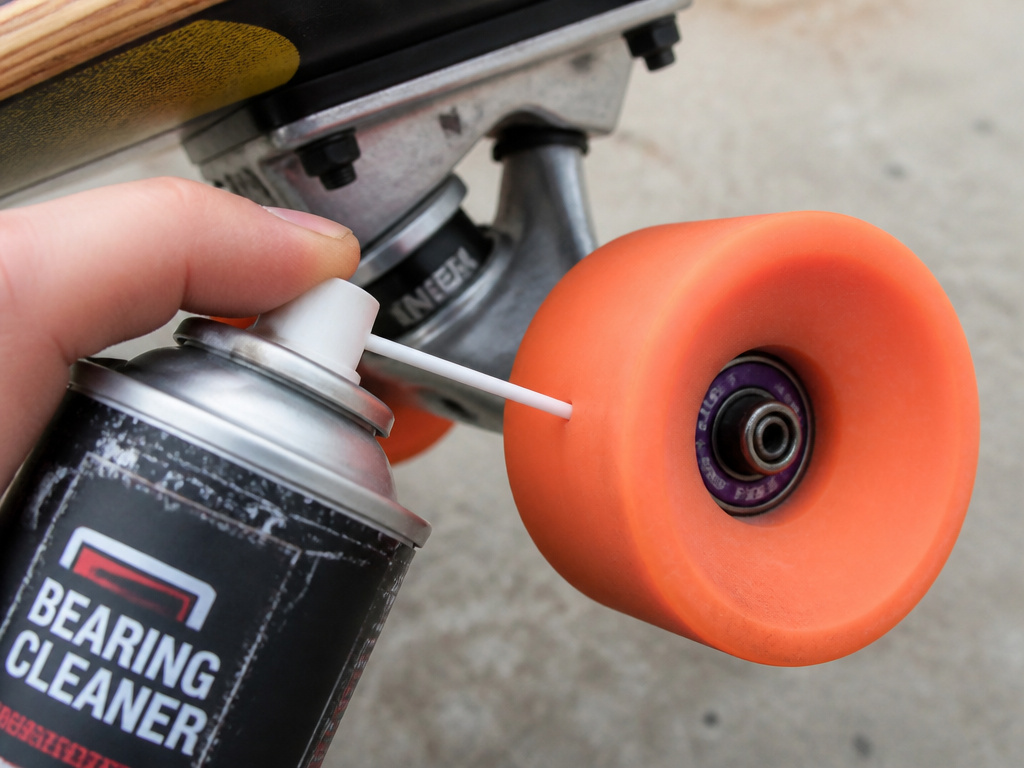
Yes, but it’s a half-measure.
It’s better than nothing, especially after a wet ride when you need to displace water. But it won’t remove packed-in grit or old, hardened grease.
Troubleshooting Common Post-Cleaning Issues
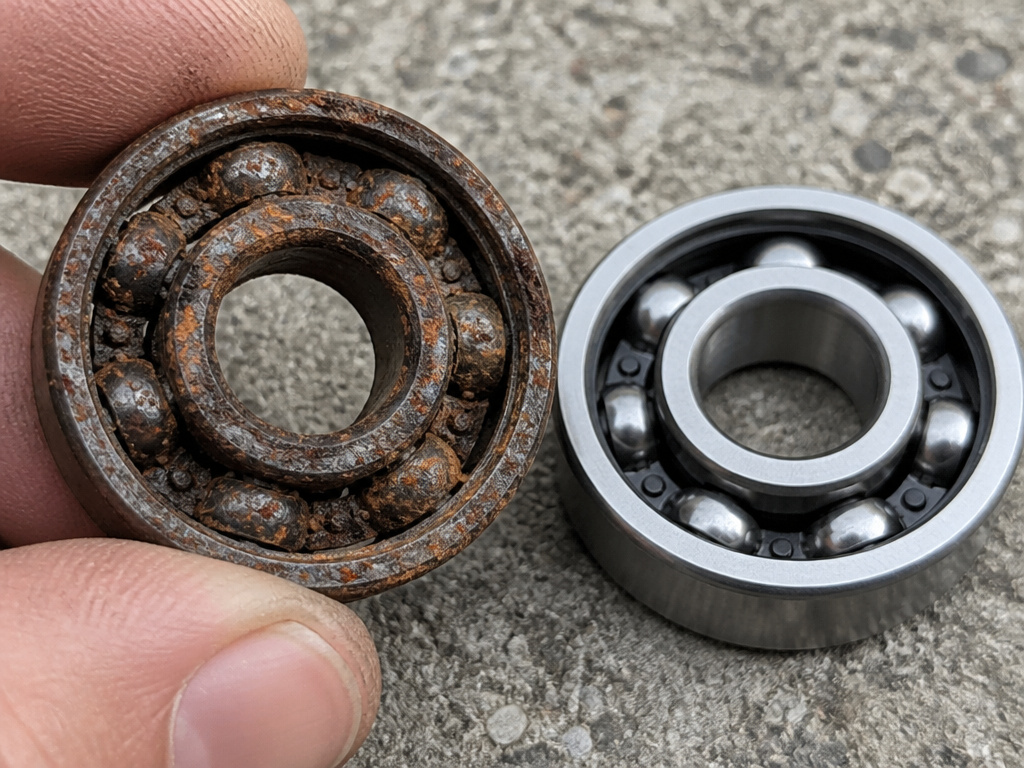
Sometimes, bearings don’t come back to life after cleaning. Here’s what might be wrong.
The bearing is still noisy or gritty. You didn’t get all the dirt out. Soak and agitate again with fresh solvent.
The wheel doesn’t spin freely after reinstalling. The bearing is likely mis-seated in the wheel. Pop the bearing out and press it back in evenly, checking alignment.
The bearing feels slow even with fresh lube. You might have used too much oil, creating drag. Try blowing it out again with compressed air and applying a single drop of oil.
Rust appears a few days later. You didn’t dry thoroughly enough. Once rust starts on the precision surfaces, the bearing is finished. The Fireball Supply Co. Advice is blunt: “We recommend replacing the entire set if any rust or corrosion is present.”
What to Avoid When Cleaning Bearings
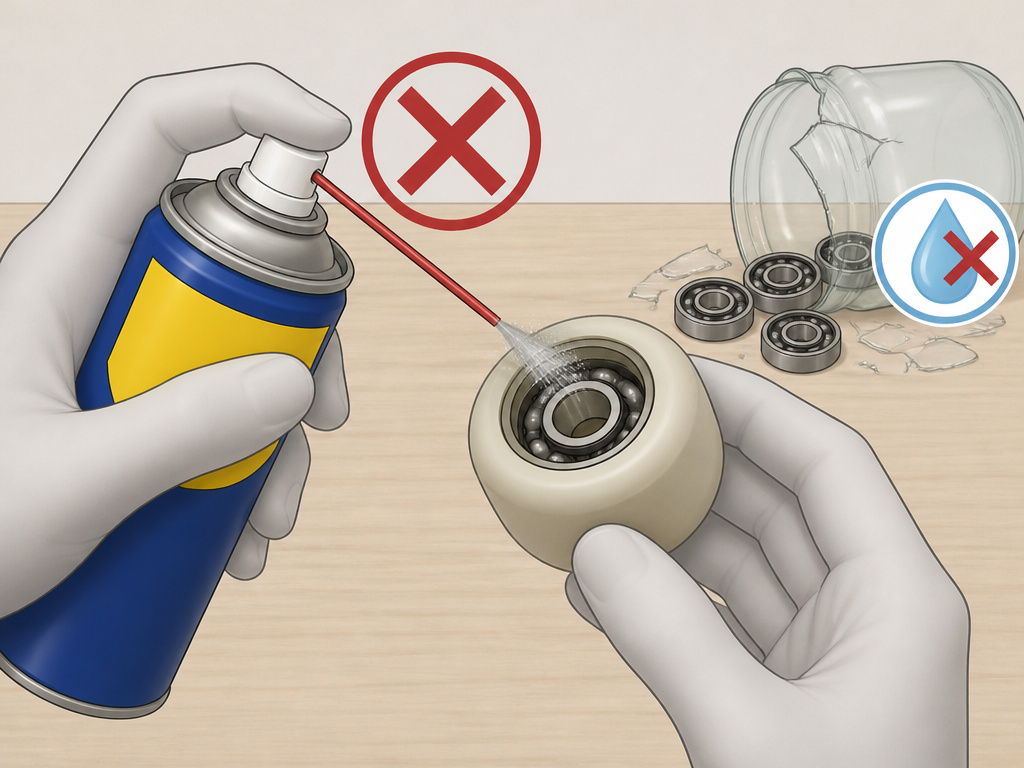
A few missteps can ruin your bearings faster than dirt.
- WD-40 is not a lubricant. It’s a water displacer and penetrant. It will clean, but it leaves a thin film that attracts dirt and provides no long-term lubrication.
- Water is the enemy. Unless you’re following the Bones method for washing rubber shields with soapy water, keep bearings away from water. It causes rust.
- Don’t spin bearings with compressed air.
- Avoid aggressive shaking in glass jars. Bones warns against glass because it can break. A metal can or thick plastic jar is safer.
- Don’t over-lubricate. More oil is not better. It becomes a dirt magnet.
Frequently Asked Questions
Is WD-40 good for cleaning skateboard bearings?
WD-40 will dissolve grease and displace water, so it can clean. But it’s not a suitable long-term lubricant for high-speed bearings. It leaves a residue that attracts dirt and gummifies.
Can I use rubbing alcohol to clean skateboard bearings?
Yes, isopropyl alcohol (91% or higher) is one of the best and most common solvents for cleaning bearings. It evaporates quickly, leaves minimal residue, and is effective at dissolving old grease and grime.
What is the best cleaning solution for skateboard bearings?
For a balance of effectiveness, safety, and availability, 91-99% isopropyl alcohol is the best choice. Citrus-based cleaners also work but may leave a slight residue, as noted by Bones Bearings. Avoid anything water-based unless you can guarantee immediate and complete drying.
How do I clean my bearings if the shields are non-removable?
For sealed or non-removable metal shields, soak the entire bearing in solvent and agitate vigorously. Use compressed air to blow the cleaner in and out through the shield gaps.
The Bottom Line
Follow the manufacturer’s advice for your specific shield type, especially the warning about solvents on rubber. Dry with compressed air, lubricate with 1-2 drops of a dedicated oil like Bones Speed Cream, and reassemble carefully.
If you see rust, replace the bearings. No amount of cleaning will restore pitted metal. Now go give them a spin.