As an Amazon Associate we earn from qualifying purchases.
Before you start the calibration process for your hoverboard, take some necessary steps to ensure that the process goes smoothly. First, disconnect the hoverboard from any power source. It’s necessary to have the board on a flat and level surface, so use a level or a carpenter’s square to check if it’s even. Make sure the surface is free from dirt and debris as they can interfere with the calibration process.
Check the wheels to make sure they’re correctly aligned. If they’re not, adjust the screws on the side of the board, but be careful not to make them too tight as it may damage the hoverboard components. You must check the battery level as well. Ensure that it’s fully charged so that it can power the calibration process. If it’s not fully charged, the board may not complete the process successfully.
Once you have taken all the necessary steps, you can begin the calibration process. Ensure that you strictly follow the instructions given in the manual and pay close attention to any warning notices. Following the guidelines given will make sure that your hoverboard is calibrated to the correct level, ensuring optimal performance and a safe, smooth ride.
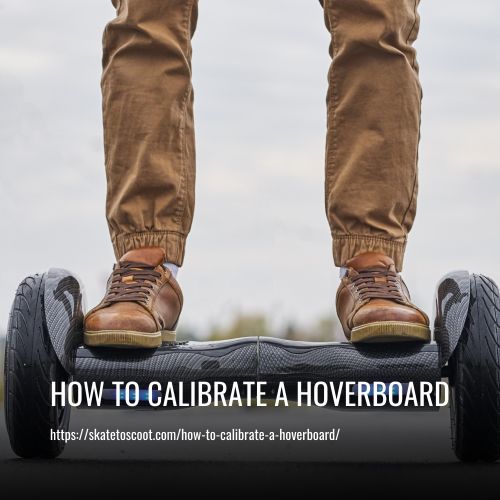
Calibrating Your Hoverboard (Any Brand)
Calibrating your hoverboard is an essential maintenance procedure to ensure optimal performance and smooth rides. If your hoverboard isn’t balancing or functioning properly, it’s time to calibrate it. A calibration process restores the board’s balance sensors, tilt sensors, and gyroscopes to ensure a safer and more enjoyable ride. Here’s a step-by-step process to calibrate your hoverboard:
1. Turn off your hoverboard using the power button on the board itself. If you have a remote, using it to turn off the hoverboard isn’t enough.
2. Place your hoverboard on a flat and level surface. The board should be steady and not wobble.
3. Press the power button on your hoverboard and hold it down for about five seconds until it beeps.
4. Wait for 30 seconds as the board calibrates to the surface. Avoid pressing any buttons or moving the hoverboard during this period.
5. Press the power button again to turn off the hoverboard and save the calibration.
That’s it! Your hoverboard is now calibrated and ready for smooth rides.
Why do You need to Calibrate Your Hoverboard? Some Basic Reasons
Calibrating your hoverboard is essential to ensure safety while riding and prolong its lifespan. Regular calibration ensures that all sensors and motors are functioning correctly, reducing safety hazards like potential crashes.
Calibration also allows for efficient and proper functioning, leading to smooth rides and easier control of the board. A correctly calibrated hoverboard provides improved stability, making it easier to balance while riding.
Time to Calibrate the Hoverboard
It’s not uncommon for hoverboard owners to experience discomfort while riding on their device. Some common symptoms that indicate the need for recalibration include both sides of the hoverboard not working correctly, continuous blinking of the red light, malfunctioning of the device, and an uneven or rough feeling while standing on the panel. These issues can be easily resolved by recalibrating your hoverboard.
Hoverboards are designed to perform optimally on flat and level surfaces. Exposure to rough handling or uneven terrain can cause the device to become unbalanced, leading to the issues described above. Recalibrating your hoverboard will restore optimal performance and ensure a smoother ride.
It’s also essential to avoid exposing your hoverboard to water as it can damage the device’s internal components. Regular recalibration combined with responsible usage will keep your hoverboard functioning smoothly and extend its lifespan.
When Should Calibrate My Hoverboard?
Calibrating your hoverboard is crucial to ensure that it is functioning correctly and providing smooth rides. But when is the right time to calibrate your hoverboard? Let’s take a look at some key indicators that signal the need for calibration.
If your hoverboard is beeping constantly, has unresponsive foot pedals, or the LED lights are flashing, it’s time for a calibration. Other indicators include difficulty maintaining a straight line while riding, the hoverboard leaning to one side, or if it suddenly accelerates or decelerates without warning.
Calibrate Hoverboard With Remote
Remote-controlled hoverboards can cause a lot of problems, especially when it comes to calibration. Children, who are often the owners of hoverboards, tend to forget to use the silver on-board button to turn off the hoverboard, relying instead on the remote. However, this puts the hoverboard into sleep mode, rather than turning it off.
Sleep mode can cause issues if left on for extended periods. This necessitates recalibration of the hoverboard, which cannot be done using the remote. Instead, hoverboard owners should use the silver on-board button to put the hoverboard into calibration mode. This will ensure that the sensors and tilt sensors are working optimally, resulting in a more balanced and safe ride.
How to Reset Hoverboard Bluetooth?
It is crucial to be cautious when resetting the Bluetooth on your hoverboard. Complete resetting of the device should be avoided unless it is entirely necessary. If your hoverboard Bluetooth isn’t functioning properly, there are a few steps you can take before resetting the device.
Firstly, try to reconnect the hoverboard with your phone. Make sure that the Bluetooth is not connected to any other devices before doing so. If it still doesn’t connect, forget the Bluetooth connection of your hoverboard, disconnect the device and Bluetooth connection, and restart the process.
If you still face issues, check your hoverboard’s user manual to see if there’s a specific app that you need to use to connect to it. If you have to perform a reset, ensure you follow the proper steps. The steps involved in resetting the hoverboard vary for different models.
Calibrating With A Smartphone App
Calibrating your Bluetooth hoverboard may seem riskier than it’s worth, but with the right steps, you can do it successfully using the manufacturer’s mobile app. First off, make sure to install the app onto your smartphone and connect it to the hoverboard.
Be sure to follow the app’s instructions closely, as incorrectly calibrating your board can damage the Bluetooth chip. Even if you follow the steps correctly, there is still a risk of damaging the chip, so it’s best not to reset it unless it’s absolutely necessary.
Once you’ve installed the app and connected it to your board, make sure you place the board on a smooth, level surface. Head to the app and find the “calibrate the unit” option, and follow the instructions that pop up. The steps will be specific to your hoverboard model, so make sure you get manufacturer advice to ensure optimal results.
How To Recalibrate:
If your V6 hoverboard experiences an error, it will not operate until it is properly recalibrated. You can tell if the unit needs recalibration by the red Status Indicator Light. Do not attempt to use the unit until the error has been fixed. Here are the steps to recalibrate your V6 hoverboard:
- Place the hoverboard on a flat, level surface with the mat facing up.
- Hold down the Power Button for about 5 seconds until the lights on the V6 flash, indicating a successful calibration.
- Turn the unit OFF and then back ON again to restart it. Your V6 hoverboard is now recalibrated and ready for use.
Testing It Out
After calibrating your hoverboard, it’s essential to test it out before taking it for a spin. First, ensure that you’re on an even surface and wearing appropriate safety gear, including a helmet. Once you’ve turned on the board, look for red flashing lights, indicating any errors.
Assuming there are no issues, climb onto the board and take a ride. Start by making turns to confirm that both sides move at the same speed. Then, proceed to go in a circle to ensure all the sensors are working correctly.
TroubleShooting – Hoverboard Won’t Calibrate
If your hoverboard won’t calibrate, there might be an issue with the gyroscope sensors or uneven foot pads. It’s essential to check the LED lights and run a series of troubleshooting exercises to determine the root cause of the problem.
1. Check the LED lights:
The first thing to do when your hoverboard won’t calibrate is to check and see if any LED light is stuck on. On a 6.5″ hoverboard, the LED light that is in front might be stuck. On the 8″ Lambo hoverboard, the LED lights are generally on top of the wheels. If one side of the Lambo hoverboard is stuck, the lights might be flashing, but one side will not balance. On the 10″ hoverboard, both leds on the front and back will be lit up, but only on one side when stuck.
2. Replace the gyroscope:
If an LED light is stuck on, then you’ll need to replace your hoverboard’s gyroscope on the side with the LED lights stuck on. On a 6.5″ hoverboard, that would be the same side as the LED light stuck in front. On the 8″ Lambo hoverboard, you need to replace the gyroscope on the side with the lights stuck that won’t balance. On the 10″ hoverboard, the gyroscopes need replacement on the side with the LED lights that are stuck.
3. Fix uneven foot pads:
Before trying to calibrate the hoverboard or replace anything, make sure the foot pads are level and not uneven. You can also try cleaning the foot pads to ensure that nothing is causing them to malfunction. If that doesn’t work, reach out to the manufacturer for advice to fix the hoverboard won’t calibrate issue.
FAQs
To calibrate a Hover 1 hoverboard, start by turning off the hoverboard. Then, press and hold the power button for at least five seconds. You will see the lights start to flash and hear a message saying “Calibration successful.” This will recalibrate the hoverboard and ensure it is functioning properly.
To calibrate your Gotrax Hoverboard, start by turning it off. Then, adjust the foot pedals so that they are level with each other and the ground. Next, press and hold the power button for 10 seconds until the LED lights start flashing. After that, press the power button to turn off the hoverboard. Finally, press the power button again to turn it back on.
To calibrate a Swagtron hoverboard, hold down the power button for 10 seconds until you hear a beep and see the LED lights start flashing. Then, turn off the hoverboard by pressing the power button again. Finally, turn it back on, and your Swagtron hoverboard should be calibrated.
Conclusion:
Calibrating your hoverboard is a simple but important step in ensuring a smooth and safe ride. By following these easy steps, you can avoid accidents and prolong the life of your hoverboard. Remember, safety always comes first, so take the time to calibrate your hoverboard before your next ride. Happy hovering!
Amazon and the Amazon logo are trademarks of Amazon.com, Inc, or its affiliates.
