How to Unfold a Scooter: Step-by-Step (With Real Manuals)
This post contains affiliate links. As an Amazon Associate, we earn from qualifying purchases.
To unfold a scooter, you must first identify its folding mechanism type, then follow the manufacturer’s specific sequence, which often requires setting the drive mode, ensuring the power is off, and applying force in a precise direction until an audible click confirms it’s locked. The Aspire HS268M manual says to set the N-D lever to Drive, slide the seat to a green point, and listen for a click. The Ninebot eKickScooter ZING manual says to press the fender brake, unfold the stem until it clicks, and confirm the latching axis is secured.
That “click” is your signal, but it’s not the whole story. The real work happens in the steps that lead to it. I’ve watched people yank on a handlebar, convinced the scooter is broken, when they missed a single lever position or didn’t apply their weight correctly. The manuals are clear, but they assume you’re reading them cover to cover before you touch the scooter, which nobody does. This is why a simple guide on how to unfold a scooter is so valuable.
What follows is the translation. We’ll start with a universal sequence that works for most scooters, then break down the exact steps for specific brands using their official manuals. This section explains what to do if the click doesn’t happen, how electric scooters differ, and the essential safety check to do before you move.
Key Takeaways
- Identify the mechanism first, collar, lever, or button, before applying force; using the wrong technique can damage the lock.
- Set the drive mode to Drive on mobility scooters like the Aspire HS268M, as its manual requires; other models like the Ninebot ZING lack a drive selector.
- Listen for the audible click and visually confirm the lock is secured; if it doesn’t click, check for weight on the mechanism and realign the stem.
- Unplug the charger first on models like the Aspire HS268M; the scooter will not respond to folding/unfolding commands if the charger is plugged in.
- Perform a pre-ride safety check every time, focusing on the folding joint, brakes, and tire pressure; a quick daily inspection prevents most failures.
The Universal 4-Step Unfolding Sequence
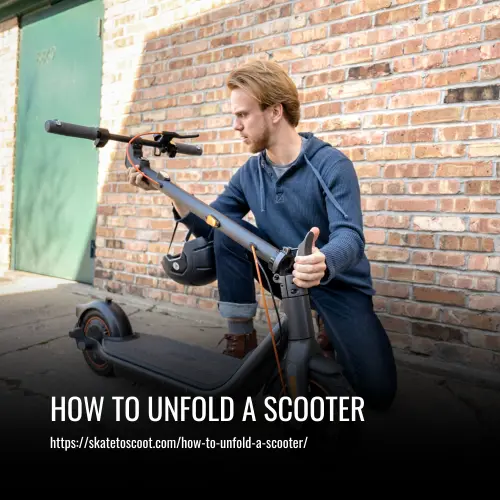
Before you touch any brand-specific levers, run through this checklist. It pulls the common prerequisites from half a dozen OEM manuals into one reliable routine.
First, find a flat, stable surface. Unfolding on grass or a slope invites a tip-over. Second, check the power state. For the Aspire HS268M, the manual says the power must be OFF before unfolding. Sources disagree on power state: some automatic models may require power ON, but the Aspire manual specifies OFF. When in doubt, off is safer for manual unfolding.
Third, manage the drive selector. On mobility scooters with an N-D (Neutral-Drive) lever, set it to Drive. The Aspire HS268M manual is explicit: set the N-D lever to D before unfolding to prevent the scooter from rolling. Kick scooters and many electric kick models lack this lever, so you can skip this step.
Fourth, locate the main release. Is it a collar you slide up, a lever you press down, or a button you hold? Apply firm, steady pressure in the correct direction, don’t jerk it. Then, unfold the stem or tiller with one hand supporting the handlebar and the other pulling the base. Listen for the click. If you don’t hear it, stop. The lock isn’t engaged.
A properly unfolded scooter stem will produce a distinct, metallic click when the latching pin seats fully. If you only hear a soft scrape or nothing at all, the mechanism is not locked, and the stem could collapse under riding load.
Here’s a quick reference table matching the mechanism type to the action you’ll take:
| Mechanism Type | What to Look For | Primary Action | Brand Example |
|---|---|---|---|
| Collar / Clamp | A ring around the stem, often with a bolt or quick-release lever. | Slide or twist the collar to unlock, then pull the stem upright. | Segway KickScooter |
| Release Lever | A prominent latch, usually red or orange, near the base of the stem. | Press the lever down (sometimes while pulling the handlebar forward) to disengage the hook. | Ninebot eKickScooter ZING |
| Button / Motorized | A small button, often labeled “A” or “OPEN,” and a motorized sound. | Press and hold the button; the scooter unfolds automatically in stages. | CareCo Auto-Folding |
Brand-Specific Unfolding Steps (Straight from the Manuals)
Generic advice on how to unfold a scooter gets you only so far. The real precision is in the manufacturer’s steps. These aren’t suggestions; they are the documented procedure that, if skipped, can lead to a malfunction or a safety issue.
Unfolding the Aspire HS268M Mobility Scooter
The Aspire HS268M manual outlines a specific sequence. First, ensure the scooter is on a flat surface and the power is OFF. Second, set the N-D lever to the D (Drive) position. This is critical, if the scooter is in freewheel (Neutral), it could roll when you unfold it. Third, make sure the charger is unplugged; the manual states the scooter will not respond to folding/unfolding commands if the charger is plugged in.
Now for the mechanical action. Slide the seat forward until it reaches the green point on the frame. You should hear an audible click when it locks. That click is your confirmation. Don’t just look for the green point; listen for the audible click. If you don’t hear it, slide the seat back and try again with more forward pressure. The joint might be stiff from storage.
Unfolding the Ninebot eKickScooter ZING
For this kick scooter, the process is simpler but still precise. The Ninebot eKickScooter ZING manual says to first press the fender brake to disengage the hook. This is a safety interlock, the stem can’t be unfolded unless the brake is depressed. Then, unfold the stem and push it up until you hear a click.
After the click, you have a mandatory check: confirm that the latching axis on the folding mechanism is secured. Give the handlebar a firm shake. There should be no play or wobble at the joint. This model also has a unique motor safety: the motor will not engage before the speed reaches 1.9 mph (3 km/h), so don’t panic if you push off and there’s no immediate power.
Unfolding the Great British Mobility AeroCarbon
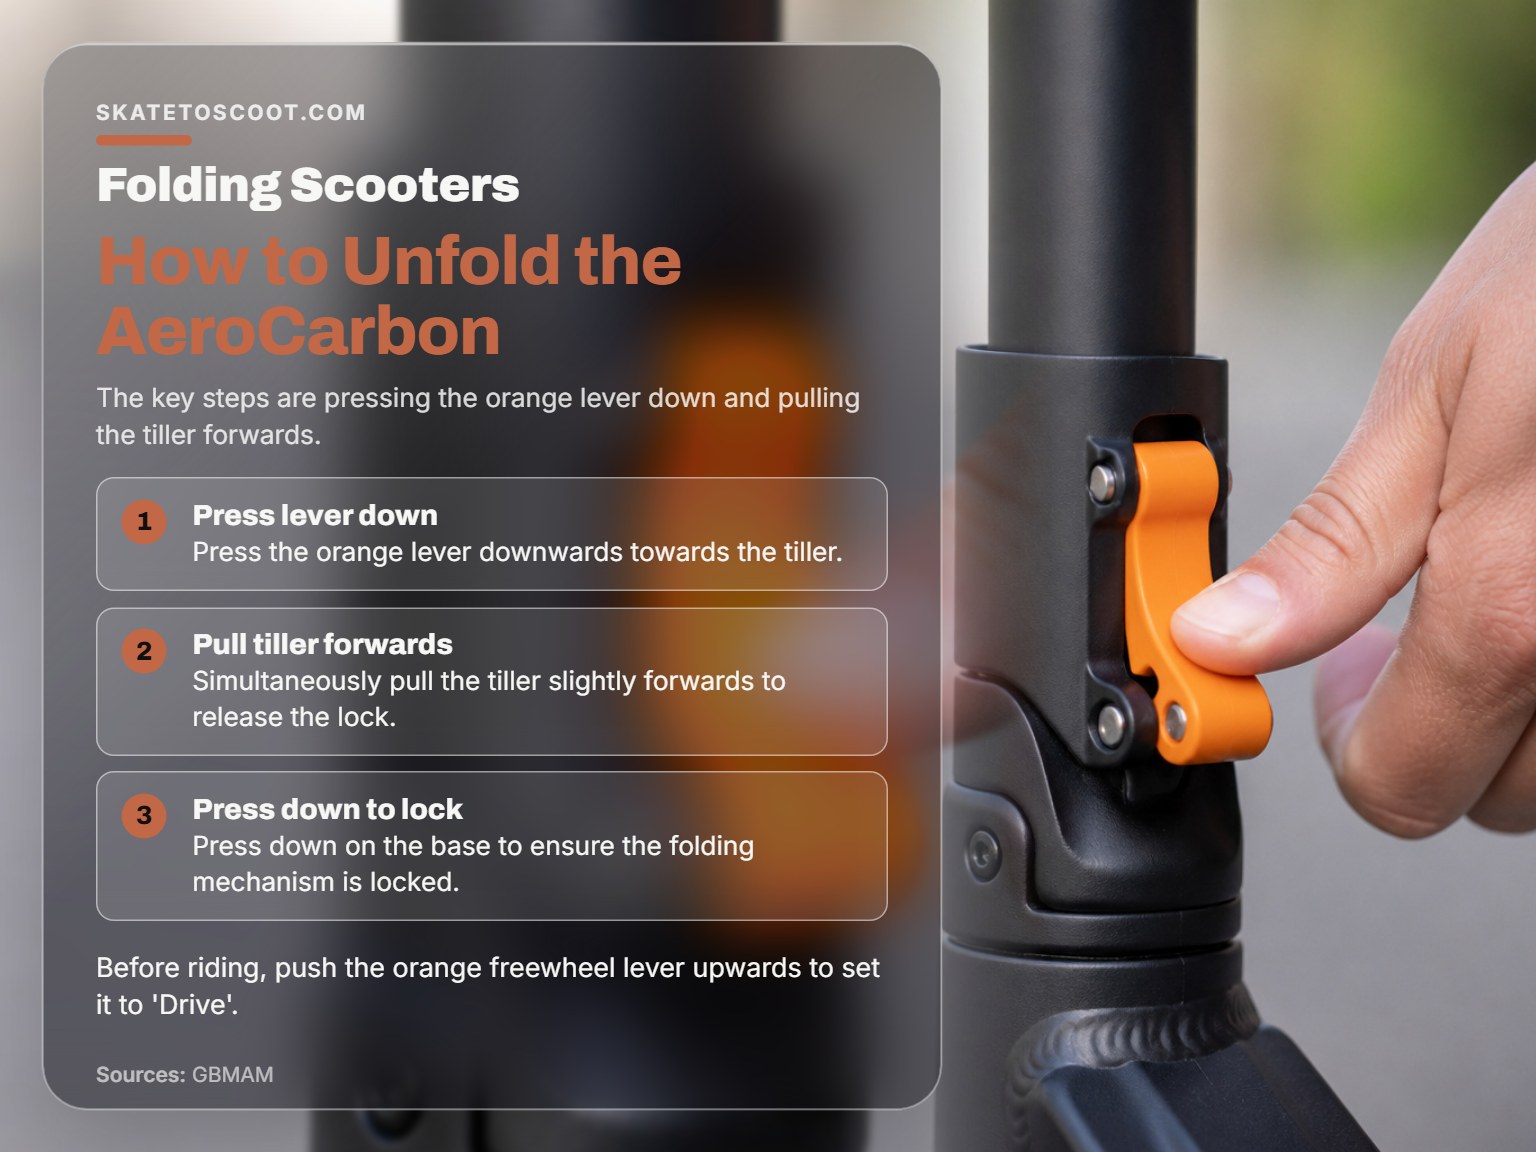
The AeroCarbon manual adds a nuance often missed. To unfold, press the orange lever downwards towards the tiller. Then, simultaneously pull the tiller slightly forwards. That “pull forwards” step is the key, it releases tension on the lock before you pull the tiller upright. After unfolding, press down on the base of the scooter to ensure the folding mechanism is locked.
Before riding, you must also check the freewheel lever. The manual instructs you to push the orange lever upwards to set it to ‘Drive’. If it’s in neutral, the scooter will roll freely and won’t provide powered drive.
Where this goes sideways: Unfolding the AeroCarbon without pulling the tiller forwards first. The lock stays under tension, you fight it, and eventually force it, which can bend the latching pin. The next time you fold it, it won’t seat correctly.
Troubleshooting a Stuck or Stiff Mechanism
You’ve followed the steps, but nothing moves. Or it moves but won’t click into place. This is where forum advice diverges from manual guidance, and where you need to be careful.
First, eliminate the obvious. Is there weight on the scooter? Some mechanisms, like the one on the Madd Gear Urban Eclipse discussed on Reddit, will not release if there’s weight on the footboard. Lift the scooter slightly to take the load off the lock. Is the charger plugged in? On the Aspire HS268M, this physically disables the mechanism.
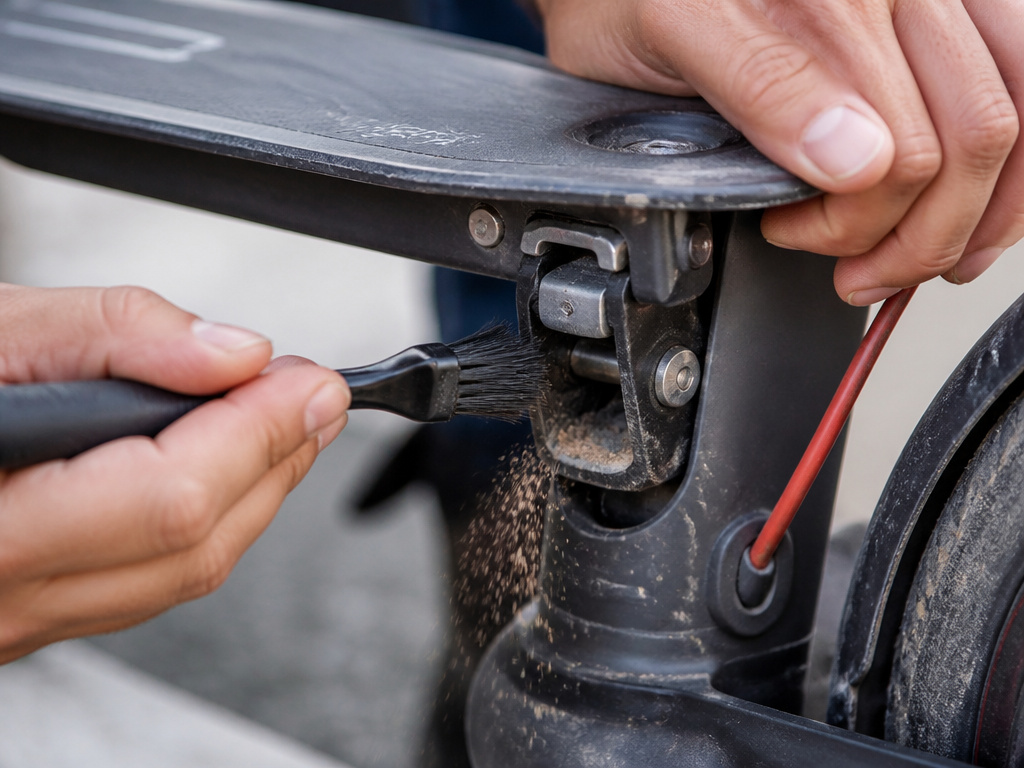
If it’s still stuck, inspect for dirt and debris. A folding joint packed with sand or grit won’t latch. Use a brush and a dry cloth to clean it out. For a stiff but not stuck collar, a single drop of silicone-based lubricant on the pivot points can work wonders. Avoid WD-40 or oil-based lubes, they attract more dirt.
What if it unfolds but won’t click locked? This is a common Reddit complaint. The fix is usually alignment. Fully extend the stem, then apply downward pressure on the handlebars while wiggling the stem base. You’re trying to get the locking pin to find its hole. If that fails, check for visible damage, a bent pin or a cracked latch housing means it’s time for a repair.
| Symptom | Likely Cause | Immediate Action | If It Persists |
|---|---|---|---|
| Lever won’t budge | Weight on mechanism, dirt jam, or damaged latch. | Lift scooter, clean joint, inspect for obstructions. | May require professional repair; forcing it breaks parts. |
| Unfolds but no click | Misalignment, stiff new mechanism, or worn lock. | Apply firm downward pressure on handlebars while seated; realign stem. | Lubricate pivot points (silicone spray); inspect lock for wear. |
| Feels “gritty” or scrapes | Sand, dirt, or corrosion in the folding joint. | Clean thoroughly with brush and dry cloth. | Apply minimal lubricant after cleaning. |
| Collar spins freely | Over-loosened quick-release clamp or stripped threads. | Tighten the clamp bolt evenly with the correct tool. | Replace the clamp assembly if threads are stripped. |
Unfolding Electric Scooters vs. Kick Scooters
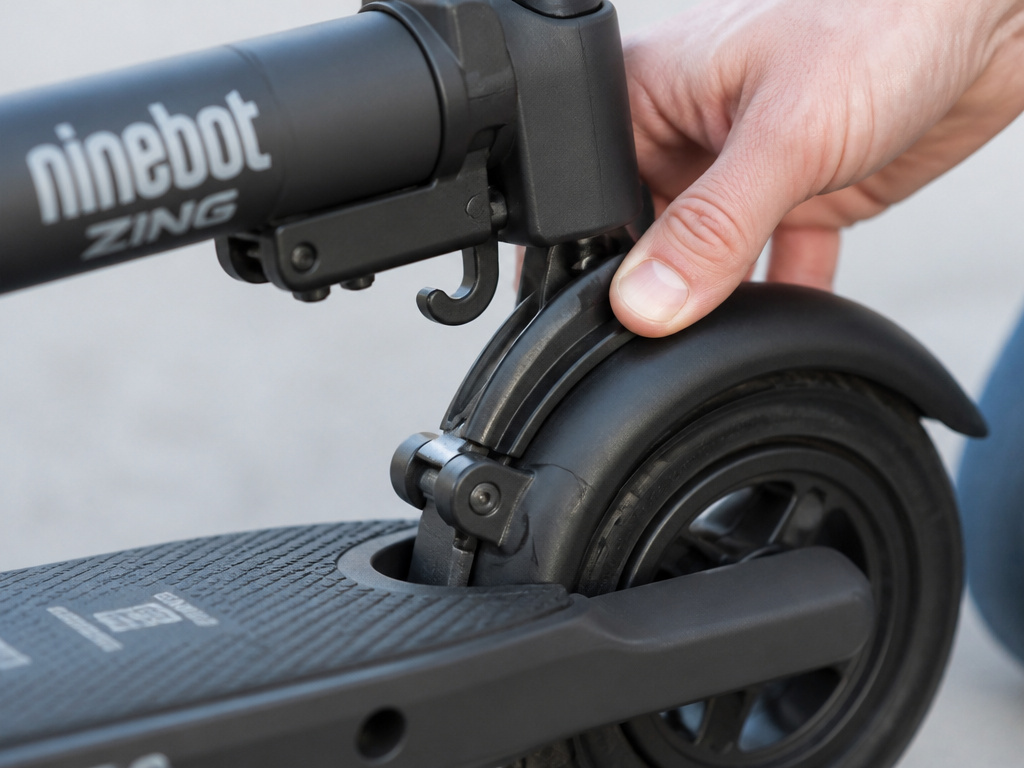
The core mechanics of how to unfold a scooter are similar, but the stakes are higher with an electric model. You’re dealing with more weight, a battery, and electrical cables that can be pinched.
For electric mobility scooters like the Aspire or CareCo models, always check the battery and power state first. The Aspire manual warns to use only the lithium battery charger (2A/4A) for the lithium battery and not to interrupt the charge cycle until the indicator turns green. A flat battery can sometimes lock out electronic functions.
With electric kick scooters, be mindful of cables running through the stem. When unfolding, ensure the stem isn’t pinching any wires. A pinched cable can short the throttle or lights. Also, note that the maximum speed for a model like the Ninebot ZING is 6.2 mph (10 km/h).
For standard kick scooters, the process is more forgiving. The main risk is mechanical damage from forcing things. The Segway KickScooter manual simply says to tighten the clamp until a click is heard and visually confirm the latch is locked. The force required is less, but the principle of the audible click remains.
The Critical Pre-Ride Safety Check
Unfolding the scooter is only half the job. Before anyone gets on, you must verify it’s safe to ride. This isn’t just a glance; it’s a deliberate inspection.
Start with the folding joint you just worked on. Shake the handlebars vigorously. There should be zero movement where the stem meets the base. Any flex or creaking means the lock isn’t fully engaged. Next, check the brakes. Squeeze the hand brake or press the fender brake; they should engage firmly and return smoothly.
Give the wheels a spin. They should turn freely without rubbing. Check tire pressure with a thumb, they should be firm, not squishy. For electric scooters, do a quick function test: turn on the power, and gently press the throttle to ensure the motor engages (remember, the Ninebot ZING needs that 1.9 mph push).
The Great British Mobility AeroCarbon manual provides a structured schedule: a daily inspection of all parts, a weekly check of turning, driving, and preset functions, and a monthly inspection of the brake system and connections. For the Aspire HS268M, a six-monthly inspection focusing on battery condition is recommended.
Before you start: A loose folding joint can collapse under riding load, causing a forward pitch and a face-first fall. A malfunctioning brake won’t stop you in time on a decline. These checks take 60 seconds and prevent 99% of ride-ending failures.
Where to find pictures and videos for unfolding steps
Your scooter’s user manual is the best place to find accurate visual guides. Manufacturers include specific diagrams and photos that match your model’s exact folding mechanism. Look for images showing the location of levers, the correct hand placement, and what a properly locked position looks like. If you no longer have the physical manual, search online for the official PDF using your scooter’s full model name and the words ‘user manual’. Videos from the manufacturer’s official channel or website are also reliable. Avoid generic tutorial videos, as the latch or button on a different model might look similar but operate in the opposite way.
Frequently Asked Questions
How do you open a foldable scooter if you don’t have the manual?
Identify the mechanism type first. Look for a collar around the stem, a lever near the base, or a button on the control panel. Search online for “[Your Scooter Brand Model] user manual PDF”. OEMs like Segway and Aspire often host them on their official sites. As a last resort, search for a model-specific YouTube tutorial.
Why is my scooter not unfolding?
The most common reasons are missing a prerequisite step or a stiff mechanism. Did you set the drive mode to Drive (on mobility scooters)? Is the charger unplugged? Is there weight on the footboard preventing release? If all prerequisites are met, the mechanism may be jammed with debris or slightly misaligned. Clean the joint and try applying firm pressure while wiggling the stem.
What should I do if my scooter doesn’t “click” locked?
Do not ride it. First, ensure the stem is fully upright and the two halves are perfectly aligned. Apply downward pressure on the handlebars to help the locking pin seat. If it still won’t click, inspect the locking pin and hole for dirt, damage, or wear. A new scooter might just be extremely stiff, requiring more force than feels comfortable, but an older one with this issue likely needs part replacement.
Is there a difference between folding and removable stems?
Yes, and it’s crucial. A folding stem uses a hinge and locking mechanism to fold over, like on a Razor or Ninebot. A removable stem detaches completely from the base, often with a quick-release pin or bolts. Never mistake one for the other; trying to “fold” a removable stem will damage the attachment points. Check your manual or look for a visible hinge joint.
How do I maintain the folding mechanism?
Keep it clean and dry. Wipe down the joint after use on dusty or wet ground. Every few months, apply a tiny amount of silicone-based lubricant to the pivot points only, avoid getting lubricant on the locking pins or teeth. Periodically check all bolts and fasteners for tightness, and visually inspect the latch for cracks or metal fatigue.
The Bottom Line
Unfolding a scooter is a skill, not just a task. It hinges on matching the right preparation, power state, drive mode, charger status, to the specific mechanism your model uses. The Aspire HS268M demands its N-D lever in Drive; the Ninebot ZING needs its fender brake pressed. If you miss those details, you’ll struggle with the scooter or, more seriously, ride it while it’s not secured.
One rule most guides skip: if your scooter has been in storage for over a month, check the battery before you even try to unfold it. The Aspire manual says to store batteries at 30%-50% charge and recharge them every three months if stored for more than three months. A dead battery can lock up electronic releases.
Everything above assumes a functional mechanism. If your scooter’s joint is damaged, bent, or chronically stiff after cleaning, stop. Professional repair is cheaper than a hospital visit from a stem collapse. Your first ride after unfolding should always start with that 60-second safety shake-down, it’s the cheapest insurance you’ll ever buy.
