How to Fix a Motor on an Electric Scooter: Step-by-Step
This post contains affiliate links. As an Amazon Associate, we earn from qualifying purchases.
To fix a motor on an electric scooter, you must first isolate the problem through a process of elimination: check the throttle, battery, and controller before testing the motor itself with a multimeter for specific electrical failures like open windings or shorted Hall sensors. The repair itself involves removing the wheel, disconnecting the motor’s power and sensor cables, and either replacing the entire hub unit or, in rare cases, attempting an internal repair on bearings or sensors.
Most guides tell you to “test the motor with a multimeter” and leave it there. They don’t give you the numbers that matter — the exact resistance reading that means “bad,” the no-load current threshold from the manufacturer’s manual, or the size of the four specific bolts holding your particular motor in place. That’s the difference between guessing and knowing how to fix a motor on an electric scooter.
What follows is a mechanic’s walkthrough, not a generic list. You’ll get the step-by-step diagnostic logic used in actual service manuals, the specific electrical values for brands like Niu, the torque-wrench-level detail on what to disconnect first, and the hard financial math on when to just buy a new motor, which is central to the how to fix a motor on an electric scooter question.
Key Takeaways
- Always disconnect the battery first. Every OEM manual, from Niu to Invacare, mandates this to prevent electric shock or controller burnout.
- Diagnosis is a funnel, not a guess. Start with the simple, free checks (connections, throttle) before moving to tools (multimeter) and finally considering motor removal.
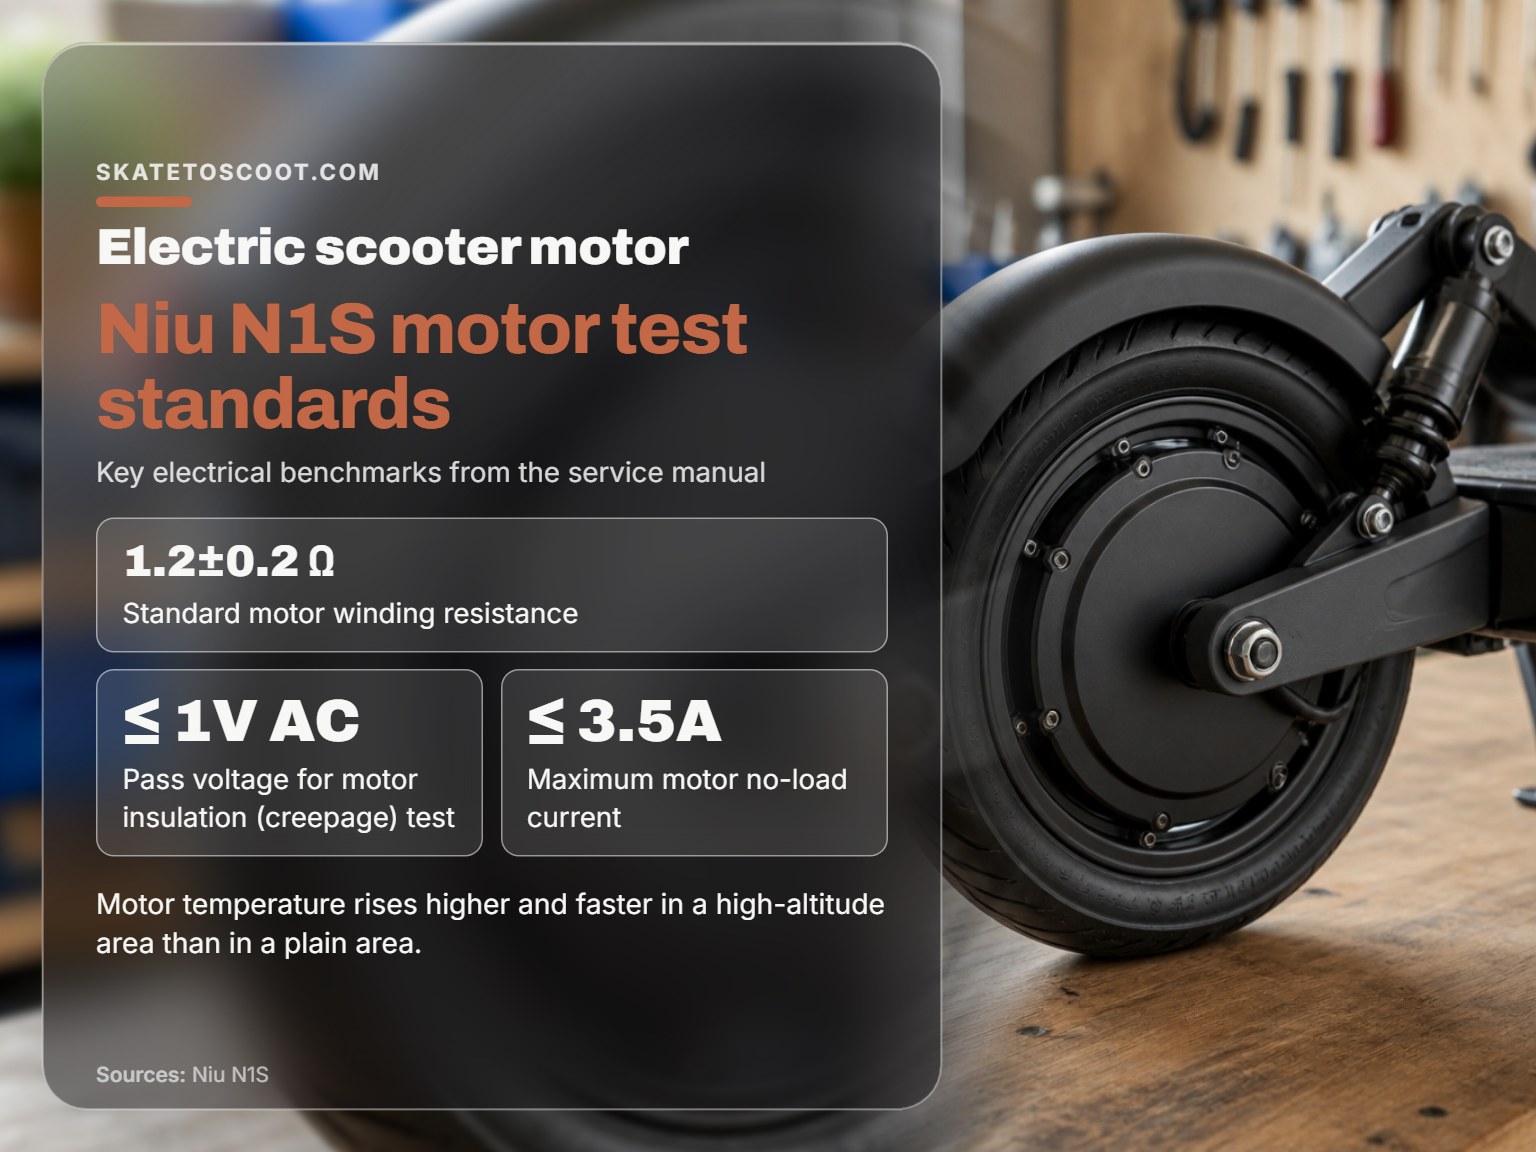
- The Niu N1S service manual defines a healthy motor with three electrical tests: winding resistance of 1.2±0.2 Ω, insulation leakage ≤ 1V AC, and no-load current below 3.5A.
- Internal motor repair is rarely economical. The EW-36 service manual explicitly states labor costs usually exceed the price of a new motor, favoring unit replacement for field technicians.
- Low tire pressure kills hub motors. Niu manuals directly link under-inflated tires to physical damage of the motor hub, making tire maintenance a motor preservation step.
Before You Start: The Non-Negotiable Safety Rules
Before you start: Disconnect the main battery. The Invacare Cetus manual states this is the first step to avoid electric shock. Wait for the motor to cool to prevent burns, and never work on the scooter while it is powered on. Reversing the battery or motor polarity when reconnecting will burn out the controller.
Workshop safety is a serious matter. In skating, a bad fall can break a wrist. In scooter repair, a live 48V circuit or a spinning motor can do far worse. The warnings in the service manuals are not suggestions. The Niu N1S manual states maintenance should only be performed by trained specialists with proper tools, and it emphasizes wearing safety glasses for any work involving prying or drilling.
Your first tool isn’t a wrench — it’s the battery disconnect. Every procedure, in every manual cited here, starts there. The second is patience: let a hub motor that’s been running cool down. It can hold heat long after you stop riding.
Step 1: The Process-of-Elimination Diagnosis
Your scooter isn’t moving. Is it the motor? Maybe. But it could just as easily be the throttle, a loose connection, or a dead controller. Jumping straight to motor removal is like assuming your skate’s wheel is seized before checking if the axle nut is just too tight.
Start with what costs nothing but time.
Check the throttle. Does the display light up when you press it? Does it feel loose or gritty? Sometimes, the issue is as simple as throttle problems where the internal sensor fails, sending no signal to the controller.
Listen and feel. With the scooter on a stand and powered on (safely, wheels off ground), gently apply the throttle. Do you hear a faint hum from the motor? Does the wheel try to turn but bind, or does nothing happen at all? A humming motor that doesn’t turn points to a mechanical jam or a faulty Hall sensor inside. Complete silence points back to the throttle, wiring, or controller.
Inspect every connector. Follow the thick power cables from the battery to the controller, and from the controller to the motor. Look for the Hall sensor connector — a smaller, multi-pin plug that tells the controller the motor’s position. Unplug each one, look for corrosion (a white or green powder), bent pins, or moisture. A bad connection here can mimic a dead motor. This is a core part of diagnosing electrical wiring issues.
Rule out the controller. This is trickier. If you have a known-good controller you can swap in, that’s the fastest test. Otherwise, you need a multimeter to check if it’s receiving battery voltage and sending power to the motor phases when the throttle is engaged. Often, a faulty speed controller is the culprit, not the motor.
Where this goes sideways: Assuming the motor is dead because the wheel “feels stiff.” A dragging brake pad, a seized bearing, or even a wrapped-around piece of debris can lock a wheel solid. Always lift the wheel and try to spin it by hand with the power off. If it rotates freely, the problem is almost certainly electrical, not mechanical.
The 4-Step Electrical Diagnosis (Using a Multimeter)
If your process of elimination points to the motor, it’s time for the multimeter. This is where generic advice ends and the manufacturer’s spec sheet begins.
A healthy brushless hub motor has two electrical parts: the three thick phase windings and the smaller Hall effect sensors. You test them separately.
| Test | What It Checks | How To Do It | A Good Result |
|---|---|---|---|
| Phase Winding Resistance | Integrity of the motor’s copper coils. | Set multimeter to Ω (200 range). Measure resistance between each pair of the three phase wires (A-B, B-C, C-A). | All three readings should be identical and very low, matching the specific standard for your scooter model (e.g., 1.2±0.2 Ω for a Niu N1S). A reading of “OL” (open circuit) means a broken coil. |
| Phase Winding Continuity to Case | Checks if a damaged coil is shorting to the motor housing. | Set multimeter to continuity (beep mode). Touch one probe to a phase wire, the other to the bare metal motor case. | No continuity (no beep). A beep means a short to ground — a fatal motor fault. |
| Hall Sensor Voltage | Checks if the 5V power is reaching the sensors. | Plug in the Hall sensor connector. Set multimeter to DC Volts (20V range). Probe the power and ground pins on the motor side of the Hall sensor connector. | ~5V DC. No power here means a controller issue, not a motor issue. |
| Hall Sensor Signal | Checks if each sensor is working. | With meter on DC Volts, probe a signal pin (often yellow, green, blue) and ground. Slowly rotate the wheel by hand. | Voltage should cycle between a low and a high state (typically near 0V and 5V) as magnets pass each sensor. A flat 0V or 5V means a dead sensor. |
The Niu N1S service manual adds two critical, specific benchmarks. First, the winding resistance standard is 1.2±0.2 Ω. Second, the maximum motor no-load current (tested with the wheel off the ground at full throttle) is ≤ 3.5A. A motor drawing more than that is inefficient and likely failing. However, the EW-36 service manual simplifies diagnosis, recommending motor replacement if the controller outputs proper power and other components are ruled out, favoring a process-of-elimination over specific bench tests.
A properly functioning Hall sensor will click the voltage on and off with a clean, digital snap as you turn the wheel. A failing one might show a sluggish, intermediate voltage that never quite reaches 5V or 0V.
If all phase tests are good but one Hall sensor is dead, you might have a repairable motor. If a phase winding reads open or is shorted to the case, the motor core is finished.
When to Replace vs. Repair: The $300 Question
You’ve diagnosed a bad motor. Now comes the real decision: fix it or replace it? The manuals and the DIY community are split here, and your choice depends entirely on the motor’s value and your tolerance for risk.
Replace the entire motor unit. This is the official, recommended path. For most common scooters, a complete hub motor assembly can be found for $100-$300. The procedure is straightforward: remove the wheel, disconnect the cables, swap the tire onto the new hub, and reinstall. The EW-36 service manual is blunt: “Going internal with the motor… Is not recommended for field service technicians. Typically, the labor costs… Will exceed the cost for a replacement motor.”
Pros: Guaranteed fix. No specialized knowledge needed beyond basic mechanical skills. Often comes with a warranty.
Cons: Higher upfront cost. You’re replacing potentially good components (like magnets and stator) along with the bad one.
Attempt an internal repair. This is the realm of the dedicated DIYer, often documented in scooter motor repair forums and subreddits. Common repairable issues include:
- Replacing Hall sensors: If diagnostics point to a single failed sensor, they can be desoldered and replaced for a few dollars.
- Replacing bearings: A grinding noise points to bad bearings. Pressing out the old and pressing in new bearings requires a bench vise and bearing press tools.
- Cleaning and re-greasing: As one Reddit user found, an “old electric scooter” was revived after “3 hours of wrenching… Cleaning all the gunk and molten burnt” material from inside the motor.
Common mistake: Opening a motor without marking the rotor and stator position. The magnetic alignment is critical. A single mark with a paint pen across the joint before you pry it apart saves hours of frustration reassembling.
I lean towards replacement for most people. The time, specialized tools, and risk of causing further damage usually outweigh the savings. But for a rare, expensive motor or as a dedicated learning project for the how to fix a motor on an electric scooter, internal repair has its place. Just know you’re going against the official general repair advice for electric scooters.
Motor Removal and Replacement: A Mechanic’s Walkthrough
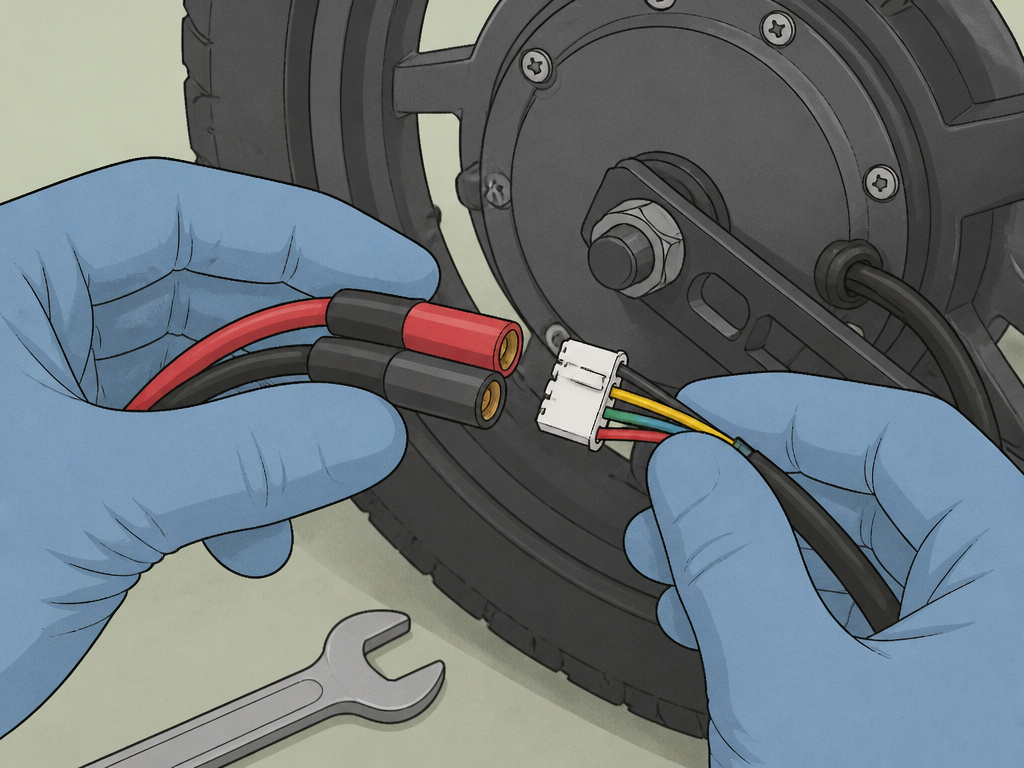
Once you’ve decided on replacement, the job becomes mechanical. While every scooter is different, the principles from the service manuals are universal.
1. Access the Motor. For a hub motor, this means removing the rear wheel. You’ll need to disconnect the brake (disc or cable), release the axle nuts, and possibly detach suspension arms. The Invacare Cetus manual specifies removing “M6 x 50L x 4pcs” screws. The EW-36 manual notes the motor is secured by four 10mm bolts and the axles by five 6mm hex bolts. Your scooter will have its own specific fasteners.
2. Disconnect Everything. Before the wheel is loose, unplug two things: the main power connector (thick, often bullet-style connectors) and the Hall sensor connector (small, multi-pin). Label them with tape if they aren’t unique. This is the moment to double-check the battery is disconnected.
3. Remove the Wheel/Motor Assembly. Support the scooter frame. Once the final fastener is removed, the wheel and motor will drop free. It’s heavier than you think.
4. Swap the Tire. Deflate the tire, break the bead, and transfer it to your new motor hub. This is often the most physically demanding part, similar to wrestling a stiff skate wheel onto a new frame. Tire levers and soapy water are your friends.
5. Reinstall in Reverse Order. Mount the new wheel, reconnect the cables exactly as they were, and tighten all fasteners snugly. The Niu MQi GT EVO manual has a critical warning here: “Pay attention to the wire polarity in installing the battery or controller.” Reversing the motor phase wires might just cause it to run backwards; reversing the battery leads will fry your controller.
6. Test Before Final Tightening. Reconnect the battery. With the wheel off the ground, gently test the throttle. Does the motor spin smoothly? Do the brakes work? Once confirmed, do a final torque pass on all axle nuts and bolts.
A final, often-overlooked tip from the Niu manuals: after any motor work, check your tire pressure. “Driving at insufficient tire pressure will cause damages to the motor hub.” A soft tire puts uneven stress on the hub casing, leading to cracks and bearing misalignment over time.
Edge Cases and Professional Help
Some problems don’t fit the standard guide.
The scooter works, then suddenly cuts out. This points to an overheating motor. The motor has an internal thermal cutoff that resets once it cools. Causes can be a binding brake, under-inflation, or simply overloading the scooter on a long hill. The Niu manuals flag a specific environmental edge case: “The motor temperature rises higher and faster in a high-altitude area than in a plain area.” Less air for cooling means it hits its thermal limit quicker.
Power is present but the motor doesn’t engage. You’ve checked the throttle and connectors. This is a classic symptom of a motor not engaging due to a failed Hall sensor. The controller sees no position signal and refuses to send power to the phases to prevent damage.
When to call a pro. If you’ve gone through the diagnostic steps and are still lost, or if the thought of handling battery terminals makes you nervous, stop. The cost of a professional diagnosis can save you from buying unnecessary parts. This is especially true for intermittent issues like a sudden shutdown while riding, which could be motor, controller, or battery-related.
How to check motor brushes
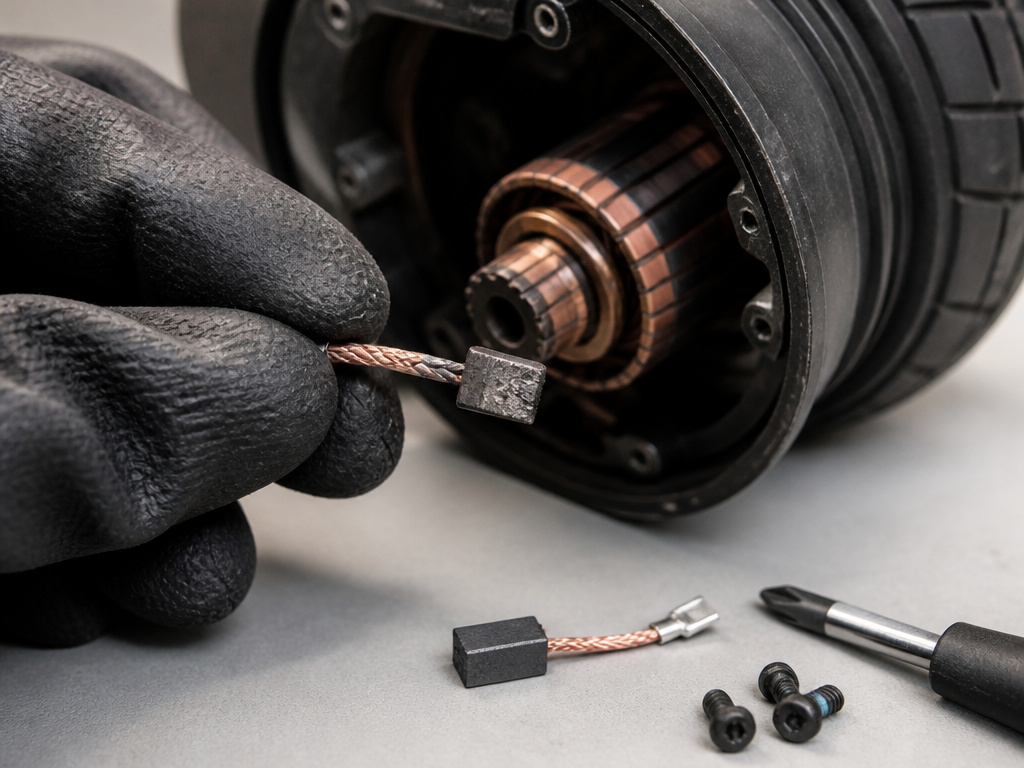
First, disconnect the battery and ensure the motor is cool. On scooters with brushed motors, worn brushes are a common failure point. Accessing them requires removing the motor cover, which is often secured by specific bolts. Inspect the carbon brushes for excessive wear; if they are too short, they won’t make proper contact with the commutator. Look for signs of arcing, burning, or a cracked brush holder. While some manuals advise against internal repairs for field technicians, a visual brush inspection can confirm if a simple replacement is possible. Always use original or equivalent replacement parts specified by the manufacturer to ensure compatibility and safety.
Fixing belt, chain, and gear problems
Mechanical drive issues often mimic motor failure. Start by checking the drive belt or chain for proper tension, wear, and damage. A loose belt can slip, while a seized chain or damaged gear will prevent the wheel from turning. Inspect the sprockets and gears for broken teeth or misalignment. Before any disassembly, turn off the battery to prevent accidental activation. On some models, accessing these components requires removing specific bolts securing the motor to the swingarm. If the mechanical linkage is intact but the motor still doesn’t drive the wheel under load, the fault likely lies with the motor or controller, not the mechanical system.
Frequently Asked Questions
Can an electric scooter motor be repaired?
Yes, but it depends on the fault. Internal repairs like replacing Hall sensors or bearings are possible for a skilled DIYer with the right tools. However, if the motor’s copper windings are burned out or shorted, the entire motor unit must be replaced. Most OEM service manuals, like the official N1S maintenance guide, recommend unit replacement over internal repair for reliability.
How much does it cost to replace a motor in an electric scooter?
Costs vary widely by scooter model and motor power.
How do I know if my electric scooter motor is bad?
Key symptoms include: the scooter making a clicking noise but not moving, the motor feeling extremely hot to the touch after short use, a burning smell, or a complete lack of movement or sound when the throttle is applied. A multimeter test showing open windings or a short to ground confirms a fatal motor failure.
How do you fix an electric motor that won’t spin?
First, ensure power is reaching the motor by checking battery voltage and controller output. If power is present, the issue is likely internal. For brushless hub motors, this is most commonly a failed Hall effect sensor, which can sometimes be replaced. For brushed motors, it could be worn-out carbon brushes that need replacing. If internal components are visibly damaged or windings are burned, replacement is the only fix.
The Bottom Line
Fixing a scooter motor isn’t about brute force or blind optimism. It’s a systematic process of elimination that starts with free, simple checks and progresses to specific, tool-required diagnostics. The single most important resource you have isn’t a forum post — it’s the manufacturer’s service manual for your specific model, which contains the exact test values, torque specs, and safety warnings everyone else is guessing at.
If your multimeter readings match the spec sheet and point to a bad motor, replacement is usually the most sensible path. The labor and uncertainty of a deep internal repair rarely pay off financially, a point the service manuals themselves make clear. But for the tinkerer, cracking open a failed motor is the ultimate education in how these electric workhorses function. Just mark your alignment before you pry, and keep the battery disconnected. Everything else is just following the steps.
