Why Wont My E Scooter Turn ON? Causes and Fixes
This post contains affiliate links. As an Amazon Associate, we earn from qualifying purchases.
Your e-scooter won’t turn on because the electrical circuit is broken somewhere between the battery and the display. The fix starts with checking the most common points of failure in this order: a dead or unseated battery, a faulty charger or charging port, a blown fuse, loose wiring, a tripped safety switch, or a failed controller. Letting a cold battery warm up or performing a specific reset sequence for your model can also solve many no-power issues.
That break in the circuit is almost always at one of a handful of predictable spots. Think of it like tracing a wire from the power source to the lightbulb, you check the plug, the outlet, the switch, and the bulb itself. On a scooter, the battery is the plug, the charger and its port are the outlet, the fuses and connections are the wiring, and the controller is the switch that tells the motor to go.
What follows is a mechanic’s approach, not a guessing game. We’ll start with the simplest, most common fixes anyone can do, then move to the tools-needed diagnostics. By the end, you’ll have either fixed it or know exactly what to tell a repair shop.
Key Takeaways
- Start with the battery and charger, On some systems, a green light just means the charger is plugged in and idle, not that it’s actively charging a depleted pack. However, Razor manuals instruct to charge for up to 12 hours even if the light turns green.
- A specific reset sequence (like holding the throttle and brake while pressing power) can clear a tripped Battery Management System (BMS) lockout, which is a common failure after a deep discharge.
- Never ignore a swollen, hot, or smelly battery, stop using and charging it immediately and seek professional replacement, as this is a fire hazard.
- Using a basic multimeter to check battery voltage at the charging port is the single most definitive test to rule out a dead battery versus a controller failure.
- If your scooter powers on only when plugged into the charger but dies when unplugged, the battery pack itself has failed and cannot hold a charge.
The Step-by-Step Diagnostic Flowchart
Don’t jump to the hardest fix first. Follow this sequence. It’s built to solve 80% of no-power problems with no tools, and it will tell you exactly when you need a multimeter or a screwdriver.
| Step | Action | What a Positive Result Means | What to Do Next |
|---|---|---|---|
| 1. Basic Checks | Ensure scooter is on a flat, dry surface. Check key/ignition is ON. Press & hold power button for 5+ seconds. | Nothing happens. | Proceed to Step 2. |
| 2. Charger & Port | Plug in charger. Does the charger light come on? Is the port clean, dry, and undamaged? | Light comes on (red or green). | Proceed to Step 3. Light off = faulty charger or wall outlet. |
| 3. Battery Reset | If battery is removable, take it out and reseat it firmly. For integrated batteries, locate and perform your model’s reset sequence. | Scooter may power on. | If still dead, proceed to Step 4. |
| 4. Warm Up | Bring a cold scooter inside for a bit, then try powering on. | Scooter powers on. | Problem solved—battery was too cold. |
| 5. Voltage Check | Tool Required: Multimeter. Set to DC Volts (~50V range). Probe the charging port pins. | Reading matches pack voltage (e.g., 36V, 48V). | Problem is NOT the battery. Go to Step 6. |
| 6. Fuse & Wiring | Tool Required: Screwdriver. Locate and visually inspect the main fuse. Check for loose connectors in deck. | Fuse is intact; connections are tight. | Likely a controller or display failure. Professional diagnosis needed. |
This chart is your roadmap. The next sections explain each step in detail, including the brand-specific quirks and the physical sensations that confirm you’re doing it right.
Start Here: The Universal First Steps
Before you open a single panel, run through these checks. They take two minutes and solve more problems than you’d think.
First, is the scooter actually trying to start? Place it on a stable, level surface. If your model has a key ignition, like the X-Go Astro where the “key ignition acts as the power switch,” make sure it’s turned fully to the ‘on’ position. Now, press and hold the power button on the display for a full five seconds. Some controllers need this long to boot.
Listen closely. Do you hear a faint click from the deck? Do any dashboard LEDs flicker for a split second? That tiny click is the controller or a relay trying to engage, it tells you there’s some power reaching the system, which points away from a totally dead battery and toward a safety lockout or a bad connection.
Common mistake: Assuming a green charger light means a ready-to-ride battery. On some systems, a green light just means the charger is plugged in and idle, not that it’s actively charging a depleted pack.
If you get absolutely nothing, no click, no flicker, silence, the answer to why wont my e scooter turn on is almost certainly in the power supply chain: the battery, the charger, or the connection between them.
Diagnosing the Battery and Charging System
This is the heart of the issue. A battery can be dead, disconnected, or too cold to function.
Check the charger first. Plug it into a known-good wall outlet. The charger should have an LED that lights up. No light at all? Try a different outlet. Still nothing? The charger itself is likely faulty. If the light comes on (red or green), plug it into your scooter’s charging port. The light should change color (often from green to red) to indicate charging has begun. If it stays green, the scooter’s battery may be so deeply discharged that the charger’s safety circuit won’t engage, or the BMS has locked it out.
For removable batteries, take the battery out and click it firmly back into place. This reseats the main power connectors. Owners on Reddit constantly solve “no power” issues by simply reseating a loose battery or stem connector wire.
For cold weather issues, the advice is straightforward: bring the scooter into a warm environment for a bit, then try again. Batteries may not power on in very cold temperatures. Bring it inside for a bit and try again.
Where this goes sideways: Storing a scooter in freezing temperatures. Razor’s manuals for the Power Core E100 and EcoSmart Metro explicitly state this “will permanently damage the battery.” This isn’t temporary performance loss; it’s a chemical degradation that ruins the cells.
Now, the critical test: checking battery voltage with a multimeter. This is the step that separates guesswork from diagnosis.
How to Use a Multimeter to Check Battery Voltage
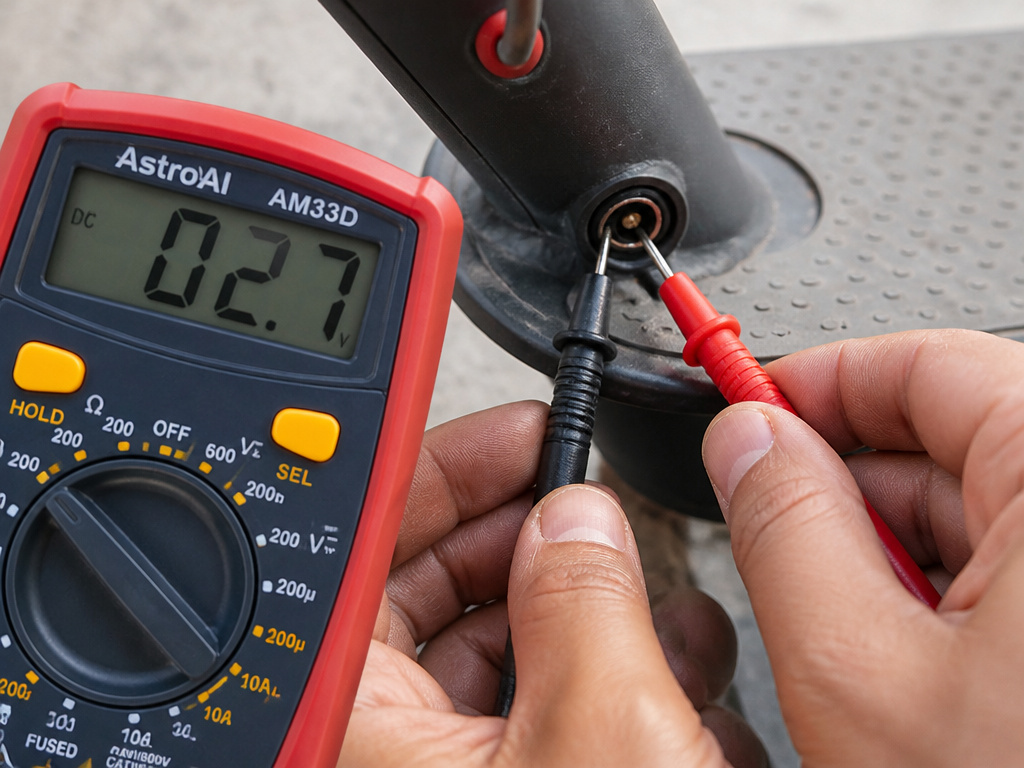
You need a cheap digital multimeter. Set it to DC Volts (V with a straight line). Choose a range higher than your scooter’s rated voltage. Now, with the scooter unplugged, insert the red probe into the center pin of the charging port and the black probe to the outer metal sleeve.
- Good Reading: A voltage within 1-2 volts of the pack’s rating (e.g., ~40V for a 42V pack). This means the battery has charge. Your problem is elsewhere, likely a fuse, wire, or controller.
- Low Reading (<50% of rated voltage): The battery is deeply discharged. You may need to try a long charge (up to 12 hours for Razor models) or a specialized charger to revive it.
- Zero or Near-Zero Reading: The battery is dead, has an internal break, or the BMS has failed. This often requires battery replacement.
A specific warning from the RevRides support guide: “Be cautious when checking the battery voltage – if the two leads touch while you are checking the volt…” This is crucial. Touching the probes together while they’re connected to the battery terminals can cause a short circuit, sparks, and damage. Be methodical.
Electrical Safeguards: Fuses, Kill Switches, and Loose Wires
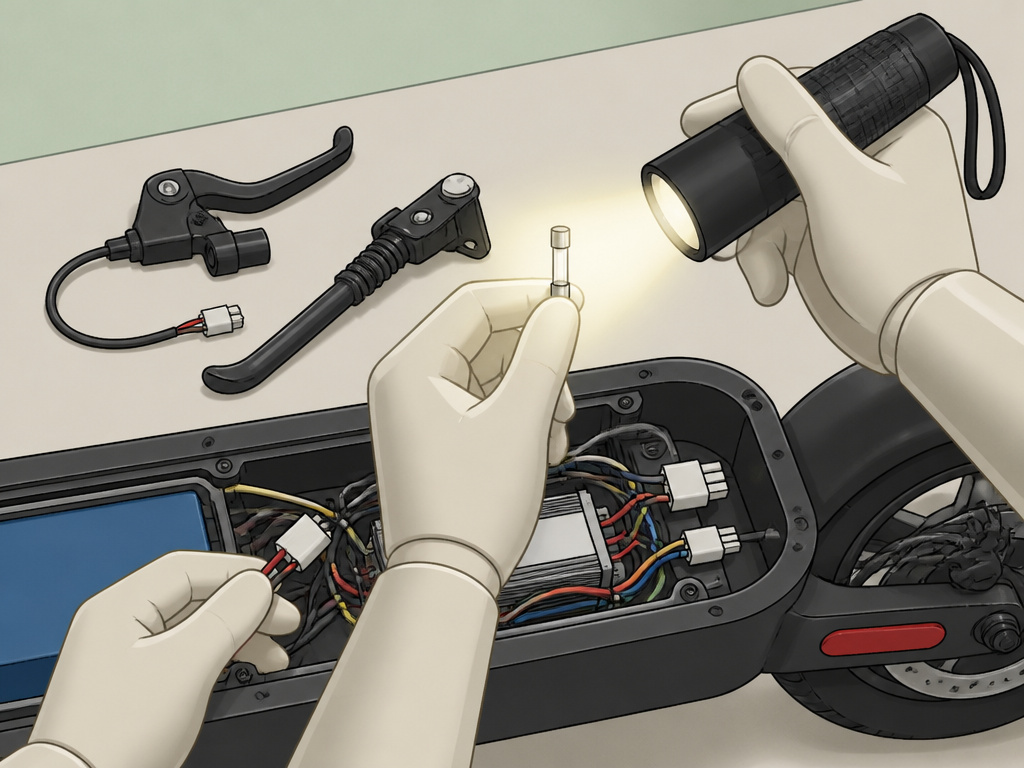
If your battery shows good voltage while you’re asking why wont my e scooter turn on, the problem is in the delivery system. These are the next most likely failure points.
1. The Main Fuse. Locate your scooter’s fuse panel (often under a rubber cap near the charging port or inside the deck). Pull the fuse out and hold it up to the light. You should see an unbroken metal wire or strip inside the glass or ceramic tube. If it’s blackened or the wire is visibly severed, the fuse is blown. Replace it with an identical amperage rating.
2. Loose Wiring and Connectors. Over time, vibration can shake connectors loose. You’ll need to open the deck (usually by removing several screws on the underside). Once inside, look for any wires that have come unplugged. Give each connector a gentle tug to ensure it’s secure. Look for any wires that are pinched, cut, or have melted insulation, a sure sign of a short circuit.
3. Safety Switches (Kill Switches). Many scooters have a safety feature that cuts power if a brake lever is engaged or a kickstand is down. Ensure all brake levers are fully released. Some models have a magnetic reed switch in the kickstand; if it’s bent or dirty, it can falsely tell the controller the kickstand is down, preventing startup.
Easy to miss: A faulty kill switch can mimic a dead battery. If your scooter has a physical kill switch on the handlebars (sometimes a little toggle), make sure it’s in the “run” position.
When Simple Fixes Fail: Controller Reset and BMS Lockout
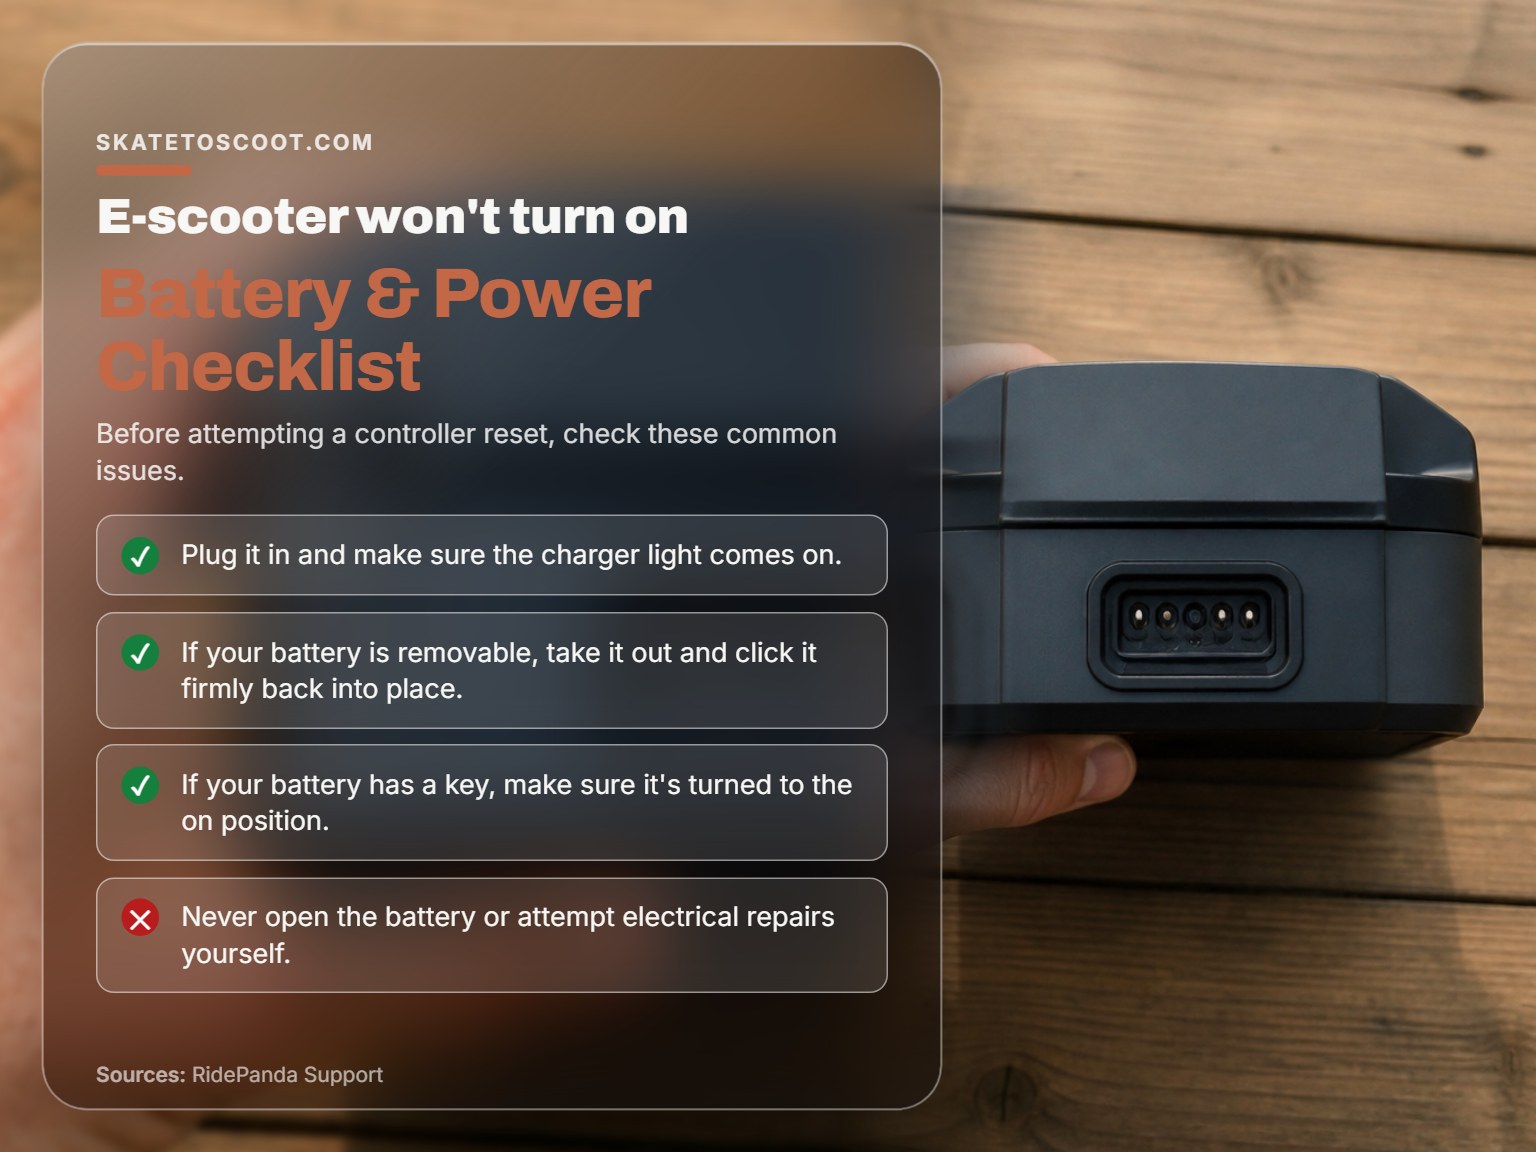
Sometimes the scooter’s computer gets confused. A reset can clear this glitch.
Generic Reset: Turn the scooter off. Press and hold the power button for 30 seconds. Release, then wait a minute before trying a normal startup.
Advanced/Brand-Specific Reset: This often involves holding multiple buttons. A common sequence for models with a throttle and brake levers is: hold the throttle at max, pull the brake lever, and press the power button, holding all three for 10-15 seconds. This can force a hard reset of the controller and BMS.
BMS Lockout is a special case. If the Battery Management System detects an unsafe condition (like a short circuit, extreme temperature, or cell imbalance), it will disconnect the battery from the rest of the scooter to prevent damage or fire. The scooter will appear completely dead. A reset might clear a temporary lockout. A persistent lockout, especially after a deep discharge or physical impact, usually indicates a faulty battery pack that needs professional service or replacement.
The telltale sign of BMS or battery failure? The scooter powers on normally only when plugged into the charger but dies the moment you unplug it. The charger is providing the operating voltage the battery no longer can.
The Professional Threshold: When to Stop DIY
Your safety is more important than the scooter. There are clear lines not to cross.
Stop immediately and seek professional help if:
- The battery is swollen, hot to the touch, or smells like burning chemicals. This is a critical failure and a fire risk. The RidePanda guide is unequivocal: “Stop using and charging your battery right away.”
- You see melted wires, burn marks, or charred connectors inside the deck. This indicates a serious short circuit that needs proper repair.
- After all basic checks (battery voltage good, fuse intact, connections tight), the scooter is still completely dead. The culprit is likely the controller or the display unit, which require specific replacement parts and often soldering.
Opening a sealed battery pack or trying to solder a new controller without the right tools and knowledge will likely cause permanent damage or injury. Knowing when to call in a pro is a key part of the diagnostic process.
My scooter got wet, now it won’t turn on
Water and electric scooters don’t mix. If your scooter was caught in rain or ridden through a puddle, stop using it immediately. Do not try to turn it on or plug it in to charge, as this can cause a short circuit. Move the scooter to a dry, warm area and let it air out completely for several days. Check the charging port and any other openings to make sure they are clean and dry. If moisture got inside the battery or controller, internal damage is likely. In this case, do not open the battery or attempt electrical repairs yourself. Your safest option is to have the scooter inspected by a professional repair technician.
Frequently Asked Questions
Why isn’t my electric scooter turning on even though it’s fully charged?
Full” charge might not be reaching the scooter’s electronics. The most common cause is a blown fuse or a tripped BMS lockout preventing the battery from discharging. Check the main fuse first. If that’s fine, try a specific reset sequence for your model to clear any electronic faults.
What can I do if my scooter has power but won’t start?
If the dashboard lights up but the motor doesn’t engage, the problem is after the main power circuit. Check your safety switches (brake sensors, kickstand switch), ensure the scooter isn’t in a “walk” or beginner speed mode, and listen for a clicking sound from the motor controller when you press the throttle. That click means the controller is getting the signal but not sending power to the motor, which points to a motor, throttle, or controller connection issue.
How do I reset an e-scooter?
There’s no single method. For many models, a simple power cycle (off, wait 60 seconds, on) works. For others, you need a button combo: hold the power and mode buttons for 10 seconds, or hold the throttle and brake while pressing power. Consult your manual or search online for your specific model’s factory reset procedure.
How to tell if a scooter fuse is blown?
Locate the fuse (often a small, clear cylinder near the battery or controller). Remove it and look for a continuous metal strip inside. If the strip is broken, blackened, or melted, the fuse is blown. You can also use a multimeter set to continuity mode; a functional fuse will show continuity (a beep), a blown fuse will not.
Before You Go
Diagnosing a scooter that won’t turn on is a process of elimination. You start with the simplest, most accessible components and work inward. The vast majority of cases are resolved at the battery, charger, or fuse stage.
If you take away one thing, let it be this: a multimeter is your best friend. A $20 tool that tells you the battery’s state of charge eliminates days of guesswork and prevents you from buying parts you don’t need. That voltage reading at the charging port decides your entire next move.
Finally, respect the manufacturer’s limits. If your Razor Power Core manual says a 12-hour initial charge and a 24-hour maximum, that’s not a suggestion, it’s the engineered tolerance for that specific battery chemistry. Stop using and charging your battery right away if it’s swollen, hot to the touch, or smells like burning. When the evidence points to internal failure, a professional repair is the correct, and safest, next step.