How to Hot Wire an Electric Scooter: Step-by-Step
This post contains affiliate links. As an Amazon Associate, we earn from qualifying purchases.
Hot wiring an electric scooter involves bypassing a faulty ignition switch by connecting the main battery power wire directly to the controller’s ignition wire, using tools like a multimeter and jumper cables. This is a temporary, last-resort fix for your own scooter when a key is lost or the switch is broken, and it carries significant legal, safety, and technical risks.
The process hinges on correctly identifying two specific wires in a 24V to 60V system. A wrong connection can fry the controller, drain the battery, or start a fire. Most guides on how to hot wire an electric scooter gloss over that modern scooters, especially rentals and connected models, are engineered to make this nearly impossible without specialized tools or software.
What follows is a straight walkthrough of the old-school wire method, the specific tools that make it safer, the reasons it often fails on newer models, and the permanent, legal fixes you should pursue immediately after.
Key Takeaways
- Hot wiring is strictly a temporary, last-resort fix for your own scooter. Doing it to any vehicle without explicit permission is illegal.
- You must disconnect the battery before any electrical work. The Invacare Scorpius Series manual states to remove it entirely to avoid shock or damage.
- A digital multimeter is essential for identifying the correct power and ignition wires. Guessing wire colors is a direct path to a blown controller.
- Modern scooters with NFC tags, app authentication, or integrated alarms (like Bird or Lime models) cannot be hotwired with simple wire tricks. You’d need to replace parts or flash the motherboard.
- The only proper long-term solution is a professional ignition switch replacement, which typically costs $75-150 including parts and labor.
The Tools You Actually Need (and What to Skip)
You don’t need a full mechanic’s kit. You need four specific tools that prevent you from destroying your scooter’s electronics. Forget the rest.
A digital multimeter is your most critical tool. You can use it to distinguish between the constant power wire from the battery and the switched ignition wire by measuring DC voltage. Without it, you’re working blind. Next, you need 14-16 gauge insulated wire with alligator clips for making a temporary, solid connection. Thinner wire can overheat. Insulated electrical gloves rated for your scooter’s voltage (24V-60V) are essential, this isn’t a household current, but a short can deliver a nasty jolt. Finally, have wire strippers and electrical tape on hand for clean work.
What can you skip? Fancy screwdriver sets. Using a screwdriver to force the keyhole is a classic move, but it almost always voids the warranty and damages the lock mechanism. Magnet tricks are equally unreliable. Your goal is a clean, reversible electrical connection, not brute force.
Before you start: Scooters operate on 24V to 60V DC systems. A short circuit can cause immediate component failure or fire. Always disconnect the main battery connector before handling wires, and work on a flat, stable surface with no moisture present.
Step-by-Step: The Wire Bypass Method
This is the controlled way to bypass a simple, mechanical ignition switch. It only works on older or basic personal scooters.
First, disconnect the battery. Sources disagree on the exact method, the Invacare Scorpius Series manual says to remove the battery completely, while the general guide (levyelectric.com) says to disconnect the main battery connector or remove the negative terminal connection. The principle is the same: eliminate all power to the system before you touch a single wire. Place the removed battery well away from your workspace.
Second, access the ignition switch. It’s usually under a handlebar cover or control panel. Access the ignition switch, which is usually under a handlebar cover or control panel. Before you disconnect anything, take a photo of the wiring harness with your phone. This reference shot will save you during reassembly.
Third, identify the critical wires with your multimeter. This is the make-or-break step. Reconnect the battery temporarily for testing (keep gloves on). Set your multimeter to DC voltage mode (use the 200V setting for safety). Use the multimeter to measure DC voltage at each wire to distinguish between constant power and switched ignition wires.
The wire showing full battery voltage (e.g., 36V, 48V) even with the key off is your constant power wire. The wire that shows zero voltage when off but full voltage when the key is turned is your switched ignition wire. These are the two you need for the how to hot wire an electric scooter procedure. Mark them with small pieces of tape.
Fourth, make the bypass connection. Disconnect the battery again. Using your prepared jumper wire with alligator clips, connect one clip to the exposed conductor of the constant power wire. Connect the other clip to the switched ignition wire. Ensure the clips have solid metal-to-metal contact. Wrap any other exposed wire ends with electrical tape to prevent accidental shorts.
Fifth, test the scooter. Reconnect the battery. The scooter’s display should light up. Gently test the throttle with the rear wheel lifted off the ground. If the motor engages, your bypass works. This is a purely temporary connection for emergency mobility.
Where This Goes Sideways: Troubleshooting a Failed Bypass

If the scooter doesn’t power on, your wire identification was likely wrong. Go back to step three with the multimeter. The most common mistake is confusing an accessory wire (like for lights) with the main ignition wire.
If the display powers on but the motor won’t run, the problem might be elsewhere. Check the kill switch position, if it’s engaged, it will cut power to the motor regardless of your bypass. Also, a completely dead battery won’t power the system, even with perfect wiring. This is why knowing how to hot wire an electric scooter and how to fix wiring is a fundamental skill; the issue might be a broken connection downstream.
A complete system failure after your attempt usually means a reversed connection or a short. Immediately disconnect everything and check the main fuse on the thick red positive wire from the battery. It’s designed to blow and protect the controller. Never bypass a blown fuse; it indicates a dangerous overcurrent condition that must be fixed first. For more on this, see our guide on fixing a scooter’s electrical fuse.
Modern Scooters Are a Different Beast

The wire-twisting method is for a bygone era. Newer personal scooters and all rental models have layers of digital security that render simple bypasses useless.
Many connected scooters require smartphone app authentication before the controller will engage the motor. The ignition switch is just one part of a chain; without the correct digital signal from the app, nothing happens. Higher-end models use NFC tags or cards, you can’t “hotwire” a near-field communication signal with alligator clips.
Rental scooters from companies like Bird and Lime are engineered specifically to prevent hotwiring a Lime scooter. As one source notes, they require purchasing new replacement parts or “flashing” the motherboard with specialized software, tasks far beyond simple wire work. Many also have integrated alarm systems with 110-120dB sirens that trigger on tampering.
The bottom line? If your scooter has a digital display, a companion app, or is a rental, traditional hotwiring is off the table. Your path is either professional repair or authorized replacement parts.
The Professional Path: Permanent Ignition Switch Replacement
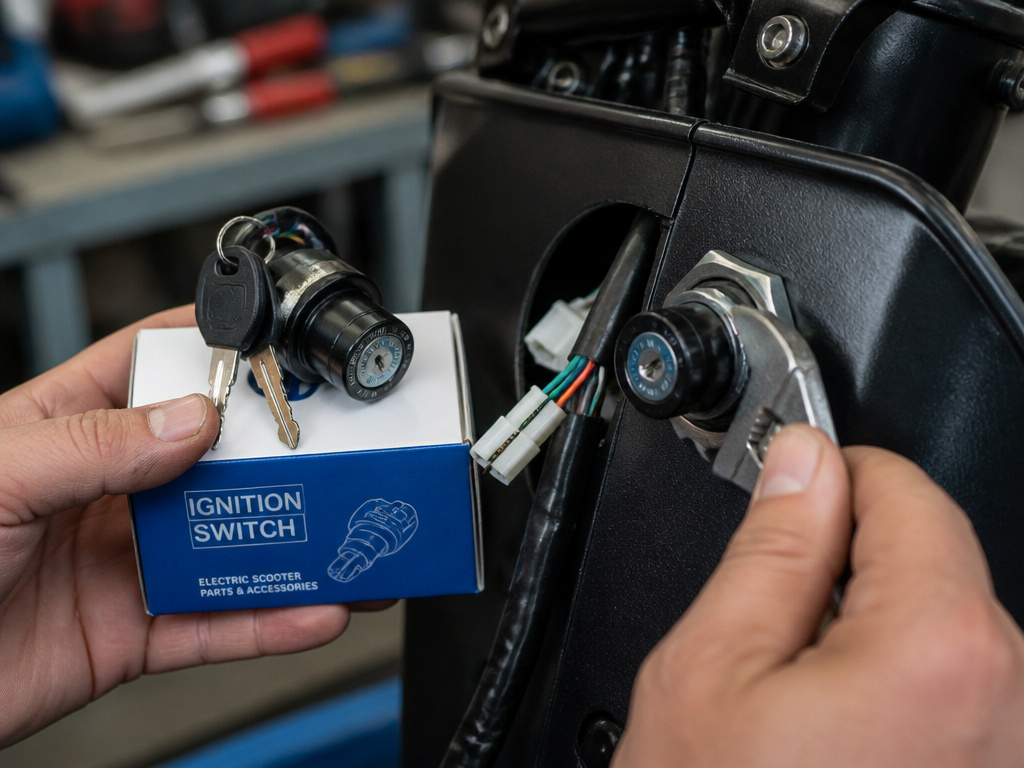
Hotwiring is a band-aid. The proper repair is to replace the faulty ignition switch. It’s more straightforward than you might think and doesn’t cost much.
A new ignition switch assembly with keys costs between $20 and $50 for most models. You’ll follow the same access procedure: disconnect the battery, remove the handlebar cover, and unplug the old switch’s wiring harness. The switch is usually held by a mounting nut. Install the new switch, reconnect the harness, and test with the new key.
If you’re not comfortable with this, a professional repair typically costs $75 to $150, including diagnosis, parts, and labor. It’s the safest option, preserves any warranty, and ensures the job is done correctly. This is especially wise if your troubleshooting suggests issues beyond the switch, like a faulty controller.
| Solution | Estimated Cost | Time Required | Best For | Risk If Skipped |
|---|---|---|---|---|
| Temporary Wire Bypass | $0 (using owned tools) | 30-60 minutes | Emergency mobility only | Permanent scooter insecurity, risk of electrical fire or damage if left connected. |
| DIY Ignition Switch Replacement | $20 – $50 (parts) | 1-2 hours | Owners comfortable with basic tools & wiring. | Possible installation errors leading to intermittent faults or no start. |
| Professional Repair | $75 – $150 (parts & labor) | 1-2 hours (shop time) | Anyone unsure, or for modern scooters with complex systems. | Paying for unnecessary repairs if diagnosis is incorrect. |
Legal, Ethical, and Safety Imperatives You Can’t Ignore

This isn’t scare talk. It’s the documented consequence of skipping these rules.
Legally, bypassing the ignition system of any vehicle you don’t own is a criminal act, tampering, attempted theft, or outright theft. Law enforcement assumes criminal intent if you’re caught. This knowledge is for your own property, for educational purposes, or for professional repair with explicit authorization.
Ethically, there’s no legitimate reason to bypass someone else’s security. Sharing these techniques to facilitate theft is irresponsible.
Safety-wise, the rules are absolute. The Niu N1S scooter service manual states its maintenance information is “for technical specialists only,” warning that improper work can cause injury or create unsafe conditions, while other sources provide DIY guides. Always wear your voltage-rated insulated gloves and safety glasses. Work in a dry, well-ventilated area, and keep a fire extinguisher rated for electrical fires nearby. If you’re ever unsure, stop. The cost of a professional repair is always less than the cost of a new controller or a hospital visit.
How Different Scooter Brands Affect Hotwiring

Brand-specific designs heavily influence what you can and cannot bypass. Some manufacturers provide distinct circuit diagrams for different battery types, meaning the wiring layout you’re looking for changes. Many modern scooters, especially rental models, are engineered to prevent traditional hotwiring by twisting wires together. These often require replacing entire engineered parts or flashing the scooter’s motherboard, not simple wire connections. Other brands integrate digital security like NFC tags, smartphone app authentication, or magnetic switches, making a purely electrical bypass often technically impossible. Always consult the specific manual for your model before attempting any work.
Frequently Asked Questions
Can you hotwire any electric scooter?
No. Only older or basic models with purely mechanical ignition switches can be bypassed with wire methods. Modern scooters with digital immobilizers, app controls, NFC, or advanced alarm systems cannot be hotwired without specialized tools or software. Rental scooters like Bird or Lime are specifically engineered to prevent it.
What if the bypass doesn’t work and my scooter is completely dead?
First, verify your battery has charge. A dead battery won’t power anything. Second, check the main fuse on the thick red positive wire from the battery, a blown fuse indicates a short. Third, re-check your wire identification with a multimeter; the most common failure is connecting the wrong wires. If you have a kill switch, ensure it’s not engaged.
Is it cheaper to hotwire or just replace the ignition?
Replacing the ignition is the smarter, safer, and more permanent choice. A new switch assembly costs $20-50, while a professional repair is $75-150. Hotwiring is free but leaves your scooter permanently insecure and risks damage every time you use the temporary connection. The small investment in a new switch assembly or professional repair is worth it.
Can I use a magnet or screwdriver instead of wires?
Sometimes, but not reliably. A strong magnet might activate a magnetic switch on some older models. Forcing a screwdriver into the keyhole can turn a worn mechanical switch, but it often damages the lock mechanism and voids warranties. These methods are less controlled and riskier than the deliberate wire bypass method.
What should I do immediately after a successful temporary bypass?
Use the scooter only for essential travel to get the parts or visit a repair shop. As soon as possible, disconnect the temporary wires and implement a permanent solution: order a replacement ignition switch or take it to a professional. Leaving a bypass in place is an invitation for theft and an electrical hazard.
Before You Go
Be realistic about hotwiring. It’s a useful skill for a very narrow scenario: getting your own basic, older scooter moving in a genuine emergency when you’ve lost a key. For everything else, it’s the wrong tool.
If your scooter is newer, connects to an app, or says “Niu” or “Invacare” on it, the wire method probably won’t work. Your time is better spent calling a shop or ordering the correct kit for bypassing an ignition switch. The goal is a reliable ride, not a hack that might fail when you need it most.
Your first move this week shouldn’t be to open the tool box. It should be to find your scooter’s model number and search for “ignition switch replacement” videos and parts. That path leads to a fixed scooter. The other path leads to a parking lot, a multimeter, and the sinking feeling that comes from a bundle of wires that all look the same.
