How to Do a 180 on a Longboard: Step-by-Step
This post contains affiliate links. As an Amazon Associate, we earn from qualifying purchases.
To do a 180 on a longboard, you and the board turn half a rotation together in the air, landing you riding fakie. A frontside 180 turns your chest toward the direction you’re rolling first, while a backside 180 turns your back toward it first. You need a solid ollie and comfort riding fakie first. The core steps are: set your feet, wind up your shoulders opposite the spin, pop, bring your knees up, and look over your shoulder to spot the landing.
That half-rotation is the simple part. The mechanics underneath decide whether you land clean or bail. It’s a physics problem disguised as a trick, you’re using friction from your feet to start and stop the board’s spin, not just jumping and hoping.
What follows is the full breakdown: the two main types of 180 (frontside and backside), the step-by-step mechanics of how to do a 180 on a longboard, how to practice it safely, and how to fix the mistakes everyone makes. By the end, you’ll know exactly which variation to try first and how to build up to landing it rolling.
Key Takeaways
- Learn your fakie first. Every 180 ends with you riding backwards. If rolling fakie feels unstable, master that before you try to spin.
- Start with the backside 180. Most people find the ollie-based backside 180 easier because you can see the landing throughout the turn. Get it solid before tackling the frontside.
- Speed makes it harder. Learn the rotation slowly, on flat ground or grass. Adding speed before you have the mechanics down guarantees a fall.
- Commit to the full 180 degrees. Stopping halfway at 90 degrees is a prime way to roll an ankle. Decide on the full rotation before you pop.
- Your shoulders lead, your feet follow. Many sources emphasize that the spin starts with your upper body winding up and unwinding. If your feet try to lead, the board won’t come with you.
What Is a 180 on a Longboard?
A 180 is an ollie where you and the board turn half a rotation together in the air, so you land riding fakie. It’s a foundational trick that teaches you to control your body and board in the air, a skill that leads into more advanced spins and slides.
There are two primary variations, defined by which side of your body faces the direction of travel during the turn. A frontside 180 turns your chest toward the direction you are rolling first. A backside 180 turns your back toward the direction you are rolling first. Think of it like this: if you’re turning left, a frontside 180 has your chest open to the left as you spin. A backside 180 has your back to the left.
The 180 belongs to flat-ground progression. It builds on a solid ollie and comfort riding fakie. If riding fakie still feels strange, spend a few sessions rolling and turning fakie before you try.
Most skaters find the ollie-based backside 180 easier to learn initially because the landing is visible throughout the rotation. The frontside 180’s final segment is blind, requiring more commitment. You should learn both, they are two halves of the same control skill.
Prerequisites: What You Need Before You Try
Don’t chase the trick before you own the basics underneath it. Trying a 180 without these is like building a house on sand.
First, a solid ollie. You need to be able to ollie consistently while rolling and land on the bolts most of the time. The 180 is an ollie with a rotation added; if your ollie is shaky, the rotation will magnify every flaw.
Second, comfort riding fakie. Every 180 ends with you rolling backwards. If you have to step off or pivot to correct yourself immediately after landing, you haven’t truly landed the trick. Spend time just cruising and making gentle turns while riding fakie. This builds the muscle memory so landing doesn’t feel foreign.
Third, a stable stance. You should be comfortable with kickturns and maintaining balance while rolling. If you’re still fighting for basic balance on a longboard, the 180 will be a frustrating struggle.
The Physics of the Turn: Why It Spins (And Stops)
It looks like magic, but it’s just applied force. Understanding the “why” makes the “how” much clearer.
A frontside 180 starts with the same physics as an ollie: the pivoting of the board’s center of mass that starts with pressing on the tail. To add the rotation, you create a twisting force. Physicist Paul Doherty explains you push off to the side and forward with the rear foot and pull back with the front foot to cause the board to rotate. You use the friction of your feet to stop the rotation.
By pushing downward, you make a friction force that allows you to push the board to the side and spin it around. You need a delicate touch that pushes down enough to remain in contact with the board to get it started and is still in contact to stop it from rotating.
This is the critical nuance of how to do a 180 on a longboard. You’re not just jumping and twisting your hips. You’re using downward pressure to create grip between your shoes and the griptape, then using that grip to lever the board around. Overdo the downward push, and the board will leave your feet. Underdo it, and you won’t get enough friction to initiate or stop the spin cleanly. It’s a feel you develop through practice.
Step-by-Step: How to Do a Backside 180
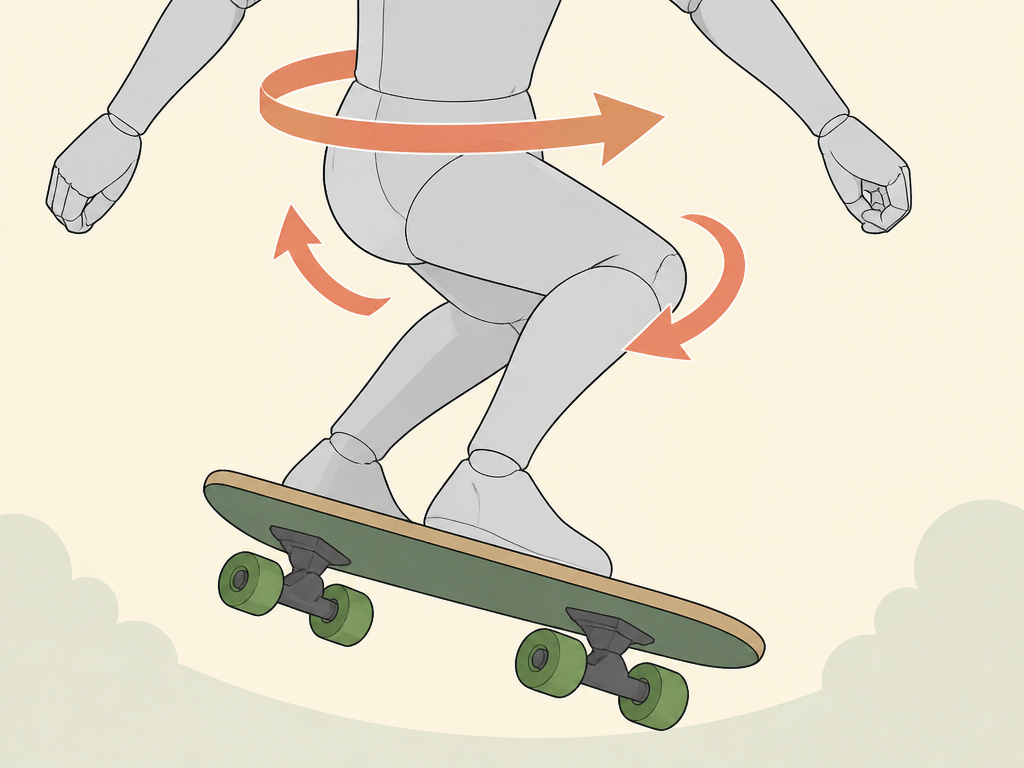
We’ll start with the easier one. Follow these steps in order, practicing each one before chaining them together.
1. Set Your Feet. Take your normal ollie stance: the ball of your back foot on the tail, your front foot just behind the front bolts. Some riders move the back foot slightly toward the toe side for a backside 180. Find what keeps the board squarely under you.
2. Wind Up Your Shoulders. Crouch and turn your shoulders a little in the opposite direction of the spin. For a backside 180, your shoulders wind toward your toes. This coiling action is what you’ll “unwind” to power the rotation.
3. Pop and Unwind. Ollie, and as you leave the ground, unwind your shoulders powerfully in the direction of the spin (for backside, that’s turning your back toward the direction of travel). Your hips and legs will follow. This is where that shoulder-initiation from the source material is key, your upper body leads the turn.
4. Keep the Board Close. Bring your knees up and keep your feet on or close to the board as it turns. Don’t kick the board away from you.
5. Spot Your Landing. Look over your leading shoulder (your right shoulder if you’re regular-footed spinning backside) toward where you will land. You can see the ground the whole time in a backside 180, use that visual cue.
6. Land Fakie. Aim to land with your weight centered over the bolts, knees bent to absorb the impact. Your momentum will naturally want to carry you backwards, ride it out.
7. Roll Away. The finish is riding away fakie without a step or a pivot to correct yourself. If you can’t do this, go back and drill your fakie riding.
Step-by-Step: How to Do a Frontside 180
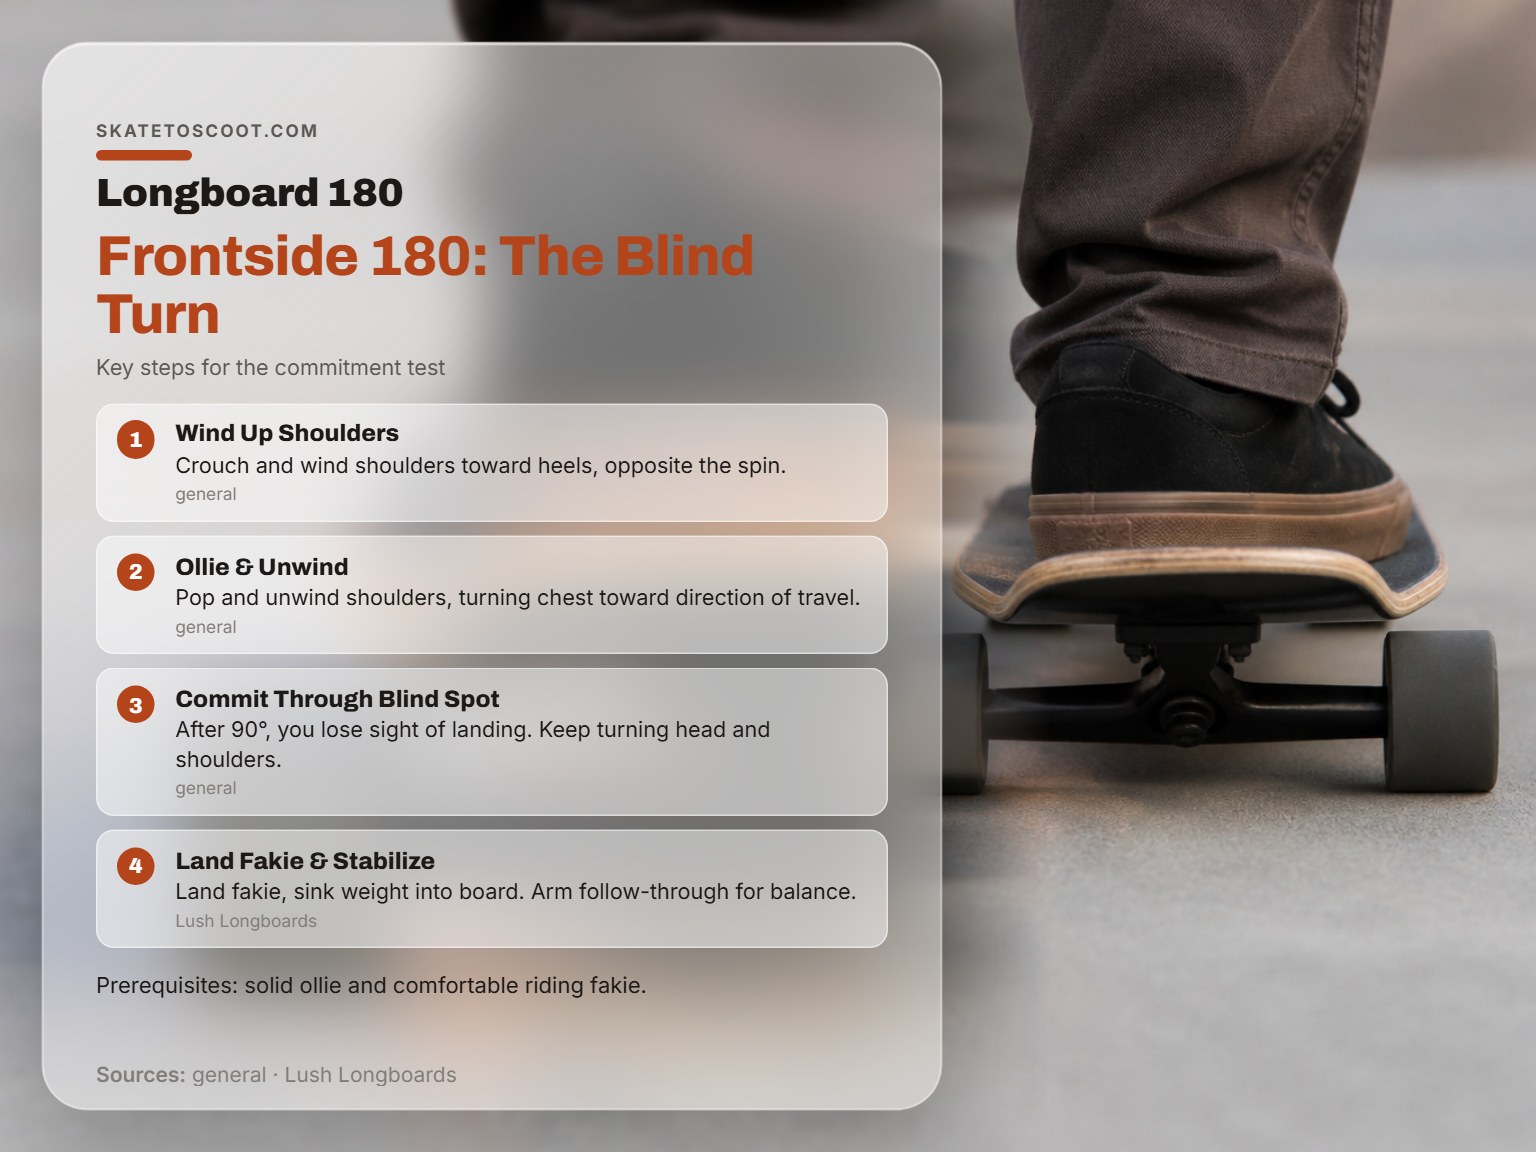
The frontside is the commitment test. The mechanics are similar, but the visual cue disappears.
1. Foot Placement. Similar stance, but some riders adjust the back foot slightly toward the heel side for a frontside 180.
2. Shoulder Wind-Up. Crouch and wind your shoulders toward your heels, the opposite direction of the spin.
3. Pop and Spin. Ollie and unwind your shoulders, this time turning your chest toward the direction of travel. This is the “frontside” part.
4. The Blind Spot. As you pass 90 degrees, you’ll lose sight of the landing. This is where most people panic and under-rotate. Commit. Keep turning your head and shoulders.
5. Land and Stabilize. Land fakie, sinking your weight back down into the board. You might need a slight arm follow-through to keep your balance as the slide completes. A clean longboard slide uses this same weight-sinking principle.
6. Ride Out. Just like the backside, the goal is a clean roll-away in fakie stance.
Common Mistakes and How to Fix Them
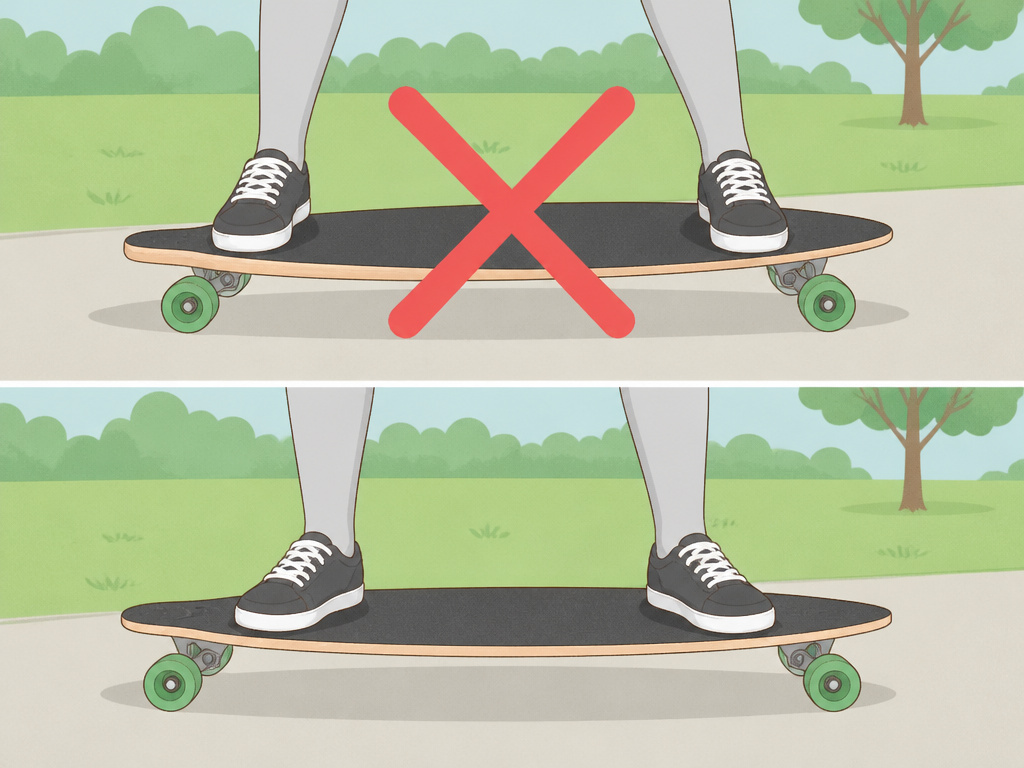
These are the errors I see every single session at the park. Avoid them, and you’ll progress ten times faster.
Under-rotation (Stopping at 90 Degrees). This is the most common fail and the one that leads to rolled ankles. You pop, spin halfway, and land sideways. The board stops dead, but your body keeps going.
- Fix: You’re not committing with your shoulders. Practice stationary 180s on grass where falling doesn’t hurt. Drill the feeling of unwinding your shoulders all the way through the 180-degree arc. Mentally decide on the full rotation before you leave the ground.
The Board Flies Away. You pop, but the board shoots out in front or behind you.
- Fix: This is usually a foot-pressure issue, exactly as physicist Paul Doherty warned. You’re either not keeping your feet in contact (kicking down too hard) or you’re not using your feet to guide the board. Focus on keeping your feet glued to the board through the entire motion, using that friction to control the spin.
You Can’t Land Fakie. You land the rotation but immediately step off or have to pivot back to regular.
- Fix: This isn’t a 180 problem; it’s a fakie problem. Go back to the prerequisites. Spend an entire session just riding around in fakie, doing gentle carves and kickturns. Your body needs to trust that riding backwards is stable. This is also where learning how to stop on a longboard from fakie is a crucial safety skill.
Adding Too Much Speed. “It’ll give me more momentum to spin!” is the thought. In reality, it just gives you less time to control the spin and a harder fall.
- Fix: Learn it slowly. The source is explicit: speed makes the 180 harder, not easier. Start stationary on grass, then try it rolling at a walking pace. Only add speed when you can land it consistently at the slower pace.
Practice Drills That Actually Work
Don’t just hurl yourself at the trick. Break it down with these drills, grounded in the source material.
Kickturn 180s. Rolling slowly, lift the nose and pivot 180 degrees on the back wheels, then set it down and ride fakie. Do it both frontside and backside. This teaches the rotation and the fakie roll-away without the pop.
Stationary 180s on Grass. Standing still on grass or carpet, ollie and turn 180 degrees. Land on the bolts. Do ten backside, then ten frontside. The soft landing helps you concentrate on the spin without worrying about falling.
Quarter Turns. Rolling, ollie and turn about 90 degrees, then let the wheels finish the turn on the ground. Gradually turn more in the air (110, 135, 160 degrees) and less on the ground until you land the full 180. This progressive overload is how you build the muscle memory safely.
Frontside Standup 180 Slide: A Different Beast
This is where the “180” label gets confusing for beginners. A Frontside Standup 180 Slide is a longboard-specific trick, more about freeriding than street skating. You initiate a slide to rotate the board 180 degrees while staying on your feet, often at higher speeds.
The technique differs. According to Lush Longboards, you pop your weight upwards to unweight the board and initiate the slide. As you come around, sink your weight back down into the board and use arm follow-through to keep the slide smooth. The goal is a controlled, sliding rotation, not an aerial one.
Where this goes sideways: Be careful not to hold the slide sideways too much or you will flatspot your wheels. This is a wear-and-tear issue unique to sliding 180s, not the ollie version.
The revert back to regular stance is, for many skaters, easier than the initial 180 slide, which is a key difference from the ollie-based how to do a 180 on a longboard. This highlights how context changes the trick’s difficulty. Learning this slide is a natural next step after mastering basic powerslide technique.
Gear and Setup Recommendations
Your equipment won’t do the trick for you, but the wrong gear will definitely stop you.
Deck: For ollie-based 180s, any sturdy skateboard or hybrid longboard with a defined kicktail works. For slide-based 180s, a dedicated freeride or downhill longboard with concave and a functional kicktail is ideal. Wheelbase and length affect stability; a longer board can be more stable for dance-style 180 steps but heavier to pop.
Wheels: Smaller, harder wheels are generally easier to pop for ollie 180s. For slide 180s, you typically want larger, round-lipped freeride wheels in a similar hardness range to break traction predictably.
Trucks: Tighten your trucks a bit when first learning. This reduces the board’s tendency to turn underneath you as you wind up, giving you a more stable platform. As you get better, you can loosen them for a more fluid motion. Loose trucks can contribute to speed wobbles on landing if you’re not centered.
Safety Gear: This isn’t optional. Wear a helmet, knee pads, and elbow pads. Wrist guards are arguably more important for beginners, as the instinct is to put your hands out. Learning how to fall off a longboard safely should be your very first lesson.
Progression Path: What’s Next?
You own the 180 when you can land it rolling at normal speed, first try, on the bolts, and ride away fakie without a step or a pivot to fix it. Do this with both frontside and backside.
Once you have that:
- Combine them. Do a frontside 180, ride fakie for a bit, then do a backside 180 to revert back to regular. This is a fundamental line.
- Add a shuvit. Try a pop shuvit (the board spins 180 beneath you without your body rotating). This builds board control.
- Move to 360s. A full rotation uses the same shoulder-initiation mechanics, just with more commitment and wind-up.
- Incorporate slides. Practice your Frontside Standup 180 Slide, linking the worlds of flatground tricks and speed control.
How to do a No-Comply 180
A No-Comply 180 is a stylish, low-impact way to turn around. It uses the same physics as an ollie, starting with a press on the tail to pivot the board’s center of mass. As you step off with your front foot, use a delicate touch to push down and create enough friction with your rear foot to spin the board. Push off to the side and forward with your rear foot while pulling back with your front foot to cause the rotation. The key is to keep your feet in contact with the board to both start and stop the spin. Over-pushing downward can cause the board to leave your feet, so focus on a controlled motion. Land with your weight centered to ride away cleanly.
Sliding vs. Stepping the Front Foot
The difference between sliding and stepping your front foot defines the trick’s style and stability. Sliding the foot keeps it in constant contact with the board, using friction to control the rotation. This method offers more control during the spin and a smoother landing, as your foot never loses its reference point on the grip tape. Stepping the foot off entirely creates a more dramatic, pendulum-like motion but requires precise timing to get your foot back on for the landing. For consistency, especially when learning, focusing on a smooth slide helps maintain board control. The goal is to land on the bolts without needing a corrective step, which builds the foundation for riding away fakie with confidence.
Frequently Asked Questions
How to do a 180 on a skateboard?
The core mechanics are identical to a longboard 180: an ollie with a 180-degree rotation. However, a standard skateboard is shorter and lighter, making the pop and spin feel snappier and easier to control mid-air. The steps, foot placement, shoulder wind-up, pop, and spot-the-landing, are the same. Many skaters actually find it easier to learn 180s on a skateboard first due to the quicker response, then transfer the skill to a longer, heavier longboard.
How do you do a 180 turn?
180 “turn” often refers to a non-ollie rotation, like a kickturn or a pivot. For a kickturn 180, you roll slowly, lift the front wheels by pressing on the tail, and pivot the board 180 degrees on the back wheels before setting the nose down to ride fakie. It’s a fundamental skill and a great drill for learning the body rotation needed for the ollie 180, but it’s not the same trick.
Are there any tricks you can do on a longboard?
Absolutely. Longboarding encompasses a huge range of tricks beyond cruising. These include slides (like heelside and toeside slides, pendulums), dance steps (cross-steps, Peter Pans), freestyle tricks (shuvits, tiger claws, no-complies), and downhill racing techniques. The 180 is a gateway trick that opens up many of these disciplines.
Which 180 is easier, frontside or backside?
For the basic ollie 180, most people find the backside 180 easier because you can see the landing throughout the rotation. The frontside 180’s final segment is blind, requiring more trust and commitment. However, for slide-based 180s (like the Frontside Standup 180 Slide), some skaters report the revert back to regular is easier than the initial slide, showing that “easier” depends heavily on the specific trick and context.
I keep under-rotating. What am I doing wrong?
You are almost certainly not committing with your upper body. Your shoulders initiate and control the spin. If you stop unwinding them mid-air, your rotation stops. Practice the full shoulder motion off the board. Crouch, wind your shoulders opposite the spin, then jump and unwind them completely, imagining you’re trying to look directly behind you. The board follows your torso.
Before You Go
One rule most guides skip: if you can’t comfortably ride fakie for a reasonable distance, stop trying 180s and go drill that. An hour of focused fakie riding will do more for your 180 success rate than ten hours of hurling yourself into spins you can’t land.
The other essential item is gear. I’ve seen more progress halted by a sprained wrist than by any technical flaw. Pad up. Knowing a fall won’t injure you gives you the confidence to commit to the rotation.
Finally, understand that the 180 isn’t one trick. It’s a family. The ollie 180, the slide 180, the no-comply 180, they’re different tools for different situations. Start with the basic ollie backside, master it, then explore the others. Each one teaches you something new about how your weight, your speed, and your board interact.
