How to Roller Skate Without Falling: Step-by-Step
This post contains affiliate links. As an Amazon Associate, we earn from qualifying purchases.
To roller skate without falling, you match three things: gear that actually protects you, a body position that manages your center of gravity, and a surface that forgives mistakes. The CPSC states that a helmet, elbow pads, knee pads, wrist guards and gloves should always be worn., and a 2006 study found skaters try to catch themselves with their arms over 90% of the time—so without wrist guards, you’re inviting a fracture. The foundational stance is knees bent, feet shoulder-width apart, and weight centered over the balls of your feet.
That 90% figure comes from a video analysis of hundreds of falls, which explains why every safety guide, from the Boy Scouts to orthopedic surgeons, starts with the same short list of mandatory equipment. A fall isn’t an “if” for a beginner; it’s a “when.” The goal is to make contact with the ground predictable, controlled, and harmless. Learning how to roller skate without falling is therefore about managing the inevitable impact.
What follows is the sequence that moves you from standing still to rolling with confidence. This guide covers the essential gear checks, the three drills that build balance before you ever move, the mechanics of a safe fall, and how to fix the wobbles that trip most beginners up. By the end, you’ll have a day-by-day practice plan that builds skill, not just hope.
Key Takeaways
- Wrist guards are essential. A 2006 study in the British Journal of Sports Medicine found skaters instinctively reach out with their arms in over 90% of falls; guards prevent the fractures that follow.
- Start with the ‘V-Walk’ or ‘Duck Walk’. Before you try to glide, spend your first session marching in place with toes pointed out, shifting weight foot to foot. This builds the ankle strength and balance memory for your first roll.
- Inspect your skates before every session. Per the Riedell owner’s manual, check that wheels spin freely, axles are tight, and toe stops are secure. A loose wheel or stuck bearing causes more unexpected falls than any lack of skill.
- Practice falling on a soft surface first. The SIT inline skate manual instructs beginners to always try to fall forwards onto knee pads, then catch themselves with elbow and wrist guards—drill this motion without skates on.
- Avoid slopes until braking is automatic. The CPSC and SIT manuals both warn against skating on inclines until you’ve drilled the heel brake or T-stop on flat, traffic-free ground.
The Gear That Stops a Fall From Becoming an Injury
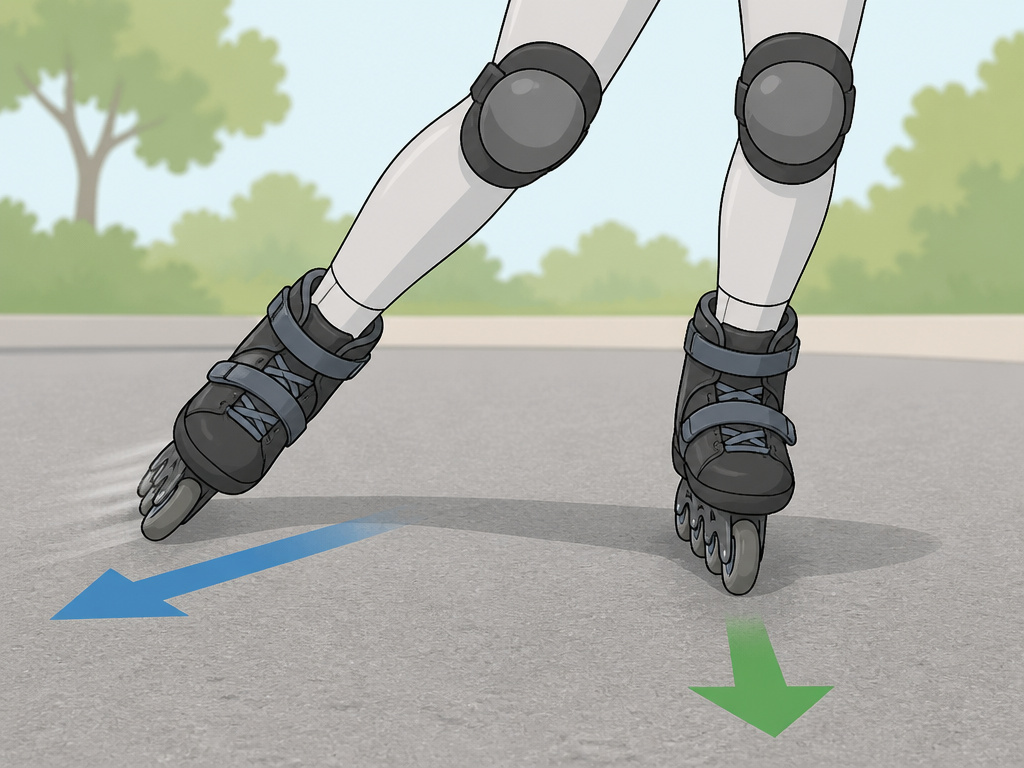
Be honest about protective equipment. You don’t wear it because you’re bad at skating. You wear it because the physics of a human body meeting pavement doesn’t care about your skill level. The U.S. Consumer Product Safety Commission is blunt: a helmet, elbow pads, knee pads, wrist guards, and gloves should always be worn. This isn’t a suggestion for kids; it’s the baseline for anyone on wheels.
The standards matter. Your helmet needs approval from ANSI, SNELL, CPSC, or ASTM. That stamp means it’s been tested to absorb a specific impact. For your wrists, the need is even more urgent. Remember that 90%+ stat? Your brain’s default response to tipping over is to throw your hands out. A wrist guard with a solid splint redirects that impact away from the small bones in your wrist and into the stronger structure of the forearm. It’s the single most important piece of gear after the helmet.
Before you start: A helmet with a cracked shell or compromised foam liner offers no real protection, regardless of its certification sticker. Inspect it. Worn-out Velcro or stretched straps on pads mean they’ll shift on impact, exposing your joints. Replace them.
Your skates themselves are part of your safety system. The Riedell owner’s manual has a concise pre-skate checklist: tight laces for proper foot support, wheels that roll without resistance, clean and tight axle nuts, and secure toe stops that aren’t worn down. A toe stop that is worn out needs replacement. Ignoring this is like driving with bald tires and hoping it doesn’t rain.
Where this goes sideways: Putting on all your gear but leaving the skate’s kingpin nut loose. A wobbly truck makes steering unpredictable, and that first subtle lean becomes an unstoppable tip. The fix takes ten seconds with a skate tool. Check it.
The Pre-Skate Ritual That Prevents Wobbles
Your first ten minutes with skates on should happen against a wall, on carpet, or on grass. You are not learning how to roller skate without falling yet. You are learning what it feels like to stand on wheels. The SIT manual’s initial position is your bible: feet shoulder-width apart, knees slightly bent. This isn’t a slight suggestion. Bend them until you feel your weight settle over the balls of your feet, not your heels. If you feel yourself leaning back, you’re already on the path to a backward fall.
Now, try the Scouting.org “safe-T” stance. Roll one skate back until its arch touches the other skate’s wheel, forming a T. This anchors you. The pressure on that back wheel creates friction. It’s your parking brake. Practice shifting your weight from your front foot to your back foot and feel how the stability changes. This is the first sensation of control.
The part nobody mentions: Your ankles will feel weak and wobbly for the first few sessions. That’s not a sign you’re doing it wrong. It’s a sign the small stabilizing muscles, which have never worked this way before, are being introduced to their new job. The wobble decreases with each minute of practice.
From the safe-T, move to the “V-Walk” or “Duck Walk.” Heels together, toes pointed out. Lift one skate at a time, stepping in place. Right, left, right, left. You’ll look silly. Do it anyway. This drill builds the ankle strength and weight-shift coordination that gliding requires. After a minute of marching, try to advance each foot a few inches forward as you step. You’re now “waddling” forward. This is the bridge between standing and rolling.
Common mistake: Trying to glide before you can comfortably hold the bent-knee stance for 30 seconds without grabbing a wall. Your legs will burn. That’s the point. If you can’t hold the position statically, you definitely can’t control it while moving.
How to Fall Forward (And When Not To)
One point often missed is that learning to fall is a more important skill than learning to stop when you’re starting out. If you know how to hit the ground, the fear of falling evaporates, and with it goes the stiff, panicked posture that causes most falls.
The sources have a nuanced disagreement here, and it’s instructive. The SIT manual advises to “Always try to fall forwards, and never backwards!”, while the Scouting.org pamphlet suggests to “try to fall forward” and a 2006 study found a significant percentage of falls are backward. Their reasoning is that your protective knee pads are designed to take the first impact, followed by your elbow and wrist guards. It’s a controlled sequence. The 2006 video analysis study, however, found that while 56.7% of roller/inline skating falls are forward, a significant 39.3% are backward. The Scouting.org pamphlet softens the directive to “try to fall forward” so your pads can provide protection.
| Fall Direction | Percentage of Falls | Recommended Response | Why |
|---|---|---|---|
| Forward | 56.7% | Go with it. Land on knee pads, then hands. | Your gear is positioned to absorb this impact in sequence. |
| Backward | 39.3% | Tuck your chin, roll to your side. | Falling flat on your back risks head and spine injury; rolling disperses force. |
| Sideways | 4.0% | Aim to land on the fleshy part of your thigh/hip. | Avoid direct impact on the hip bone; let muscle cushion it. |
The takeaway? Your default plan should be a forward fall onto your pads. But if you find yourself going over backwards, fighting it to try and twist forward often makes it worse. Tuck your chin to your chest, try to roll to one side, and aim to land on the meaty part of your buttock and thigh. Practicing this on a soft surface builds the muscle memory so you don’t freeze.
Practise falling initially onto a soft surface using protective equipment without your inline skates. Always try to fall forwards, and never backwards! Fall onto your protective knee pads. Then catch yourself using the elbow and wrist protectors. Spread your fingers in order to avoid injury. – SIT Inline Skate Manual
The four-step method for getting up from the Scouting.org guide is the only one that works reliably on wheels. Get on hands and knees. Raise one knee and plant that skate flat on the ground. Sit back onto the heel of your other skate, centering your weight over both. Use your hands on your raised knee to push yourself straight up. Any other method will likely send a wheel rolling out from under you.
Your First Moves: From Waddle to Glide
You’ve stood, you’ve marched, you’ve practiced falling. Now for the magic moment: your first glide. The instinct is to push straight back like on an ice skate. Forget that. For inline and quad skates on pavement, think “pushing out to the side.”
Start in your V-Walk stance. Instead of lifting a foot to step, press your weight onto your right foot and push your left foot out diagonally to the side. Don’t lift it; let it slide along the ground. As you extend your left leg, you’ll feel your right skate start to roll forward. Bring your left foot back underneath you, shift weight onto it, and push your right foot out to the side. You’re now “scissoring.”
This is the follow-through propulsion method. It’s inefficient and slow, and that’s perfect. You’re building balance, not speed. The sound you want is a smooth, continuous roll, not a clack-clack-clack of wheels repeatedly leaving and hitting the ground. If you’re making the clacking sound, you’re picking your feet up too high. Keep them low.
Troubleshooting your first wobbles:
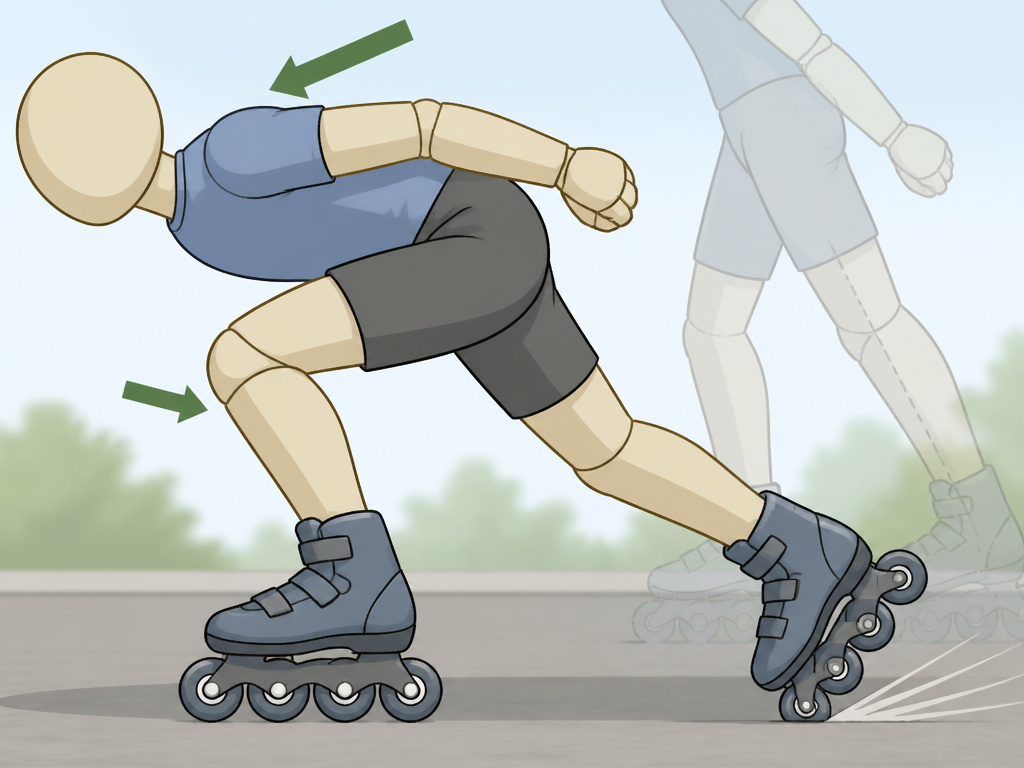
- Wobble: You start rolling but then your feet shoot out in front of you.
- Cause: You’re leaning back. Your weight is on your heels.
- Fix: Bend your knees more. Seriously, more than you think. Point your chest slightly forward.
- Wobble: You can’t seem to push off with any power.
- Cause: You’re standing too upright, with straight legs.
- Fix: Get lower. The power comes from your leg extending from a bent position.
- Wobble: You keep turning unintentionally.
- Cause: You’re pushing off with the inside or outside edge of your wheel, not the full set.
- Fix: Focus on pressing the entire wheel truck flat against the ground during your push.
Stopping: The Heel Brake and the T-Stop
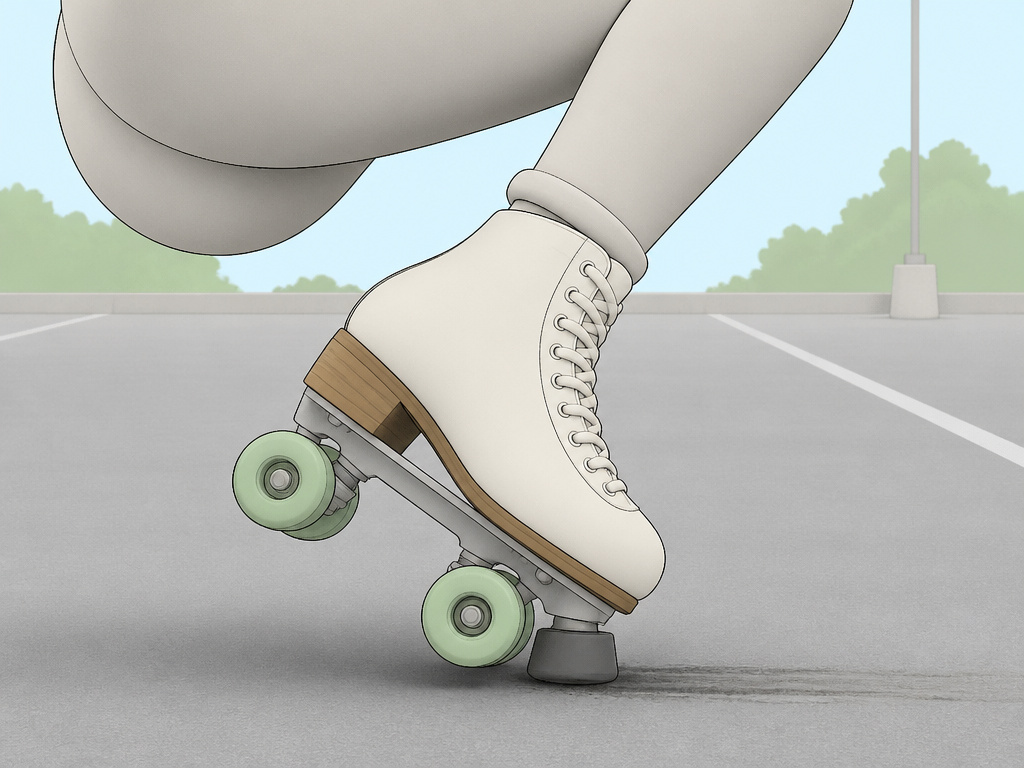
You cannot progress without a reliable stop. Full stop. The heel brake technique is recommended by sources like the CPSC and the SIT manual. For most beginner inline skates, the brake is on the right heel. To use it, skate with your right foot slightly in front. Raise your right toes, press the brake pad down onto the ground, and bend your knees. The harder you press and the more you bend your knees, the faster you’ll stop. It feels unnatural at first—like you’re sitting down onto your back foot. That’s correct.
The Scouting.org pamphlet teaches the “safe-T” as a standing position. The SIT manual explicitly says the T-stop technique is “only suitable for advanced skaters.” Why? Because it requires balancing on one foot while dragging the full set of wheels of the other skate sideways. Get it wrong, and the dragging foot can catch an edge and spin you around. If your skates have a heel brake, use it first. Master rolling on one foot before you even think about the T-stop.
Practice various braking techniques on a smooth surface without traffic or pedestrians. Avoid slopes until you are confident about braking. – SIT Inline Skate Manual
Find a long, flat, smooth parking lot or tennis court. Skate ten feet, then practice your heel brake. Do it twenty times. The goal is to make the motion automatic, so you don’t have to think “right foot forward, toes up, sit back” when you need to avoid a crack or a pebble.
Drills for Balance and Edge Control
Balance is a skill, not a gift. These drills isolate the components so you can strengthen them off-skates and integrate them on-skates.
The Single-Leg Stand: On carpet or grass, take your skates off. Stand on one foot. Easy? Now bend that knee. Harder? Now close your eyes. This lights up your ankle stabilizers. Do 30 seconds per leg, twice a day. When you can do it on skates on carpet, you’ve built a firewall against one major cause of falls.
The Lemon Drop: This is an edge-control drill. While rolling slowly, try to make a series of half-circle shapes on the ground with your outside edges, as if you’re squeezing lemons with your feet. It teaches you to steer by applying pressure to the inside or outside edges of your wheels, not just by turning your whole foot.
The Cross-Over Step: For turning at higher speeds, you need the cross-over technique cited in the SIT manual, borrowed from ice-skating. In a safe, open area, practice stepping your outside foot over your inside foot while turning a wide circle. It feels like crossing your legs. This keeps your weight centered over your wheels during a turn, preventing you from falling to the outside.
| Drill | Surface | Goal | Sign You’re Ready to Move On |
|---|---|---|---|
| Single-Leg Stand (30 sec) | Carpet, then pavement | Ankle stability | No wobbling when you open your eyes. |
| Lemon Drops | Smooth pavement | Wheel edge control | You can make 5 consecutive, smooth half-circles. |
| Cross-Over Steps | Large, empty lot | Turning without speed loss | You can complete a full circle without putting your inside foot down. |
Let’s clear something up. Drills are the fastest path to advanced tricks. Spending 80% of your early practice time on these fundamentals is an investment. It pays off when you instinctively recover from a wobble that would have sent you down a month earlier.
The Surface Is Your Silent Teacher
The CPSC could not be clearer: “Skate on smooth, paved surfaces without any traffic. Avoid skating on streets, driveways or surfaces with water, sand, gravel or dirt.” Your initial practice should be on the smoothest concrete or asphalt you can find—a basketball court, an empty parking lot, a paved bike path on a quiet morning.
Every crack, pebble, or seam is a lesson, but early on, they’re a lesson you fail. A wheel catching in a crack stops instantly while your body keeps moving. That’s physics, and you lose. Later, you’ll learn to unweight your skates by lifting your feet slightly when crossing obstacles. For now, scan your path and avoid anything that isn’t flat.
Avoid water, oil, potholes, and very rough surfaces. – SIT Inline Skate Manual
Night skating is not recommended by the CPSC. Your depth perception is shot, you can’t see debris, and drivers can’t see you. The only exception is a perfectly lit, dedicated skate park you know like the back of your hand, and even then, your margin for error is zero.
How to Use Your Arms for Balance While Skating
Your arms are your most important tool for staying upright. Think of them as counterweights, held out to your sides at about shoulder height. When you feel yourself tipping to the left, gently swing your right arm out to counteract the shift. Keep your movements smooth and controlled; wild flailing can throw you off further. Studies show that skaters instinctively use their arms to break a fall in the vast majority of cases, which highlights their natural role in managing your center of gravity. Practice keeping your arms active and relaxed as you move, letting them flow with your strides to maintain a stable, balanced posture over your skates.
Frequently Asked Questions
How long does it take to not fall anymore?
You’ll never stop falling entirely—even pros take spills. But the frequency plummets. Most adults can reach a point where unexpected falls are rare after sufficient deliberate, drill-focused practice. The type of fall changes: from unpredictable collapses to controlled bails during attempted new moves. Setting realistic learning expectations helps you track progress.
What is the most common mistake that leads to a fall?
Leaning back. When you get scared or lose balance, the instinct is to straighten your legs and pull your torso upright. This puts your center of gravity behind your wheels, and your feet shoot forward. The fix is counterintuitive: bend your knees more and point your chest slightly down toward the ground.
Do I need different gear for indoor vs. Outdoor skating?
The protective gear is identical. The skates themselves differ. Outdoor wheels are typically larger and made of softer urethane to absorb vibration, while indoor/rink wheels are typically smaller and harder for speed and slide. Using hard wheels outdoors makes every pebble feel like a speed bump and drastically increases vibration-induced fatigue, which leads to falls.
How do I know if my skates are fitted correctly?
Proper skate fit is foundational. Your heel should be locked in place with no lift when you bend your knees, and your toes should lightly brush the end of the boot without being crunched. A boot that’s too large allows your foot to slide around inside, destroying your control and making your ankles work overtime to compensate, which leads to quick fatigue and wobbles.
Is it harder for adults to learn than for kids?
In some ways, yes. Adults have a higher center of gravity and more fear of injury, which creates tension. The 2006 study noted that children over 6 years old actually had a higher rate of head strikes (10.9%) than younger kids (4.5%), possibly due to less parental assistance. The advantage adults have is the ability to follow structured drills and understand the “why” behind the techniques. The learning timeline is similar, but the path is more mental.
The Bottom Line
One rule most guides skip: if you haven’t practiced falling on a soft surface in full gear, you are not ready to roll on pavement. That drill does more for your confidence and safety than any other single exercise. Everything above assumes you’re willing to spend your first session not skating, but building the systems that let you skate safely.
Your first real skate session should be boring. A parking lot, a wall to hold onto, and the V-Walk for 30 minutes. The goal isn’t distance or speed; it’s building the neural pathways for balance and the muscle memory for a low stance. Trust that process.
If you take one thing from this, let it be the pre-skate inspection. A loose axle nut or a worn toe stop has ended more sessions—and caused more fractures—than any complex trick ever will. Your essential skating safety equipment is your first defense. Your maintained skates are your second. Your drilled technique is your final, and most powerful, layer. Layer them all, and the falls that do come will be stories, not injuries.
