How to Break in New Roller Skates: The 12-Hour Rule
This post contains affiliate links. As an Amazon Associate, we earn from qualifying purchases.
To break in new roller skates, you start with short sessions, adjust lacing for control or comfort, and use heat molding if your skates support it. The goal is about 12 hours of skating spread over a month, but stiff leather boots can take 20-40 hours. Sharp pain or numbness means the fit is wrong, not that they need breaking in.
That 12-hour figure isn’t a guess. It’s the point where most skates transition from stiff new gear to a molded extension of your foot. The process isn’t about suffering; it’s about controlled adaptation. A key part of this is understanding how to break in new roller skates. You’re convincing the boot’s materials to remember your ankle bones and convincing your feet to trust a rigid shell.
What follows is the manufacturer’s playbook—Powerslide’s fitting tips, Riedell’s inspection checklist, Marsblade’s bake times—mixed with the realities you only hear in skate shops when you compare a how to break in new roller skates. This includes the lacing debate, the insole question nobody agrees on, and how to tell if that hotspot is a temporary protest or a deal-breaker.
Key Takeaways
- Start with short sessions and build up over weeks, as Powerslide advises, to avoid friction blisters from excess movement.
- Lace for control or comfort depending on your skill level; Riedell insists on a tight, supportive fit for proper foot support, while Powerslide allows looser lacing for more comfort.
- Expect the break-in to take about 12 hours of skating over a month, but budget significantly more time for stiff, non-thermoformable boots like some Riedell or Antik models.
- For Powerslide skates, heat mold only if you see the MYFIT logo on your liner or boot, and always follow your brand’s specific instructions to avoid damage.
- Inspect wheels, bearings, and toe stops before each session as per Riedell’s manual; a wobbly wheel or a worn stop won’t fix itself with break-in.
The First Rule: Check the Fit Before You Start
You can’t break in a skate that doesn’t fit. This seems obvious, but the pain of week two has convinced many a skater they just need to “power through” a size mismatch. Don’t. A boot that’s too long lets your foot slide, which grinds your heel and creates blisters. A boot that’s too short will never magically grow; it will just bruise your toenails.
The manufacturer test is simple. According to Powerslide, when you bend your knees into a skating stance, your toes should not jam against the front of the boot. That’s your length check. For width, you should feel snug, even tight, but not pinched. If you feel a sharp, localized pressure on a bone or joint that doesn’t ease when you wiggle your toes, that’s a potential pressure point, not just tightness.
Common mistake: Trying to break in skates that are a full size too small because a shop assistant said “they’ll stretch.” Leather stretches millimeters, not sizes. Synthetic materials might not stretch at all.
If you’re unsure, review the roller skate fit guidelines before you cut any tags. It’s cheaper to exchange a box-fresh pair than to sell a painful, barely-used one at a loss.
The 12-Hour Rule That Decides It
How long should it take? The Lucky Skates blog puts a number on it: about 12 hours of skating over the course of roughly a month. That’s the benchmark for many recreational skates with thermoformable liners. It’s a useful target because it’s measurable. You don’t just skate “until it feels better”; you log short, consistent sessions and track progress.
But here’s where forums diverge from the official line. Owners of stiff, traditional leather boots—think Riedell 336s or high-end Antik models—report break-in periods of 20 to 40 hours. My own break-in of a similar boot was a six-month slog of twice-weekly sessions. The leather was so stiff it creaked like a sailing ship for the first month. The difference is material memory: a heat-moldable liner softens and reshapes with heat; full-grain leather needs mechanical persuasion, hour after hour.
Most users feel initial comfort after roughly 5 to 10 miles of inline skating. Be patient with your skates and feet will adjust with consistent use. Skatepro article summarizing common break-in experience
The takeaway? Know your skates. If they’re high-end leather, budget double the time. If they’re hybrid boots with a MYFIT liner, the 12-hour rule is a solid guide.
Short Sessions and Strategic Suffering
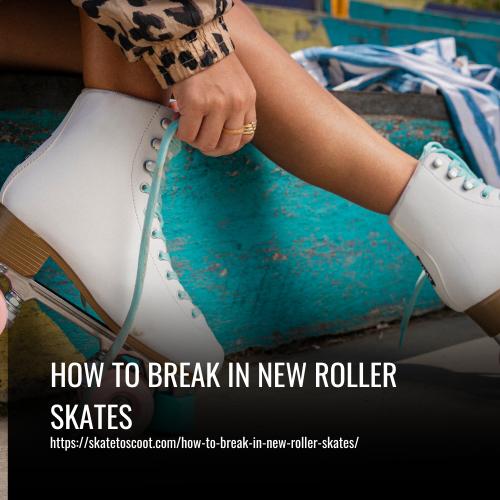
Powerslide’s advice for new skaters is blunt: “Start step by step, do not skate for too long on your first days.” This isn’t about toughness; it’s about physics. Excess movement inside the skate causes friction. Friction, plus sweat, equals blisters. A blister on day one sets your progress back a week.
The goal is to accumulate time without triggering a full-blown inflammatory response from your skin or soft tissues. It’s the same principle as breaking in a new pair of hiking boots, but with more wheel-induced momentum and a specific how to break in new roller skates. Wearing the right skating attire, like moisture-wicking socks, is essential here.
The Lacing Debate: Control vs. Comfort
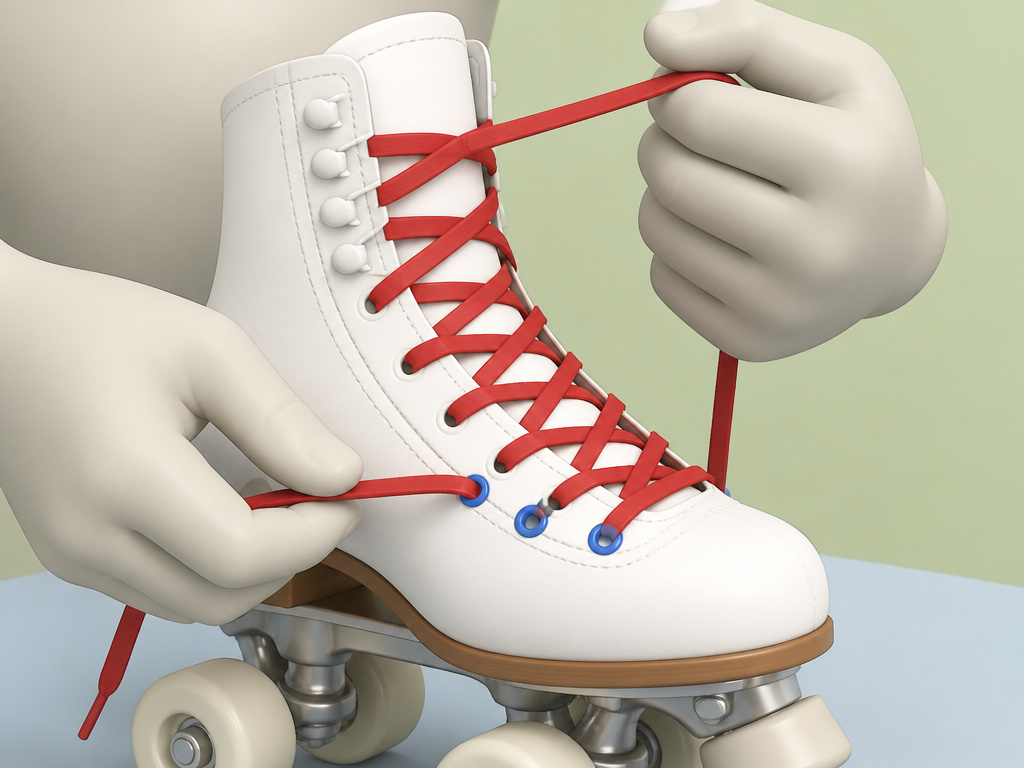
How tight is tight? Here, our primary sources disagree. Riedell’s manual is unequivocal: “Make sure your laces are done up tightly for a snug and secure fit for proper foot support.” They’re coming from a roller derby and artistic skating perspective where lateral support is everything. A loose boot is a wobbly, unpredictable, and dangerous boot.
Powerslide’s fitting guide offers a nuance: “Lace your skates tightly if you want more control, or keep them looser for more comfort.” They add, “If you want more support make sure you lace all the eyelets up to the top.” This frames lacing as a dial, not a rule.
| Lacing Style | Best For | The Feel | Risk If Skipped |
|---|---|---|---|
| Tight, all eyelets | Advanced skills, jumps, high-impact turns | Maximum ankle lockdown, reduced flex | Instability at speed; increased roll risk |
| Snug, lower eyelets looser | Beginners, long-distance fitness skating | Allows more ankle flexion, reduces top-of-foot pressure | Less precise control, can lead to over-gripping with toes |
| Variable (skip eyelets) | Addressing specific pressure points (wide toe box, high instep) | Relieves localized pain | Can create new pressure points if pattern is uneven |
My stance? Beginners should err toward the Powerslide method. Your primary goal is to build confidence and time-on-wheels, not maximum performance. A lace that’s crushing your instep will make you hate skating before you can even stop properly. As your skills grow, you’ll naturally cinch them down. Learning to skate safely is more important than a tourniquet-tight fit on day one.
Heat Molding: The Accelerator (With Caveats)
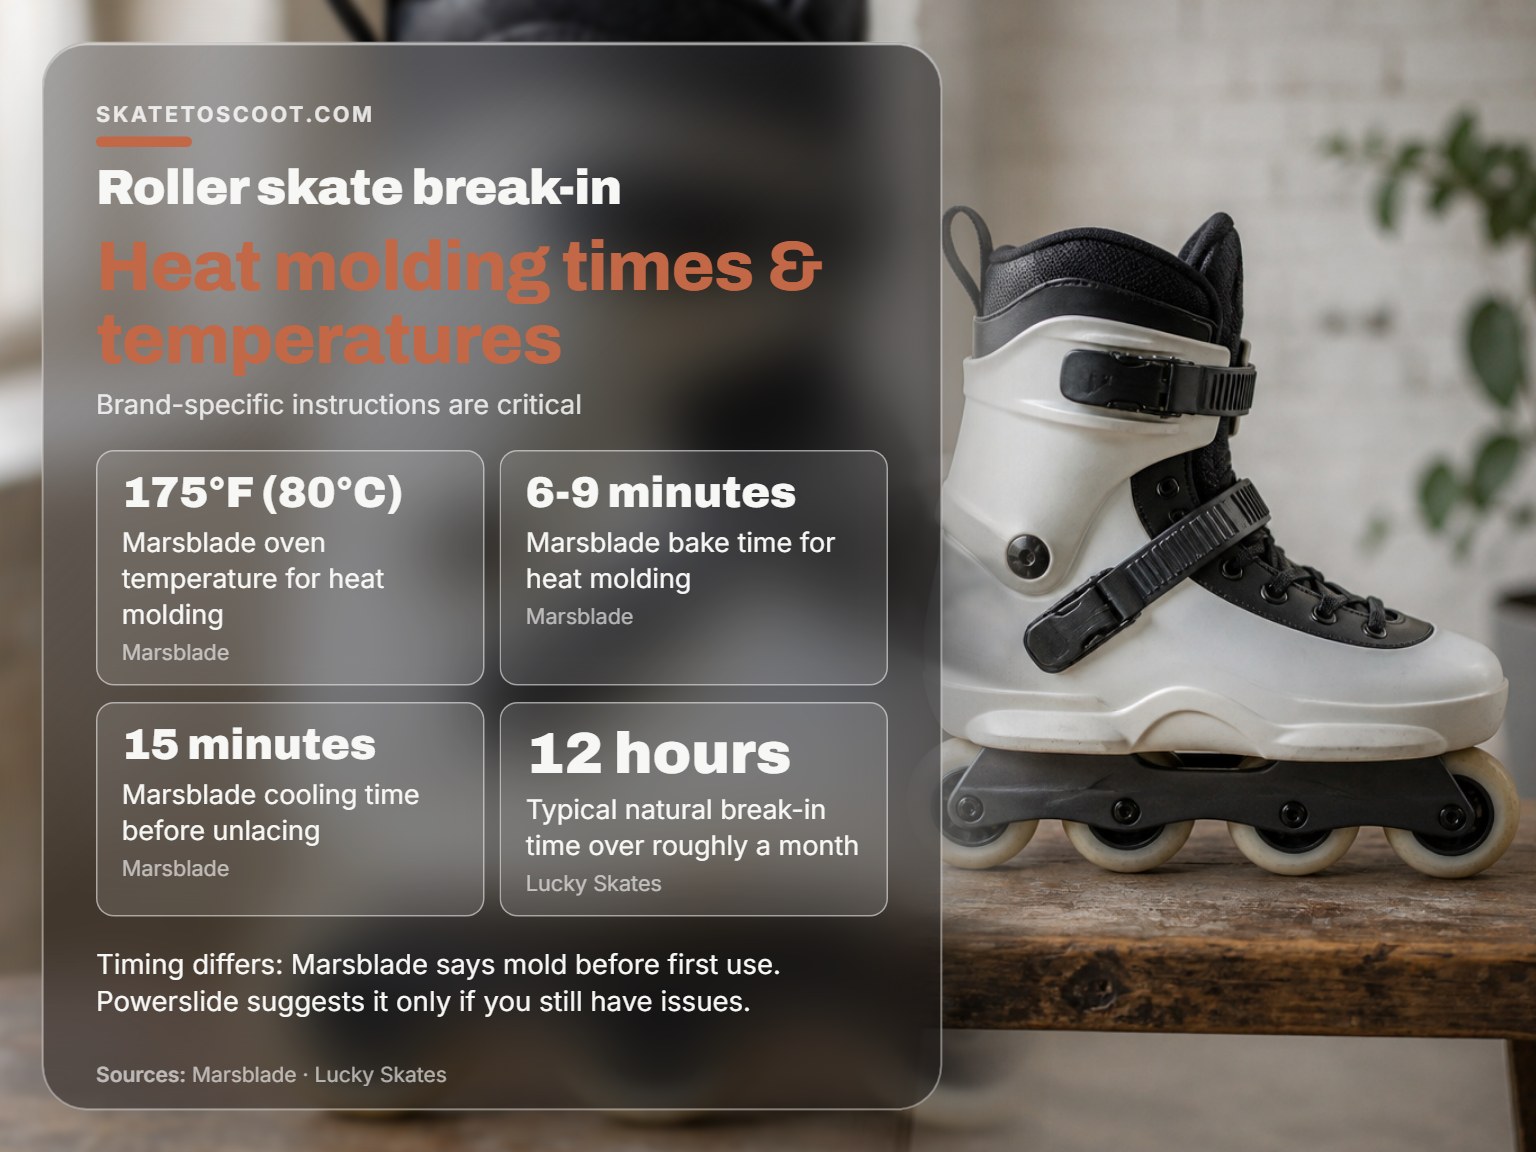
Heat molding is the cheat code for break-in. It uses controlled heat to soften the boot’s or liner’s materials so they conform to your foot’s exact shape. But it’s not a universal solution, and the instructions vary wildly by brand.
First, check if you can. Powerslide says to look for the MYFIT logo on the liner or boot to check for heat moldability. No logo, no molding. Second, follow YOUR brand’s instructions. They are not interchangeable.
- Marsblade (for their ice hockey-style skates): Bake at 175°F (80°C) for 6-9 minutes. Cool for 15 minutes before unlacing.
- Powerslide with removable liner: Specific oven process shown in their videos. The liner comes out, gets heated, and is reshaped.
- Powerslide Swell (integrated liner): The entire skate is heated as a unit. A different video, a different process.
Where this goes sideways: Following a Marsblade guide for a Powerslide Swell. The integrated liner skates can’t have the liner removed, and overheating the chassis can warp the plastic, ruining the skate’s structural integrity.
The biggest debate in the sources is when to heat mold. Marsblade says “before first use.” Powerslide positions it as a solution “if you are still having issues.” Why suffer through 10 hours when a 10-minute bake can fix it? But if the fit is generally good, just stiff, skating them first is the safer play.
Addressing the Gaps: Insoles, Footies, and Volume

What if there’s too much space? A boot that’s slightly too roomy, especially in the heel, is a blister guarantee. Powerslide’s solution is MYFIT Footies—small, adhesive foam pads of varying thicknesses that stick inside the liner to take up volume and lock your heel down. They’re a brilliant, low-cost fix for a common problem.
The more contentious fix is aftermarket insoles. Powerslide’s guide for hybrid boots like the Swell or Kaze states, “in most cases skating without innersole is preferred.” They’re designed with a specific footbed volume; adding a thick insole can cram your foot up into the toebox. However, many skaters with arch support needs swear by slim sports orthotics. The key is “slim.” You’re not adding cushioning; you’re filling an anatomical gap.
If you have thin feet or specific pressure points, the Footies are your first stop. If you have collapsing arches, a supportive but thin insole might be necessary. Try skating without first, as Powerslide advises. If you feel your foot swimming or arch fatigue sets in early, then explore the insole route. This is one area where your body’s feedback overrides the manual.
The Other “Break-In”: Wheels, Bearings, and Maintenance
Your boots aren’t the only thing that changes. New wheels often have a slight mold release agent or micro-grooves from manufacturing that make them feel slippery for the first hour or two of skating. This is not a defect; it’s a coating wearing off. Some skaters speed this up by rolling their wheels on rough concrete before their first session.
More critical is the maintenance that keeps you rolling safely during the break-in period. Riedell’s manual is strict here, and it’s a checklist worth memorizing:
- Before each session: Inspect wheels. They should be secure but spin freely. Check toe stops for wear (replace if worn over 40%). Ensure all nuts and bolts are tight.
- After each session: Spin wheels again. Listen for gritty sounds. Lubricate bearings if needed.
- Periodically: Rotate wheels. Riedell specifies a diagonal swap pattern: right skate front left wheel with left skate back right wheel, and so on.
This isn’t busywork. A wheel that’s overtightened (axle nut cranked down) won’t spin freely and will burn out its bearings. Riedell notes that overtightening can void the warranty. One that’s too loose will develop lateral play, causing a scary wobble. Learning to clean your skates and maintain your wheels from day one builds habits that prevent costly repairs later.
When It’s Not Breaking In: Pain vs. Discomfort
Be honest. Some pain means stop. Numb toes mean circulation is cut off. Sharp, shooting pain in a tendon or ligament means something is pinching. A blister that forms in the same spot every single session, despite perfect socks and lacing, means the boot’s shape is fighting your foot’s shape.
Discomfort is different. It’s a general ache in the muscles of your feet and ankles as they learn to support you in a new way. It’s a feeling of overall stiffness, like wearing a stiff new leather jacket. It’s a hotspot that emerges after 45 minutes but fades after you take the skates off. Discomfort you can manage. Pain you must diagnose.
If you’ve given a well-fitted skate 10-12 hours over a few weeks and a specific spot is still causing sharp pain or blisters, it’s time to consider professional help. A skate shop can often “punch out” a small pressure point on a leather boot using a specialized tool. For thermoformable skates, a targeted re-heat might solve it. If the pain is widespread and debilitating, the sad truth is you might need a different first pair of skates. No amount of breaking in fixes a fundamental mismatch.
What socks should I wear to break in skates?
Socks are your first defense against friction. Special skating socks are designed to wick moisture and reduce rubbing, which can prevent blisters during the break-in period. If your skates feel too roomy, you can add thin layers or use specific footies in different thicknesses to take up extra volume without creating bulky seams that cause new pressure points. The goal is a snug, secure fit where your foot doesn’t slide around inside the boot. Avoid thick, bulky socks that can change the fit you’re trying to achieve and potentially create new hotspots as the boot forms to the wrong shape.
How do I prevent and treat blisters from new skates?
Prevention starts with your setup. Consider using special skating socks to minimize friction. If you feel a hotspot developing during a session, stop and address it immediately before it becomes a full blister. You can apply protective pads or moleskin directly to your skin or the skate’s interior liner at the pressure point. For skates with too much room, footies in various thicknesses can fill the space and stop your foot from sliding, which is a common cause of blisters. If a blister does form, keep it clean and covered, and avoid skating on it until it heals to prevent further damage.
Can I stretch my skate boots by hand when I’m not wearing them?
Manually working the boot off your foot can help soften stiff materials. Use your hands to repeatedly bend and flex the ankle cuff and the sole of the boot, focusing on areas that feel particularly rigid. This process mimics the natural breaking-in motion without the pressure on your feet. For persistent pressure points, a more targeted solution like heat molding may be necessary to speed up the process and reshape the material. Look for specific logos on your liner or skate to see if they are designed for this type of molding, and always follow the manufacturer’s instructions if you proceed.
Frequently Asked Questions
What is the fastest way to break in roller skates?
The fastest safe way is a combination of short, frequent skating sessions and heat molding if your skates are moldable. If heat molding is an option, doing it at the start (following manufacturer instructions exactly) can significantly reduce break-in discomfort.
How long does it take to break in new roller skates?
For most recreational skates with modern liners, plan for about 12 hours of actual skating time, spread over roughly a month. For stiff, non-thermoformable leather boots (like some Riedell or Antik models), the break-in can take 20-40 hours or more, stretching over several months of regular use.
Can I speed up break-in by getting them wet or using a hair dryer?
Do not soak your skates. Water can damage leather, glues, and internal foams. Using a hair dryer on a heat-moldable area to spot-treat a pressure point is a common advanced technique, but you risk overheating and damaging the materials if you don’t know exactly what you’re doing. The oven method outlined by manufacturers like Marsblade is far more controlled and safer for the skate.
Should I wear two pairs of socks to break in skates?
No. This is a common mistake. Multiple socks create more friction layers between your skin and the boot, which is a prime cause of blisters. They also change the volume inside the boot, meaning the skate breaks in to the wrong shape. Wear a single pair of proper, moisture-wicking skating socks.
Before You Go
The single biggest factor in a successful break-in is accepting the timeline. It’s a process, not an event. Log your sessions. Note where hotspots appear. Adjust your lacing. That 12-hour mark is a real threshold—once you cross it, the skate starts working with you, not against you.
If you take away one thing, let it be this: inspect your gear every time. A loose axle nut or a worn toe stop won’t fix itself, and a mechanical failure mid-skate is a hundred times worse than any blister. Break-in is as much about you learning the feel of your equipment as it is about the equipment softening up. Pay attention to both.
