How Tight Should Ice Skates Be: Step-by-Step
This post contains affiliate links. As an Amazon Associate, we earn from qualifying purchases.
Sources disagree on how tightly the toe/forefoot area should be laced: John Shorey’s Hockey Made Easy recommends ‘semi-tight,’ while the Bowling Green State University guide advises ‘good firm tension’ and the Mississauga Figure Skating Club says to tie laces ‘loosely’ over the toe. The goal is a “snug but not painful” fit where your heel is locked down with no more than a pencil-width gap, your toes can wiggle up and down but not side to side, and you can bend your knees deeply without restriction.
That’s the official stance from multiple skating bodies, but the how tight should ice skates be question is easy to get wrong. The difference between supportive and restrictive is a few millimeters of lace tension, and that line moves depending on your foot shape, your skate model, and even the temperature of the rink.
What follows is a breakdown of the three-zone lacing method to answer how tight should ice skates be, the physical tests you can run at home to verify your fit, and how to spot the common mistakes that turn a skate session into a painful one.
Key Takeaways
- Lacing recommendations vary by source: for the toes, some advise semi-tight (Hockey Made Easy), others firm (Bowling Green State University) or loose (Mississauga FSC); for the ankle, some advise snug-not-tight (Morgan Park Sports Center), while others advise tight (Hockey Made Easy) or slightly decreased tension (Bowling Green State University).
- Your heel must be locked down; perform the heel-lift test where a helper holds the boot while you try to lift your heel up and forward.
- Never wrap laces around your ankle; this hinders forward flex, impairs skating speed and turns, and creates a tripping hazard.
- Expect a break-in period of 6–10 hours of ice time; new skates will feel stiff and may cause arch discomfort before molding to your feet.
The Lacing-by-Zone Breakdown

Forget tightening every eyelet the same amount. Your foot needs different things from the toe box, the arch, and the ankle. The most detailed guidance comes from Hockey Made Easy (John Shorey), which breaks the lacing into three specific zones.
The bottom 3 eyelets should be semi-tight to allow blood to circulate to the toes. The middle 3 eyelets should be semi-tight to allow an up and down movement of the top part of the foot when starting and stopping. The top 3 eyelets should be tight to keep the ankle in an upright position.
That’s a clear, actionable framework. We can translate it into what you feel.
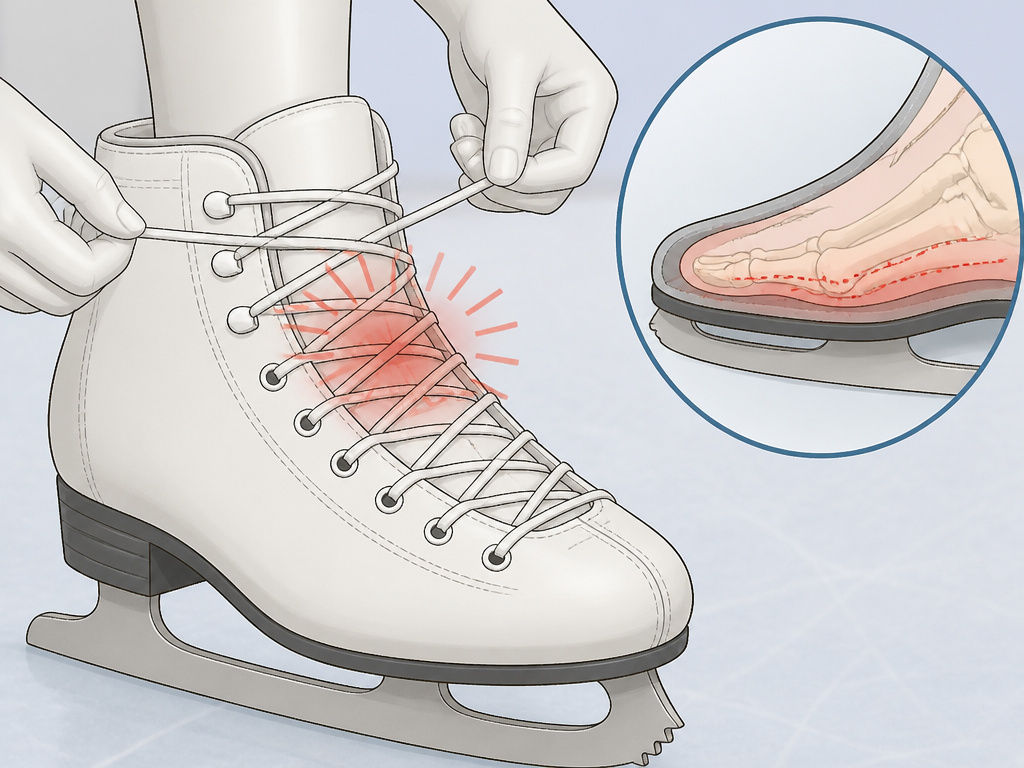
Start with the bottom three eyelets, near your toes. “Semi-tight” means you should feel the lace contact, but your toes should not feel compressed. You need blood flow. The European standard EN 15638:2009, cited in skate manuals, warns that laces tied “too tightly… Can lead to blood congestion in the foot.”
The middle three eyelets cover your instep. This is where you need firm support. The Bowling Green State University guide advises “good firm tension on the laces” here to keep the foot held in position and support the arch. This is the anchor point of your skate.
The top three eyelets surround your ankle. Shorey says “tight,” but other sources disagree. The Morgan Park Sports Center guide states, “Lacing should be secure, but not tight above the ankle,” while the Bowling Green State University guide advises “slightly decreased lacing tension” for the top hooks. The goal is to keep the ankle upright without casting it in place. You must be able to achieve a deep knee bend.
| Lacing Zone | Target Tightness | Why It Matters | Risk If Too Tight |
|---|---|---|---|
| Bottom 3 Eyelets | Semi-tight | Allows blood circulation to toes; prevents numbness. | Foot numbness, cold toes, “lace bite” across the top of the foot. |
| Middle 3 Eyelets | Firm / Tight | Locks the foot into the boot’s heel pocket; provides essential arch support. | Instability, excessive foot movement leading to blisters and lost power transfer. |
| Top 3 Eyelets / Hooks | Snug, not restrictive | Keeps ankle upright while allowing necessary forward flex for knee bend. | Restricted ankle mobility, inability to bend knees deeply, strain on Achilles tendon. |
Here’s a tip from Riedell’s fitting guide for achieving this balance at the ankle: “We recommend using a couple of cross twists in your laces at the top of the eyelets before lacing the hooks with medium tension.” This cross-twist technique helps lock your heel back into the boot while leaving the ankle area flexible.
How to Test Your Fit at Home
You don’t need a professional fitter for a basic check. A few simple tests, drawn from official club guides, will tell you most of what you need to know. Wear the thin socks you’ll skate in—the Mississauga Figure Skating Club specifies “only one pair of tight fitting socks or tights.”
First, check the heel lock. This is the most critical test. According to the Bowling Green State University guide, your helper should “hold down the back portion of the skates and have you try and lift your heel up and forward out of the heel cup of the boot.” Your heel should not lift. None. If it does, the boot is too big or you haven’t laced the instep tightly enough.
Second, check the heel gap. With the skate partially laced, kick your heel back as far as it will go. Stand up, distributing your weight evenly. According to the Mississauga FSC guide, “The space at the back of the heel should be no more than a pencil width.” Grab a standard pencil. If it fits in that gap with room to spare, the skate is too long.
Third, check toe space and width. Stand up straight. “You should be able to wiggle your toes up and down slightly, but not side to side,” states the BGSU guide. Your toes should gently brush the front of the boot. Now bend your knees into a skating stance. Your toes should pull back slightly from the front. If they jam into the front when you bend, the boot is likely too short.
Common mistake: Wearing thick socks for padding. Multiple sources mandate a single, thin sock. The Hockey Made Easy guide specifies “one pair of thin 100% cotton socks.” Thick socks create dead space, allowing your foot to shift and blisters to form.
Finally, walk around on the rubber flooring. Your ankles should not wobble. If they do, you likely need more tension in the top eyelets or a stiffer boot. This is a common issue when choosing beginner skates that don’t match your strength or weight.
Signs Your Skates Are Too Tight (or Too Loose)
Pain is a signal, not a rite of passage. You need to diagnose the type of pain. General stiffness and mild arch discomfort during the first few hours is normal break-in. Sharp, localized pain or numbness is a problem.
Your skates are TOO TIGHT if:
- You feel numbness or a pins-and-needles sensation in your toes within 10 minutes of lacing up. This points to overly tight forefoot lacing restricting circulation.
- You experience a sharp, burning pressure across the top of your foot where the laces cross. This is classic “lace bite.”
- You cannot achieve a deep knee bend because the ankle cuff won’t let your shin move forward.
- The lacing panels of the boot are pinched tightly together. Riedell notes that if the panels are “too close together when laced with firm tension, the boot is too wide.”
Your skates are TOO LOOSE if:
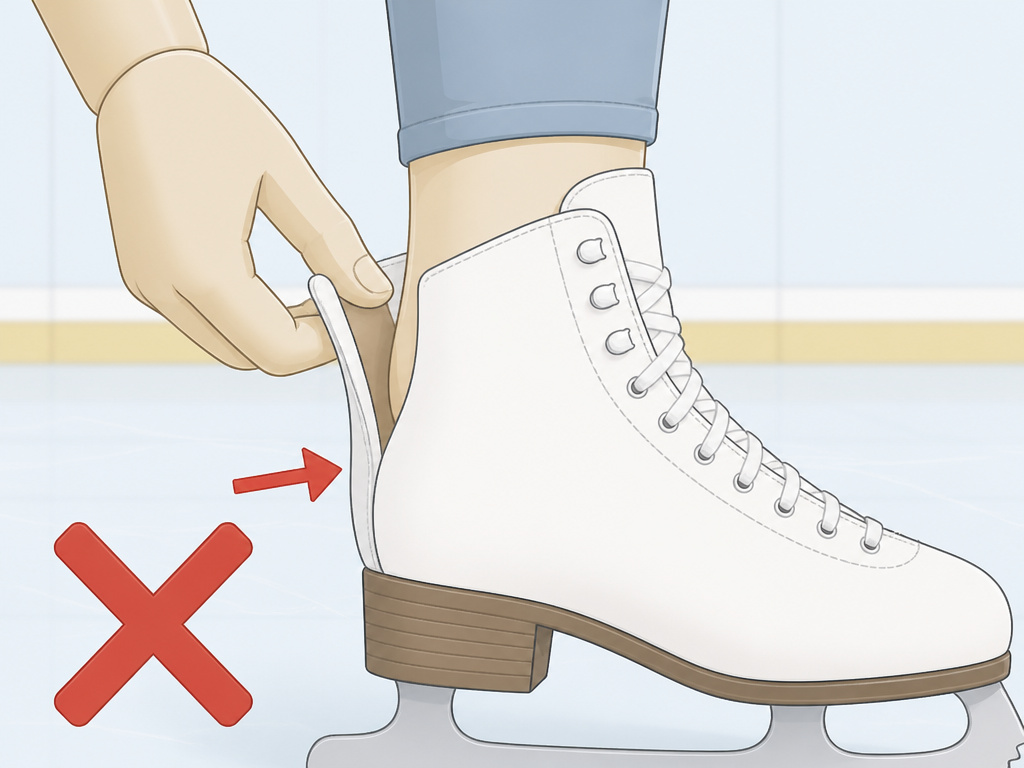
- Your heel lifts during the heel-lift test. This is the cardinal sin of a loose fit.
- You get blisters on your heels or the balls of your feet after skating. Friction from foot movement causes them.
- You feel excessive side-to-side wobble in your ankles when standing or gliding.
- Your toes can slide from side to side inside the boot when standing straight.
Often, the issue isn’t overall tightness but a mismatch in width. If you have wide feet, cranking down standard-width laces will create pressure points on the sides without securing your heel. A proper width should lace firmly without the panels dramatically closing.
The Ankle Wrap Debate and Lace Length
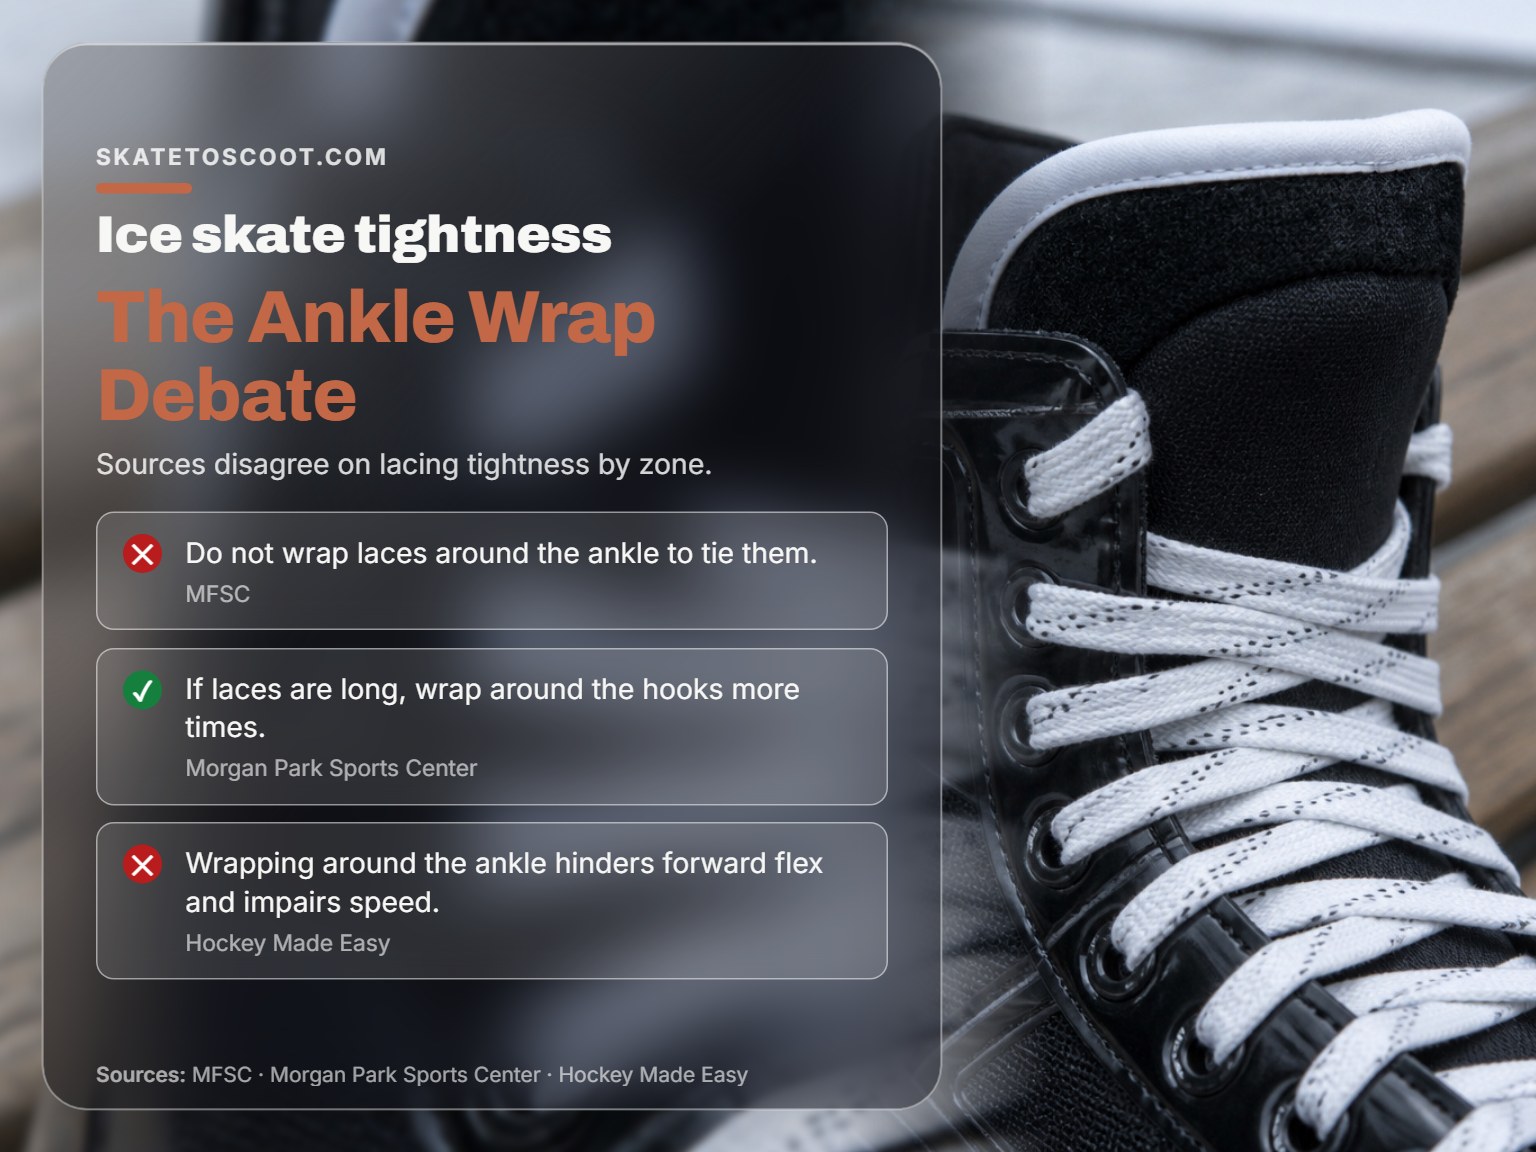
One rule is unanimous: never wrap your laces around the back of your ankle to tie them off. The Hockey Made Easy guide is explicit: “Do not wrap the laces around the ankle to tie them as this hinders the forward flex of the foot and ankle and will impair your child’s skating speed and turns.” The Mississauga and Morgan Park guides also warn against wrapping laces around the ankle.
But there’s a confusing contradiction. The same Morgan Park guide says, “If laces are long, wrap around the hooks more times.” This refers to taking an extra turn around the existing hooks before tying the bow, not wrapping around the ankle itself. It’s a subtle but important distinction.
The real solution is proper lace length. Riedell warns that “Laces that are too long create a tripping hazard.” If your laces are so long that you have to wrap them around anything to tie a normal bow, you need shorter laces. Riedell provides lace charts to match your boot size and eyelet count.
Heat Molding and the Break-In Period
Even perfectly fitted new skates won’t feel like slippers. Leather and stiff synthetic materials need to mold to your unique foot contours. This “break-in period” varies. The retailer Puckstop.com notes it “can vary, but it’s usually between 6-10 hours of ice time.”
For many modern skates, you can accelerate this with heat molding. Riedell’s detailed fitting procedure involves heating the boots in a specialized oven at 165°F / 75°C for 4-7 minutes (medium stiffness boots: 4-6 minutes; firm and extra-firm stiffness boots: 5-7 minutes), then wearing them laced for approximately 10 minutes to let them shape. Not all skates are moldable, however. Riedell specifies that their lightweight microfiber boots (Elara and Vega) are pre-molded.
Where this goes sideways: Trying to break in skates that are genuinely the wrong size or width. No amount of molding or suffering will fix a fundamental sizing error. Pain that persists beyond the first few sessions is a sign to reassess your skate fit.
The most common break-in ache is in the arch, as the stiff insole conforms. Some pressure on the ankle bones is also normal. Sharp pain on bony prominences or the aforementioned numbness means stop, loosen, and reassess.
How Tight Should Ice Skates Be for Hockey, Figure Skating, or Recreation?
The ideal tightness varies significantly by skating discipline. For hockey, Hockey Made Easy (John Shorey) recommends lacing the bottom and middle three eyelets semi-tight and the top three eyelets tight. Regardless of the type, you should be able to wiggle your toes slightly up and down, and your heel should not lift out of the boot.
Frequently Asked Questions
Is it better for ice skates to be tight or loose?
They must be snug, not tight. “Snug” means your foot is fully contacted and supported without pressure points. “Loose” allows movement that causes blisters and instability. “Tight” restricts circulation and mobility. The BGSU ice arena skate guide advises lacing with good firm tension from the toe to the ankle and slightly decreased tension on the top hooks.
How tight do you want ice skates?
You want them tight enough to pass the heel-lift test and prevent side-to-side toe wiggle, but loose enough to allow a deep knee bend and avoid toe numbness. It’s a balance best achieved by the three-zone lacing method.
Is it better to size up or down for ice skates?
You typically size down. Street shoe size is unreliable for skates. The key is the heel test: if there’s more than a pencil-width gap when your foot is kicked back, the size is too long, even if the number is smaller than your shoe size.
Do skates need to be tight?
They need to be secure. Your foot should be a solid unit with the boot. This requires firm lacing in specific areas, not overall crushing tightness. A secure fit prevents foot pain and maximizes power transfer from your leg to the blade.
Before You Go
The single biggest mistake is treating lacing as a single action from toe to top. It’s not. Your foot has three distinct zones with different needs, and your lacing should reflect that. Start semi-tight, get firm in the middle, and finish snug at the ankle.
Trust the physical tests over a subjective “feel.” The heel-lock test and the pencil-width gap are objective measures. If your skates pass those but still hurt in specific spots after a few sessions, the problem is likely width or boot shape, not length. At that point, professional fitting or a different model is the answer, not tighter laces.
Remember, the break-in period is real—6–10 hours is a solid benchmark. But suffering is not a requirement. Use the methods here to break in skates effectively, and don’t ignore pain signals that point to a fundamental misfit. Your foundation is everything.
