How to Balance a Hoverboard: Step-by-Step Calibration
This post contains affiliate links. As an Amazon Associate, we earn from qualifying purchases.
Balancing a hoverboard requires two distinct actions: calibrating the device’s internal sensors on a level surface, and learning to ride by shifting your weight with precise ankle movements. Calibration fixes a board that tilts, spins, or beeps on its own; riding technique keeps you stable in motion. The process is mechanical, not magical.
The distinction matters because most guides treat “balance” as a single fix, without explaining how to balance a hoverboard correctly. They don’t tell you that a perfectly calibrated board still feels wobbly if your stance is wrong. And they almost never mention the hard limits printed in the manual, like a 35-degree tilt shut-off or a 250-pound maximum load, that no amount of calibration can override.
What follows is a breakdown of both sides of how to balance a hoverboard: the step-by-step reset for the machine, and the body mechanics for the rider. You’ll also get the signs that calibration isn’t the answer, a model-specific cheat sheet, and the one test that proves your fix worked before you step on.
Key Takeaways
- Calibration requires a perfectly level surface; a slanted floor teaches the board the wrong “level” and the problem comes back within minutes.
- Hold the power button for 3-5 seconds (15 seconds for a Jetson Sphere) until lights flash or you hear a beep, then wait with no weight on the deck.
- It can take up to three attempts to fully calibrate, per Tru Ride Tech (Jetson) and HOVERBOARD.com, while other sources like Sharper Image and Hoverboards.com do not specify multiple attempts as standard.
- Riding balance comes from your ankles, not your hips; bending at the waist is the fastest way to overcorrect and fall.
- Check your board’s manual for hard limits like the Sharper Image Model 204257‘s 15° max climb angle or 35° automatic shut-off, calibration cannot overcome these.
The Universal Recalibration Process
Every hoverboard has a brain, a logic board that reads gyroscopes and tilt sensors. Calibration tells that brain, “This flat position is zero. This is level.” When that internal zero-point drifts, the board fights you. It tilts, spins one wheel, or beeps angrily.
The core steps of how to balance a hoverboard are the same across brands, but the details change everything.
Place the hoverboard on a confirmed level surface, powered completely off and unplugged from the charger. Press and hold the power button for the duration specified by the manufacturer (typically 3-5 seconds, or 15 seconds for a Jetson Sphere) until indicator lights flash or an audible signal sounds. Without applying any weight to the foot pads, allow the board to remain undisturbed for 30 seconds to complete its internal calibration cycle. Power the unit off, then on again to test.
Start with the board powered off and unplugged. This isn’t a suggestion. If the board is in sleep mode or still connected to the charger, the calibration signal can get noisy. HOVERBOARD.com is explicit: start with the board “leveled and unplugged from the charger.”
Finding a truly level surface is the step everyone rushes. Use a spirit level if you have one. If not, a marble or a ball bearing works. Place it on the foot pad. If it rolls, your surface isn’t level. Calibrating on a slope teaches the board that slope is flat, so it will tilt when you move it to actual flat ground.
Now, the button press. For most Jetson models and generic boards, hold the power button for 3 to 5 seconds. The Jetson Sphere is the outlier, you must hold for 15 seconds. Release the button the moment you get the signal: a series of beeps, a musical tune, or flashing lights.
Here’s where you do nothing. For 30 seconds, the board’s gyros are sampling. Don’t touch it. Don’t lean on it. Tru Ride Tech’s guide stresses this: “Make sure that you’re not leaning on the board or putting any weight on it during any part of the process.” Any pressure skews the reading.
After the wait, power the board off completely, then turn it back on. This reboots the system with the new calibration loaded.
Model-Specific Signals and Edge Cases
Not all boards announce success the same way. Modern Jetson models like the Hali X or Lumino will play a tune and then a voice will say “calibration successful.” Older Jetson models without Bluetooth speakers will just beep. Non-Jetson boards might only flash their LED lights.
Two edge cases break the standard rule. First, the Jetson Motokicks. This is a two-scooter kit. The Tru Ride Tech guide has a special call-out: “You’ll follow the same process, but need to do it twice: Once for each of your kicks.” Calibrate them separately.
Second, cold boards. The Sharper Image manual warns not to charge if the ambient temperature is below 32°F. A board stored in a cold garage needs to warm up to room temperature before you even attempt calibration or charging. The electronics can give false readings.
How Many Times Should You Calibrate?
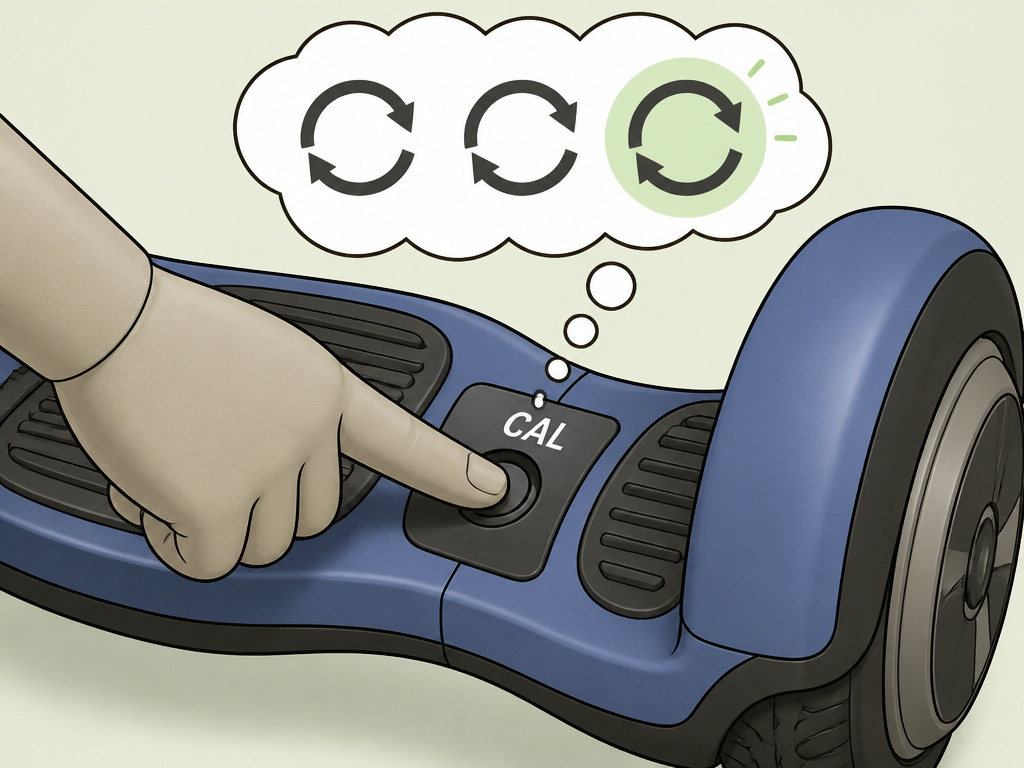
Sources disagree here, and it’s a perfect example of why you check your manual. Tru Ride Tech (Jetson) says, “It can take up to three recalibration attempts.” HOVERBOARD.com instructs, “Repeat this process 3 times to fully calibrate your Hoverboard.” The Sharper Image manual and the Hoverboards.com guide don’t specify multiple attempts.
Where this goes sideways: Running the process once and giving up. If your board still drifts after one try, do it again. And maybe a third time. The internal gyros can be stubborn.
| Brand / Source | Recalibration Attempt Advice | Key Signal |
|---|---|---|
| Tru Ride Tech (Jetson) | Up to 3 attempts may be needed. | Beeps/tune, possible voice announcement. |
| HOVERBOARD.com | Repeat the process 3 times. | Light flash sequence. |
| Sharper Image Manual | Procedure stated once. | LED indicator change. |
| Generic Third-Party Guide | Often suggests a single attempt. | Lights flashing. |
The takeaway: if the first calibration doesn’t stick, don’t assume it failed. Try a second and third time exactly as before. If it still malfunctions after three attempts, the problem likely isn’t calibration.
Physical Riding Technique: It’s Ankles, Not Hips
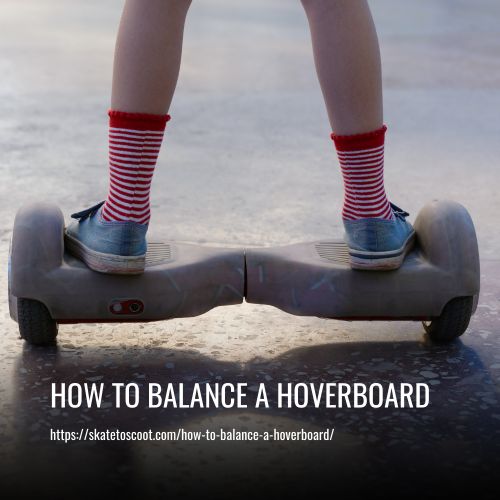
A freshly calibrated board can still feel terrifying. That’s because device balance and rider balance are different skills. The board keeps itself upright; you direct it. Most beginners fail by using their hips.
Your control comes from ankle flexion. To go forward, press down with the balls of your feet, as if you’re leaning onto your tiptoes. To go backward, press down with your heels. To turn, twist your ankles, press your right toe and left heel to spin right, and vice versa.
Bending at the waist shifts your center of gravity too high and too suddenly. The board’s motors correct for the foot pad pressure, not your shoulder position. So you lean forward with your chest, but your feet are neutral, and the board doesn’t move. You lean more, it finally jerks forward, and you overcorrect backwards. This is the classic wobble.
Start on a flat, smooth surface like a driveway or empty tennis court. Have a wall or railing to hold onto. Step on one foot at a time, keeping most of your weight on your grounded foot. Get both feet on, spaced shoulder-width apart, knees slightly bent. Look ahead, not down. Now, make tiny ankle presses. The goal isn’t speed; it’s learning the pressure-to-movement connection.
The self-balancing mechanism is designed to keep the deck level under a centered weight. If you’re stiff and fighting it, you create noise the system can’t filter. A relaxed, bent-knee stance allows the board to work properly.
How long does it take? For a complete beginner, focused practice is needed to feel stable moving in a straight line. Confident turning and stopping takes practice spread over days. It’s a new motor skill. Your brain is building pathways for micro-adjustments you’ve never made before.
When Calibration Isn’t the Solution: Ruling Out Other Problems
You can calibrate a board three times and it still shakes, beeps, or refuses to move. At that point, you’re not looking at a software reset. You’re looking at a hardware or physical problem.
First, check the simple stuff. Are the tires properly inflated? A soft tire creates a wobble. Is there debris lodged in a wheel or the wheel well? Is the board physically damaged from a crash, cracks in the shell, a loose fender?
Next, consider the battery. A failing battery can cause power delivery issues that mimic imbalance. The Sharper Image Model 204257 uses a Lithium ion 36V / 4.4Ah / 158WH battery. If the board dies rapidly or struggles on slight inclines, the battery might be the culprit.
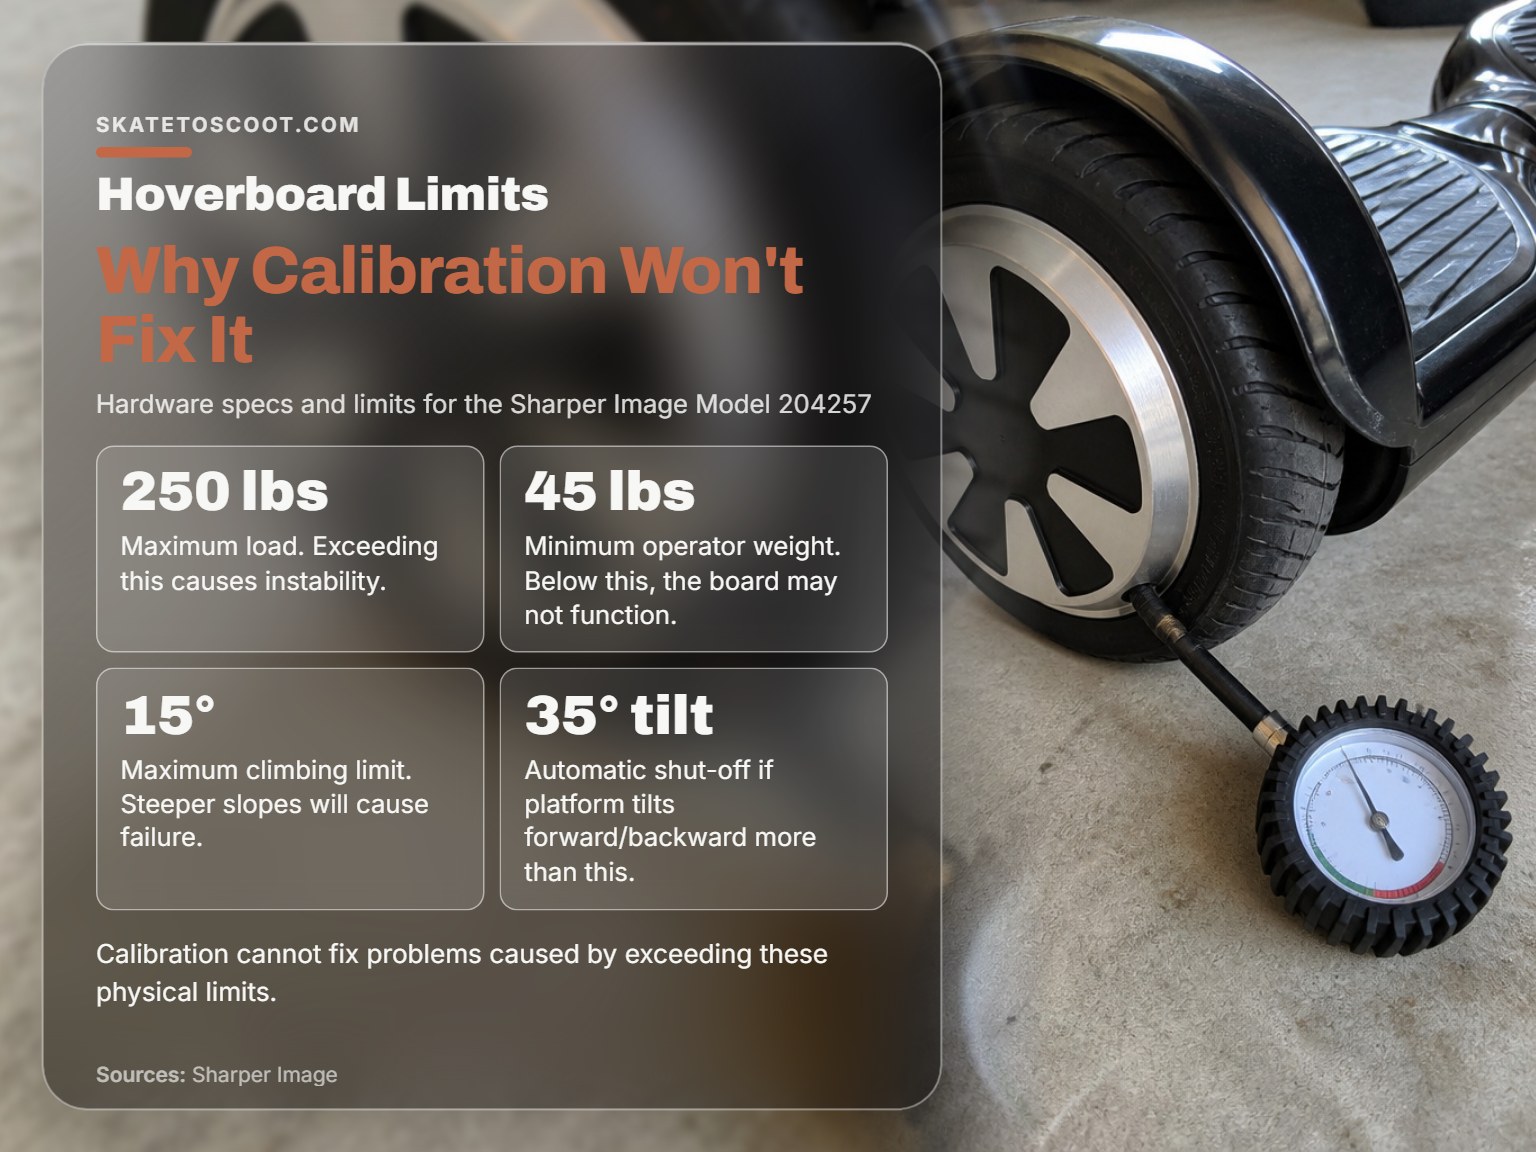
Then there are the absolute hard limits. Every board has them, and they’re in the manual. For the Sharper Image Model 204257:
- Maximum Load: 250 lbs.
- Minimum Operator Weight: 45 lbs.
- Maximum Climbing Limit: 15°.
- Automatic Shut-off: If the platform tilts more than 35° forward or backward.
If you weigh 260 lbs, the board will struggle no matter how many times you calibrate it. If you’re trying to climb a 20-degree hill, it will fail. If you tilt it past 35 degrees (maybe trying to get up a curb), it will simply power off. Calibration doesn’t change these numbers.
Common mistake: Assuming every balance issue is a calibration problem. Physical damage, worn parts, and exceeding design limits all cause instability that a reset cannot fix.
Use this quick checklist before you decide calibration failed:
- Visual Inspection: Any cracks, loose parts, or flat tires?
- Weight Check: Are you within the board’s min/max load rating?
- Terrain Check: Are you on a slope steeper than 15°?
- Battery State: Is the battery fully charged? Does it hold charge?
- Error Lights: Is there a persistent red light or error flash pattern?
If you answer “yes” to any of the first three, calibration is a waste of time. You need a physical repair or a different board.
Testing and Verifying Your Calibration
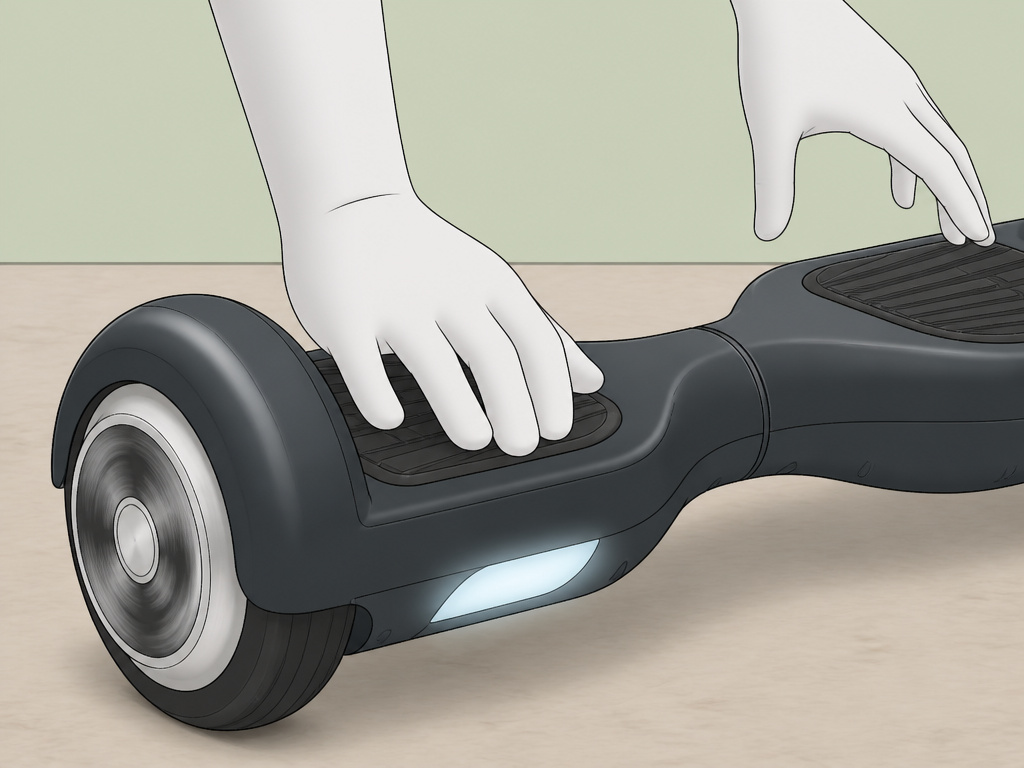
You’ve run the procedure. Now, prove it worked before you commit your full weight. A proper verification catches a bad calibration and prevents a spill.
The Hover Test: Power the board on. Place it on a flat floor. Crouch beside it and gently press down on the very front edge of one foot pad with your hand. The board should try to correct by spinning the front wheel backward. Now press the rear edge. It should spin the wheel forward. Do this on both sides. The response should be immediate and smooth. If one side is sluggish or doesn’t respond, the calibration on that motor is still off.
The Audio/Visual Check: Know your board’s “ready” state. For the Sharper Image Model 204257, the LED display board shows green when fully charged, red for low power. After calibration, the power-up sequence should look normal, no unusual flashing red lights or repeated beeping.
The Controlled Mount: Hold onto a wall. Place one foot on the board, keeping most weight on your other leg. Does the board stay still, or does it slowly drift or turn? It should hold position. Now add your second foot lightly. Does it feel stable, or does it immediately try to move? It should feel planted.
If it passes these tests, proceed to slow, straight-line practice. If it fails, go back to the calibration steps. Remember the manufacturer advice: it may take a few tries.
Hoverboard Safety and Maintenance for Stable Balance
Balance isn’t just a one-time fix. It’s a product of ongoing care. Ignoring maintenance creates conditions where calibration fails faster.
Keep It Clean. The foot pad mats have sensors. The Sharper Image manual warns: “Please do not cover the mats with any other items, as the Hover Board may become unable to switch off.” It also says to stand directly on the mats, not beside them. Dirt, sand, or sticky spills on these mats can interfere with the pressure readings, making the board behave erratically.
Charge Smart. Use only the provided charger. The Sharper Image Model 204257 charges fully in 130 minutes, reaching 80% in about 90 minutes. Charging in a temperate environment (above 32°F) is required. Let the board cool down after a long ride before plugging it in.
Wear Gear. This is the rider’s balance insurance. A mindset focused on hoverboard safety includes a helmet, wrist guards, and knee pads. When you’re learning, you will make mistakes. This equipment allows you to step off or fall and avoid turning a wobble into an injury.
Finally, know when to seek help. If you’ve calibrated multiple times, verified all physical parts, and the board still has issues like shaking or one dead motor, it’s likely an internal fault. The logic board, a gyroscope, or a motor controller may need replacement. At that point, professional repair or a warranty claim is the next step.
How to Calibrate a Bluetooth Hoverboard
The process for calibrating a Bluetooth-enabled hoverboard starts with the basics. Begin with the board powered off, leveled on a flat surface, and unplugged from the charger. Ensure you are not leaning on the board or putting any weight on it during the entire process. Hold the power button down for several seconds; some models require a longer press. After initiating the calibration, you may need to repeat the entire sequence multiple times to get everything back in proper alignment. It can take up to three recalibration attempts. For models that come as a pair of independent units, you must perform the process separately for each one.
Frequently Asked Questions
How do you rebalance your hoverboard?
You rebalance a hoverboard by performing a calibration reset. Place the powered-off board on a level surface, hold the power button for 3-5 seconds (or 15 seconds for a Jetson Sphere) until lights flash, wait 30 seconds without touching it, then power cycle it. This resets the internal gyroscope’s sense of “level.”
How do you balance on a hoverboard?
You balance on a hoverboard by keeping your knees bent, your weight centered, and using subtle ankle movements to steer. Avoid bending at the waist. Look ahead, not down at your feet. The board’s self-balancing technology keeps you upright; you control direction with pressure from your feet.
Why is my hoverboard shaking after calibration?
If your hoverboard is shaking after calibration, the most likely cause is an uneven tire or a physical obstruction in a wheel. It could also indicate a failing motor or a loose internal component. Verify the tires are intact and inflated evenly, and ensure nothing is stuck in the wheel wells.
Can you calibrate a hoverboard with a phone app?
Some modern, Bluetooth-enabled hoverboards can be calibrated or have their settings adjusted via a manufacturer’s smartphone app. However, the fundamental hardware calibration, resetting the gyroscope zero-point, is almost always done via the physical button sequence described in the manual. The app may offer fine-tuning on top of that.
How often should I calibrate my hoverboard?
Calibrate your hoverboard before its first ride, and anytime it shows signs of imbalance like tilting, spinning, or constant beeping. HOVERBOARD.com recommends doing it “routinely” as preventative maintenance, especially if you ride over rough terrain or the board has been transported.
The Bottom Line
Balancing a hoverboard is a two-part job: calibrate the machine, then train the rider. The calibration process is strict, a level surface, the right button-hold time, no weight, and the patience to do it up to three times. The riding technique is subtle, ankles, not hips.
The limits are real. No calibration will let a 260-pound rider safely use a board rated for 250, or conquer a 20-degree hill on a board maxed at 15 degrees. The manuals for models like the Sharper Image 204257 list these specs for a reason.
Start with calibration if your board acts up on its own. But if the problem persists after three attempts, stop. Check for physical damage, tire issues, or whether you’re simply asking the board to do something its motors were never built to do. Sometimes, the fix isn’t a reset. It’s a repair, or the honest realization that you need a different model for your needs.
