How to Balance on a Longboard: Step-by-Step
This post contains affiliate links. As an Amazon Associate, we earn from qualifying purchases.
To balance on a longboard, you need a stable, low stance with soft knees and your weight centered over the board. Start by finding your natural foot position (regular or goofy), then practice static and one-foot balance drills on grass or carpet before attempting to roll. A lower deck height, stable trucks, and bigger, softer wheels make balancing significantly easier for beginners.
That foundation, soft knees, centered weight, is the physical platform everything else builds on. But a platform is useless if the ground underneath it shifts. The real work isn’t just holding a pose; it’s managing the three forces that constantly try to knock you off: your own pushing foot, the board’s tendency to turn, and the pavement’s imperfections. Most guides tell you to “bend your knees.” This one shows you which muscles to engage, where to look when your instinct says “down,” and how to pick a board that fights for your balance instead of against it, including the fundamentals of how to balance on a longboard.
What follows: the four essential balance drills, the mechanical reason lower decks win, the gear that actually helps (and what’s marketing), and how to spot the moment you’re ready to add speed.
Key Takeaways
- Your front leg is your anchor during pushing and braking; practice one-foot balance drills on grass for 5–10 seconds at a time to build this stability.
- Lower deck height (drop-through or drop-down designs) directly improves stability and makes foot braking easier by bringing you closer to the ground.
- Truck tightness is a tuning tool, not a set-and-forget spec; quarter-turn adjustments can fix a board that feels too twitchy or too stiff to turn.
- Speed wobbles start with weight too far back; bend your knees and shift your hips forward to recenter your weight over the trucks if they begin.
- Wrist guards are high-value early gear; the instinct to catch a fall with outstretched hands is strong, and wrist guards significantly reduce fracture risk according to the CPSC skateboarding safety fact sheet.
How Your Longboard Setup Affects Stability
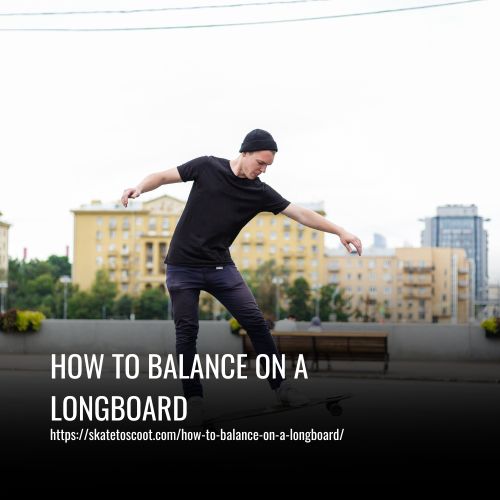
You can have perfect form, but if your board is working against you, you’re fighting a losing battle. The answer to how to balance on a longboard isn’t just a skill you learn; it’s a characteristic your equipment either supports or undermines. The U.S. Consumer Product Safety Commission (CPSC) states clearly that longer boards and wider wheelbases increase stability. That’s a primary source telling you hardware choice matters.
Think of it like learning to bike. You wouldn’t start on a fixed-gear track bike with skinny tires. You’d pick something stable and forgiving. The same logic applies here.
The CPSC notes that longer boards increase stability and that boards with wider hangers (wheels that are farther apart) give riders greater control. This isn’t a subtle preference, it’s documented guidance on reducing the risk of speed wobble and loss of control.
The main specs that dictate how stable your board feels are deck mount style, truck geometry, and wheel size. Get these right, and half the battle is won before you step on.
| Feature | Best for Beginner Balance | Why It Helps | What to Avoid |
|---|---|---|---|
| Deck Mount | Drop-through or Drop-down | Lowers your center of gravity, making the board feel more planted and easier to step on/off. | Top-mounts (for first board) – they feel taller and less stable initially. |
| Truck Type | Reverse Kingpin (RKP) | Designed for smooth, stable turns at cruising speeds, common on dedicated longboards. | Traditional Kingpin (TKP) on a long deck – can feel twitchy and less stable at speed. |
| Wheel Size | Bigger wheels (e.g., 70mm+) | Rolls over cracks and rough pavement smoothly, reducing chatter that disrupts your balance. | Small, hard wheels – they transmit every bump and can stick on pebbles. |
| Wheel Hardness | Softer wheels | Provides more grip, which feels predictable and secure when leaning into turns. | Harder wheels – designed for sliding, they offer less grip and can feel sketchy. |
A simple check before you ride, per the Longboard Bible: make sure wheels spin freely, trucks are evenly tightened, and there’s no wheel bite (the wheel touching the deck during a turn). A board that’s fighting itself will make learning to balance infinitely harder.
Finding Your Stance and Foot Position
Your stance is your home base on the board. Get it wrong, and you’ll feel perpetually off-kilter. Regular (left foot forward) and goofy (right foot forward) are the two options. Don’t overthink it based on handedness, your dominant foot often wants to be in the back for pushing power, but the only test that matters is which feels more natural when you step on.
One method suggested by the Longboard Bible is a ‘socks on smooth floor’ slide test: the foot that goes out first to catch your balance is likely your front foot. Other guides suggest different methods, like stepping onto the board while holding onto something.
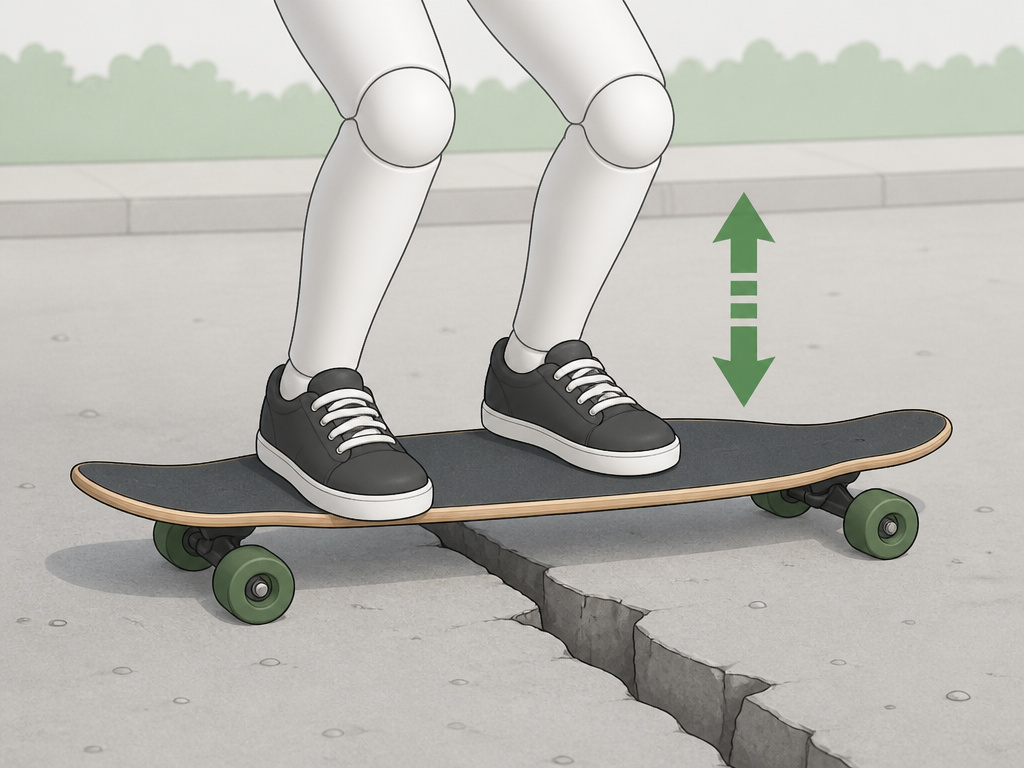
Once you’ve guessed, test it on the board while it’s stationary on grass or carpet. Your feet should be roughly shoulder-width apart, positioned over or just behind the truck bolts. This isn’t a rigid stance; it’s a ready position. Your knees must stay soft, imagine you’re about to catch a basketball, not standing at attention.
Common mistake: Locking your knees and standing upright. This raises your center of gravity and turns your legs into rigid poles, offering no shock absorption. The first crack in the pavement will knock you off line.
Your foot placement evolves as you move. When pushing, your front foot points roughly toward the nose. Once you’re rolling, you’ll rotate it to be more perpendicular across the deck for a stable riding stance. This shift is where new riders often wobble, they forget to adjust their front foot after pushing, leaving it pointed forward where it offers little side-to-side support.
The 4 Drills That Build Stable Balance
The core of how to balance on a longboard is a muscle. You don’t just have it; you develop it through specific, progressive drills. Jumping straight to rolling is like trying to bench press your max without working up to it. You’ll fail, and you might get hurt. This sequence takes you from zero to rolling confidence.
Drill 1: Static Stance (2-3 minutes)
Place your board on grass or in a crack so it can’t roll. Step on and find your basic longboard stance. Practice bending your knees and then straightening slightly. Look straight ahead, not at your feet. The goal is to teach your body that standing on this moving platform is a normal, relaxed position.
Drill 2: One-Foot Balance (The Secret Weapon)
This is the single most important drill for learning to ride a longboard. On your stable board, stand with just your front foot on the deck, positioned over the front bolts. Hover your back foot beside the board. Hold this for 5–10 seconds. Reset. Repeat. Why it works: Both pushing and foot braking require your front leg to support all your weight while the back foot is off the board. If you can’t do this statically, you definitely can’t do it while moving. Master this, and pushing becomes a matter of adding a light kick.
Drill 3: Slow Walking Roll
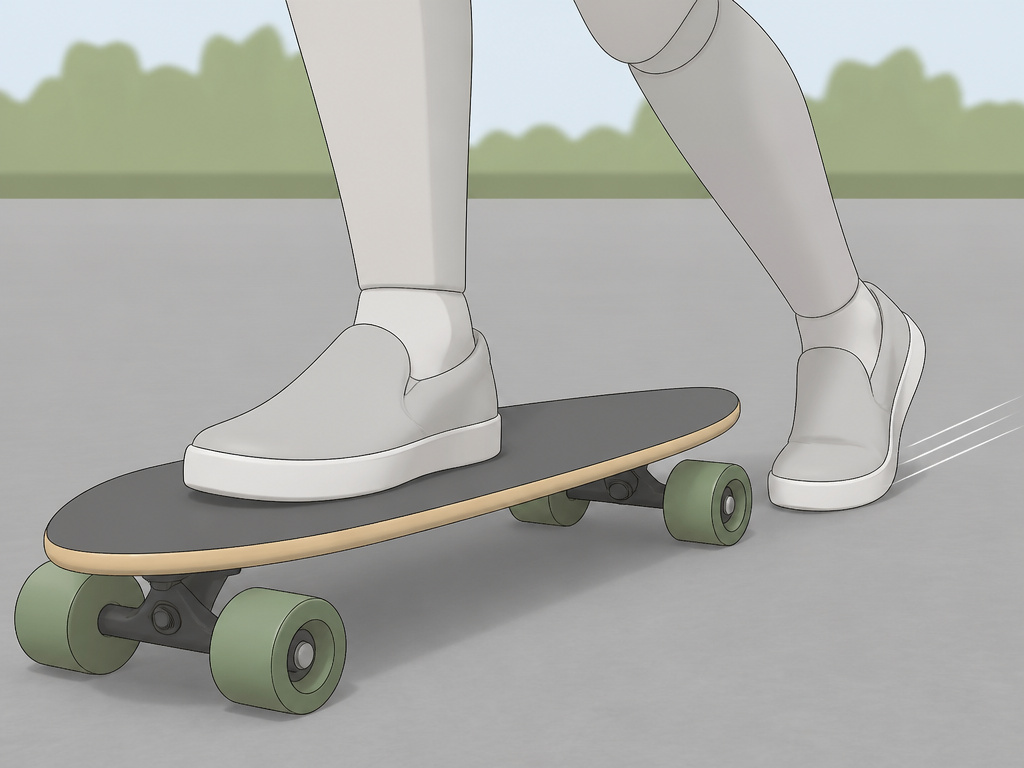
Find a perfectly flat, smooth stretch of pavement. Place your front foot on the board. Instead of pushing hard, use your back foot to walk the board forward, taking tiny, shuffling steps while keeping most of your weight on the front foot. You’re not trying to coast; you’re getting used to the micro-movements of the deck under one stable foot. It feels silly. It works.
Drill 4: The Push-and-Catch
Now, add a gentle push. Push once, then immediately place your back foot on the board and ride out the momentum. Focus on catching your balance with both feet on the deck before you stop. Keep pushes short and controlled. The goal is the transition from pushing stance to riding stance, not distance.
I’ve watched students struggle for weeks trying to link pushes because they skipped Drill 2. Their front leg would collapse as soon as they lifted their back foot to push, creating a wobble cycle. Two days of focused one-foot balance drills broke that cycle. The board stopped being a bucking bronco and started feeling like a platform.
Pushing, Posture, and Weight Distribution
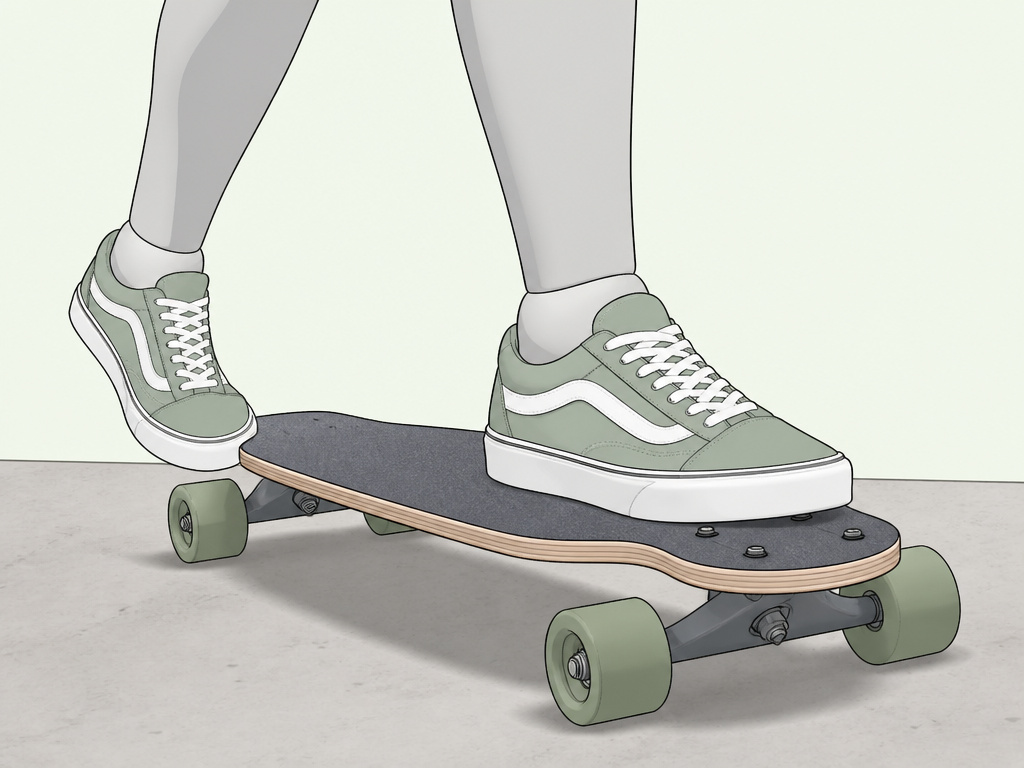
With a stable stance, you’re ready to move. Pushing is where balance becomes dynamic. The cardinal rule: your front leg is your pillar. All your weight should be on it before your back foot leaves the ground to push. If you keep weight on your pushing foot, the board will snake underneath you.
The sequence is simple, but the feel is everything:
- Front foot on the board, angled slightly forward.
- Shift your hips forward until you feel your weight settle onto that front leg.
- Now, and only now, use your back foot to push lightly. Don’t stomp.
- Swing the back foot back onto the deck, placing it near the rear truck bolts.
Your posture dictates control. Here’s the checklist:
- Knees: Soft, always bent.
- Hips: Lowered, not sitting but in a slight athletic squat.
- Chest: Relaxed and facing forward.
- Eyes: Looking 10-20 feet ahead where you want to go. Your body follows your head.
- Arms: Loose and out for balance, not stiff at your sides.
Where this goes sideways: Leaning back. When you get nervous, the instinct is to recoil, shifting your weight behind the rear truck. This lightens the front trucks, making steering vague and initiating speed wobbles. Your weight should be centered or slightly forward.
A quick sensory cue: you should feel the ball of your front foot pressing firmly into the grip tape. If that pressure lightens, you’re leaning back. Correct it immediately.
Turning, Carving, and Managing Momentum
Turning is how you steer, but for a beginner, it’s also your first tool for speed control. You don’t turn the board with your feet; you steer it by shifting your weight. Toeside turns happen when you gently press your weight toward your toes. Heelside turns happen when you press toward your heels.
Carving is just linking gentle S-turns. It’s a foundational skill for cruising on a longboard because it naturally bleeds off speed through friction and builds rhythm. Start wide on a gentle slope or with a bit of push speed. Look through the turn, your head leads, your shoulders follow, your hips follow that, and the board follows your hips.
But here’s the critical disclaimer straight from the Longboard Bible: carving is not an emergency brake. If you’re on a hill and picking up too much speed, carving alone won’t save you. That’s why foot braking is essential.
If your board feels too twitchy in turns, your trucks might be too loose. A quarter-turn tighten with a skate tool can add stability. If it feels stubborn and won’t turn, loosen them a tiny bit. The Decathlon guide warns that overtightening can damage the bushing bands, while loosening too much can cause wheel bite, where the wheel locks up against the deck. Small adjustments. Test. Repeat.
How to Stop Safely and Control Speed
Stopping is the skill that grants freedom. Without it, every push is an act of faith. The first and most important method is foot braking. It works by dragging the sole of your shoe on the pavement to create friction.
The mechanics rely entirely on the one-foot balance drill you mastered. Shift your weight onto your front leg. Extend your back leg, letting your heel or the full sole skim the ground lightly. Increase pressure gradually to slow down. Never stamp down, that’s a shortcut to being thrown forward.
Worth knowing before you start: Foot braking will destroy shoes. It’s not a maybe. Use an old pair or dedicated skate shoes with a flat, grippy sole. The wear pattern is a badge of progress.
When are you ready for a slight incline? Only when you can foot brake to a complete stop, predictably, three times in a row on flat ground. Pick a slope so mild you could walk up it without getting winded, with a long, flat run-out at the bottom. Walk it first.
Speed wobbles are the specter that haunts new riders gaining confidence. They’re rapid, uncontrollable oscillations of the front truck. The Longboard Bible lists the common causes: going faster than your control level, weight too far back, trucks too loose, stiff legs, or rough pavement.
If wobbles start: Do not lean back. That worsens it. Get lower by bending your knees deeply and shift your hips forward over the front truck. Try to gently scrub speed with foot braking if possible. The fix is often in your setup and stance, not just courage. Ensuring your trucks, wheels, and hardware are snug and even is a baseline, per the CPSC’s advice to keep hardware tightened for stability.
A 7-Day Practice Plan for Solid Balance
Consistency beats marathon sessions. A progression plan from the Longboard Bible involves 15–30 minute sessions. This plan integrates the drills and skills from above.
| Day | Focus | Key Drill | Move on when you can… |
|---|---|---|---|
| 1 | Stance & Static Balance | Static stance on grass, stepping on/off. | Step on without grabbing for support. |
| 2 | One-Foot Foundation | One-foot balance hold (5-10 sec). | Hold for 10 seconds without major wobble. |
| 3 | Pushing Mechanics | Slow walking roll, push-and-catch. | Do 5 push-and-catch sequences smoothly. |
| 4 | Foot Braking | Light foot drags at walking speed. | Bring yourself to a stop from a slow roll. |
| 5 | Turning & Carving | Wide figure-eight turns on flat ground. | Complete a figure-eight without putting a foot down. |
| 6 | Linking Skills | Push → Carve → Brake → Stop sequence. | Repeat the sequence 3 times consecutively. |
| 7 | Gentle Incline (If Ready) | Practice on a very mild slope with a run-out. | Control your speed with braking before the run-out ends. |
Repeat days as needed. The day you conquer foot braking is the day the board stops being a liability and starts being a tool.
Essential Gear for Confident Learning
Gear doesn’t make you a better rider, but the right gear removes fear and prevents injury, which allows for more effective practice. This isn’t a marketing list; it’s a functional one based on what actually changes the learning curve.
Non-Negotiable:
- Certified Helmet: The CPSC states a helmet must fit snugly with the chin strap fastened and sit level on your head. If it’s loose, it can come off on impact. This is essential.
- Skate Tool: You will need to adjust your truck tightness. A basic T-tool is mandatory.
- Proper Shoes: Flat-soled, grippy shoes (vans, skate shoes). No sandals, no running shoes with high, soft soles.
High-Value Additions for Month One:
- Wrist Guards: The CPSC highlights these as “especially important for reducing the risk of fractures.” When you fall, you will put your hands out.
- Knee/elbow pads: The Longboard Bible calls these “optional,” but adds they speed up learning because you fear falling less, while the CPSC recommends using them. That’s real. Fear is a physical blocker to relaxing your stance.
- Dedicated “Braking Shoes”: Accept that your foot braking shoe will get shredded. Have a pair just for practice.
The goal is to create a practice environment where a minor fall is a learning moment, not a trip to urgent care. That safety net is what allows you to push your balance to its next limit.
How to practice longboard balance on carpet or grass
Before you ever hit pavement, start on a soft, stable surface like carpet or short grass. This is where you build your foundational balance without the board rolling away. Practice stepping on and off the board, finding your stance with your feet near the truck bolts. Work on one-foot balance with just your front foot planted, holding it for several seconds. This static practice builds the muscle memory for staying centered. A board that’s lower to the ground can make this initial balancing easier. Use this safe space to get comfortable with your weight distribution before introducing movement.
Where to find a good place to practice longboarding
The best environment for learning is a flat, smooth, and spacious area with no traffic. Look for empty parking lots, tennis or basketball courts, or smooth bike paths during quiet times. The pavement should be even and free of gravel, cracks, or debris that could catch your wheels. This type of space gives you the room to practice pushing, gentle turning, and braking without obstacles or surprises. Avoid any slopes or hills while you’re learning the basics. A wide-open, smooth area reduces fear and allows you to focus entirely on your balance and control.
Frequently Asked Questions
How long does it take to learn to balance on a longboard?
Following a structured progression, such as a 7-day plan with short daily sessions, can build foundational balance and braking skills. The one-foot balance drill is the fastest accelerator.
Why can’t I balance on my skateboard?
If you’re trying on a standard skateboard (under 33 inches), the shorter wheelbase and smaller, harder wheels are inherently less stable than a longboard setup. The advice here assumes a beginner-friendly longboard. If you’re on a skateboard, the principles still apply, but the learning curve is steeper.
What is the proper stance for longboarding?
The proper stance is the one that feels stable for you, regular or goofy. Your feet should be roughly shoulder-width apart over the truck bolts, knees soft, weight centered, and chest facing forward. It’s an athletic ready position, not a static pose.
How long should my longboard be if I’m 5’4″?
Deck length is less critical than deck style and wheelbase for balance. Focus more on getting a drop-through or drop-down deck for the lower platform, as this has a more direct impact on stability than a few inches of length.
Should I tighten my trucks when I’m learning?
Often, yes, a little. Tighter trucks reduce the board’s twitchiness, making it feel more stable for straight-line pushing and balance drills. Just don’t crank them so tight that you can’t make gentle turns. Use quarter-turn adjustments.
Before You Go
One rule cuts through everything else: never ride faster than you can stop. That’s not a buzzkill; it’s the equation that drives real progress. Once stopping is a reflex, fear evaporates. You stop white-knuckling the deck and start feeling it.
If you remember one drill, make it the one-foot balance hold. It’s the direct physical connection between static confidence and dynamic control. Everything else, pushing, braking, managing wobbles, flows from that strength.
And if your board still feels like a wild animal after all this, check the hardware. Loose nuts, uneven trucks, or a deck that’s too high and twitchy are fixable problems. Your balance is a skill. Your setup is a tool. Make sure the tool is sharp.
