How to Ride an Electric Longboard: Step-by-Step
This post contains affiliate links. As an Amazon Associate, we earn from qualifying purchases.
To ride an electric longboard, you match your stance to the board’s mechanics, use the remote’s throttle to accelerate and its brake lever to slow down, and always have a backup stopping plan like foot braking. The rider weight limit varies by model; for example, the TDC USA Kruze has a 200 lb max, while the RazorX Longboard has a 220 lb limit. Never rely solely on the electronic brake.
That speed and weight range isn’t a suggestion. It’s the line where the board’s motor, battery, and frame are engineered to perform safely. Go over it, and you’re asking the electronics to work harder than their rated capacity, which shortens their life and can lead to a sudden failure when you least expect it. A key part of how to ride an electric longboard is respecting these limits.
What follows is the real sequence for how to ride an electric longboard: gearing up, a pre-ride mechanical check, mastering the remote in a parking lot, and then layering in the skills that keep you upright when the electronics don’t. By the end, you’ll know how to read your board’s limits and your own.
Key Takeaways
- Match your stance to your board’s drive system, hub-motor boards like the Atom H-series kick-push easily when dead, while belt-drive models like the Atom B-series have more resistance.
- The electronic brake is an assist, not a guarantee, manufacturers like TDC USA warn that power or brake failure can happen instantly, and Atom Longboards advises never relying on the board’s brake as your sole means of stopping, making foot braking a mandatory skill.
- Accelerate slowly to maximize range. Atom’s testing shows that gentle throttle input and coasting can significantly extend your battery’s range on a single charge.
- Never charge a cold battery. The RazorX manual explicitly states not to charge at or below 32°F (0°C), as it can permanently damage the battery cells.
- Your initial practice should be in parking lots only. Riding on roads or mixed paths requires muscle memory for the remote that only comes with deliberate, low-speed practice.
Gearing Up: Your Non-Negotiable Safety Kit
I’ve watched new riders skip the pads because a short test ride felt easy. Then they hit a seam in the pavement at 8 mph, their board stutters, and they instinctively put a hand out. That’s how you get a wrist that’s sore for six weeks. A helmet is the absolute bare minimum, but wrist guards are arguably just as critical for your first dozen hours.
Your kit needs to cover the points you’ll actually hit. A certified skate helmet is essential. For pads, focus on the wrists, knees, and elbows in that order. Slide gloves are overkill for beginners, but they’re worth looking at once you start carving harder. The goal isn’t to look like a robot; it’s to walk away from the small spills that are part of learning.
Common mistake: Wearing a bike helmet for skating. Skate helmets are certified for multiple impacts and cover more of the back of your head, which is where you’ll likely hit during a backwards fall.
The 4-Step Pre-Ride Checklist You Can’t Skip
Before you even step on the board, you need to verify its mechanical health. This takes two minutes and prevents the vast majority of “my board just died” moments.
First, check the battery. Most remotes have a battery level indicator. If the battery level is low, charge it first. The RazorX Longboard gets up to 40 minutes of continuous run time on a full charge, but that’s under ideal conditions. Second, inspect the wheels and trucks. Spin each wheel by hand. It should spin freely for a few seconds without a gritty sound or wobble. Tighten any visibly loose truck kingpins, but don’t overtighten, you still need to turn.
Third, pair the remote and test the connection. Stand next to the board and gently press the throttle forward. The board should not move. With the board’s wheels off the ground, press the throttle lightly. The wheels should spin smoothly. If they jerk or don’t respond, re-pair the remote following your board’s manual. Fourth, plan your route. Stick to smooth, dry pavement without loose gravel or sand. The RazorX manual is explicit: it’s intended for flat, dry surfaces and you should not ride in mud, ice, puddles or water.
| Check | What to Look For | Why It Matters |
|---|---|---|
| Battery Level | Remote shows 3+ bars or 75%+ | Prevents sudden power loss mid-ride. |
| Wheels & Trucks | Wheels spin freely; trucks are snug but not stiff | Ensures smooth rolling and predictable turning. |
| Remote Connection | Wheels respond smoothly to throttle input while board is lifted | Confirms the board will respond when you need it to. |
| Riding Surface | Pavement is dry, smooth, and free of debris | Maintains traction and avoids wheel lock/stoppages. |
Finding Your Stance and Foot Placement
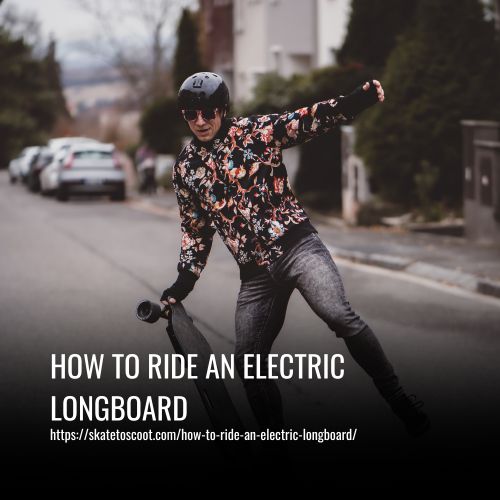
Your stance is your foundation. Get it wrong, and every acceleration will feel unstable. Many riders are “regular” (left foot forward). A simple test: have someone gently push you from behind. The foot you step forward with to catch yourself is likely your front foot. On the board, your front foot should be angled across the deck, right over or just behind the front truck bolts. This angle gives you control to steer and helps you resist the torque of acceleration.
Your back foot goes perpendicular, across the tail. This is your throttle foot, the one that will subtly shift weight when you press the remote. On a hub-motor board like the Atom H-series, this stance also sets you up to kick-push if the battery dies. Belt-drive boards like the Atom B-series have more rolling resistance, so kicking is harder but still possible. The wrong move is putting both feet side-by-side, parallel to the board. You’ll have no control.
Mastering the Remote Control: Throttle and Brake
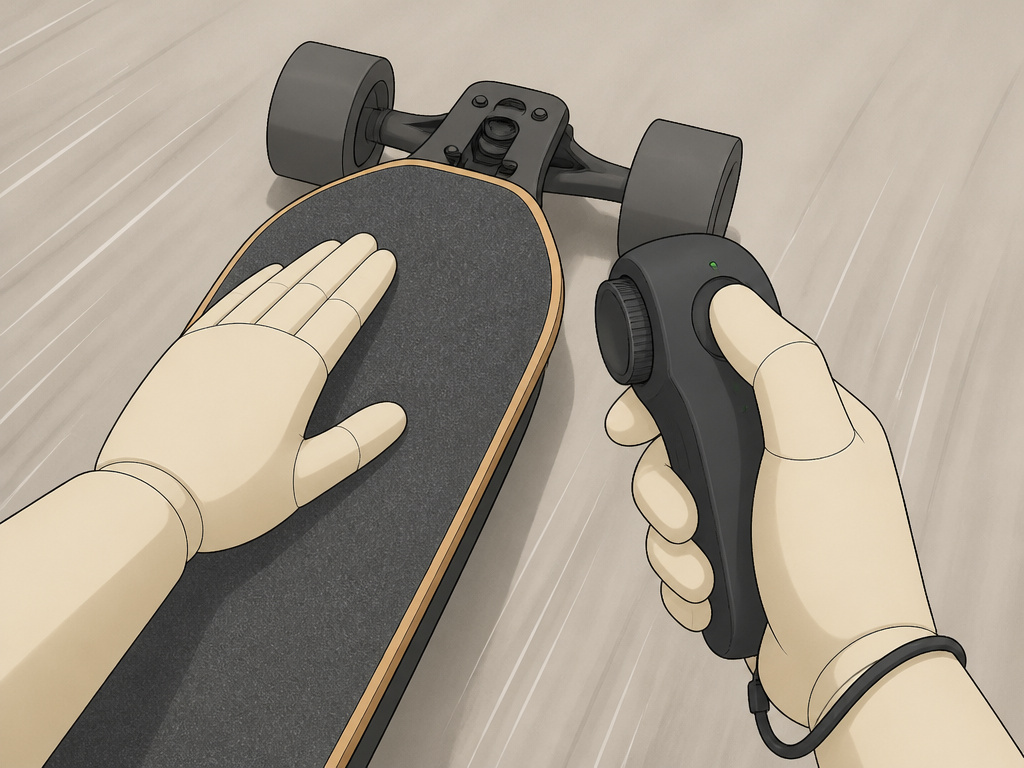
The remote is your only direct mechanical link to the motor when learning how to ride an electric longboard. Its feel is everything. Most remotes have a thumbwheel or trigger for throttle and brake. The first rule: always start in the lowest speed mode. This isn’t just about top speed; it limits how quickly the board accelerates, which is the part that throws most beginners off.
To accelerate, you don’t just push the throttle forward. You lean your front knee forward first, shifting your weight over that front foot. Then you roll the throttle forward smoothly. This coordinated movement keeps the board flat and prevents a wheelie or a speed wobble. The RazorX Longboard has a specific quirk: its motor won’t engage unless the board is already moving at least 3 mph. You must give it a kick-push start.
Where this goes sideways: Stabbing the throttle from a standstill. The board lurches, your weight flies backward, and you either fall off the back or trigger a violent speed wobble. Smooth input is the only safe input.
Braking is the reverse. First, shift your weight slightly back onto your rear foot. Then, gently pull the brake lever backward. The board will slow down. Practice this in your empty lot until you can stop smoothly from a walking pace. But here’s the critical layer the remote can’t provide: you must also practice stopping without the remote.
How to Stop When the Electronics Fail
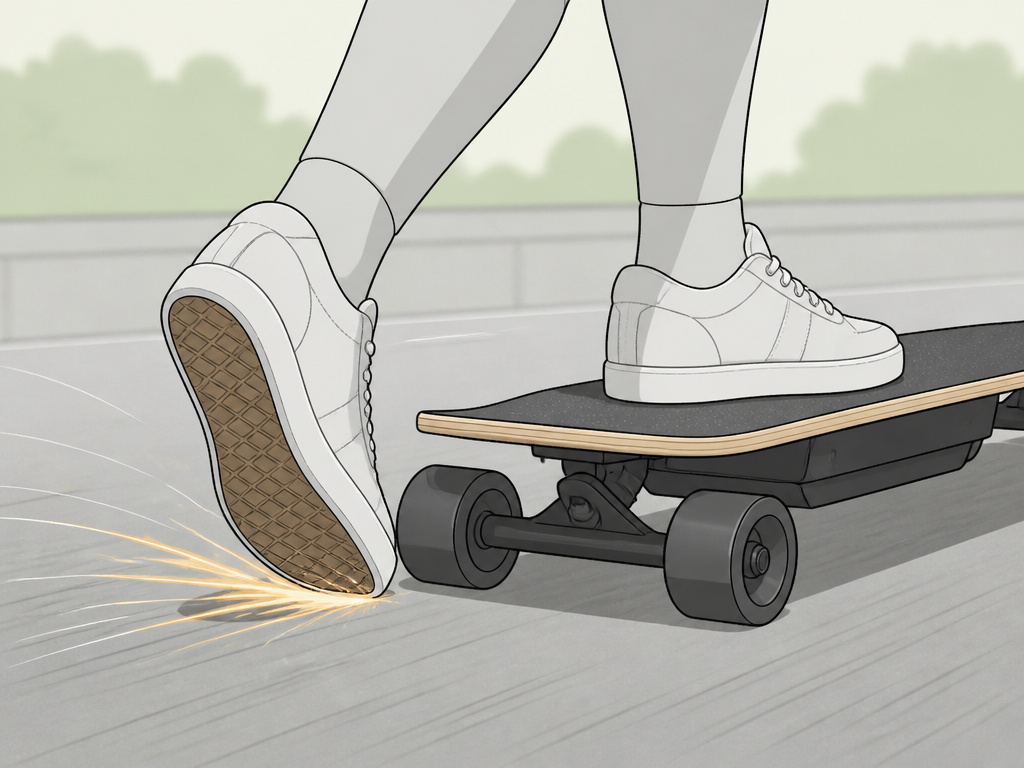
This is the single most important skill you can practice. Every manual I’ve read, from the stark warning in the TDC USA manual to the clear advisory from Atom Longboards, says the same thing: never rely on the electronic brake as your sole means of stopping. Power can cut, the remote can disconnect, the brake can overheat.
You have two reliable, mechanical options: the foot brake and the board slide. Start with the foot brake. While rolling slowly, keep your front foot planted and angled. Hover your back foot off the board, near the edge. Gently lower the sole of your shoe onto the pavement. Don’t stomp; let friction do the work. Increase pressure until you stop. It will scuff your shoe. That’s fine. A scuffed shoe is cheaper than a dental bill.
The board slide (or heel-side slide) is for when you need to stop faster. It’s an advanced move that requires confidence and practice on a regular longboard first. As a beginner, focus on the foot brake. Make it so automatic that you reach for it before you reach for the remote brake.
| Stopping Method | Best For | Risk If Skipped |
|---|---|---|
| Remote Brake | Controlled, gradual slowing on known-good terrain. | Complete failure if power/connection is lost; you have no backup. |
| Foot Brake | Everyday stopping, low speeds, preserving battery. | Wears shoe soles; requires practice to apply smoothly without jarring. |
| Board Slide | Emergency stops, higher speeds, advanced riders. | High risk of crashing if technique is poor; can flat-spot wheels. |
Turning, Carving, and Managing Speed Wobbles
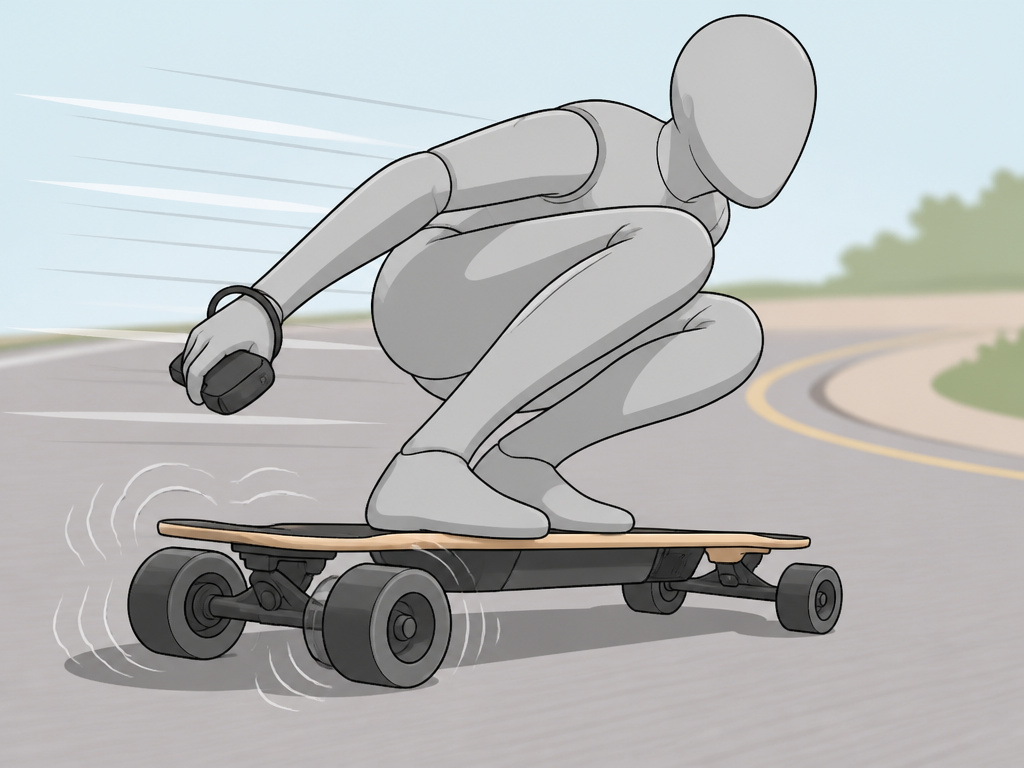
Turning an electric longboard uses the same mechanics as a regular board: you lean. To turn right, lean your weight onto your toes. To turn left, lean onto your heels. Start with wide, gentle carves. The remote adds a complication: you must maintain throttle control while leaning. If you’re in a turn and you suddenly let off the throttle, the board will decelerate and your line will tighten unpredictably.
Speed wobbles happen when the board’s rear trucks oscillate left and right faster than you can correct them. They’re caused by stiffness, in your legs and in the board’s trucks. If you feel them start, do not panic and jump off. Crouch lower to lower your center of gravity, and shift your weight slightly forward onto your front foot. Relax your legs. Often, the wobbles will dampen themselves. If they don’t, gently apply the foot brake to slow down smoothly.
The part nobody mentions: Speed wobbles often start because a rider is standing too upright and stiff-legged, transmitting every tiny vibration from the deck into their rigid frame. Bend your knees. Let the board move under you.
How to Fall Correctly (Because You Will)
Falling is not a sign of failure; it’s a data point. The goal is to fall in a way that minimizes damage. The worst thing you can do is stick an arm out straight to catch yourself. That’s a great way to break a wrist or collarbone.
When you feel yourself going, try to tuck and roll. Aim to land on the meaty parts of your body, your shoulder, your back, your thighs, and let the momentum roll you. If you’re wearing your pads, they’ll slide. This is why we wear them. If a roll isn’t possible, try to slide. The slide gloves or knee pads will take the abrasion. What you’re avoiding is the sudden, jarring impact.
Consider practicing falling techniques in a safe environment.
Your First 5 Hours: A Practice Plan
Don’t just aimlessly ride around. Structure your early sessions to build competence safely.
- Hour 1: Static Balance. Stand on the unpowered board on carpet or grass. Find your stance. Shift your weight from toes to heels. Get comfortable.
- Hour 2: Powered Straight Lines. In your empty lot, practice starting, rolling 50 feet, and stopping using the remote brake. Keep your speed very low.
- Hour 3: Turning and Foot Braking. Add gentle turns. Practice coming to a complete stop using only your foot brake from a slow roll.
- Hour 4: Low-Speed Carving. Link turns together into wide “S” shapes. Practice controlling speed with the throttle while leaning.
- Hour 5: Emergency Drills. Have a friend call out “stop!” and practice your foot brake reaction. Practice a controlled jump-off at a slow speed.
Riding in the Real World: Etiquette and Awareness
When you leave the parking lot, you’re sharing space. Act like a bicycle. Obey traffic signals. Use hand signals for turns. Assume cars do not see you. Ride predictably, in a straight line, and never weave in and out of parked cars. It’s advisable to stay off roads where the speed limit exceeds your board’s comfortable cruising speed.
Visibility is key. If you must ride near dusk, use lights. A white light on the front and a red light on the back are essential. Never wear headphones. You need to hear approaching cars, cyclists, and pedestrians. Your ears are a critical part of your situational awareness.
How to maintain an electric longboard
Keep your board rolling smoothly by sticking to a few key habits. Always use the specific charger that came with your board; using a different one is a serious safety risk. Store and charge your board in a dry place, and avoid riding through puddles or in the rain, as water damage to electrical components is typically not covered under warranty. To maximize your battery’s range and lifespan, push off to start, accelerate slowly, and coast when you can. Regularly check your hardware for tightness and inspect the wheels and deck for wear. A well-maintained board is a reliable board.
What electric longboard is best for beginners
Look for a board with multiple speed modes, including a low mode with slower acceleration. Beginners benefit from boards with multiple speed modes, especially ones that feature a low mode with slower acceleration to help you build confidence. Pay close attention to the rider weight limit to ensure a safe and responsive ride. Start by practicing on flat, dry pavement without loose debris, and remember that the board’s electronic brake should never be your only way to stop.
Frequently Asked Questions
How hard is it to learn to ride an electric longboard?
For most adults with decent balance, the basics are manageable with focused practice in a safe area. The motor eliminates the need to push, which can make initial learning easier. Mastery of higher-speed control and emergency maneuvers takes weeks or months.
How do electric longboards work?
An electric longboard uses a battery-powered motor, usually housed in the hub of a wheel (hub motor) or connected via a belt/gear (belt-drive), to turn the wheels. A handheld remote control sends wireless signals to the board’s receiver to control speed (throttle) and braking. The Atom Longboards FAQ provides a clear breakdown of their different motor systems.
How do you stop on an electric longboard?
You have three main options: using the brake lever on the remote, dragging your foot on the ground (foot braking), or for advanced riders, performing a board slide. The remote brake is a primary method for many boards, but sources like the TDC USA manual warn you must be prepared to stop without it, while others present it as a reliable primary slowing method.
Can you ride an electric longboard when the battery dies?
It depends on your board. Atom Longboards states its H-series models with hub motors have low resistance and can be kicked like a regular longboard. Their B-series belt-drive boards have more resistance, making kicking harder. It’s always possible, but it may not be practical for long distances.
The Bottom Line
Your board’s manual has the final say on weight limits and temperature warnings, ignore those specs at your own risk. The real skill isn’t just riding under perfect conditions; it’s knowing how to handle the board when the power cuts, the remote lags, or the pavement gets rough. Start slow, gear up, and drill the foot brake until it’s reflex. That’s how you move from being a passenger on an electric platform to being a rider in control.
