How to Footbrake Longboard: Step-by-Step Technique
This post contains affiliate links. As an Amazon Associate, we earn from qualifying purchases.
Footbraking a longboard is a fundamental safety skill that uses your shoe as a friction brake to control speed and stop. You reposition your front foot forward, bend your knee, and extend your back foot to skim the ground with your heel first, applying pressure gradually while keeping most of your weight over the front foot.
The heel-first contact point is where most learners either lock it in or eat pavement. A heel skims; a toe or flat foot grabs. That single distinction decides whether you slow down smoothly or get thrown off balance in half a second. This is the core principle of how to footbrake longboard.
What follows: a drill-based technique that works for drop-decks and top-mounts, the exact speed where footbraking stops being enough, the one electric skateboard failure mode that makes this skill essential, and why your shoe choice matters more than you think.
Key Takeaways
- Start practicing at a walking pace on flat, smooth pavement; speed amplifies every mistake.
- Apply braking pressure gradually, a sudden stomp will grab the pavement and throw you.
- Keep your weight on your front foot; leaning back shifts your center of gravity and causes a wobble.
- Heel-first contact allows your foot to skim and gauge the surface; leading with the ball of your foot risks an instant catch.
- Footbraking works at any speed, but for emergency stops at very high speeds, a slide is more reliable.
The Step-by-Step Footbrake Technique
Forget the vague “drag your foot” advice. That’s how you sprain an ankle. A controlled footbrake is a sequence, and skipping any step turns a slowdown into a bail.
First, get rolling at a slow, comfortable speed, a fast walking pace is perfect. Your front foot should be across the board, just behind the front trucks. Now, pivot that front foot so it points straight ahead, following the board’s nose. Bend that front knee. This does two things: it lowers your center of gravity, and it shifts your weight forward, over the foot that will stay on the board.
The Pantheon Longboards instructional drill emphasizes keeping your braking foot forward of the rear axle to avoid contact with the wheel, a mistake that can instantly stop the board and throw the rider.
Next, face your shoulders and hips forward. Do not look at your back foot. Extend your back foot out to the side, in line with your front foot. Aim to touch the ground with your heel first. This is not a step down; it’s a gentle skim. Once the heel is sliding, slowly lower the rest of your foot until the sole is flat against the ground. Only then do you begin to apply pressure by pressing down through that back leg.
The pressure comes from your leg muscles, not from leaning your body weight back. If you feel your upper body tilting backward, you’ve shifted your weight off the front foot. Recenter yourself. Increase pressure until you feel the deceleration you want, hold it, and then, this is the part people skip, lift your foot cleanly off the ground and return to your riding stance before you come to a complete stop. Stopping with your foot planted is unstable.
Body Positioning & Weight Distribution
Your upper body is a counterweight. Where you put it decides whether you brake or crash.
Keep a wide stance. A narrow stance is tippy. Your front knee stays bent and your chest should be over that front knee. This posture forces most of your weight onto the front foot, where it belongs. The back foot is just a brake pad; it shouldn’t carry much load. If your back leg is straight and stiff, you’re probably putting too much weight on it. A slight bend in the back knee allows for micro-adjustments in pressure.
Your arms are for balance, not for windmilling. Hold them out to your sides or put your hands on your front knee. The knee-touch trick is a classic coaching move, it locks your shoulders forward and automatically shifts your weight where it needs to be.
Common mistake: Looking down at your braking foot. Your head is heavy. When you look down, your whole torso follows, pulling your weight back and to the side. Keep your eyes on the horizon.
Common Beginner Mistakes (And How to Fix Them)
Everyone makes the same few errors. Knowing them in advance cuts the learning curve in half.
Mistake 1: Stomping the foot down. You panic and slam your whole foot onto the pavement. The sole grabs instantly, your body lurches forward, and the board shoots out from under you. Fix: Practice the “touch-down” drill from a standstill. Just roll slowly, extend your foot, and only let your heel kiss the ground. Lift it back up. Do this fifty times. The goal is to replace the stomp reflex with a skim.
Mistake 2: Leaning back. It feels intuitive to lean away from the braking foot, but it pulls your center of gravity behind the board. Fix: Consciously press your chest toward your front knee. Better yet, put both hands on that knee while you practice. It physically blocks you from leaning back.
Mistake 3: Letting the foot drift behind the board. Your foot slips too far back and makes contact with the rear wheel. The results are sudden and violent. Fix: Be aware of your foot’s position relative to the board. The Pantheon video is adamant: keep that foot forward of the rear axle. Some riders, as noted in the Lush Longboards guide, even lock their ankle against the board’s rail for a tactile reference point, while Pantheon Longboards advises keeping your foot away from the rear wheels and forward of the rear axle to avoid contact.
Mistake 4: Using the wrong shoes. Running shoes have deep, grippy treads designed to grab. They will grab the asphalt. Fix: Wear skate shoes or any flat-soled shoe. The smooth, flat rubber provides consistent, predictable friction. If you’re burning through soles, companies like Muirskate sell replacement footbrake patches.
Foot Placement & Shoe Contact Debate
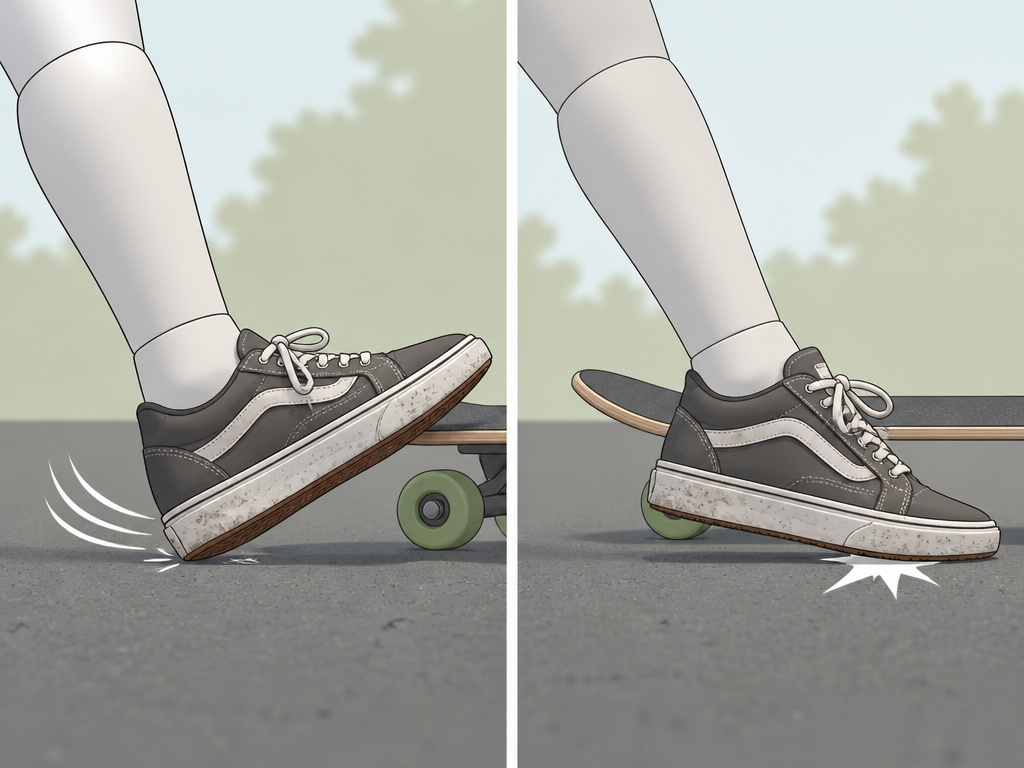
There’s a genuine disagreement in the community about how your foot should meet the road. The Reddit threads show the split.
One camp insists on heel-first. You let the heel skim, then roll the foot flat. This creates a smooth transition and allows you to gauge the road’s texture before committing weight. It’s the safer method for beginners and high speeds.
The other camp advocates for ball-of-the-foot-first or even a toe tap. The argument is that this approach allows you to “test” the ground with a small part of your shoe before stepping down. Some riders use this as a speed-check tap before a full brake.
| Contact Method | Best For | Risk If Done Wrong |
|---|---|---|
| Heel-First | Beginners, high speeds, variable pavement | Foot can bounce if not placed gently; less immediate braking power. |
| Ball/Toe-First | Experienced riders, gauging speed quickly | Toe can catch a seam or pebble, causing a sudden stop and forward pitch. |
My take? Start with heel-first. It’s the technique recommended by most instructional guides and it’s far more forgiving. The toe-tap method is a useful skill for advanced riders who can manage the higher risk, but it’s a terrible default for someone learning their first speed control techniques.
Advanced Variations & Speed Limits
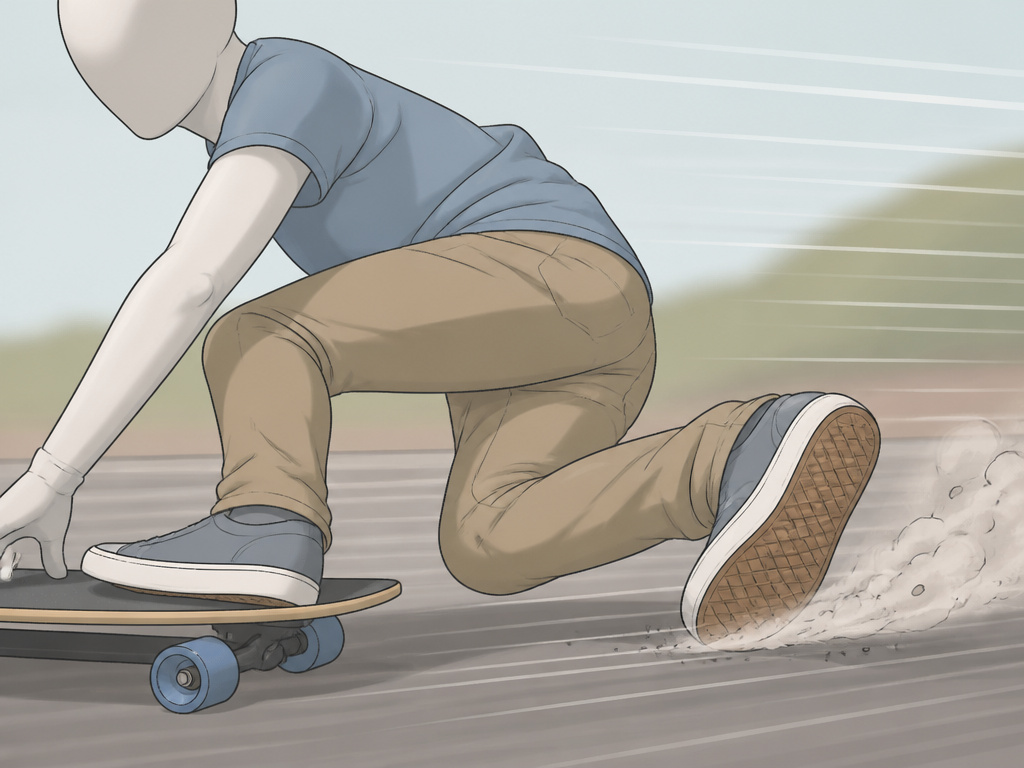
Once the basic footbrake is automatic, you can explore variations for specific scenarios.
The Swiss footbrake (mentioned in the Lush Longboards guide) involves a more aggressive, digging motion with the foot, often used for scrubbing speed quickly during downhill runs. The Luge style or double-footed brake is exactly what it sounds like, dragging both feet. It’s a last-resort, maximum-friction move for when you need to stop now and don’t care about shoe preservation.
So, how fast can you footbrake? The Reddit consensus is eye-opening: there is no theoretical speed limit. Riders report footbraking at very high speeds. The real limit is practical: your ability to maintain balance on one foot against immense wind resistance and vibration, and your courage to put a foot down at that velocity.
Where this goes sideways: Relying solely on footbraking for emergency stops at high speed. While possible, it’s less reliable than a premeditated slide. A footbrake at high speed takes significant distance and perfect form; a Coleman slide can kill speed more quickly. If you’re bombing hills, footbraking is your speed modulator, but a shutdown slide should be your planned stop.
Why This Skill is Non-Negotiable for Electric Skateboards
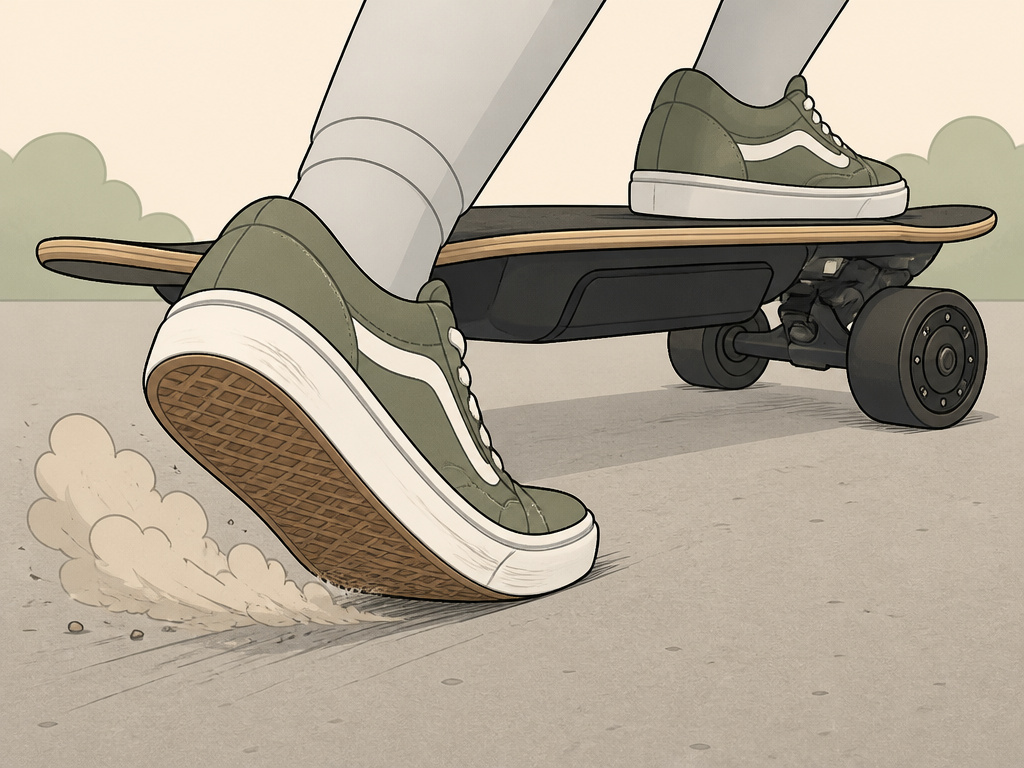
If you ride a powered board, footbraking isn’t just a skill, it’s a critical backup system. The Boosted Boards manual states it plainly: “In the event of wireless interference or battery fault, you may need to rely on skating techniques like footbraking or sliding to stop.”
Electric skateboards can fail in ways traditional longboards can’t. The battery can fault. The remote can lose connection. Regenerative braking can shut the board down if you brake downhill on a full battery. When the electronics go silent, you’re on a suddenly heavy, unpowered plank. Your only controls are balance, carving, and your foot.
This makes practicing how to footbrake longboard on a regular longboard first a smart move. The muscle memory translates directly, and it’s easier to learn without the weight and power of an e-board. Before you rely on a remote, master the fundamentals of how to ride a longboard without power.
Practice Drills to Build Muscle Memory
Don’t just ride and hope to figure it out. Isolate the skill.
- Stationary Balance Drill: On your board while stationary, practice shifting your weight onto your front foot and lifting your back foot off the ground. Hold it. This builds the one-legged balance that is the foundation of footbraking.
- Heel-Skim Drill: At a very slow roll, practice extending your foot and letting only your heel brush the ground. Don’t brake. Just touch and lift. Repeat until the motion is smooth and controlled.
- Low-Speed Stop Drill: On a flat, smooth lot, push once to a slow speed. Go through the full footbrake sequence to a complete stop. Focus on a smooth heel-to-sole roll and lifting your foot at the end. This is your beginner guide to stopping.
A drop-deck board (like the Pantheon Ember) makes these drills easier because the lower platform improves stability. A top-mount board (like the Pantheon Tortuga) is taller and requires better balance from the start.
Frequently Asked Questions
Can you footbrake at high speed?
Yes, experienced riders footbrake at very high speeds. However, the margin for error shrinks dramatically. At high speed, any sudden grab or imbalance can have severe consequences. For controlled, reliable stopping at high speeds, learning a slide is a safer long-term goal.
Why does my foot shake when I try to footbrake?
Shaking is usually a sign of tension and poor weight distribution. You’re likely putting too much weight on the braking foot or locking your back leg straight. Focus on keeping your weight over your front foot and maintaining a slight bend in your braking knee. The shake will subside as your muscles learn the new job.
Should I footbrake with my pushing foot or my other foot?
Almost always, use your pushing foot. This is the foot you’re already comfortable putting down on the ground, and its muscles are conditioned for the impact. Switching feet adds an unnecessary layer of complexity when you’re learning.
How do I stop on a longboard without footbraking?
The other primary methods are sliding (like a Coleman or push-up slide) and carving hard to scrub speed. For complete beginners, the simplest alternative is to step off the board and run it out, but this only works at very low speeds and requires you to be able to stop a longboard safely first.
How long does it take to learn to footbrake well?
With focused, daily practice, most riders get the basic motion down in a single session. Feeling confident using it to control speed at moderate speeds might take a few weeks of consistent riding. Mastery, where it becomes an automatic reflex, takes months of regular use.
Before You Go
One threshold changes everything: if you can’t comfortably balance on your front foot alone while rolling, you’re not ready to footbrake effectively. That single-leg stability is the platform the whole technique is built on. Work on that first.
The next time you’re out, spend ten minutes on the heel-skim drill for how to footbrake longboard. Don’t worry about stopping, just get the feel of the road against your heel. That light touch is the difference between controlling your descent on a hill and fighting for survival. Footbraking is the most utilitarian skill in longboarding. It’s not flashy, but it’s the one that keeps you rolling session after session, especially when you’re riding downhill and need to meter out your speed precisely. Start slow, earn the control.
