How to Speed Check on a Longboard: A 5-Step Breakdown
This post contains affiliate links. As an Amazon Associate, we earn from qualifying purchases.
A speed check on a longboard is a controlled, partial slide used to shed momentum, typically at a 10- to 45-degree angle to your direction of travel, so you can straighten out and continue riding. It’s the essential skill between basic footbraking and full shutdown slides for managing speed on hills.
That angle is what separates a check from a shutdown. A full 180 slide stops you or sends you backwards. A speed check just removes a few miles per hour and allows you to keep moving forward. Learning how to speed check on a longboard is key because get it wrong, and you either slide out completely or hook up abruptly and get thrown.
What follows: the exact five-step sequence for a heelside check, the critical body mechanics most tutorials skip, how to tell if you’re going fast enough to slide, and the one practice progression that actually works.
Key Takeaways
- Initiate the slide with a pre-carve to the opposite side; this loads the board and sets your body position for the push-out.
- Your hands and shoulders drive the rotation, not your legs. A forceful counter-rotation of your upper body is the engine of the slide.
- Start practicing on a gentle, consistent slope where you can maintain 10-15 mph; too slow and the wheels won’t break traction.
- Wear slide gloves even for checks. A low-speed fall onto asphalt without palm protection grinds skin off in seconds.
- If your board hooks up mid-slide and throws you, you stopped rotating your upper body. Keep those shoulders turning until you’re ready to straighten out.
What a Speed Check Actually Is (And Isn’t)
A speed check isn’t a trick. It’s a control tool, and understanding how to speed check on a longboard is key. Think of it as a controlled, momentary loss of traction on your back wheels—and sometimes all four—that you initiate and stop at will. The goal is to reduce your momentum by a specific amount, not to slide for show or come to a full stop.
The sound is a short, sharp scritch or a longer, drawn-out hiss, depending on your wheels and the pressure you apply. Visually, you’ll see a fine, light dust trail from your wheels, not the thick, dark skid marks of a locked-up slide. That dust is your urethane wheels literally grinding off a microscopic layer. If you’re not leaving any dust, you’re probably not sliding.
This is distinct from a glove-down predrift or a Coleman slide, where you put a hand down for stability and commit to a much deeper angle. A speed check is a stand-up maneuver; your hands stay free, ready to counter-rotate your upper body.
The Heelside Speed Check: A 5-Step Breakdown
Most riders learn heelside first because your body is naturally oriented facing the hill, giving you better vision and a more intuitive weight distribution. The sequence is a chain reaction: one step triggers the next.
Step 1: The Pre-Carve (The Setup)
Carve hard to your toeside first. If you’re riding regular (left foot forward), this means turning to your right. This isn’t a gentle lean; it’s a committed carve that angles your board across the hill. This motion loads the trucks, engages the edges of your wheels, and positions your body for the reverse action.
Common mistake: Skipping the pre-carve. Riders try to kick the board straight out from a neutral stance. Without that opposing energy, the board has nowhere to go but sideways uncontrollably, often resulting in a high-side fall.
Step 2: Weight Shift and Crouch
As you reach the apex of your toeside carve, shift your weight slightly to your back foot and drop into a low crouch. Your front foot should be roughly parallel to the board, while your back foot angles out slightly, heel hanging off the edge. This lowers your center of gravity and prepares your legs to push.
Step 3: The Counter-Rotation Explosion
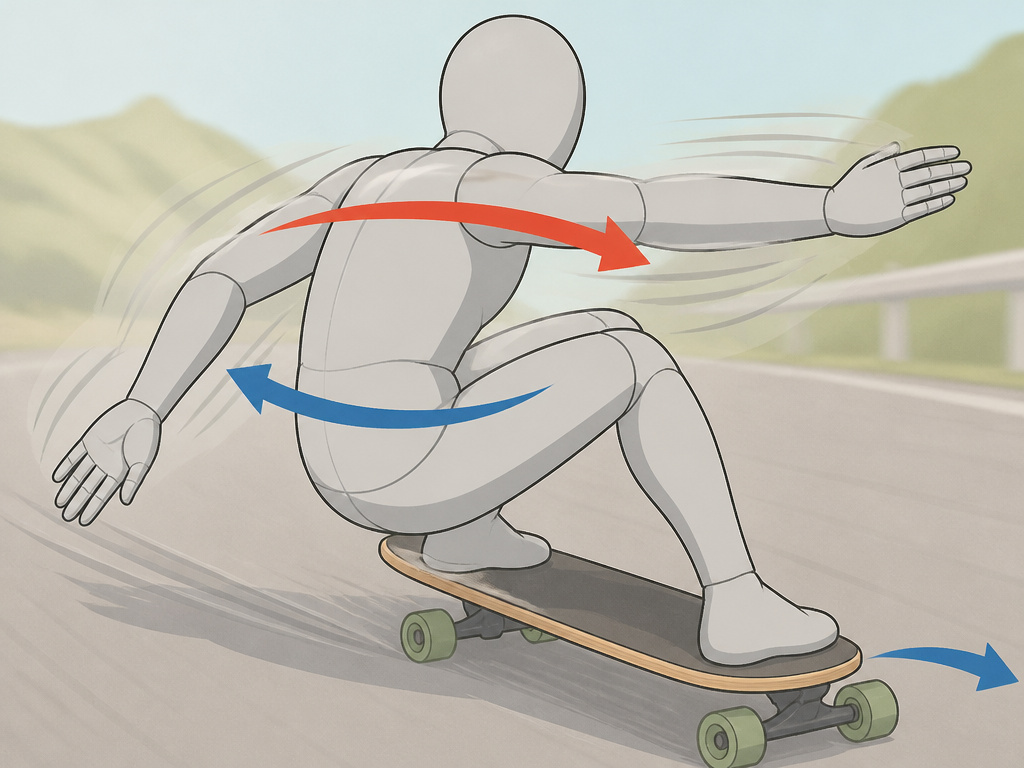
Here’s where the slide happens. From your crouch, violently rotate your shoulders and arms back to your heelside (left, for a regular rider). Throw your lead arm across your body and your back arm behind you. This upper-body torque is what starts the board rotating out from under you. Your legs follow this motion, pushing the board out to the side.
Your hands are the ignition. If your shoulders don’t spin, your board won’t either.
Step 4: Managing the Slide Angle
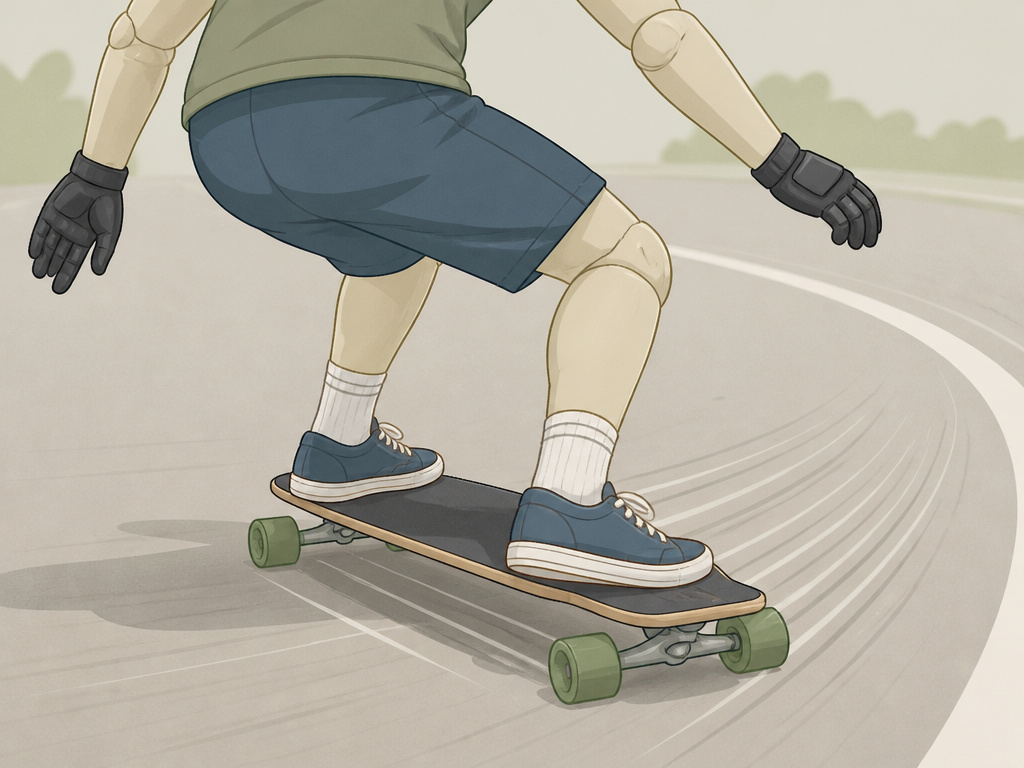
As the board breaks traction, focus on your front foot. Use it to steer and control the angle. A shallow check might only be 10 degrees off your line. A deeper one might go to 45. Your upper body should continue rotating slightly to keep the slide going. The moment you stop rotating and bring your shoulders square to the board is the moment the wheels grip again.
Step 5: The Hook-Up and Recovery
To end the slide and straighten out, reverse the rotation. Smoothly bring your shoulders back in line with the board. As you do, shift your weight back to a more centered stance and let the trucks pull the wheels straight. You should feel the board “hook up” and regain traction, now traveling several miles per hour slower.
| Step | Key Action | What Happens If You Skip It |
|---|---|---|
| 1. Pre-Carve | Hard carve opposite direction. | Board slides unpredictably; high risk of falling. |
| 2. Crouch | Drop weight, angle back foot. | No power for push-out; slide initiation fails. |
| 3. Counter-Rotation | Explosive shoulder/arm turn. | Board doesn’t break traction; you just carve harder. |
| 4. Manage Angle | Steer with front foot, keep rotating. | Slide stops abruptly or washes out into a full 180. |
| 5. Hook-Up | Bring shoulders square, center weight. | Board grips unevenly, causing a wobble or toss. |
Why Your Wheels Matter (A Lot)
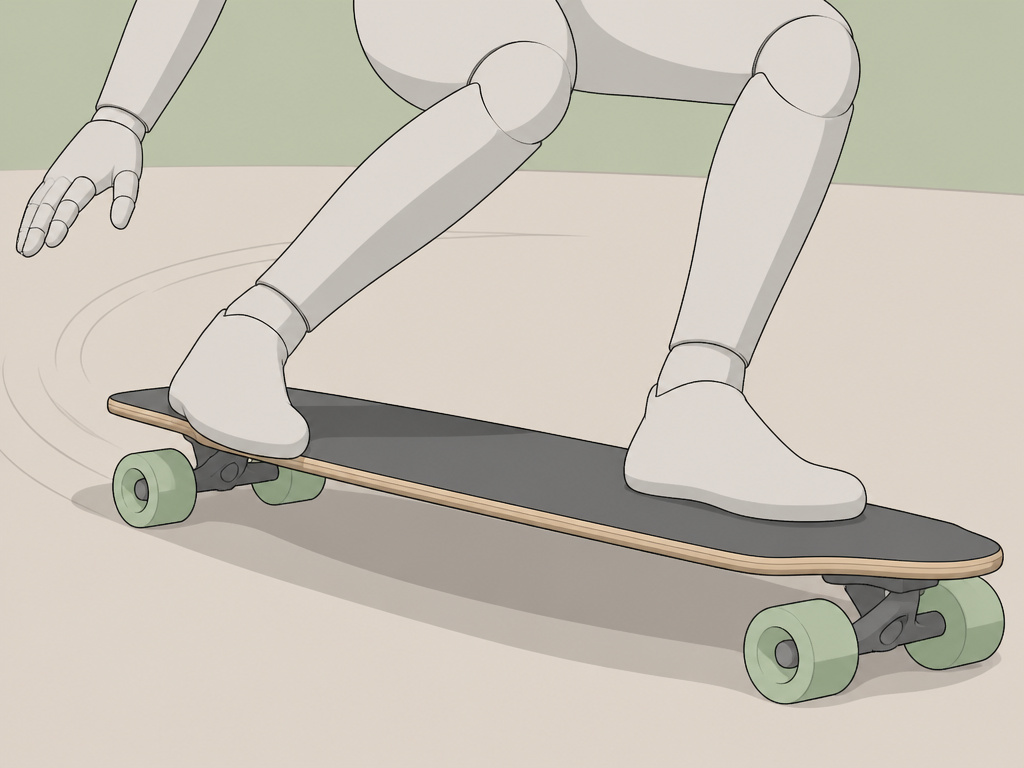
You can force a slide on any wheel, but some are designed to make it easier. Harder, smaller-contact-patch wheels slide more predictably. Softer, grippier wheels designed for cruising will fight you.
Forum users specifically called out Zombie Hawgs and Landyachts wheels as good starters for learning. They offer a balance of predictability and grip. Once you’re comfortable, you might seek out dedicated freeride wheels like Remember Peewees or Cult Classics for smoother, longer slides.
The point is, your gear either helps or hinders the physics. Trying to learn speed checks on a board with soft, 80mm commuter wheels is like learning to drift on all-season tires. It’s possible, but you’re fighting the equipment every step of the way.
Gauging Your Speed: How Fast Is Fast Enough?
You need enough momentum to overcome the friction between your wheels and the pavement. You need enough momentum to overcome the friction between your wheels and the pavement. Below that, you’ll likely just carve harder without breaking traction.
How do you know you’ve hit 15 mph without a speedometer? Use landmarks. A brisk running pace is roughly 8-10 mph. If you’re passing a jogger easily, you’re probably in the zone, which is the right speed for learning how to speed check on a longboard. Another method is the known-distance test: time yourself over a measured distance to estimate your average speed.
For a technical, DIY approach, Dr. Jonathan P. Hare’s published design for an infrared skateboard speedometer shows what’s possible. His prototype, using a 555 timer chip and a single wheel reflector, could measure speeds up to a maximum detectable speed of 67 revolutions/second, which calculates to ~36 mph for a 76mm diameter wheel. That kind of project is for data nerds, but it highlights a principle: knowing your exact speed removes guesswork. A commercial bicycle speedometer with a wheel sensor is a simpler, off-the-shelf solution for the number-obsessed.
Common Beginner Mistakes (And How to Fix Them)
Watching new riders attempt checks reveals the same errors repeatedly. Here’s the shortlist.
Leaning Back Too Far: It feels safe to put all your weight on your back foot, but it makes the board unstable. Your weight should be slightly rear-biased, but your torso must stay over the board. If your chest is behind your back truck, you’ll lose control. The Fix: Practice static squats on your board, focusing on keeping your chest between your trucks.
Kicking, Not Rotating: You swing your back leg out like a mule kick. This sends the board into a wild, unmanageable spin. The Fix: Drill the upper-body motion stationary. Stand on your board on carpet and practice the violent shoulder counter-rotation without moving your feet. Feel how your core twists.
Freezing Mid-Slide: You initiate the slide, then panic and lock up. Your shoulders stop rotating, the board grips instantly, and you get thrown in the direction of travel. The Fix: Commit to the rotation. Promise yourself you’ll complete the upper-body turn, even if the slide feels too long. It’s easier to recover from a slightly longer slide than from being ejected.
Not Wearing Slide Gloves: This isn’t a stylistic choice. The first time you touch down at 15 mph without gloves, you’ll understand. Asphalt acts like coarse sandpaper on skin. The Fix: Get a cheap pair of slide gloves with plastic puck palms. They are essential safety gear for learning any slide.
Can You Do a Toeside Speed Check?
Absolutely. The mechanics are the mirror image of a heelside check, but it’s universally considered more challenging. Your back is to the hill, which limits vision and feels less natural. The weight distribution and rotation are also trickier to master.
For a toeside check (regular stance), you’d pre-carve heelside first (to the left), then counter-rotate your shoulders to the right (toeside) to initiate the slide. Because you’re rotating your upper body away from the hill, it requires more commitment and core strength to prevent yourself from opening up and bailing out backwards.
Most instructors recommend solidifying your heelside check to at least a 90% success rate before seriously attempting toeside. The fundamentals of weight shift and rotation transfer, but the stakes are higher when you can’t see where you’re sliding.
Building a Safe Progression Path
Jumping straight to speed checks on a steep hill is a shortcut to injury. Follow a logical ramp-up.
- Master Footbraking: Reliably control moderate speed by dragging your foot. This teaches you balance on one foot, a prerequisite for sliding.
- Practice Pre-Carves: On a gentle slope, practice carving hard from heelside to toeside and back. Get comfortable with the board angling sharply across the hill.
- Learn a Shutdown Slide: Many riders find it easier to first learn a full 180 heelside stand-up slide (a “pendy”) in a safe, flat lot. Committing to a full rotation teaches you the break-traction feeling without the pressure of controlling a partial slide.
- Add Speed Gradually: Once you can consistently initiate a slide, find a slightly steeper hill. The extra speed will make the board slide more willingly, which ironically can make it easier to control the angle.
- Start Checking: On that steeper hill, focus on the pre-carve and immediate counter-rotation, but consciously pull the board back straight after a short slide. Use the techniques for downhill to find appropriate practice terrain.
This progression builds the muscle memory and confidence layer by layer. Skipping steps is how you develop bad habits—or worse, a fear of speed.
The Role of Other Longboard Skills
Speed checking doesn’t exist in a vacuum. It’s one tool in a larger kit for riding downhill safely. Understanding how to avoid speed wobbles is critical, as a wobble will ruin any slide attempt. Knowing multiple longboard stopping methods gives you options if a check isn’t enough. Even knowing how to gain speed efficiently means you can reach your practice speed faster and with less effort.
These skills interconnect. Good downhill form prevents wobbles, which gives you the stability to initiate a clean check. It’s all part of the same system.
How to choose wheels and bearings for speed
Your gear directly influences your potential top speed and how you manage it. For higher speeds, focus on components that reduce friction. Hard, large-diameter wheels maintain momentum better over smooth surfaces. Bearings should be kept clean and properly lubricated to spin freely, as any resistance here directly saps your speed. For electric boards, some manufacturers provide specific calibration values for different wheel types to ensure an accurate speed reading on the remote. According to manufacturers like Evo-Spirit, this adjustment is for display accuracy only, not for legal evidence, whereas organizations like OIML define rigorous calibration standards for official speed enforcement. According to ONSRA, cold temperatures reduce battery performance, leading to lower range, top speed, and acceleration.
Frequently Asked Questions
What’s the difference between a speed check and a shutdown slide?
Speed check is a partial, controlled slide at a shallow angle (10-45 degrees) used to reduce speed while continuing forward. A shutdown slide, like a 180 stand-up or glove-down Coleman, is intended to kill all or most of your momentum, often bringing you to a stop or changing your direction.
How do I know if I’m going fast enough to slide?
For most riders and wheel setups, you need to be going at least 10-15 mph. A good indicator is if you are comfortably passing a jogger on a mild slope. If your wheels simply grip and carve when you try the motion, you likely need more speed or a slide-friendlier wheel.
Do I need special wheels to learn speed checks?
You don’t need them, but they help immensely. Harder, smaller freeride wheels (like Zombie Hawgs, Remember Peewees, or Cult Classics) are designed to break traction predictably. Learning on soft, grippy cruiser wheels is significantly harder and can be frustrating.
Why does my board keep hooking up and throwing me?
This is the most common frustration. It means you are initiating the slide correctly but then stopping your upper-body rotation mid-slide. The moment your shoulders stop turning and square up to the board, the wheels regain traction instantly. The fix is to consciously continue the shoulder rotation slightly throughout the entire slide, only bringing them square when you’re ready to straighten out.
Is it safer to learn gloves-up or gloves-down?
For a pure stand-up speed check, your hands don’t touch the ground, so gloves are just for palm protection during falls. However, many riders find it easier to learn the break-traction feeling first with a glove-down slide (like a Coleman). The glove gives a point of stability, allowing you to focus on your feet and board angle. There’s no single right answer; it depends on your comfort and learning style.
Before You Go
The single biggest barrier isn’t skill—it’s commitment. The physics of a slide require you to forcefully break the grip that’s keeping you safe, which feels deeply counterintuitive. Your first real speed check will feel like a controlled crash. That’s normal.
Find a gentle, consistent slope with a clean runoff. Wear your helmet, slide gloves, and pads. Practice the pre-carve and violent shoulder rotation at a standstill until it’s automatic. Then, add just enough speed to make the wheels complain. That faint scritch sound is your goal. Listen for it.
Everything above assumes you’re on a functional board with tight hardware and broken-in bushings. If you’re fighting speed wobbles before you even think about sliding, solve that first. A wobbling board cannot be slid safely. Get your fundamentals solid, then add the advanced tool. That’s the real progression.
