How to Teach a Kid to Ride a Hoverboard: The 5-Step Drill
This post contains affiliate links. As an Amazon Associate, we earn from qualifying purchases.
To teach a kid to ride a hoverboard, you need three things verified before the first session: a UL 2272-certified board, full protective gear (skateboard helmet, wrist guards, knee and elbow pads), and a flat, open practice area away from traffic. The process is about building balance and trust in stages, not speed, with the first goal being a confident mount and dismount.
That UL 2272 certification is a federal safety standard for the entire hoverboard unit, created after the U.S. Consumer Product Safety Commission (CPSC) logged over 300 fire and overheating incidents. A board missing that mark, especially one bought before January 2016 or from a mall kiosk, carries a documented fire risk. The teaching part is straightforward once you’ve cleared that safety gate, and knowing how to teach a kid to ride a hoverboard begins with choosing a certified board.
What follows is the sequence I use with new skaters, adapted for hoverboards. We’ll walk through the essential safety prep, the exact words and drills that work with kids, how to structure short practice sessions to avoid frustration, and what to do when the inevitable wobbles and falls happen.
Key Takeaways
- Verify UL 2272 certification before buying or using any hoverboard. The CPSC states boards bought before January 29, 2016, are non-compliant and pose a fire hazard.
- Supervise all charging. The CPSC and Children’s Hospital of Pittsburgh explicitly warn against charging overnight or unattended due to fire risk.
- Full protective gear is mandatory: a skateboard helmet, wrist guards, and knee and elbow pads. A 2019 multi-center study found all finger fractures at the primary institution were hoverboard wheel injuries requiring surgery.
- Start in beginner mode on a flat, smooth surface like a driveway or empty tennis court. Most boards top out at 12 mph, but beginner mode limits that to a crawl.
- Break learning into 5–10 minute sessions focused on one skill (mounting, dismounting, tiny forward shifts). Kids master balance through short, successful reps, not marathon practices.
The Gear Is Non-Negotiable
You don’t teach a kid to skate without a helmet. A hoverboard is no different, but the stakes include fire and finger injuries that end in the operating room. The gear list comes straight from the authorities, not from a marketing department.
The CPSC chairman recommends the same safety gear you’d wear for skateboarding: a skateboard helmet, knee and elbow pads, and wrist guards. The wrist guards matter most for the first month. When a child falls, their instinct is to put their hands out. A 2019 orthopedic study published by the National Institutes of Health found all finger fractures at their primary institution were hoverboard wheel injuries requiring surgery. Wrist guards distribute that impact.
The board itself needs a safety check. The UL 2272 mark should be on the product and packaging. This certification covers the entire unit’s electrical system. The CPSC safety alert states: if you purchased your hoverboard before January 29, 2016, then your hoverboard is not UL 2272 compliant. They also warn against buying from kiosks, secondhand sellers, or online retailers without proof of compliance. A price significantly lower than others is a red flag.
Before you start: A hoverboard’s lithium-ion battery can overheat. The CPSC is aware of more than 300 self-balancing scooter/hoverboard incidents related to fires or overheating, including a 2017 house fire that killed a 2-year-old girl and her 10-year-old sister. Only charge when you are present to watch it, keep it away from anything flammable, and let the device cool for an hour after riding before plugging it in.
Finding the Right Practice Zone
The perfect spot is a private, predictable slab of pavement.
You need a flat, smooth surface like a driveway, basketball court, or empty tennis court. Grass seems softer, but it hides bumps and drains a hoverboard’s battery faster. The surface must be clean—pebbles, sand, or wet leaves are instant slip hazards. This isn’t just about comfort; a study in the Journal of Pediatrics noted uneven terrain is a common factor in loss-of-control injuries.
Check your local laws. Some municipalities ban hoverboards on sidewalks and streets. The practice zone must also be far from car traffic, hills, or any body of water. The goal is to remove variables so the child can focus on one thing central to how to teach a kid to ride a hoverboard: balancing on a stable, unmoving board.
The 5-Step Mounting and Dismounting Drill
Most guides tell kids to “just step on.” That’s how they fall backward and scare themselves off the board for good. The mount and dismount are the first skills to drill, and they happen with the board off.
Here is the physical sequence, broken into coachable chunks.
- Stance Check: Have them stand beside the board, feet shoulder-width apart, knees slightly bent. This is their “ready stance” they return to after every attempt.
- Hand Placement: They place their dominant hand on your shoulder or a sturdy railing for support. Their other hand stays free for balance.
- Foot Placement: Looking straight ahead, they place their dominant foot firmly on the front half of its footpad. The foot should be centered, not angled. Hold the board still with your foot.
- Weight Shift: This is the commit moment. They slowly shift their weight onto that foot, bringing their other foot up and onto its pad. Their feet should be parallel, about hip-width apart.
- The Dismount: To get off, they reverse the process: look ahead, shift weight back to their dominant foot, and step the other foot cleanly back to the ground, followed by the first foot. Practice this five times before you ever power the board on.
The common mistake is looking down at the feet. Looking down pulls their center of gravity forward and guarantees a stumble. Drill “eyes up” from the start.
A hoverboard balances when your weight is centered over the wheels. Looking down at your feet shifts your head forward, which the board reads as a command to move. You’ll wobble, overcorrect, and likely step off backward.
Building the First Movements
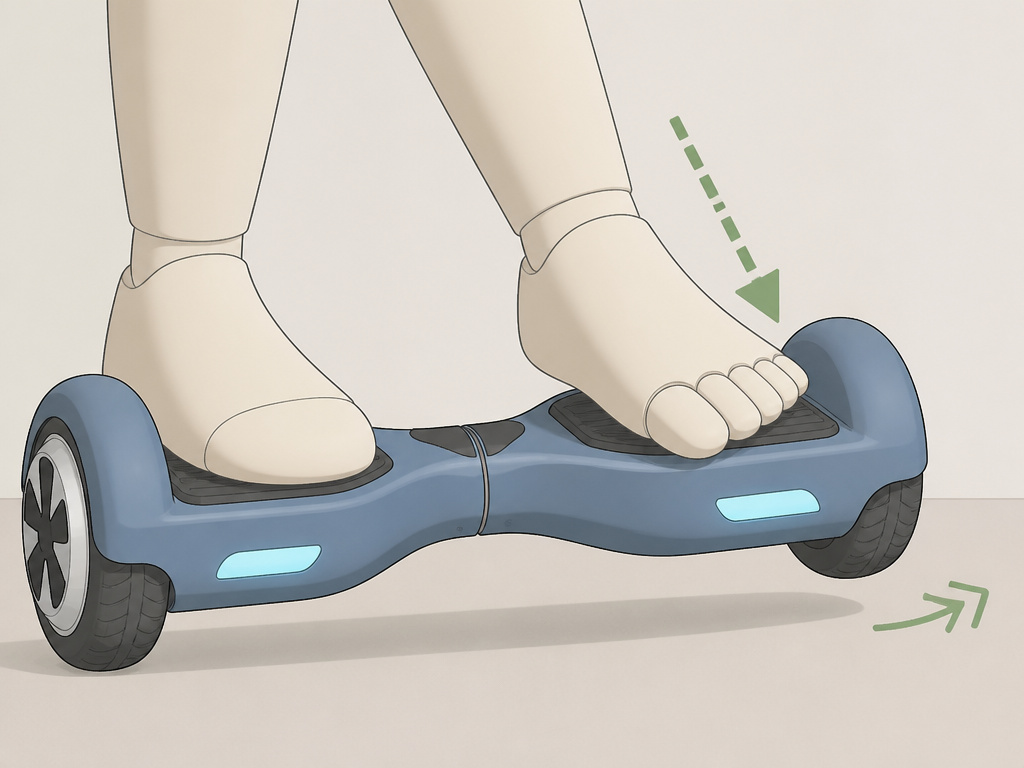
With a solid mount and dismount, you can power on the board. Enable beginner mode if the model has it—this limits speed and softens the motor response. Now the goal is micro-movements.
Have the child mount the stationary board, find their balance, and hold your shoulders. The first movement isn’t forward; it’s a slight forward press with the toes. This triggers a tiny, slow roll forward. Then, a slight backward press with the heels to stop. Practice this rocker motion: toes to go, heels to stop. The board moves inches, not feet.
The next layer is turning. It’s not a lean; it’s a gentle pressure differential. Pressing the toes of the right foot while keeping the left foot neutral will initiate a slow left turn. It’s subtle. If they try to lean their torso, they’ll over-rotate and step off.
This phase is about trust. The board’s self-balancing mechanism works, but a child’s instinct is to fight it. Keep sessions short. End on a success, even if that success is just mounting and doing two rocker motions without help. Small reps build confidence faster than one long, frustrating session.
| Skill | The Drill | Common Mistake & Fix |
|---|---|---|
| Mounting | 5x with board off, using support | Looking down at feet. Fix: Have them name an object across the yard to force eyes up. |
| Rocker Motion | Toes forward → heels back, board moves < 1 ft | Stiff legs. Fix: Encourage a soft knee bend; it acts as suspension. |
| Gentle Turn | Right toes press for left turn, then reverse | Leaning shoulders. Fix: Tell them to keep their belly button pointed forward; the turn comes from the ankles. |
| Controlled Stop | Heels down evenly, then step-off drill | Panic jump-off. Fix: Drill the sequenced dismount until it’s automatic before adding speed. |
Troubleshooting Wobbles and Falls
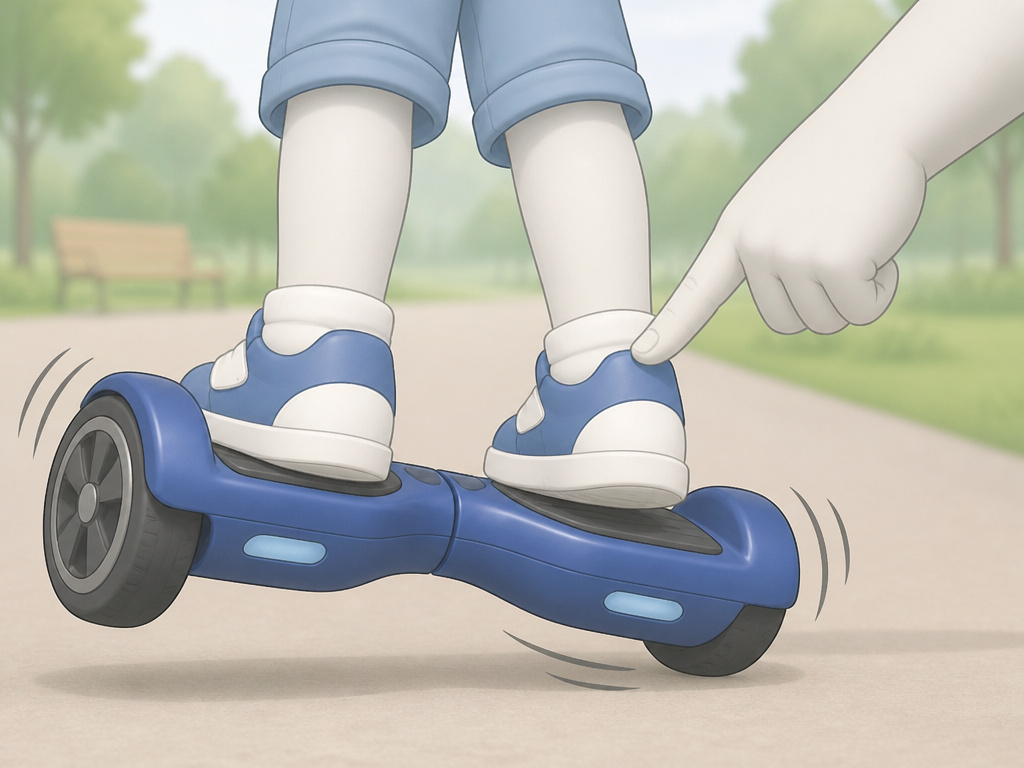
They will wobble. They will probably fall. Your reaction decides whether they try again.
A wobble means their weight is shifting side-to-side faster than the board’s gyros can correct. The fix is to stop. Have them press their heels down evenly to halt the board, then step off using the drilled dismount. Reset. The mistake is trying to ride out a wobble, which usually ends with a fall.
When they fall, your first question isn’t “are you okay?” It’s “what did you feel?” Was your weight on your heels? Did you look down? This frames the fall as data, not failure. Check for scrapes, but avoid dramatic fussing—it teaches them a small fall is a big deal.
For very young kids (6-8), their attention span is shorter and their risk awareness is low. Their practice sessions should be 3-5 minutes, strictly supervised, with immediate celebration of tiny wins. An older child (9+) can handle more verbal instruction and a 10-minute session focused on one drill.
When Are They Ready to Ride?
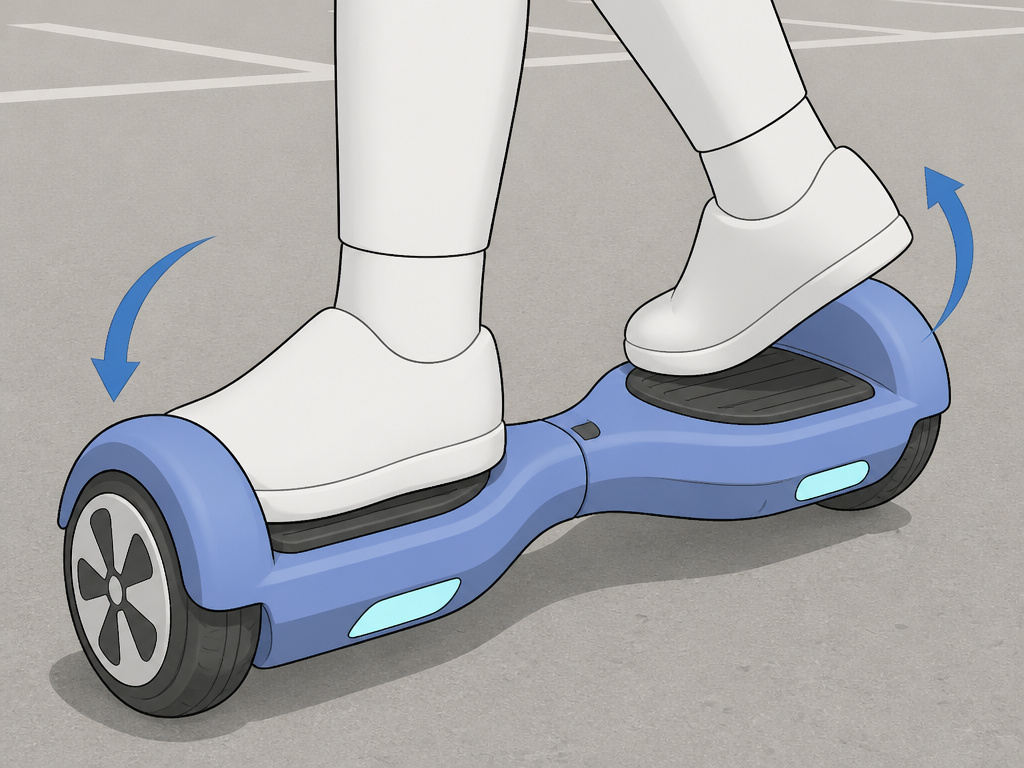
They’re ready to ride when they can consistently mount, dismount, perform the rocker motion, and execute a gentle turn without holding onto you. That’s it. This might take several sessions over a week.
Resist the urge to graduate them to open spaces or higher speed modes quickly. Mastery at 1 mph is better than panic at 3 mph. The CPSC notes these devices can reach 12 miles per hour. Let them build comfort with the basics until those movements are muscle memory. Only then should you explore a larger, open area, still under direct supervision.
Their first real ride should be a short, straight line in a parking lot with you walking alongside. The goal is sustained, controlled forward motion and a planned stop. Turning and more advanced maneuvers come weeks later, not days.
Where this goes sideways: Letting a child charge the hoverboard alone. The CPSC and Children’s Hospital of Pittsburgh both state unequivocally: do not charge overnight or when no one is present. A fire can start, and the agency is aware of incidents related to fires or overheating, including fatal injuries.
Pre-ride checklist (e.g., battery, beginner mode)
Before your child steps on, run through a safety checklist. First, confirm the hoverboard is UL 2272 certified for the entire unit, not just parts; ask the seller for documentation. Check for any recalls on the CPSC website. Ensure the board is charged in an open, dry area away from anything flammable, and never leave it charging unattended. Let the device cool down for an hour after riding before plugging it in. Visually inspect the wheels for any debris and set the device to its slowest beginner mode if available. Finally, have your child put on a skateboard helmet, knee and elbow pads, and wrist guards before you begin.
Frequently Asked Questions
What is the best age for a child to ride a hoverboard?
There’s no official best age, but motor skills and risk awareness improve dramatically around age 8. The key factor is maturity, not a birthday. A child needs the focus to follow safety rules, wear all protective gear, and understand cause-and-effect. Regardless of age, constant, active supervision is mandatory.
How hard is it to learn how to ride a hoverboard?
The mechanics are simple—pressure on the footpads controls movement. The challenge is overcoming the instinct to fight the self-balancing system. For most kids, a few short practice sessions are enough to achieve basic control. The real difficulty is patience; rushing the steps leads to falls and lost confidence.
Are hoverboards meant to be inside or outside?
Outside, on smooth, dry pavement. Indoor use on carpets or uneven floors increases the risk of catching a wheel and falling. Also, charging should always occur in an open area away from combustibles, as per the CPSC safety alert. This makes a garage or driveway a safer charging location than a bedroom.
Can a hoverboard seat attachment help with learning?
Yes, a go-kart-style seat attachment can be a useful intermediate step. It lowers the center of gravity and allows the child to focus on steering with their feet without worrying about balance. However, it’s a training tool, not a permanent mode. They should still practice standard standing operation and wear all the same protective gear.
Before You Go
The timeline for how to teach a kid to ride a hoverboard is measured in successful repetitions. If your child hasn’t clicked after two sessions, stop trying to push through. Take a two-day break, then come back and re-drill the mount and the rocker motion with the board off. Often, that mental reset is all they need.
One rule most guides skip: if your hoverboard isn’t UL 2272 certified, stop now. Donate it, recycle it, but don’t use it. The half-million recalled boards and the CPSC’s incident log are the reason the standard exists. Everything in this guide assumes you’ve cleared that first, essential hurdle.
Finally, your job is to be a spotter. Provide the safe environment, the right gear, and the clear, calm instructions. Then let the kid’s own balance and curiosity do the work. They’ll tell you when they’re ready for the next step. Listen to that.
