As an Amazon Associate we earn from qualifying purchases.
Building an electric scooter offers a fun and eco-friendly alternative to traditional transportation. With a little know-how and the right components, you can create your very own electric scooter that suits your needs and preferences.
In this guide, we will provide you with step-by-step instructions and tips on how to build an electric scooter. From choosing the right scooter frame to installing the electric motor, battery, and controls, we will walk you through the process of creating a functional and powerful electric scooter.
Whether you are a DIY enthusiast or simply want to save money on purchasing a ready-made electric scooter, this guide will equip you with the knowledge and resources necessary to build your own electric scooter.
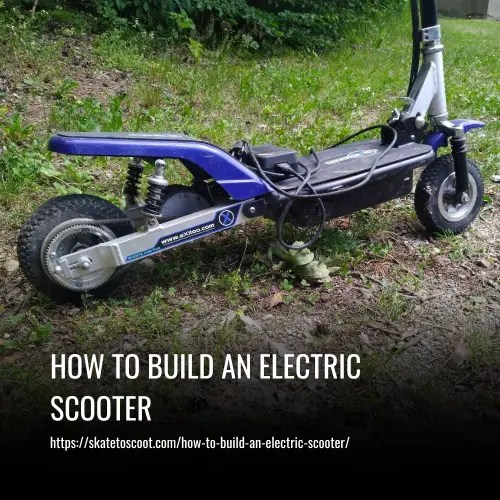
How To Build An Electric Scooter: A Step-by-Step Guide
Building your own electric scooter can be a rewarding project that allows you to customize and personalize your ride. Follow these steps to build your very own electric scooter:
1. Choosing the Right Components
The first step in building an electric scooter is selecting the right components. You will need a motor, battery, controller, and throttle. Consider factors such as the weight of the scooter, the distance you want to travel, and the speed you want to achieve when choosing these components.
2. Designing the Frame
Once you have chosen your components, it’s time to design the frame of your electric scooter. You can either design the frame from scratch or use an existing frame as a base. Ensure that the frame is sturdy enough to hold the weight of the battery and motor and has enough space to mount the components.
3. Mounting the Components
After designing the frame, proceed to mount the components. Start by mounting the motor, followed by the controller and battery. Ensure that the components are securely mounted and that the wiring is done correctly.
4. Adding the Wheels
Once the components are mounted, it’s time to add the wheels. Choose wheels that are compatible with the size and weight of your electric scooter. Make sure the wheels are securely mounted and properly aligned.
5. Installing the Brakes
Brakes are an essential safety feature on any scooter. Install the brakes correctly and test them before riding the scooter to ensure they are working properly.
6. Adding the Throttle
The final step is to add the throttle, which allows you to control the speed of your electric scooter. Mount the throttle securely and connect it to the controller correctly.
7. Testing the Scooter
After all the components are installed, thoroughly test the scooter to ensure everything is working properly and that the scooter is safe to ride. Test the speed, brakes, and maneuverability of the scooter. If you are unsure about testing the scooter, seek assistance from someone with more experience.
By following these steps, you can build your own custom electric scooter and enjoy a fun and eco-friendly mode of transportation.
Basic Components Of An Electric Scooter
Electric scooters are comprised of several essential parts that work together to create a reliable and efficient mode of transportation. Understanding these components is crucial when building your own electric scooter or maintaining an existing one. Here are the basic components you need to know about:
1. Batteries
Electric scooter battery packs consist of individual cells that store the energy needed to power the scooter’s motor and accessories. Most electric scooters use lithium-ion batteries, while cheaper models may use lead-acid batteries. Battery capacity, measured in watt-hours (Wh), affects the scooter’s range.
2. Brakes
A quality braking system is crucial for safety and control while riding. Electric scooter brakes can be mechanical or electronic. Mechanical brakes include discs, drums, and foot brakes, while electronic systems rely on the motor for braking. It is recommended to have at least two braking systems for added safety.
3. Controller
The speed controller regulates the flow of current from the battery to the motor, based on accelerator input. Controllers come in different voltage and current ratings, depending on the scooter’s motor power.
4. Deck
The scooter’s deck is the platform where riders stand. It often has a textured finish for better grip and can sometimes house the battery pack.
5. Handlebars
The handlebars provide the main connection between the rider and the scooter. They house the controls, including the accelerator, brakes, and power buttons. Folding handlebars are common in portable electric scooters.
6. Lights
Good lighting is important for visibility and safety. Electric scooters usually have LED head and tail lights, with some models featuring additional deck lighting.
7. Motor
Electric scooters use brushless direct current (BLDC) motors that are built into the wheels. Scooters can have one or two motors, with power consumption rated in watts.
8. Stem
The stem connects the handlebars to the front wheels and often includes a folding mechanism for easier storage and transportation. Stability is an important consideration for scooter stems.
9. Suspension
Some electric scooters feature suspension systems to improve ride quality and dampen bumps on the road. Suspension types include spring, hydraulic, and rubber suspension, with pneumatic tires providing additional damping effects.
10. Tires
Tires play a crucial role in traction, ride quality, and braking performance. Pneumatic tires are recommended for better ride quality and performance in various road conditions.
By understanding these basic components, you can build or maintain an electric scooter that meets your specific needs and preferences. Remember to prioritize safety by wearing appropriate protective gear and following local laws and regulations.
What Tools Are Needed To Build An Electric Scooter
Building an electric scooter requires a variety of tools to ensure a successful and efficient build. Here are the essential tools you will need:
1. Power drill
A power drill is essential for drilling holes and mounting various components on the scooter frame. It allows for precise and secure installations.
2. Screwdrivers
Different types and sizes of screwdrivers are necessary for tightening screws and fastening components together. Having a complete set of screwdrivers will ensure you have the right tool for the job.
3. Wire strippers
Wire strippers are used for removing insulation from wires, allowing for proper connections. They ensure a clean and efficient electrical setup for the scooter.
4. Pliers
Pliers are essential for gripping and manipulating wires and other components during the assembly process. They provide the necessary leverage and control for a secure and functional build.
5. Soldering iron
A soldering iron is used for soldering wires and components together. It ensures a strong and reliable electrical connection, preventing any loose or weak connections.
These tools will help you effectively build your electric scooter and ensure a successful and safe ride. Make sure to have them on hand before starting the assembly process.
Advantages Of Building Your Own Electric Scooter
Building your own electric scooter offers various advantages that make it a worthwhile endeavor. Here are some key benefits of taking on the project:
1. Customizability
One of the main advantages of building your own electric scooter is the ability to customize it to your specific needs and preferences. You can choose the components that best suit your requirements, whether it’s a more powerful motor for faster speeds or a larger battery for longer range. The freedom to personalize your scooter ensures that it fits your unique riding style and preferences.
2. Cost savings
Building your own electric scooter can often be more cost-effective compared to purchasing a pre-built model. By sourcing and assembling the individual components yourself, you can avoid the markup that comes with buying a ready-made scooter. Additionally, you have the option to select components based on their price point, allowing you to build a scooter within your budget.
3. Learning experience
Building your own electric scooter provides an excellent opportunity to learn about electrical components and how they work together. It allows you to gain hands-on experience with wiring, circuitry, and assembly. By understanding the inner workings of an electric scooter, you can troubleshoot issues, perform repairs, and even upgrade or modify your scooter in the future.
Tips to Build An Electric Scooter
Building your own electric scooter can be an exciting and rewarding project. However, it’s crucial to prioritize safety throughout the building process. Here are some important tips to keep in mind to ensure a safe and successful build:
1. Safety First
When working with power tools or handling electrical components, always wear appropriate protective gear, such as goggles, gloves, and ear protection. It is also essential to have a fire extinguisher nearby in case of emergencies.
2. Attention to Detail
Pay close attention to every detail when assembling your electric scooter. Make sure that all components are securely mounted and properly wired. Double-check all connections to avoid loose or exposed wires that could pose a safety risk.
3. Thorough Testing
Before taking your newly built electric scooter for a ride, thoroughly test all the components. Ensure that the batteries are properly charged, the motor is functioning correctly, and the brakes are responsive. Testing the scooter in a controlled environment will help you identify any potential issues and ensure that it is safe to ride.
FAQs
Building your own electric scooter can cost anywhere from a few hundred dollars to a few thousand, depending on the quality of components you choose. Factors like battery capacity, motor power, and additional features will influence the overall cost of your project.
Building an electric scooter can be challenging for beginners, but it’s not impossible. It requires a basic understanding of mechanics and electrical systems. It’s recommended to have some experience or seek guidance from knowledgeable individuals or online resources to ensure a smooth build.
While having technical skills can be advantageous, it is not an absolute requirement to build your own electric scooter. However, a basic understanding of electrical systems and proficiency in handling power tools will definitely make the process easier. With careful research, patience, and attention to detail, even individuals with little experience can successfully build their own electric scooters.
Conclusion
In conclusion, building your own electric scooter can be a rewarding and cost-effective project. While it may require some technical skills and knowledge, with the availability of DIY kits and online resources, even beginners can successfully assemble their own electric scooters.
By carefully selecting quality components, such as a powerful motor, durable frame, and reliable battery, you can create a scooter that meets your needs and preferences. Don’t forget to budget for essential accessories, such as safety equipment and tools.
Building an electric scooter allows for customization and personalization, giving you the opportunity to create a scooter that reflects your style and meets your specific requirements. Plus, with the growing popularity of electric scooters as a sustainable and convenient transportation option, building your own can save you money in the long run.
Amazon and the Amazon logo are trademarks of Amazon.com, Inc, or its affiliates.