As an Amazon Associate we earn from qualifying purchases.
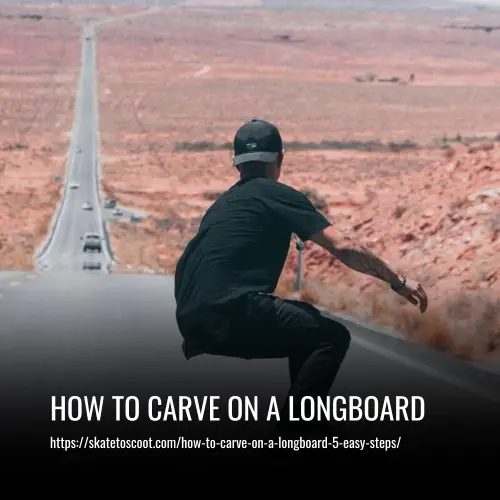
To get started with carving on a longboard, you need to find the right gear and have some fundamental knowledge about the technique of longboarding.
To Carve On A Longboard, Follow These Steps:
- Make Sure Your Longboard Is Set
- Learn The Difference Between Toeside & Heelside
- Take An Active Stance
- Start With Turning
- Start Carving!

How to Carve on a Longboard: 5 Steps for Beginners
Carving on a longboard is an essential skill that every longboarder needs to master to get the most out of their riding experience. Here we will take you through five steps that will help lay down the foundations of carving and get you started as soon as today!
It’s best if you already have a basic understanding of how to ride a board going straight before trying to carve. So, if you are still getting used to the basics, why not check out our other guides first?
1. Make Sure Your Longboard Is Set
Carving on a longboard is the ideal setup for an enjoyable carving experience. To ensure your longboard is in working condition to get the most out of it, make sure to check that the wheels are secured properly, spinning freely and that the trucks are set to a medium tightness. In addition, be sure to inspect the deck of the board for any cracks or breaks.
If everything checks out with your longboard setup and gear, you’re good to go! You’ll be able to enjoy hours upon hours of smooth carving on your trusty longboard.
2. Learn The Difference Between Toeside & Heelside
Understanding the difference between toeside and heelside can make all the difference to your snowboarding performance. Toeside refers to the direction where your toes are located on your board, while heelside means that your heels are at that position.
Generally speaking, regular riders have their toeside on their right foot and heelside on their left foot (often referred to as ‘regular’), while goofy riders have the opposite arrangement (goofy). Knowing which side is which is essential for a successful run down the mountain!
3. Take An Active Stance
Riding your board requires an active stance if you want to properly carve. That means bending both of your knees while standing on your board. This is important because it gives you flexibility and the ability to adjust your position and shift your weight properly when you start carving.
Having a well-balanced, active stance makes it much easier to learn how to carve and get the most out of longboarding. You’ll be able to feel the board and ride with more precision if you take an active stance while riding.
4. Start With Turning
Turning is an essential part of longboarding and something you need to have a firm grasp on before you start carving. To do this, you’ll need to stay in an active stance while adjusting your board by leaning and shifting your weight in the direction you want to turn.
Start off by just practicing turning either right or left and concentrate on that direction. Many times novice riders have a tendency to find one side harder than the other but this is totally normal. Make sure that you’re comfortable turning both ways before getting started with incorporating turns into your tricks.
5. Start Carving!
Are you ready to get carving on your longboard? If so, start off slowly on a flat surface and just turn your board left and right in a smooth, flowing motion. To initiate a turn, simply apply pressure to either your heelside or toeside, switching back and forth for each turn.
In order to be an expert carver, it is important to become comfortable turning in both directions. Normally, you will find you are more confident turning one way than the other; however, practice makes perfect!
Start with small turns at first and work your way up as you become more confident. With patience and practice eventually, you’ll be an expert carver!
What is ‘Carving’ Really Means When You Riding Your Longboard
Carving is a fundamental part of longboarding and is an essential skill to master if you want to make the most out of your ride. It takes some time and practice to learn how to carve properly on your board, but once you get the hang of it, you’ll be able to pull off some amazing tricks and stunts.
So what exactly is carving? Well, it’s basically a type of turning motion that allows you to shift your weight back and forth while still maintaining control over the movement.
When done correctly, carving can provide you with more efficient speed control, allowing you to easily transition from one direction to another with greater finesse than traditional turning methods. With regular practice, anyone can master carving – whether it’s for recreational purposes or for competitions!
How Helpful is the Carving Tactic for the Longboarders?
Carving is an incredibly helpful tactic for longboarders, especially those starting out. It allows you to gain more control over your ride and better manage your speed. Instead of just going in a straight line, carving lets you make an ‘S’ pattern as you move along. This helps with accelerating or decelerating and affords you more control over the board.
Learning how to carve is essential if you want to be proficient at longboarding. By mastering carving maneuvers, you will be able to ride with more confidence and stand out among other riders. If you’re a beginner looking to learn carving quickly and effectively, the Loaded Boards Icarus Bamboo Longboard is one of the best choices.
Overall, the carving is a must-know tactic for any serious longboarder, especially those just starting out on their journey. Not only will it help you improve your skills but it’ll also provide recognition as an articulate and experienced rider!
FAQs
The best longboard carving techniques involve using your body weight to lean into turns and shifting your weight to initiate smooth, controlled turns. Practice makes perfect, so try to find a comfortable stance and get used to the feeling of carving.
Maintaining balance while carving on a longboard requires staying relaxed, focusing on a fixed point in the distance, and keeping your knees bent. This will help you absorb any bumps or uneven pavement while carving.
While you can technically carve on any type of longboard, it’s easier and more enjoyable on a longboard designed for carving, such as a drop-through or pintail longboard.
When choosing a longboard for carving, consider the deck shape, wheelbase, and flex. Look for a longboard with a stable and responsive deck shape, a longer wheelbase, and a flexible deck for smoother turns.
Yes, you can carve on hills with a longboard by using the proper carving techniques and maintaining control of your speed. Be sure to practice on flat ground first before attempting hill carving.
Always wear protective gear, such as a helmet, knee pads, and elbow pads. And be sure to carve in safe, open areas with minimal traffic to avoid accidents.
Practice leaning into your turns, shifting your weight from heel to toe, and using your arms to generate momentum. Start with wide, gradual turns and gradually work up to sharper carves as you become more comfortable.
Practice leaning into turns and shifting your weight to guide the board in the desired direction. Use your arms for balance and to help initiate the turns.
Keep your weight centered and distribute it evenly across the board. Avoid sudden movements and practice controlling your speed with gentle turns and foot braking.
Some common mistakes to avoid when carving on a longboard include leaning too far into turns, using too much or too little pressure, and not paying attention to your surroundings. It’s also important to always be aware of your speed and to practice safe braking techniques.
No, previous skateboarding experience is not necessary to carve on a longboard. However, some experience with basic longboarding techniques, such as pushing and stopping, may be helpful.
It varies for each person, but with consistent practice, you can start feeling comfortable carving within a few weeks.
Conclusion
Carving on a longboard is a great way to get your feet wet in the world of skateboarding. With a few simple steps that anyone can do, you’ll be able to start carving with confidence.
Remember though, it’s best to learn under the guidance of a more experienced longboarder and take things slow as you gain more confidence. Carving on a longboard can provide hours of fun and make riding even more enjoyable than it already is.
Amazon and the Amazon logo are trademarks of Amazon.com, Inc, or its affiliates.


