As an Amazon Associate we earn from qualifying purchases.
To Charge A Razor Scooter, Follow These Steps:
- Locate the charging port
- Connect the charger
- Check the charging indicator
- Charging time
- Disconnect the charger
- Protect the charging port
How To Charge A Razor Scooter: A Step-by-Step Guide
Charging your Razor scooter is a simple process that ensures you have enough battery power for your rides. Whether you need to charge it after a long day of commuting or before your next adventure, here is a step-by-step guide to help you charge your Razor scooter correctly.
1. Locate the charging port
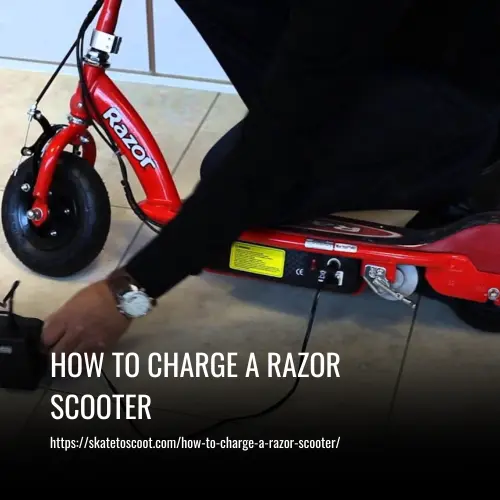
Begin by locating the charging port on your Razor scooter. Generally, it can be found on the base or deck of the scooter. Remove the small rubber cap that covers the charging port to expose it.
2. Connect the charger
Plug the charger into a standard household electrical outlet. Make sure the outlet is functioning properly. Then, insert the charging plug into the scooter’s charging port, ensuring a secure connection.
3. Check the charging indicator
Most Razor scooter chargers have an indicator light. A red light indicates that the scooter is charging, while a green light means that the battery is fully charged. Keep an eye on the indicator light to monitor the charging progress.
4. Charging time
Charging times typically range from 8 to 12 hours, depending on the model and battery level. It is recommended to charge your scooter overnight or during a period of time when you will not be using it.
5. Disconnect the charger
Once the battery is fully charged, unplug the charger from the electrical outlet and disconnect it from the scooter. This will prevent overcharging, which can damage the battery life.
6. Protect the charging port
Lastly, replace the small rubber cap on the charging port to protect it from dirt and debris. This small step will help maintain the charging port’s longevity and keep it functioning properly.
Charging The Razor Scooter Without A Charger
If you find yourself in a situation where you don’t have a charger for your Razor scooter, there are a few steps you can take to charge it without the proper charger.
1. Disconnect the battery
Start by disconnecting the battery from the electric motor of your Razor scooter. This involves removing the screw that holds the battery in place and unscrewing the battery holder from the frame. Flip the battery holder over to locate the connection between the battery and the electric motor, and disconnect it carefully with your fingers.
2. Use a power outlet
Plug the disconnected battery into a power outlet using an electrical cord. Ensure that all connections and power outlets are working correctly.
3. Monitor the battery level
Wait until the battery reaches the desired level of charge. Remember that it’s not necessary to fully charge the scooter every time. If you need to use the scooter soon, you can leave some space in the battery. The full charge time for most Razor scooter models ranges from 5 to 12 hours.
4. Observe the charging process
Keep an eye on the charging process to ensure everything is working properly. If the green indicator light on the charger does not turn on after an hour or two, there might be an issue with either the charger or the battery. In such cases, it’s essential to troubleshoot and identify the problem.
5. Reconnect the battery
Once the battery is charged, put it back in its proper place. Reconnect it with the cables in the same order as before the unplugging and charging process.
Charging The Razor Electric Scooter While Riding
Looking for a unique way to charge your Razor electric scooter? Believe it or not, it is actually possible to charge your scooter while riding it! This alternative method requires some investment and modifications to your scooter setup, but it can be a convenient and energy-saving option.
To charge your Razor electric scooter while riding, you will need to purchase a more powerful battery pack or connect additional batteries to the original pack. One common solution is to connect the batteries in parallel with the primary pack. This setup allows your motor to be powered by two sources, thereby preserving energy as you ride.
However, there are a few drawbacks to consider with this method. Firstly, it may come at an additional cost to purchase a more powerful battery pack. Secondly, the added batteries can make your scooter heavier and less maneuverable. Lastly, there is a risk of overloading the system, which could potentially lead to a short circuit or fire.
It is important to exercise caution and research online resources, including articles and social media comments, to learn from others’ experiences.
Why Is Proper Charging Essential For Your Razor Scooter
Proper charging is essential for maintaining the performance and longevity of your Razor scooter. By following the correct charging process, you can prevent potential problems and ensure that your scooter operates smoothly.
1. Avoid System Overload and Fire Risks
One of the main reasons why proper charging is crucial is to avoid system overload. Charging your scooter with the correct charger and using the recommended charging process helps prevent short circuits and reduces the risk of fire hazards. By using the original charger provided by Razor, you can ensure that the charging voltage and current are compatible with your scooter’s battery, minimizing the risk of overloading the system.
2. Convenience and Efficiency
Proper charging also provides convenience and efficiency. By regularly charging your scooter using an electrical outlet, you can avoid the hassle of searching for power sources while on the road. With a fully charged battery, you can enjoy uninterrupted rides and have peace of mind on your daily commutes or recreational trips.
3. Battery Performance and Lifespan
When you charge your Razor scooter correctly, you can prevent the battery from sagging and maintain its efficiency. Charging your scooter for the recommended period of time ensures that the battery reaches its optimal charge level. This helps to maximize its power and extends its overall lifespan.
4. Proper Maintenance and Safety
Following the correct charging process is an integral part of proper maintenance for your scooter’s battery. By avoiding extended periods of discharging and regularly charging your scooter, you can keep the battery in good condition and prevent irreversible damage. Additionally, proper charging reduces the risk of electrical malfunctions and enhances the overall safety of your scooter.
Charging Time of Razor Electric Scooter
To ensure maximum battery life and performance, it is important to properly charge your Razor electric scooter. The charging process typically takes approximately 12 hours to fully charge the scooter batteries. It is essential to use the original charger that came with your scooter, as using the correct charger can prevent damage to the battery and scooter.
When charging, make sure the scooter is turned off, and securely connect the charger to the charging port on the scooter. The charger will indicate the battery level with a green indicator light, which should not appear until after the scooter has been charging for at least 12 hours.
If the green light appears earlier, it may indicate a problem with the charger or battery. Regular charging and proper maintenance will help ensure longer battery life and enjoyable rides on your Razor electric scooter.
Safety Rules For Charging Razor Electric Scooter
Charging the battery of your Razor electric scooter is an important task that requires following some safety guidelines. By taking proper precautions, you can ensure the longevity and efficiency of your scooter’s battery. Here are some safety rules to keep in mind while charging your Razor electric scooter:
1. Avoid charging a wet or hot battery
It is crucial to never charge the battery if it is wet or hot. Exposing a wet or overheated battery to the charging process can cause damage to the battery and potentially lead to safety hazards. Always ensure that the battery is dry and within the recommended temperature range before connecting it to the charger.
2. Allow time for your scooter to rest
After a ride, it is recommended to wait at least 30 minutes before charging your scooter’s battery. This period allows the scooter and its engine to cool down. Giving your scooter this rest time helps prevent overheating during the charging process, which could impact the overall battery life and the performance of your Razor scooter.
3. Give your battery time to rest after charging
Once the charging process is complete, it is advisable to allow the battery to rest for a few minutes before turning on your scooter. This rest time allows the battery to stabilize and ensures that it is not subjected to immediate power demands, reducing the risk of overheating and potential damage.
By following these safety rules, you can protect your Razor electric scooter’s battery from damage caused by improper charging practices.
FAQs
The time required to charge a Razor electric scooter depends on the model and the battery level. On average, it takes approximately 12 hours to fully charge the scooter.
If you have a Razor electric scooter, there are two LEDs that indicate the charging process. The red LED shows that the scooter is charging, and the green LED shows that the charging is complete.
The battery life of an electric scooter can vary depending on factors such as the model, terrain, rider’s weight, and speed. In general, a fully charged battery can provide a range of 7 to 15 miles.
It is recommended to charge your electric scooter after each ride, especially if the battery level is low. Regular charging helps maintain the battery life and ensures that the scooter is ready for your next ride.
Yes, electric scooters can be charged at night. It is safe to leave the scooter plugged in overnight as most models have built-in safety features to prevent overcharging.
It is not recommended to charge a Razor scooter with a generic battery charger. Always use the original charger provided by the manufacturer to avoid any damage to the battery or scooter.
No, you should not charge a Razor scooter with a portable car jumper or any other alternative charging method not specified by the manufacturer. This can damage the battery and pose a safety risk.
Yes, you can use your Razor scooter charger in any standard electrical power outlet. However, make sure to check the compatibility and voltage requirements of the charger before using it in different regions.
No, not all electric scooter chargers are the same. Each scooter model may have unique charging requirements, so it is crucial to use the correct charger provided by the manufacturer.
Conclusion
In conclusion, charging a Razor scooter is a simple process that requires the use of the original charger or a compatible charger recommended by the manufacturer. It is important to refer to the specific charging time recommended for your model and to ensure that the charger is properly connected.
Most Razor electric scooters have a green indicator light on the charger that turns on when the scooter is plugged into an electrical outlet, indicating that the scooter is charging. It is not necessary to charge the scooter after every ride, but regular charging helps maintain the battery’s health and longevity.
While it is safe to charge the scooter at night, it is important to use the proper charger to avoid potential damage or safety hazards.
Amazon and the Amazon logo are trademarks of Amazon.com, Inc, or its affiliates.