How to Ride a Cruiser Longboard: A Coach’s Step-by-Step
This post contains affiliate links. As an Amazon Associate, we earn from qualifying purchases.
To ride a cruiser longboard, you match a stable, wide stance with smooth, controlled pushes. Your front foot points forward over the front truck bolts; your back foot provides the push. Control your speed and stop by dragging the sole of your back foot on the ground, a technique called foot braking. The shorter deck and tighter turning radius of a cruiser demand more precise weight shifts than a longer longboard, especially in city environments.
That gap between a stable stance and a controlled stop is where most new riders falter, which is why learning how to ride a cruiser longboard correctly is key. The Insportline manual notes most beginner injuries happen in the first ten minutes, often from a loss of balance during those initial, shaky pushes or a panicked attempt to slow down.
What follows is the mechanical breakdown of those first ten minutes and beyond, answering the core how to ride a cruiser longboard question. We will go through the essential safety prep, the exact foot positions that prevent wobbles, the step-by-step foot brake, and how to handle common city obstacles. By the end, you’ll have a repeatable process, not just a collection of tips.
Key Takeaways
- Most beginner injuries occur in the first 10 minutes. Always check the condition of the longboard before riding and start on flat, smooth ground.
- Your front foot should point straight or slightly angled over the front truck bolts. This creates a stable steering platform and prevents the board from shooting out.
- To stop, use the foot brake: shift weight forward, place your back foot flat, and drag the sole. Relying on jumping off or dragging a toe is less stable and wears shoes faster.
- Adjust turn responsiveness by tightening or loosening the kingpin nut on the truck. Never loosen it so much that the nut can rotate freely.
- For city cruising, a board with a shorter deck (28″ to 33″) and a tight turning radius is best. This agility comes at the cost of some high-speed stability.
Before You Start: The Non-Negotiables
Before you start: A helmet is mandatory, not optional. The Insportline manual states this plainly. Knee and elbow pads are highly recommended, especially while learning. Check your board for loose hardware, cracked wheels, or worn bearings before every session. Never ride where cars drive, at night, or on wet, oily, or sandy surfaces.
Your gear and environment set the ceiling for your progress when learning how to ride a cruiser longboard. A wobbly wheel or a helmet strap dangling loose is a failure point waiting for the wrong moment. I’ve watched students spend weeks fighting an unstable feel, only to find a single loose truck kingpin was the culprit. A thirty-second bolt check saves a month of frustration.
Start on a wide, empty, and perfectly flat piece of pavement. A deserted basketball court or a smooth parking lot is ideal. Hills, even slight ones, add a variable you don’t need on day one. The goal is to isolate the skill of balancing and pushing before gravity becomes a factor.
Your First Moves: Stance and Pushing
Finding your stance means finding the foot that naturally wants to stay on the board to steer. Stand on the board with it stationary. Have a friend give you a gentle, unexpected nudge from behind. The foot you step forward with to catch your balance is almost always your back, or “push,” foot. The foot that stays planted is your front, or “guide,” foot.
Now, place your front foot across the deck, just behind the front truck bolts, pointing straight forward or at a slight angle. This isn’t a suggestion. If your foot points sideways, your weight distribution shifts laterally, making the board want to turn when you push. It feels unstable because it is.
| Step | Action | Why It Matters |
|---|---|---|
| 1. Position Front Foot | Place over front truck bolts, pointing forward. | Creates a stable steering platform. |
| 2. Push Off | Lean forward, place back foot on ground, push smoothly. | Generates momentum without jerking the board. |
| 3. Place Back Foot | Swing push foot onto deck near the tail. | Completes the stroke and establishes riding stance. |
| 4. Repeat | Lift heel, place foot, push again as speed drops. | Maintains momentum efficiently. |
Keep your spine braced and your rib cage high. A common mistake is to hunch over the board, which shifts your center of gravity too far forward and makes balancing harder. Look ahead where you want to go, not down at your feet.
The 7-Step Foot Brake (and the One Step Nobody Skips)
Foot braking is the fundamental stopping method for non-electric cruisers. The Insportline manual describes it simply as placing the back foot on the ground and dragging the sole. The Insportline manual describes braking as placing the back foot on the ground and dragging the sole, while the Yvolution manual distinguishes between ‘Toe Drag’ and ‘Foot Braking’. It’s the most controlled way to shed speed.
I won’t recommend a toe drag for beginners. Keeping your heel on the board might feel safer, but it limits your control and grinds a hole in one spot on your shoe within a week. The full-foot brake spreads the wear and gives you a larger, more stable contact patch.
Here is the mechanical sequence. Practice it at a walking pace before you need it.
- Bend your knees. Lowering your center of gravity increases stability.
- Shift your weight to your front foot. You must unweight the back of the board to lift your back foot cleanly.
- Lift your back foot off the deck. Hover it just above the ground beside the board.
- Place your back foot flat on the ground, heel first, near the rear wheels.
- Gently press down until you feel the sole make full contact.
- Drag the foot, applying increasing pressure to slow down. Keep your foot flat.
- Come to a complete stop, then step off the board with your front foot.
The step everyone skips is #2: shifting weight forward. If you try to lift your back foot while your weight is centered or on the back foot, the board will either stop dead and throw you forward, or your front foot will slip off. That forward weight shift is the difference between a controlled stop and a fall.
Turning and Carving on a Cruiser
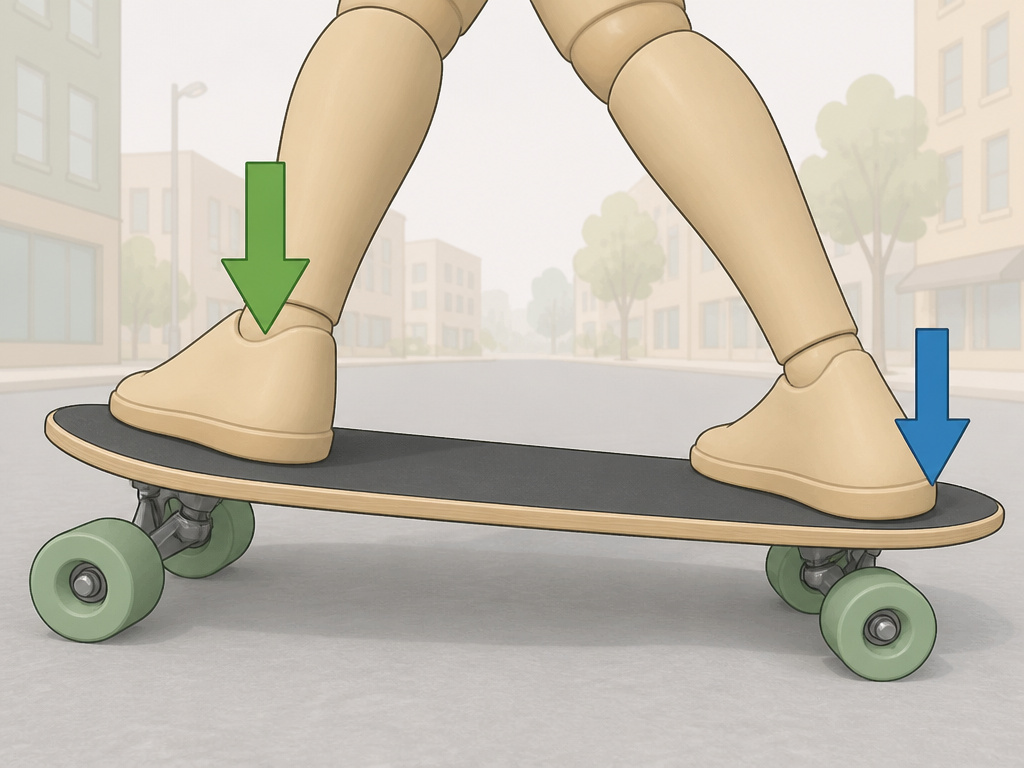
A cruiser’s shorter wheelbase makes it more responsive than a longboard. This is a double-edged sword. It allows for quick, tight turns to navigate city obstacles, but it can also feel “twitchy” and lead to speed wobbles if your stance is too rigid.
Turning happens through weight distribution. To turn left (if you ride regular stance), lean your weight onto your left heel. To turn right, lean onto your right toe. Your trucks are designed to pivot on their bushings; leaning makes them compress on one side and extend on the other, steering the board. It’s a lean, not a shoulder twist.
Common mistake: Cranking your shoulders to try and steer the board. Your upper body should be quiet and stacked over your feet. The turn comes from the ankles and knees, not the torso.
For smoother, flowing turns, carving, you link these leans together in a rhythmic S-pattern. It’s not just for style; carving is a mild speed control method on gentle slopes. On a cruiser, your carves will be tighter and more frequent than on a 40″+ longboard. This agility is the main advantage for navigating city environments.
If the board feels too loose or too stiff, you can adjust the trucks. Tightening the kingpin nut (the large vertical nut in the center of the truck) makes turns require more force and feel more stable at speed. Loosening it makes the board more responsive to lean. The Insportline manual gives the crucial limit: never loosen the nut so much that it can rotate freely.
Navigating Common Urban Obstacles
City riding is why many choose a cruiser. Here’s how to handle what the pavement throws at you.
Cracks and Pavement Seams: Approach perpendicularly if possible. As you reach it, unweight the board slightly by bending your knees and lifting your weight a hair. This allows the wheels to roll over without catching. Speed is your friend here, too slow, and the wheel can stop dead in the crack.
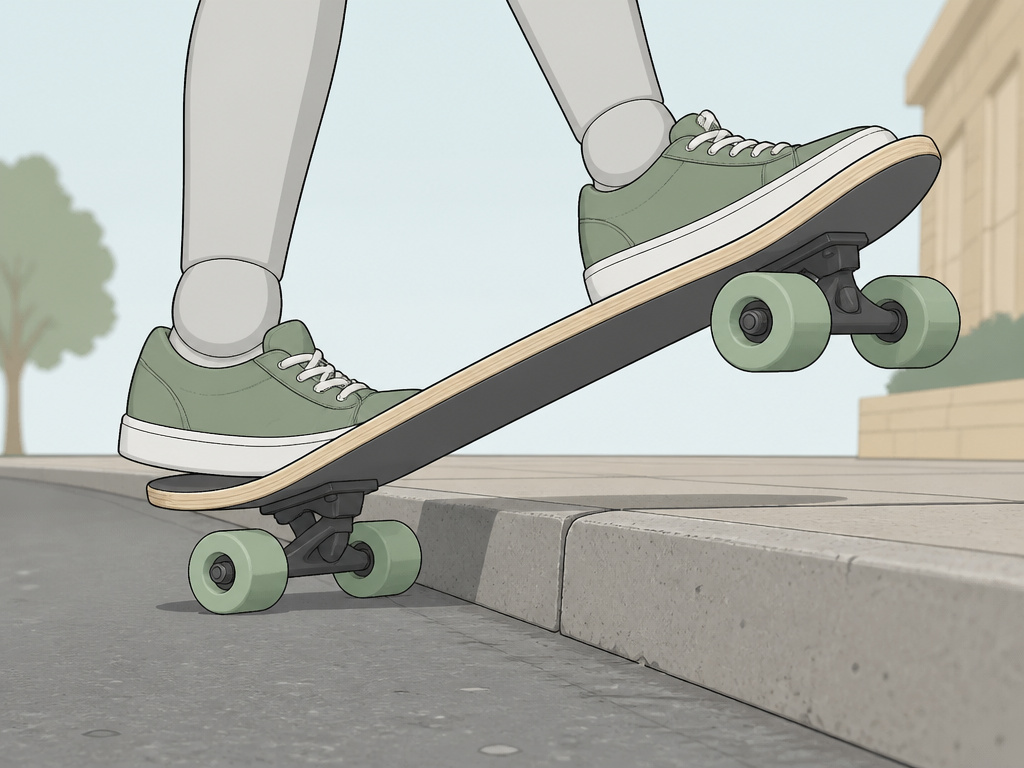
Curbs: To go up a curb, you need a kicktail. As you approach, shift your weight to the back foot, press down on the kicktail to lift the front wheels, and then step forward to level out as the back wheels climb. Going down a curb is easier: just roll off, keeping your weight centered and knees bent to absorb the impact. Without a kicktail, you’re stepping off and carrying the board.
Moderate Hills: Before descending, know how you will stop. Foot braking works, but on a steeper hill, you may need to combine it with carving to control speed. Never go down a hill faster than you can comfortably run off. If in doubt, step off and walk.
Speed Wobbles: These happen when the board’s natural frequency is excited, usually from being too rigid. If the board starts shaking, immediately lower your center of gravity (bend your knees deeply) and focus your weight slightly forward. Do not panic and lean back, that makes it worse. Gently steer into the wobble to dampen it, or execute a controlled carve to scrub speed. Stiffer trucks or harder bushings can help prevent them.
Electric Cruiser Specifics: The RazorX Example
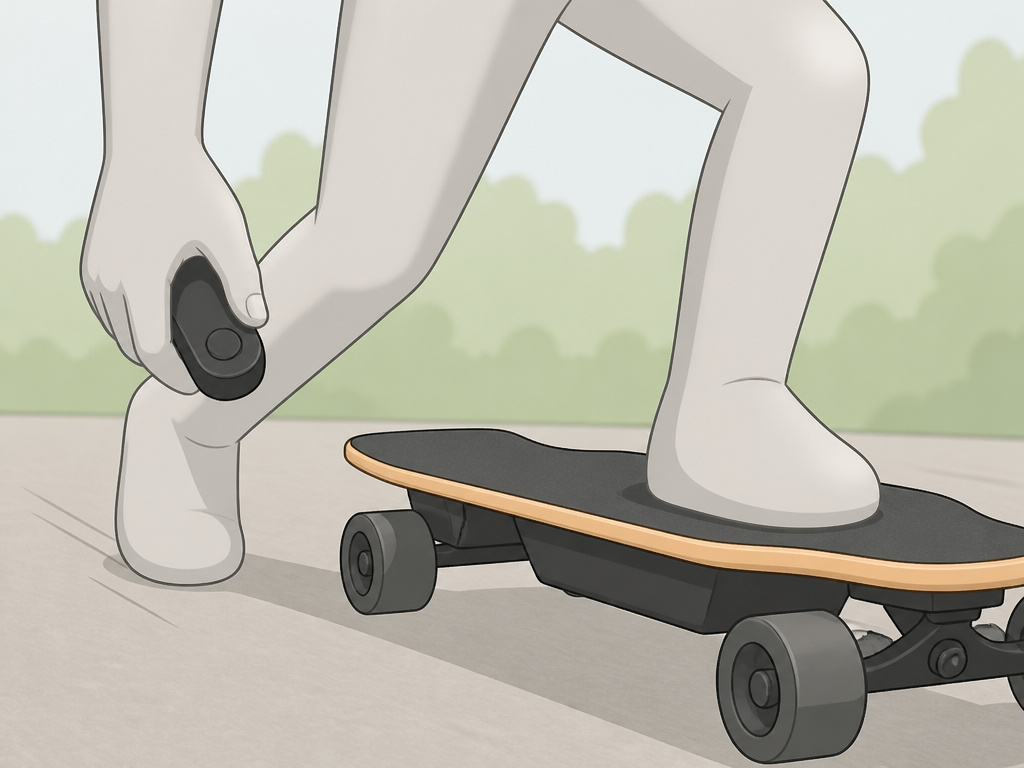
Electric cruisers, like the RazorX Cruiser, add a layer of complexity. Their manual specifies critical differences. The motor won’t engage unless you’re already moving at least 3 mph (5 km/h) from a kick-push. You can’t start from a dead stop under power.
Once engaged, the powered top speed is about 10 mph (16 km/h). Stopping relies on “dynamic motor braking” and coasting, the manual doesn’t describe foot braking, which would be difficult at those speeds anyway. The run time is up to 40 minutes of continuous ride, and the initial charge takes 8 hours. Crucially, the manual says to fully charge the battery before storing it long-term.
The presence of a remote and a motor changes the fundamental skill set for riding a longboard. Your focus shifts to remote management and anticipating motor lag. The core principles of balancing on a longboard, however, remain unchanged.
Choosing Your Setup: It’s Not Just Length
Your cruiser’s components dictate its personality. For pure, relaxed cruising on boardwalks, a longer deck (40″+) with big, soft wheels is recommended for stability and a smooth ride. For commuting, a board as low to the ground as possible (like a drop-through design) reduces pushing fatigue. For the city, a shorter deck (28″ to 33″) with a tight turning radius is best.
Wheels are your suspension. The trade-off is that larger wheels can cause “wheel bite” on tighter setups if the board doesn’t have enough clearance.
When you’re ready to choose, looking at best cruiser longboards can help narrow the field. Understanding the longboards vs cruisers debate helps you know why you’re picking a cruiser in the first place.
Choosing a Cruiser Longboard Deck Shape
Your deck shape defines how the board feels underfoot. For relaxed cruising, a drop-through deck is a popular choice. This design lowers your standing platform closer to the ground, which increases stability and makes pushing easier over longer distances. If you plan to ride in a city with lots of curbs and tight spaces, consider a deck with a kicktail. The angled tail allows you to lift the front wheels to pivot or navigate obstacles, improving the board’s maneuverability. Match the deck length to your environment; longer decks offer more stability for open paths, while shorter ones are better for weaving through urban settings.
Frequently Asked Questions
Are cruiser skateboards easy to ride?
Yes, for most beginners, cruisers are easier to start on than traditional skateboards due to their wider decks, softer wheels, and more stable trucks. They are designed for comfortable riding, not tricks. However, their shorter length can feel less stable than a longer longboard when first learning to balance.
How do I ride a cruiser skateboard?
Start by finding your stance (regular or goofy), place your front foot over the front bolts pointing forward, and use your back foot to push against the ground. Keep your weight slightly forward, look ahead, and practice pushing and coasting on flat ground before attempting turns or stops.
Are cruisers easier to ride than skateboards?
Generally, yes. Cruisers have larger, softer wheels that handle rough pavement, wider decks for better foot placement, and more forgiving trucks. A traditional skateboard’s small, hard wheels and steep concavity are designed for tricks, not comfortable cruising.
How to stop on a cruiser board?
The primary method is foot braking: shift your weight to your front foot, lift your back foot, place it flat on the ground beside the board, and drag the sole to create friction. For a complete guide, see the step-by-step breakdown in the “The 7-Step Foot Brake” section above. For electric models, rely on the motor brake and plan stops early.
What’s the main difference between a cruiser and a longboard?
The core difference is size and purpose. Cruisers are shorter (typically 28″-33″), lighter, and more maneuverable, designed for short-distance urban transport and quick turns. Longboards are longer (often 36″+), more stable at speed, and designed for cruising longer distances, downhill riding, or carving. There is overlap, but the cruiser vs longboard choice hinges on portability versus stability.
The Bottom Line
One rule most guides skip: if you haven’t mastered the foot brake at a slow, walking pace on flat ground, you have no business on a hill or in traffic. Everything about stopping on a longboard applies doubly to a cruiser, where reactions need to be quicker.
Your first goal is three clean pushes followed by a controlled, complete stop using the foot brake. Nail that sequence ten times in a row. That muscle memory, the shift forward, the foot placement, the drag, is your real safety gear. The board you choose matters, but that drilled-in technique matters more.
