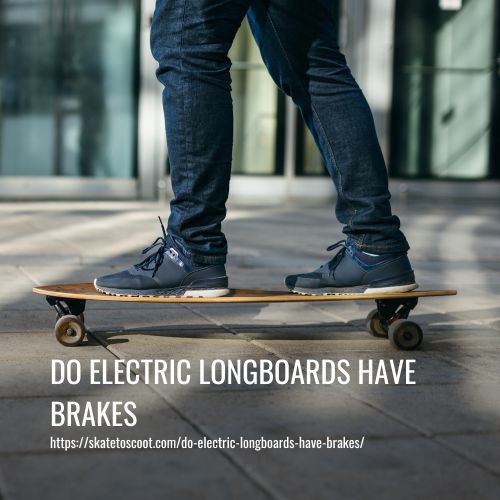
Do Electric Longboards Have Brakes? The 3-Step Technique
This post contains affiliate links. As an Amazon Associate, we earn from qualifying purchases.
Yes, electric longboards have brakes. They use electronic regenerative braking systems controlled by a handheld remote. When you pull the brake trigger, the board’s motor runs in reverse, slowing the wheels and converting some of that kinetic energy back into electricity to recharge the battery. It’s a controlled, reliable stop, until it isn’t.
That “until it isn’t” clause is where your skills start. The electronic brake is your primary tool, but every manufacturer’s manual carries the same core warning: never rely on it as your sole means of stopping. A remote can disconnect, a battery can fault, a hill can overcharge the system. You need a backup plan written in muscle memory, not in code. So, do electric longboards have brakes? Yes, but they are a single point of failure.
What follows is a breakdown of how these brakes function, their documented limits across brands like the Inboard M1 and RazorX Longboard, and the essential manual skills that bridge the gap for anyone asking do electric longboards have brakes between a convenient feature and a safe ride.
Key Takeaways
- Electric longboards use regenerative braking controlled by a remote, but you must never rely on it alone as your sole stopping method.
- Braking power can diminish or fail due to radio interference, a full battery on a downhill, or motor/ESC overheating.
- Learn and practice foot-braking as your essential backup; it’s the skill that every manual, from Atom to Boosted, explicitly says you need.
- Downhill braking with a full battery is dangerous; regenerative braking can overcharge the pack and cause the board to shut off, cutting all braking power.
- Your braking performance is tied to your board’s specs: for example, the Inboard M1’s braking power reduces above 24 mph, while the RazorX requires 3 mph for the motor to even engage.
How Do Electric Longboard Brakes Actually Work?
The system is elegantly simple on paper. Your handheld remote talks to the board’s Electronic Speed Controller (ESC). When you pull the brake trigger, the ESC commands the motor to spin backwards. This creates magnetic resistance against the wheel’s rotation, slowing you down. Because the motor is now acting as a generator, some of the energy from your deceleration gets pushed back into the battery, that’s the “regenerative” part.
This regenerative process is not 100% efficient. A significant portion of the braking energy converts to heat in the motor and ESC, not electricity. On a long, steep descent, this heat can build up, though manuals more frequently warn of battery overcharge as the primary failure mode.
The feel is unlike any mechanical brake. There’s no lever bite or pad grab. It’s a smooth, proportional resistance that increases the harder you pull the trigger.
A fact often overlooked is: that smoothness can mask the system’s limits. You get used to the reliable drag, right up until the moment a radio signal drops or the remote battery dies. The mechanical connection between your finger and the wheel is a fragile chain of wireless protocols and silicon.
The 3-Step Braking Technique Every Rider Should Master
Using the brake isn’t just yanking the trigger. Progressive pressure is the key to stability and battery health. Slam the brake at speed, and the board will stop, but you might keep going over the front.
Step 1: Pre-Brake Stance. Shift your weight slightly back onto your rear foot. Bend your knees. This lowers your center of gravity and prepares you for the deceleration force. If your weight is forward, braking will pitch you off.
Step 2: Apply Progressive Pressure. Squeeze the brake trigger smoothly and gradually. Don’t jab it. Let the deceleration build over one or two seconds. You’re aiming for a controlled slowdown, not an emergency stop. This gives the ESC and motor time to manage the energy load.
Step 3: Feather to a Stop. As you near a stop, ease off the pressure slightly to avoid a jerky halt. The board will roll the last foot or two. For a complete stop, keep light pressure until you’re stationary.
Skip the progressive squeeze, and you risk overloading the motor with a sudden current spike or, more commonly, losing your balance. The board stops; your body’s momentum doesn’t get the memo.
Where Electronic Brakes Fail (And What to Do About It)
The manuals are not shy about the failure modes. They list them because they happen. Your electric skateboard brakes are a system, and systems have single points of failure.
| Failure Point | What Happens | Your Immediate Action |
|---|---|---|
| Remote Disconnect | The board stops responding to throttle or brake inputs. It may continue coasting. | Don’t panic. Carve to scrub speed or prepare to foot-brake. |
| Full Battery Downhill | Regenerative braking overcharges the battery. The ESC shuts down to protect it, cutting ALL power and brakes. | The remote will beep (on some models). Safely stop before this happens. Ride on flats first to drain battery. |
| Low Battery Cutoff | At a critical low battery level, the board may restrict power and brake strength. | Braking feels weak. Get to a stop and walk. Don’t push the range. |
| ESC/Motor Overheat | Continuous hard braking on a long descent can overheat components, triggering thermal protection and reduced performance. | Braking power fades. Let off, coast to cool, and use foot-braking to supplement. |
Where this goes sideways: Relying solely on the remote on a steep hill with a fresh charge. The Boosted manual states it plainly: “Braking downhill on a full battery will cause board shutdown.” The remote will beep, you’ll lose braking power, and you’re now a passenger on a runaway board.
This is the predictable outcome of physics. Regenerative braking needs a place to put the energy. A full battery is a closed door. The system’s safeguard is to shut off, leaving you with whatever manual stopping techniques you’ve practiced.
Foot-Braking: Your Non-Negotiable Backup Skill
This is where the rubber literally meets the road. Foot-braking is the fundamental skill that transfers from a traditional longboard to an electric one. It’s your parachute when the electronics go quiet.
The Atom Longboards FAQ doesn’t mince words: “you should never rely on the board’s brake as your sole means of stopping. Learn to foot-brake.”
How to foot-brake on an electric longboard:
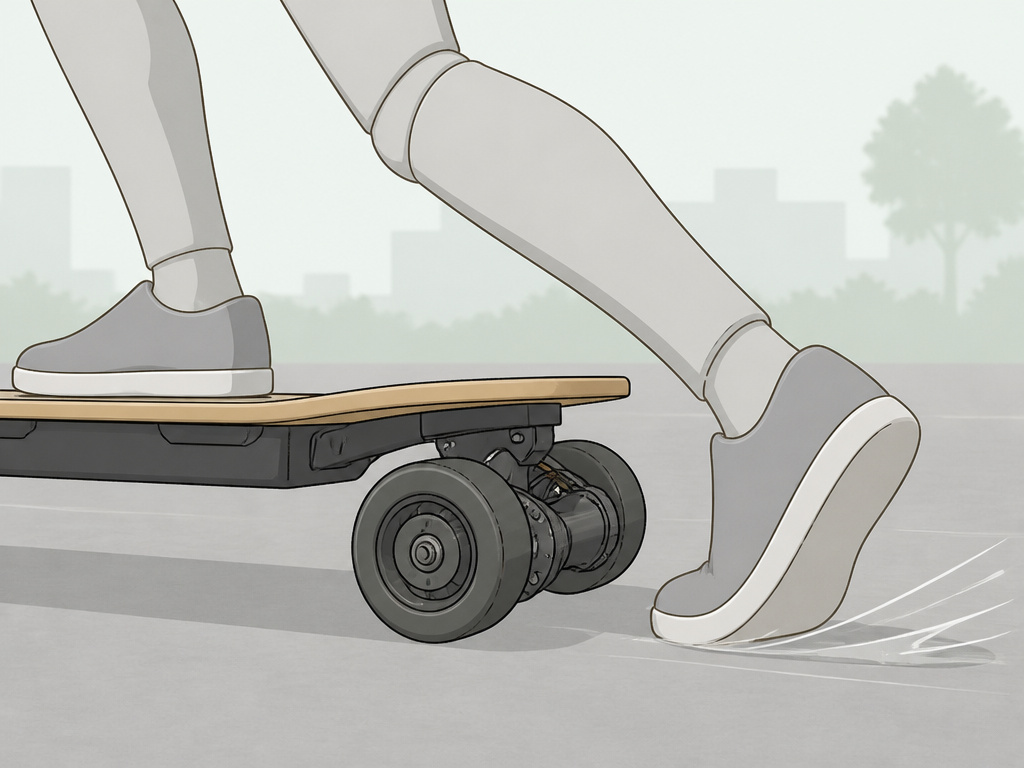
- Assume the stance: Stay in your normal riding stance. Look ahead for your stopping path.
- Lower your body: Bend your knees deeply. This gets your braking foot closer to the ground.
- Pivot and place: Keep your front foot pointed forward. Pivot your back hip and shoulder slightly, letting your back foot slide off the board heel-first.
- Gradual pressure: Let the sole of your shoe skim the ground. Gradually increase pressure until you feel the grip and deceleration. Don’t stomp.
- Retract and ride: Once stopped, smoothly bring your foot back onto the board.
Practice this in an empty parking lot at walking speed. The goal is building the muscle memory so that in a real failure, your body reacts before your brain panics. This creates the difference between a controlled slide to a stop and a high-speed bail.
Brand-Specific Brake Behaviors You Should Know
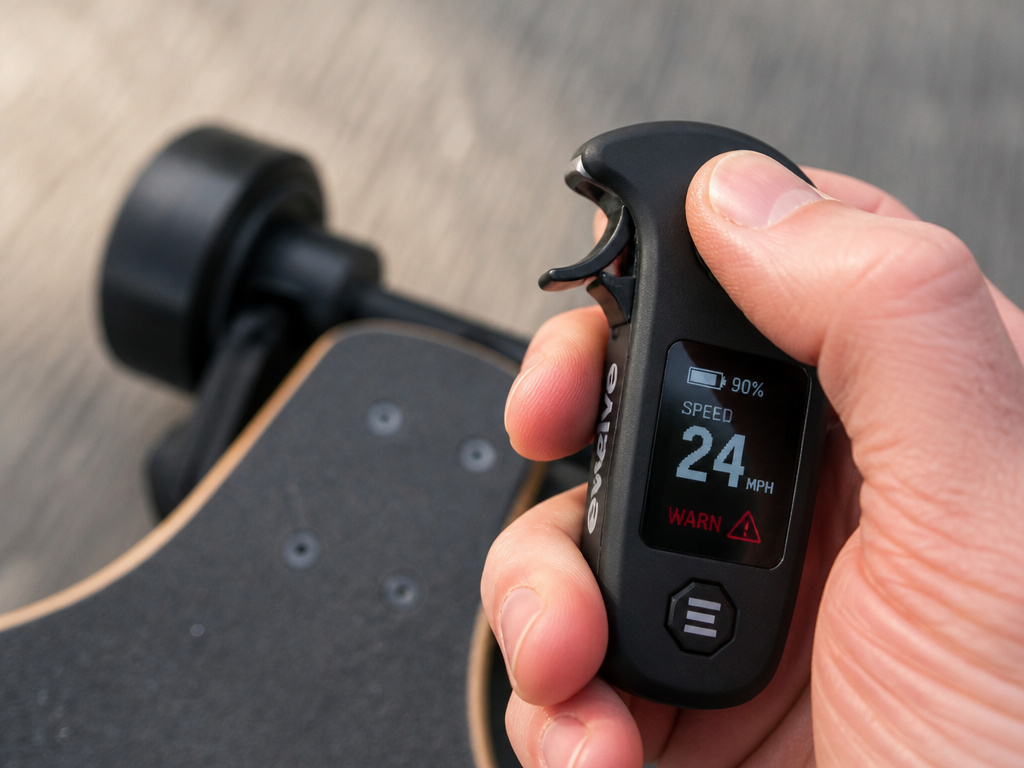
Not all brakes are created equal. The specs in the manuals reveal performance ceilings and quirks that should influence how and where you ride.
| Board Model | Braking Specifics | Key Limitation | Best For |
|---|---|---|---|
| Inboard M1 | Electronic Regenerative Braking. | Braking power reduces above 24 mph (38 kph). | Riders who stick to sub-20 mph cruising and understand the high-speed fade. |
| RazorX Longboard | Dynamic motor braking activated by moving remote lever to “STOP”. | Motor requires board to be moving at least 3 mph (5 km/h) to engage. | Beginners and low-speed environments; you must be rolling for the brake to work. |
| Atom Electric B10X | Regenerative Braking with FOC sine-wave software for smooth deceleration. | Max grade is 12% – its hill-climbing limit is also its sustained braking limit. | Riders seeking smooth, controllable braking on moderate hills. |
| Boosted / Meepo | Regenerative braking with overcharge protection. | Downhill braking with a full battery triggers shutdown. | Urban commuters who can manage battery levels and avoid massive descents. |
The Inboard M1’s braking power is reduced above 24 mph (38 kph). That’s not a suggestion; it’s a design boundary. If you’re riding an M1 near its top speed of 20 mph, you’re already brushing against that limit.
Emergency Scenarios and Advanced Stopping Techniques
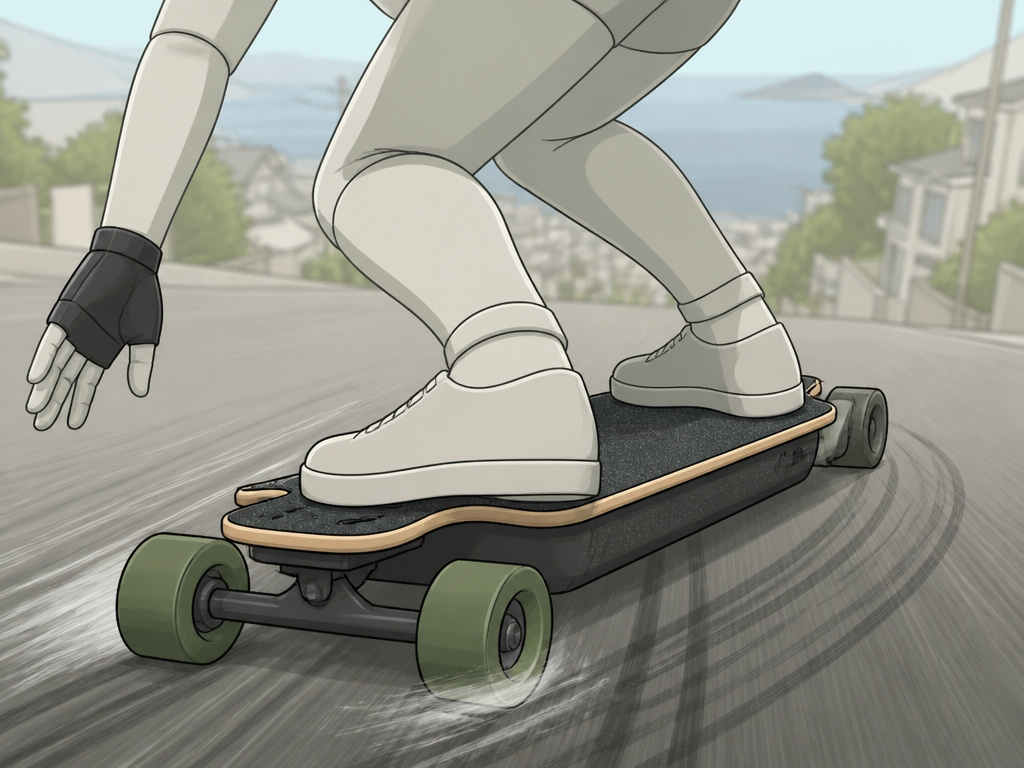
When the basic foot-brake isn’t enough, maybe you’re going too fast or the hill is too steep, you need bigger tools. Carving and sliding are advanced, higher-risk techniques, but they work.
Carving to Slow Down: This is the safest first step. Instead of rolling straight, you make wide, slow S-turns across the pavement. Each turn scrubs off speed. It’s less about sharp cuts and more about gently painting a giant serpentine down the hill. It takes space, but it requires minimal skill and puts little stress on the board.
Powerslides: For the experienced rider, a controlled powerslide is the emergency brake. You kick the board out sideways, letting the wheels slide across the pavement to burn off speed. It’s hard on your wheels, demands good balance, and takes practice on a gentle slope first. But in a true “runaway board” situation with no electronic brakes, it’s the most effective way to stop quickly without jumping off.
The reality is: if you’re not already practicing these on a regular longboard, you shouldn’t be relying on them in an emergency on an electric one. They are last resorts. Your first resort is always riding within a margin where a simple foot-brake can save you.
Brake Maintenance and Pre-Ride Checks
Your brakes are only as good as your maintenance. This isn’t about tightening a cable; it’s about verifying a system.
Before every ride:
- Remote Check: Is it charged? Does it connect to the board instantly? Do the throttle and brake triggers return smoothly?
- Battery Check: Is the board’s battery level adequate for your planned route, especially any descents? Riding a full battery down a big hill is asking for a shutdown.
- Rolling Test: At low speed in a safe area, test the brake. Does it engage smoothly and predictably? Is there any lag or stutter?
Long-term care:
- Keep it clean: Grit and grime around the motor mounts and wheels can affect performance. Wipe down the board after dirty rides.
- Listen for changes: A normally quiet motor that starts whining or grinding under braking needs attention.
- Charger discipline: Only use the manufacturer’s specified charger. Only ever use the charger provided with your board.
The core components are sealed. You can’t service them yourself without voiding the warranty and risking electric shock. Your job is monitoring and prevention.
How do gear drive and belt drive brakes differ?
While both systems use the motor to create resistance for braking, the physical connection to the wheels differs. Belt drives use a rubber belt and pulley system. In practice, gear drives can feel more immediate and direct, while belt drives may offer a slight amount of mechanical give or slip, which can affect the feel of the braking power. Regardless of the drive type, the core principle is the same: the Electronic Speed Controller reverses the motor’s function to generate stopping force.
Frequently Asked Questions
Do all electric longboards have regenerative braking?
Most do. Regenerative braking is the standard method for electric longboards because it’s efficient and works smoothly with the motor control. You’ll see it listed as a feature on boards from Atom, Inboard, Boosted, and Meepo. Some very low-cost boards may use simpler electronic braking without regeneration, but they are the exception.
What happens if my remote dies while I’m riding?
If the remote battery dies, you lose the ability to accelerate or brake electronically. The board will coast until friction and air resistance slow it down, or until you use a manual method like foot-braking to stop. This is why checking your remote charge is a critical part of your pre-ride checklist.
Can I add physical brakes to my electric longboard?
Yes, but it’s a niche aftermarket modification. Some riders, particularly those who ride steep mountain roads, install small mechanical disc brake kits. These require custom mounting, add weight, and complicate the deck. For 99% of riders, the better path is mastering the built-in electronic brake and reliable foot-braking skills.
Are electric longboard brakes safe for beginners?
They are safe if the beginner’s first lessons are about their limits. A new rider should spend their first sessions in a flat, open area not only learning to accelerate, but deliberately practicing stopping with the electronic brake and then practicing foot-braking with the power off. Understanding the “how” of the brakes is as important as the “yes, they exist.”
How long do the brakes last?
There are no brake pads to wear out. The longevity of the braking system depends on the health of the motor, ESC, and battery. Avoiding excessive heat from continuous hard braking and not overcharging the battery via downhill regen are the best ways to prolong the system’s life.
The Bottom Line
Electric longboards have sophisticated, effective brakes. But they are electronic assists, not mechanical guarantees. The Inboard M1’s performance fade above 24 mph, the RazorX’s 3 mph engagement threshold, and the universal downhill full-battery trap are the documented edges of the system’s map.
Your safety lies inside those borders. It lies in checking your battery level before a descent, in feeling the progressive trigger pull in your muscles, and in the ingrained scrape of a foot-brake that you’ve practiced until it’s boring.
So yes, they have brakes. But the real question is: do you have the skills to stop when those brakes don’t? That’s the line that separates a gadget user from a competent rider. Trust the process, not just the technology. Your fundamentals are your foundation.
