How to Fix Electric Scooter Speed Controller: Step-by-Step
This post contains affiliate links. As an Amazon Associate, we earn from qualifying purchases.
To fix an electric scooter speed controller, you need a multimeter to systematically test battery voltage, throttle signal, and controller outputs against manufacturer specifications. A healthy throttle signal ranges from ~1V at rest to 4.3-5V at full twist. If the battery tests strong but the controller outputs no power, or you smell burning or see melted components, the controller itself has likely failed and needs replacement.
That voltage range is the controller’s language. It listens for a signal from the throttle, interprets it, and commands the motor. When that conversation breaks down, you get no go, which is why many people search for how to fix electric scooter speed controller.
What follows is a field manual for the how to fix electric scooter speed controller question. We’ll walk through the safety absolutes, the five essential voltage checks with your multimeter, how to interpret what you find, and the brand-specific quirks that manuals assume you already know. By the end, you’ll know whether you need a $5 fuse, a $50 throttle, or a $150 controller.
Key Takeaways
- Disconnect the battery first, every time. Working on a live 36V or 48V system can deliver a serious shock. The Razor service bulletin explicitly states to turn the power switch OFF and disconnect the charger before any work.
- Test the throttle signal (1V to ~4.3-5V). If your multimeter doesn’t show a smooth voltage climb as you twist, the problem is likely the throttle, not the controller.
- A burnt smell or melted MOSFETs means a dead controller. The most common internal failure is a burnt MOSFET. If you see physical damage, stop testing and start shopping for a replacement.
- Check for accessory shorts. The EW-72 manual notes a rare but critical edge case: a short in the lighting or turn signal wiring can prevent the scooter from driving. Disconnect accessories to test.
- Use a known-good controller to isolate the fault. As the Preston Breeze S service manual advises, the quickest diagnostic for a complex fault is to temporarily swap in a working controller.
Safety First: The Non-Negotiables
This isn’t a skate bearing clean-up. You’re dealing with enough stored electricity to hurt you and fry components. The procedures from sources like the Razor bulletin and Levy Electric guide aren’t suggestions; they’re the difference between a fix and a trip to the ER.
Turn the scooter off. Disconnect the battery. Not just flip the switch, physically unplug the main battery connector. If your scooter has a charger port, unplug that too. Wear insulated gloves. Have safety glasses on. Work in a dry, well-lit area. I know it sounds like overkill for a toy, but a 48V battery pack doesn’t care if you’re an adult or a kid. It will arc and spark if you short it.
Before you start: A live scooter battery can deliver a dangerous shock. Always disconnect the battery first. Wear insulated gloves and eye protection. Never test a motor directly at full system voltage (use 12V) to avoid violent sparking.
Take pictures. Before you unplug a single wire from the controller, use your phone to snap clear photos of every connection. Color, position, everything. You will forget. The Razor E100 controller replacement guide exists because people plugged the yellow and green wires into the wrong prong and fried new parts. A photo is your free insurance.
Recognizing a Failing Controller
The controller is the scooter’s brain. It takes your throttle input and translates it into precise power for the motor. When it fails, the symptoms are rarely subtle.
The motor runs full-tilt regardless of throttle position. This is a classic sign of a burnt MOSFET stuck open, flooding the motor with power. Your scooter jerks forward uncontrollably when turned on. The scooter shuts down unexpectedly mid-ride, often with a faint pop or a whiff of burning electronics. You might get an error code on the display.
Acceleration feels sluggish and weak, even with a full battery. The scooter stutters, surging in little bursts before cutting out. Sometimes, the only sign is a slight stiffness in the rear wheel when the scooter is off, caused by a shorted phase wire inside the controller.
And then there’s the sensory evidence. A distinct, acrid smell of burnt plastic from the deck. Visible melt marks on the controller casing or its wires. Excessive heat on the controller box or, commonly, on the yellow phase wire leading to the motor. If you see or smell these, the diagnosis is already halfway done.
The 5-Step Voltage Check (Your Multimeter’s Roadmap)
Grab your digital multimeter. This is your stethoscope for the how to fix electric scooter speed controller process. We’re checking vital signs in a specific order, because each test rules out a layer of the system. Skipping to the controller first is like blaming the engine when you’re out of gas.
| Test Step | What to Measure | Healthy Reading (Example) | What a Bad Reading Means |
|---|---|---|---|
| 1. Battery (No Load) | DC Voltage across main battery terminals. | 24V system: ~27-28V 36V system: ~42V 48V system: ~54V |
Low voltage means a depleted or faulty battery. The controller won’t activate if voltage is below its low-voltage cutoff (~21.5-23V for a 24V system). |
| 2. Battery (Under Load) | DC Voltage while throttle is held fully open. | Drops less than 1 volt from no-load reading. | A sag of several volts indicates a weak battery that can’t deliver current, mimicking controller failure. |
| 3. Controller Input | DC Voltage at the controller’s main power input wires. | Should match your battery’s no-load voltage. | No voltage here means a broken wire, bad fuse, or faulty power switch between the battery and controller. |
| 4. Throttle Signal | DC Voltage between throttle signal wire and ground while twisting throttle. | Smooth increase from ~1V to 4.3-5V. | No change, erratic jumps, or max voltage below ~4.3V points to a faulty throttle, not the controller. |
| 5. Controller Output | DC Voltage between motor phase wires while twisting throttle. | Should show significant voltage increase corresponding to throttle position. | Good throttle signal but no voltage output here confirms a dead controller. |
Controllers have a low-voltage cutoff to protect the battery; if voltage dips below that during your load test, the scooter will simply stop.
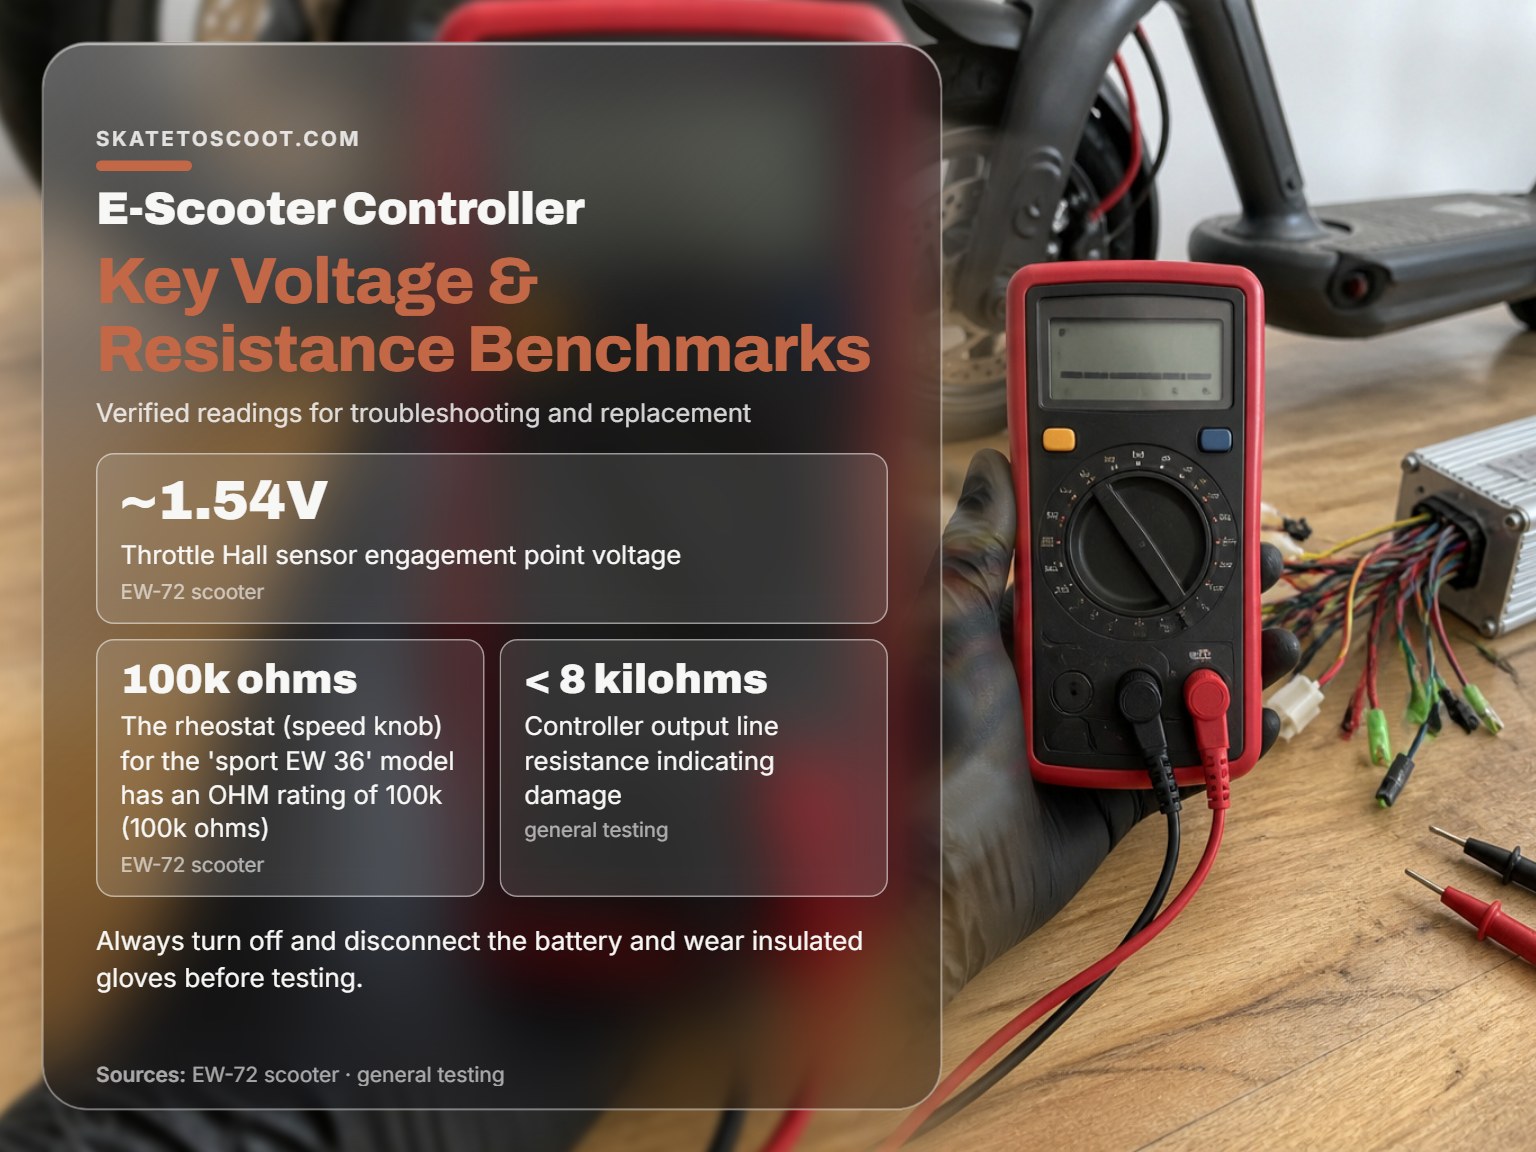
Slowly twist the throttle. You should see a smooth climb. If it sticks at one voltage or never reaches the expected full-throttle voltage (which varies by model, e.g., ~4.3-5V for many, but 3.51V for the EW-72), the throttle is a likely culprit. I’ve seen countless “dead controller” replacements that didn’t fix a thing because the real issue was a $25 throttle.
When the Problem is Not the Controller
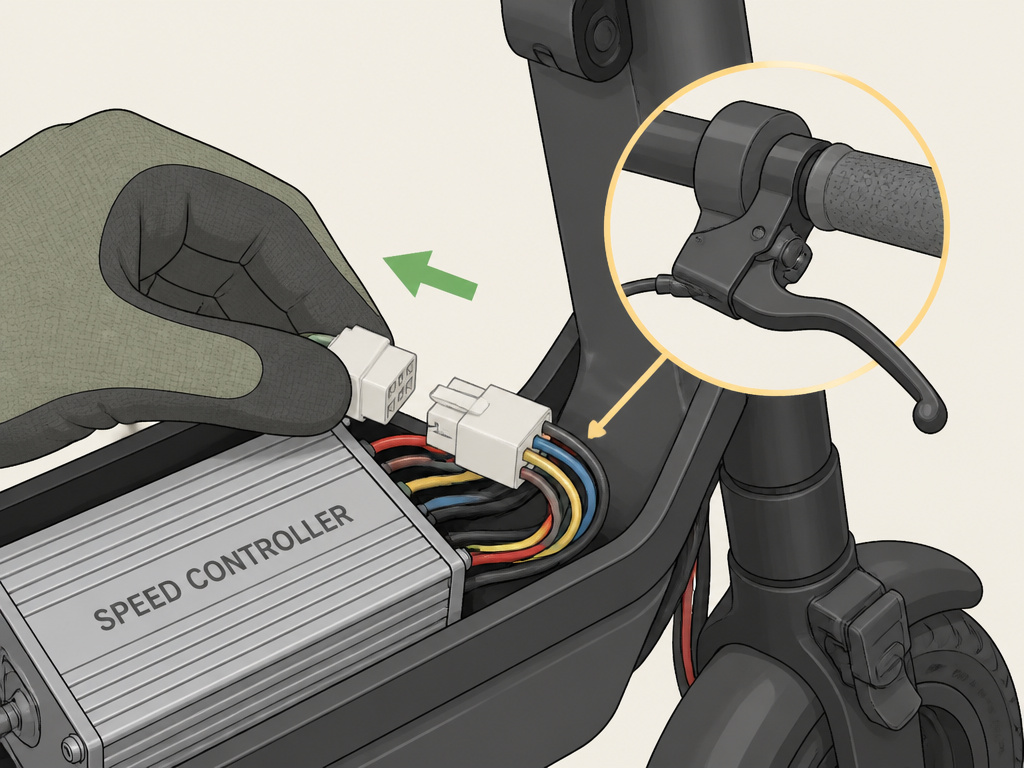
Before you order a new controller, eliminate these common imposters. They’re cheaper and easier to fix.
A faulty brake switch. Many scooters are designed to cut motor power the moment you engage the brakes. If that switch is stuck closed or shorted, the controller thinks you’re always braking. Unplug the brake switch connector at the controller. If the scooter suddenly works, replace the brake lever assembly.
A blown fuse or tripped circuit breaker. It’s the simplest check. Find the in-line fuse holder, usually near the battery. Use your multimeter’s continuity setting. A good fuse will beep; a blown one is silent. The Razor safety bulletin emphasizes checking the power path before assuming complex failure.
Loose, corroded, or damaged wiring. Jiggle every connector you can find. Look for green corrosion on metal pins, or wires that have been pinched or frayed. A single broken strand in the throttle hall sensor wire can cause intermittent failure. This is where your photos are gold, you can see if a plug has worked loose.
Accessory shorts. This is a sneaky one. The EW-72 service manual specifically calls out a “very rare instance where a short in accessory wiring (lights, turn signals) can cause the machine not to drive.” Their advice? Leave all accessories off during throttle troubleshooting. If your scooter has aftermarket lights or a USB port, disconnect them and test again.
Advanced Diagnostics: Inside the Controller Box
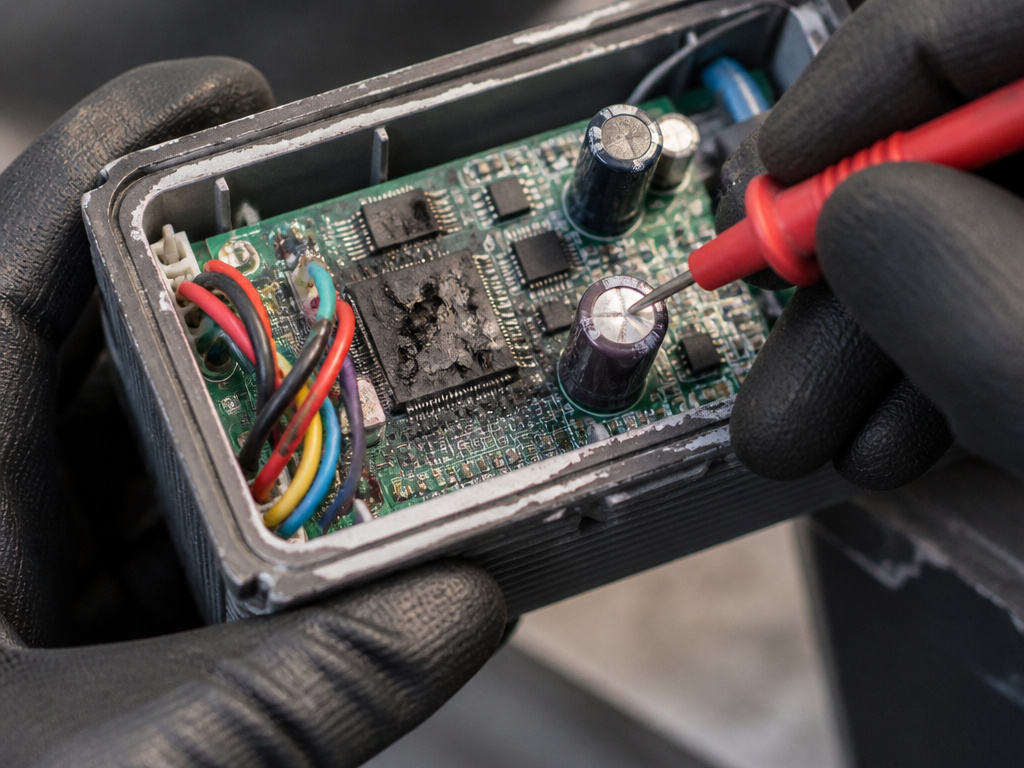
If all signs point to the controller, it’s time to open the cage. This is where you move from diagnosis to confirmation.
Visual and smell inspection is free. Open the controller compartment. A potent burnt electronics smell is a dead giveaway. Look for bulging or leaking capacitors, blackened circuit board traces, or, most commonly, melted MOSFETs. These are the small, square chips that often have a metal tab. If they look cracked, charred, or have a hole blown through them, the controller is toast.
Continuity and resistance tests. With the battery disconnected, set your multimeter to continuity (the diode symbol). Touch one probe to the controller’s negative battery input. With the other, touch each of the three thick motor phase wires. A loud beep indicates a dead short, a failed MOSFET. Switch to resistance (ohms) mode. A reading lower than 8 kilohms on any phase wire, according to the Levy Electric guide, indicates internal damage.
The swap test. When diagnostics get ambiguous, use the method prescribed in the Preston Breeze S manual: “replace temporarily the controller with another working one.” If you have a friend with a compatible scooter, a quick swap is the fastest way to know for sure. If the problem moves with the controller, you have your answer.
To Repair or Replace? A Practical Guide
You’ve found a bad controller. Now you have a choice.
Repair is only for the experienced with a soldering iron and access to specific components. If a single MOSFET is blown, you might replace it. But MOSFETs often fail in cascades, and the driver circuitry can be damaged too. Even if you succeed, the root cause (overheating, water) might kill it again in weeks. For most people, repair is a technical curiosity, not a practical solution.
Replacement is the standard path. You have two options: OEM or universal.
An OEM controller is plug-and-play. You get the exact same performance, and if you’re lucky, the connectors match. Contact the manufacturer or search the model number. Sometimes you must buy a matched controller set directly from the factory.
A universal controller offers flexibility and often more power. As discussed in scooter hacking forums, you can install any controller as long as the voltage matches and you’re willing to rewire everything, throttle, motor, battery, and display. This is the path for customization, but it requires research and comfort with wiring diagrams.
Where this goes sideways: Assuming any controller will fit. Voltage must match, but so must phase timing for brushless motors. A mismatched universal controller can run a motor hot, rough, or not at all.
Step-by-Step Controller Replacement
Here is a generic replacement procedure. Your specific scooter will vary, so keep that manual or photo handy.
- Disconnect everything. Battery first. Then unplug every connector from the old controller: throttle, motor phases, battery inputs, brake switch, display, accessories. Label them if they’re not keyed.
- Remove the old unit. Unscrew the controller from the deck. Note any thermal paste or pad used for cooling.
- Install the new unit. Mount it in the same place. If it’s a universal controller, you’ll be matching wires by function, not color. The motor’s three phase wires (usually Yellow, Green, Blue) connect to the controller’s three phase outputs. The throttle’s signal, power, and ground wires connect to their counterparts.
- Double-check the critical connections. This is where brand-specific knowledge is key. For example, on a Razor E100/E125/E150/E175, the yellow and green wires from the new control module must plug into the two bottom prongs of the power switch, not the top gold prong. The black wire from the charger port gets the top prong.
- Reconnect the battery last. Before you do, give all connections a final visual check. Turn the power on. If you hear an alarming hum or see smoke, power off immediately. If all is quiet, gently test the throttle.
Expect a slight jerk on first start as the controller syncs with the motor’s hall sensors. If it runs rough or not at all, check your phase wire combination, the correct order is often found by trial and error (there are six possible combinations for three wires).
Frequently Asked Questions
How do I reset my electric scooter controller?
True reset clears any error states in the controller’s memory. Turn the scooter off and disconnect the battery for 5-10 minutes. For a more thorough reset, press and hold the power button for 30 seconds while the battery is disconnected to drain residual power. Reconnect everything and try again. This can fix quirky behavior like a scooter that powers on but doesn’t move.
How can I bypass the speed limiter on my electric scooter?
Bypassing a limiter often involves the controller. Some scooters have a physical wire (a “speed limiter wire”) that can be cut or disconnected. Others require entering a programming mode via button presses or connecting to the controller’s programming port. Be aware this can void warranties and stress components not rated for higher speeds.
My scooter works but shows zero speed on the display. Why?
This is usually a disconnected or faulty speed sensor, not the main controller. The sensor, often located in the motor hub, sends pulses to the display. A broken wire, damaged magnet, or incorrect setting in the display’s P-menu (like wrong magnet count) will cause this. Check the sensor wiring first.
Can a bad battery damage a controller?
Absolutely. A battery that sags severely under load or has unstable voltage can cause the controller to overwork its MOSFETs, leading to overheating and failure. Always confirm your battery is healthy before condemning a controller.
Are scooter controllers interchangeable?
They can be, with major caveats. The new controller must support your battery voltage (e.g., 36V) and motor type (brushed vs. Brushless). You will likely need to rewire all connections and may need a new display. Open-source controller routes offer full programmability but are a project for advanced users.
Before You Go
Fixing a scooter controller is a logic puzzle. Start with the simple, free checks: fuses, connections, throttle signal. Your multimeter is your guide, let the voltage readings tell the story, not your assumptions.
If you open the controller and see burnt components, your decision is made. Replace it. When shopping, choose an OEM part for guaranteed compatibility, or a universal controller for a weekend project that might increase performance. Just remember the rule from the skatepark: safety and fun aren’t mutually exclusive. Double-check every high-current connection. A loose phase wire can spark, melt, and leave you stranded.
One final tip from the forums: if you’re chasing an intermittent fault and own a common scooter model, search for it specifically online. The collective knowledge around common scooter models is vast. Someone has almost certainly posted the exact voltage reading from a working throttle or the location of the elusive programming port. Use that. Then get back to rolling.
