As an Amazon Associate we earn from qualifying purchases.
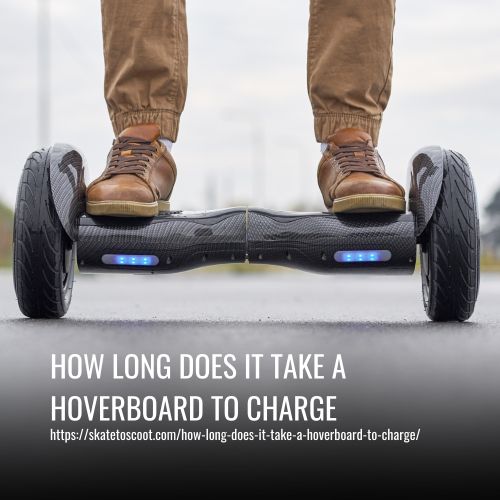
The answer is quite simple – a hoverboard takes typically around 2-3 hours to charge completely.
However, the duration may vary depending on various factors such as the battery health, weight limit of the rider, terrain, power adapter, and charging port. The more advanced and pricier models may have faster charging times, taking only an hour or so. On the other hand, cheaper models or those that use older batteries may take longer, up to 5 hours to reach full charge.
If you happen to ride your hoverboard in the rain or accidentally drop it into the water, it is essential to be extra cautious while charging it. This is because water contact may lead to a short circuit.
How Long Does it Take to Charge a Hoverboard for the First Time?
When it comes to charging a hoverboard for the first time, there are a few factors that can affect the duration. The type of battery and the brand/model of your hoverboard can have an impact on how long it takes to charge.
It’s recommended to refer to your hoverboard manual for charging instructions specific to your device. However, on average, it should take approximately three hours to fully charge your hoverboard for the first time. It’s important to note that charging time may vary in subsequent charges based on factors such as battery health, weight limit of the rider, terrain, power adapter, and charging port.
To ensure your safety while charging your hoverboard for the first time, make sure to follow the manufacturer’s recommended charging procedures. If you have any questions regarding hoverboard charging, it’s best to reach out to the manufacturer or a reputable service center for assistance.
Charging Your Hoverboard Safely
Charging your hoverboard properly is crucial, not only for the safety of the device but also for the longevity of its battery life and electrical outlets. To ensure safe and efficient charging, you must follow these steps.
Firstly, you need to use the appropriate charger. Using a charger that came with your hoverboard, and matching up the specs of the previous charger when replacing it, is essential to avoid damaging the device. Although tempting, buying cheaper chargers can result in additional expenses and headaches in the long run.
Secondly, once you have plugged in the charger to both the outlet and the hoverboard, the charging indicator lights should turn on. These lights could be located on the charger itself or the hoverboard, but they both reflect whether the charging is ongoing or complete.
Safety Tips
Safety Tips for Hoverboard Users:
- Respond to Low Battery Alerts: When the hoverboard alerts you of a low battery, stop riding immediately and recharge it. This prevents the risk of a sudden shutdown while riding.
- Keep the Charger Dry: Ensure the charger plugin is dry. Wet plugins can lead to a short circuit, electric shock, and potential need for medical attention.
- Address Leaking Fluid: If you observe leaking fluid from your hoverboard, it means the outer battery component has broken apart. Avoid using the board and seek repair or return it to the seller within the warranty period.
- Proper Charging Methods: Knowing how to charge your hoverboard correctly is crucial for its longevity. Proper charging methods can influence the board’s lifespan and the time users can enjoy it.
- Purchasing from a Trusted Source: For those looking to purchase a hoverboard, it is recommended to buy from a trusted source like Official Hoverboard. This company has a strong reputation for selling high-quality products and has extensive experience in the industry.
How To Know Whether It Is Charging
Charging a hoverboard can vary depending on the brand or model, but there are common signs to look for. You’ll typically see a light indicator on the charging port or on the charger itself to show that charging is in progress. Stay observant for blinking lights on the charger or illumination of lights on the board, which also signifies charging.
If no light indicator is visible, it’s recommended to check the connection of the charger and the board. Usually, the light indicates a charging problem or disconnect in the charging process. In such cases, be ready to double-check these connections, as they suggest why the light might not be on.
Ensure you’re using an appropriate charging source, such as the original charger that comes with the hoverboard or an exact replacement charger that matches your board’s version. Avoid using any power supply that doesn’t meet the manufacturer’s specifications, as it poses a risk of reducing your hoverboard’s battery life or even causing a fire.
How To Know When It Is Done Charging
Different hoverboards have varying ways of indicating that they have completed charging. The charging light could change from red to green, or a blinking light could turn solid. Some hoverboards simply turn off all indicator lights once the charging process is over.
When the hoverboard is fully charged, it’s essential to unplug it to avoid overcharging, which can damage the battery. It’s better to charge the hoverboard regularly to get the best battery life and performance.
If it’s your first time charging the hoverboard, time it to determine how long it takes to reach a full charge to make recharging in the future more comfortable.
Can you leave a hoverboard charging overnight?
One of the frequently asked questions about charging a hoverboard is whether it’s safe to leave it plugged in overnight. The answer is both ‘yes’ and ‘no’ since it depends on certain factors.
Assuming that you’re using the original charger and the battery is healthy, your hoverboard should charge fully within 2-4 hours. Leaving it plugged in overnight isn’t harmful because most UL-certified hoverboards have safe, fireproof batteries. However, cheap hoverboards or those with counterfeit battery versions often contain highly flammable liquid and are at high risk of catching fire if left unattended while charging.
To keep your hoverboard in good condition, it’s still inadvisable to charge it overnight or leave it plugged in for a more extended period. Continuous charging, even when the battery is full, can gradually degrade its life and cause it to wear out much faster.
How Long Does a Hoverboard Battery Last?
As a hoverboard enthusiast, you’re probably wondering how long your beloved device will last on a single charge. The standard answer ranges between two to six hours, but there’s more to it than that. Let’s explore some factors that impact a hoverboard’s battery life.
Factors that Affect Hoverboard Battery Life:
Surface Type: The surface you ride on can greatly impact your hoverboard’s battery life. Riding on flat, smooth roads will give you more mileage than on grass, gravel, or sand. Steeper inclines and rougher terrains will also drain your battery faster.
Weight of Rider: The weight of the rider can also impact the hoverboard’s battery life. Heavier riders require more power to move the hoverboard, which can cause the battery to drain quickly.
Temperature: Temperature can also impact your hoverboard’s battery life. High temperatures can cause the battery to drain faster, so keep that in mind before hitting the road on a hot summer day.
Battery Capacity: The battery’s capacity is a significant factor that affects its lifespan. Standard battery capacity for most hoverboards is 4.4AH, whether it’s a 6.5-inch hoverboard, Lamborghini hoverboard, hummer hoverboard, or 10-inch hoverboard. Higher capacity batteries can provide longer rides on a single charge.
Usage and Handling: How you handle and use your hoverboard also affects its battery life. Frequent starting and stopping can drain the battery quicker. Also, if you’re cruising at high speeds, it can cause the battery to discharge faster.
Boosting Your Hoverboard’s Battery Life
Are you looking to extend the life of your hoverboard’s battery? Keep reading to learn some expert tips and tricks on how to ensure you get the most out of your ride.
1. Charge Correctly:
To boost your hoverboard’s battery life, always ensure it charges fully before using it each time. Don’t try to use it before it has finished charging as this will negatively impact the lifespan. Also, make sure to use the appropriate charger designed for your hoverboard, and avoid using random chargers as they may not meet the necessary specs.
2. Mind the Road Conditions:
Keeping your hoverboard away from rough terrain and extreme weather conditions is equally important in ensuring the device remains in good working order. Hoverboards are not designed for water, snow, and high summer heat, so be sure to know the conditions before you start your ride.
3. Observe Weight Limits:
Every hoverboard comes with a weight limit, and it is essential to respect those limits. If someone heavier than the limit goes on the board, the battery will quickly drain, and worse still, the board may become damaged. So, make sure you are aware of the weight limit before riding, and ensure everyone obeys it.
4. Maintenance is Key:
Just like with most electronic devices, regular maintenance is essential to keep your hoverboard functioning well. Store it in a dry, cool place, away from direct sunlight and moisture, and make sure it is clean and free of dust and debris. The maintenance routine can be simple, but staying on top of it can do wonders in extending the battery life of your hoverboard.
Troubleshooting a Hoverboard Not Charging
If your hoverboard is not charging, there could be several reasons why. However, before you start worrying about the underlying cause, there are some steps you can take to rule out simple issues that could be stopping your hoverboard from charging.
The first step is to ensure that your hoverboard is switched off before you start charging the battery. Although some hoverboards may still charge if they have been left on, it is a good practice to switch the board off before charging.
To troubleshoot a hoverboard that is not charging despite being turned off, it is advised to inspect the connection. Verify that the charger is firmly linked to the hoverboard and the outlet. In the case of a two-part charger, ensure that both components are firmly connected.
Double-check that the outlet is working. Accidentally plugging the hoverboard into a non-working outlet could be the cause of the problem. Find an outlet that works.
If the above checks don’t solve the issue, it’s possible that you need a replacement charger or battery. You can purchase these components directly from the manufacturer, and you may find the exact replacement model and brand for your hoverboard. It is important to note that a knock-off charger or battery might work, but it may not have the same components as the original.
FAQs
Hoverboard explosions are a real danger, especially if you purchase a low-cost device with poor-quality batteries. Reports of hoverboard explosions have been documented worldwide, with accidents often occurring at night when the device is left to charge unsupervised. It is essential to never purchase a hoverboard under $150 or use a device without battery certification to minimize the risk of accidents. Remember, saving money on a cheap device is not worth risking your safety and well-being.
When your hoverboard starts flashing red light, it means that it is running low on battery and needs to be charged. Depending on the device, this can happen anywhere from 60 minutes to four hours of use. If you are in the market for a new hoverboard, it’s important to consider the battery life to ensure you get a device that fits your needs.
It is important to charge your hoverboard regularly to extend the battery life. The frequency of charging should depend on how often the hoverboard is used. Charging it every day after usage is recommended, as leaving it uncharged for long periods can damage the battery. It is also beneficial to charge the hoverboard once in a while even after a short non-operation period. Therefore, it is advised to charge your hoverboard every day for optimal performance and longer battery life.
The hoverboard’s battery charge can last for about 2 to 6 hours, or approximately 8-15 miles before the battery indicator starts flashing, and the hoverboard gradually stops. The standard capacity of most hoverboard batteries is 4.4AH. Keep in mind that a new hoverboard battery might last longer, but with use, the charging time may increase, and the discharge rate may also be quicker.
Charging a hoverboard without a charger is not advisable. If you’ve lost your hoverboard’s original charger, you can use a single pin laptop charger as a substitute. However, don’t charge for more than 40 minutes, as laptop chargers are usually more potent and can harm your hoverboard battery over time. Promptly replace the charger to guarantee your hoverboard’s safety and durability.
One of the possible problems if your hoverboard won’t charge is damage on the board, battery, or charge pin. Check these areas first and see if there are any visible issues. If everything looks okay, try looking at the charging pin and charger. If the board still won’t turn on, it may be a different issue that would require assistance from a service center. Don’t wait too long before having it checked to avoid further damage.
Conclusion:
Knowing how long it takes for a hoverboard to charge is crucial for any hoverboard rider. The charging time can vary depending on the type of battery, charger, and power source. It is recommended to use the original charger provided by the manufacturer and to avoid charging the hoverboard in direct sunlight or extreme temperatures.
Charging time can usually take 2-3 hours, but this can be longer for heavier riders or if the hoverboard has been used on rougher terrains. It is important to read the manual, follow safety precautions, and use suitable chargers to avoid damaging the hoverboard battery and ensure a longer battery life.
Amazon and the Amazon logo are trademarks of Amazon.com, Inc, or its affiliates.