Why Wont My Hoverboard Charge? Causes and Fixes
This post contains affiliate links. As an Amazon Associate, we earn from qualifying purchases.
A hoverboard that won’t charge has three likely culprits: a faulty charger, a damaged charging port, or a dead battery. For Hover-1 models, the charger’s LED light is a key diagnostic tool: a red light means it’s charging, a steady green light with a dead board points to a damaged battery. If the light doesn’t turn on at all, the port or internal wiring is the suspect.
That LED light is the board’s only way to talk. Ignoring its color and going straight for a reset is like trying to fix a car engine by only adjusting the radio. The real answer is in a sequence: verify power, interpret the light, then inspect the physical connection. This is the first step to answer why wont my hoverboard charge.
What follows is a mechanic’s checklist. We’ll walk through the external checks anyone can do, then into the internal diagnostics that separate a simple fix from a parts replacement. You’ll know when to walk away from a fire hazard and when a $50 battery swap brings it back to life.
Key Takeaways
- Interpret the charger LED first. A red light means charging; a steady green light with a dead board points to a damaged battery; no light at all signals a bad port or charger.
- Only use the supplied charger. The U.S. CPSC warns to use only chargers supplied with the hoverboard, and is aware of more than 250 self-balancing scooter/hoverboard incidents related to fires or overheating.
- Check for a recall immediately. Recalled models like the Powerboard PB-001 have no safe fix; continuing to use one risks fire, as evidenced by 27 reports of overheating and smoking.
- Never charge unattended. The CPSC advises to only charge a hoverboard when you are there to watch it, especially given the fatal house fires linked to hoverboards.
- A multimeter is your best friend. Testing the battery’s output voltage is the only way to know if it’s in deep discharge protection or truly dead.
Start With the Source: Outlet and Charger
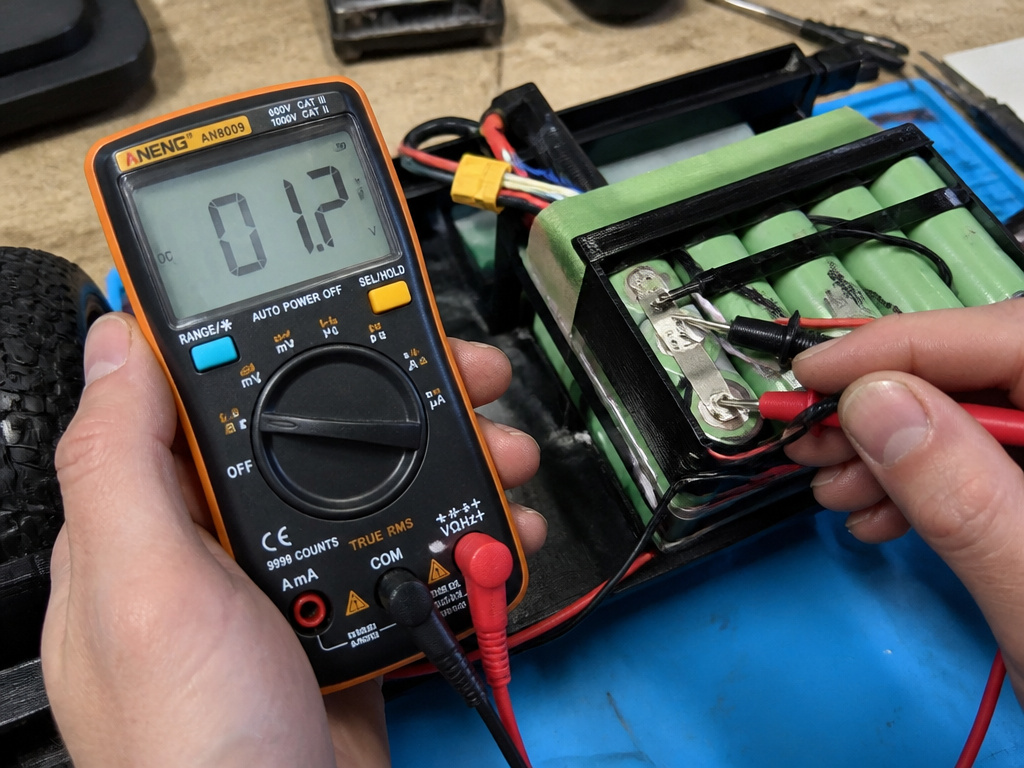
Before you open anything, eliminate the obvious. Is the outlet live? Plug in a lamp or phone charger you know works. If the outlet is dead, your problem is solved, just not the way you wanted.
Now, look at the charger itself. The U.S. Consumer Product Safety Commission (CPSC) is blunt: use only chargers supplied with the hoverboard. Their safety alert links off-brand chargers directly to the risk of fire. If you’ve lost the original charger, buying a generic replacement is a gamble. The U.S. CPSC warns to use only chargers supplied with the hoverboard, as using a non-standard charger increases fire risk.
Here’s a quick compatibility check you can do without tools:
| Charger Label Check | What to Look For | Why It Matters |
|---|---|---|
| Output Voltage (V) | Must match your hoverboard’s input rating (common: 42V). | Too high fries circuits; too low won’t charge. |
| Output Current (A) | Should match or be slightly lower than the board’s rating. | Higher amperage can overheat the battery. |
| Connector Polarity | Tip is usually positive (+), sleeve negative (-). A reversed cable damages the board. | Incorrect polarity can instantly destroy the charging port. |
If your charger passes this visual check, the next step is watching its behavior when plugged into the board.
The 3-Point Charger Light Diagnostic
This is where you stop guessing. The charger’s LED is a simple traffic light for your hoverboard’s health, and the iFixit community wiki for Hover-1 models spells out exactly what each state means.
If the charger is functioning normally, a small light on the charger will turn green. If the board is not fully charged, plugging it in will cause the light to turn red. Once the hoverboard is fully charged, the charger light will turn green.
Here is what each light state means and the next steps to take.
For Hover-1 models, a solid red light indicates the board is charging. If the board won’t turn on after extended charging, consult your model’s manual or a repair guide, as diagnostic steps can vary.
Solid Green Light (Board Won’t Turn On): This is a major warning sign. If the charger light is green but the hoverboard is completely dead, the iFixit wiki states you may have a damaged battery. The battery management system might be dead, or the battery cells are so depleted they can’t accept a charge. The charger sees a “full” circuit and turns green, but no usable energy is stored.
Where this goes sideways: Assuming a green light means “all good” when the board is dead. This often leads owners to blame the motherboard, when the battery is the real culprit. You’ll waste time and money on the wrong repair.
No Light On Charger: If the charger light doesn’t turn on when plugged into the wall, the charger is dead. If it lights up at the wall but goes off when plugged into the hoverboard, the problem is in the board’s charging port or internal wiring. A broken wire, a jammed port full of pocket lint, or a disconnected internal connector will stop power flow completely.
Inspecting the Charging Port for Physical Damage
If your diagnostics point to the port, it’s time for a close visual inspection. You’ll need a bright light and maybe a magnifying glass.
First, check for debris. The charging port is a magnet for dirt, sand, and metal shavings (if you ride near a workshop). Carefully use a wooden toothpick or plastic spudger to clear any blockage. Never use metal, which can short the pins.
Second, look for bent or corroded pins inside the port. Gently straighten any bent pins with non-conductive tweezers. Corrosion, a white or green crust, is a sign of water damage and is a much bigger problem. It means moisture has likely reached the internal battery or motherboard.
Third, feel for a loose connection. Does the charger plug wiggle excessively or feel like it’s not “clicking” in? A loose port means the internal solder joints on the circuit board have broken from stress. This is a common failure from yanking the charger cord out sideways.
If the port looks clean and undamaged but you still get no charger light, the fault is internal. The wire from the port to the battery or mainboard has likely come loose or broken. This requires opening the hoverboard, which brings us to the next critical step.
When the Battery is the Real Problem
Lithium-ion batteries don’t last forever. They have a finite number of charge cycles, and physical damage can render them dangerous. The CPSC recall notice for Powerboard hoverboards states the core hazard plainly: “The lithium-ion battery packs… Can overheat, posing a risk of the products smoking, catching fire and/or exploding.”
How do you know if your battery is dead or just asleep? You need a multimeter.
Testing Battery Voltage with a Multimeter:
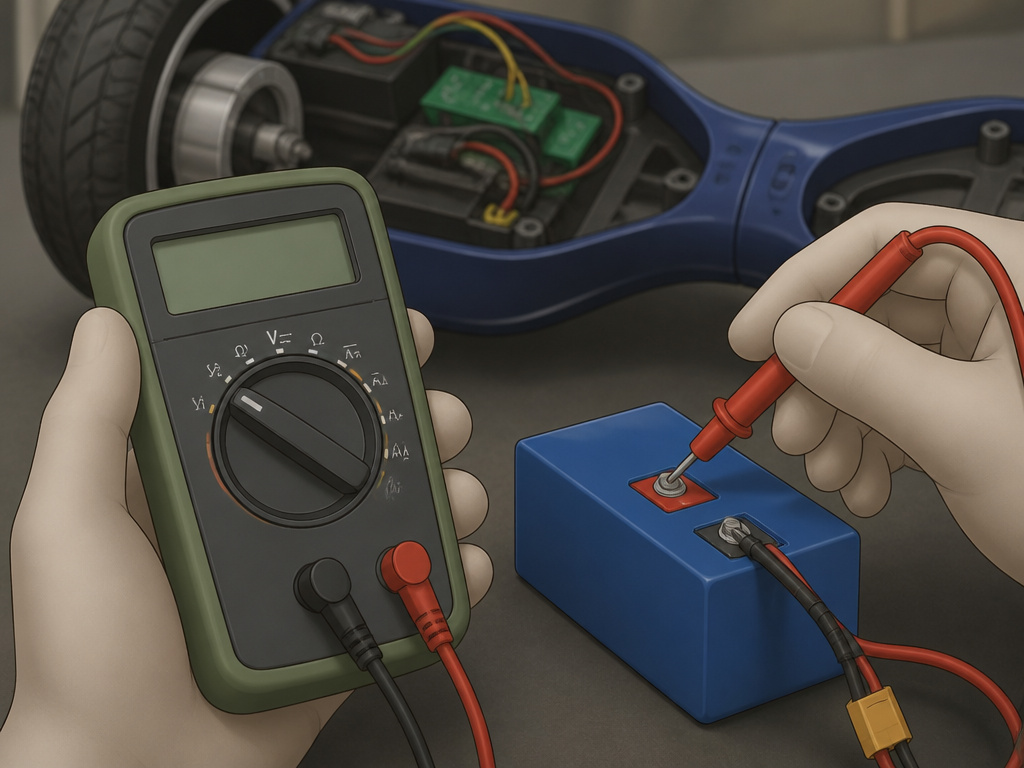
- Safety First: Ensure the hoverboard is powered off.
- Access the Battery: Carefully open the hoverboard casing following a guide for your specific model. The battery is usually a rectangular pack with two main power wires (red and black).
- Set the Multimeter: Turn the dial to DC Voltage (V, ) on the 200V setting.
- Take the Reading: Touch the red probe to the red battery terminal and the black probe to the black terminal.
- Interpret the Result:
- ~42V: Battery voltage is normal. The problem is elsewhere (motherboard, wiring).
- Between 30V and 42V: Battery is depleted but likely recoverable with a long charge.
- Below 30V: Battery is deeply discharged. Some protection circuits may prevent charging at this voltage.
- 0V or Near 0V: Battery is dead, has an internal open circuit, or the protection board has failed.
Common mistake: Ordering a new battery before testing the voltage. A board showing 0V might have a blown fuse on the motherboard, not a bad battery. You’ll waste $80 and still have a dead board.
If your battery tests bad, replacement is your only option. Never attempt to repair a lithium-ion battery pack. Punctured, swollen, or leaking batteries are immediate fire hazards and should be disposed of at a designated battery recycling center.
Internal Issues: Motherboard and Wiring

If the charger is good, the port is clean, and the battery tests at a healthy voltage, the fault lies deeper. The motherboard (main control board) is the brain of the hoverboard. It regulates power from the battery to the motors and manages the charging process.
A telltale sign of motherboard failure is a board that charges but behaves erratically, turning off randomly, not balancing, or the lights flashing error codes. Another is the charger light behaving normally, but the power button doing nothing.
Wiring issues are more straightforward. A broken wire between the battery and motherboard, or a loose connector, will kill power as surely as a dead battery. The fix involves carefully tracing each wire, checking for continuity with a multimeter, and resoldering any broken connections.
This is the most technical stage. If you’re not comfortable with a soldering iron and basic electronics, this is where you call a professional repair service or consider the board a loss. The cost of a new motherboard plus labor often approaches the price of a new, safer hoverboard.
The UL 2272 Safety Check and Recall Lookup
Troubleshooting is pointless if your hoverboard is inherently dangerous. This is a required stop step.
The CPSC states that hoverboards should be compliant with the UL 2272 safety standard. This standard tests the entire unit, battery, charger, electronics, for fire and electrical safety. Crucially, they add that even UL 2272 compliance cannot guarantee that a hoverboard will not overheat or catch fire. It’s the minimum safety barrier.
How to check your board:
- Date Check: If you bought your hoverboard before January 29, 2016, the CPSC says it is not UL 2272 compliant.
- Label Check: Look for a holographic UL certification label on the bottom of the product and a mark on the packaging.
- Recall Check: Go to www.CPSC.gov and search for your brand and model. This is not a suggestion.
I can’t stress this enough. In 2016, Hoverboard LLC recalled Powerboard model PB-001 units. The CPSC recall notice lists 27 reports of these hoverboards overheating, sparking and smoking. The firm is out of business, so there’s no remedy. If you have one of these, identified by the POWERBOARD marking on the left side, stop using it immediately. No fix is safe.
How to reset or recalibrate a hoverboard
If you’re asking why wont my hoverboard charge or it’s behaving incorrectly, a reset can sometimes clear a software glitch. The process varies by model, but a common method is to power the board off completely, then press and hold the power button for an extended period. Check your user manual for specific instructions. Before attempting any reset, ensure you are using only the charger supplied with the hoverboard, as using an incorrect charger can lead to serious safety issues. If a reset doesn’t resolve the charging problem, the issue likely lies with the hardware, such as the battery, charger, or charging port.
My hoverboard power button isn’t working
A non-responsive power button can prevent your hoverboard from turning on or charging. First, make sure the board has some charge by plugging in the correct charger and observing the light. If the charger light turns red, it’s receiving power. If the button still doesn’t work after a charge, the button itself could be physically damaged or disconnected internally. In some cases, a completely dead battery can also make the power button seem unresponsive. Since internal repairs involve opening the unit, consider the safety risks first. The lithium-ion battery packs in hoverboards can overheat, posing a fire hazard if mishandled.
Frequently Asked Questions
How can I tell if my hoverboard battery is dead?
Use a multimeter to test the voltage at the battery’s main terminals. A healthy 42V system will read close to 42V when charged. A reading below 30V indicates a deeply depleted or dead battery. A reading of 0V means the battery or its internal protection circuit has failed.
Why does my hoverboard charger light turn green immediately?
An immediate green light usually means the charger is not detecting a proper connection to the battery. This is caused by a broken wire between the charging port and the battery, a completely dead battery that won’t accept any charge, or a faulty charger that can’t deliver power.
Is it safe to leave my hoverboard charging overnight?
No. The U.S. CPSC explicitly warns, “Only charge a hoverboard when you are there to watch it. Do not charge unattended, especially overnight.” This is due to the proven risk of lithium-ion battery fires, which have caused fatal house fires.
My hoverboard works while plugged in but dies when unplugged. What’s wrong?
This is a classic symptom of a failed battery. The board is running on power directly from the charger, bypassing the dead battery pack. The battery cannot hold a charge. You need a guide for replacing a hoverboard battery.
How long should a hoverboard battery last?
With regular use, that translates to 1-3 years. Factors like extreme temperatures, frequent deep discharges, and using a non-standard charger will shorten its lifespan significantly.
Before You Go
Be realistic about the outcome. If your diagnostics lead to a recalled model like the Powerboard PB-001, a swollen battery, or burnt motherboard components, the safest fix is to stop. Recycling a hazardous device is a better outcome than a house fire. The CPSC’s tally of 13 burn injuries, three smoke inhalation injuries and more than $4 million in property damage linked to hoverboards isn’t scare talk. It’s the documented cost of pushing a faulty device too far.
If your board passes the UL 2272 and recall checks, and your multimeter points to a single bad component, then repair is a rational choice. A quality replacement battery from a reputable source, installed with care, can give you another couple of seasons.
Finally, change your habits. Charge on a hard, non-flammable surface while you’re in the room. Treat that charger LED like a warning light on your car’s dashboard. It’s the one piece of honest communication between you and a pack of volatile chemistry spinning two wheels. Listen to it.
